
How I planned my Pacific Crest Trail (PCT) hike in 4 weeks:
I know this may sound crazy, but I didn’t fully make the decision to leave my job and hike the PCT until just 4 weeks before I set foot on trail. I turned in my 2 week resignation at work on March 21st and started walking on April 14th. Some people take years to plan for such a journey.
I had been dreaming of hiking the trail “one day” and enjoyed many weekend backpacking treks, so I wasn’t going in without past experience. I had to plan all the logistics, budget, schedule, food pickups, trail maps, buying new gear, research special area restrictions (bear cans), not to mention entertaining my sister who came into town for a week just before I left, then pack up everything I own and put it into storage, find a way to get to the southern terminus, all the while attempting to keep up some level of fitness. Through that entire whirlwind, here is how I did it:
Step 0: Save every penny you can! There are a ton of costs that you don’t think about until you really start gathering all the little things together. A good rule of thumb is 1000$/month, that is of course, after getting all your gear. The 1000$ covers food, Uber rides, Trail Angel donations, hotel rooms, rides across the lake to VVR, replacing those worn out shoes on trail, and of course that juicy burger and beer in town you have been dreaming about all week. It’s good to acquire your gear over time so your not hit with the full cost at once and you have time to properly test it out. Also remember to factor in insurance (if you go that route), price of flights/rides there and back, and the price of storing your stuff back home.
Step 1: Choose NoBo (North Bound) or SoBo (South Bound) and get a permit – They are two totally different experiences and you have to take that into account when choosing which direction you will go. I chose NoBo for schedule and got my permit early because I knew it was possible that this was my year! Obtain permits here: https://www.pcta.org/discover-the-trail/permits/pct-long-distance-permit/
Click for NoBo, SoBo, and FlipFlop Details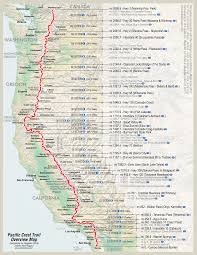
NoBo’ers:
-
- High trail population – Lots of people mean a certain level of social interaction and sharing resources like campsites or hostels. The high population also comes with the high support (trail angels) which means water caches, rides to town, and free lodging with a breakfast from time to time. Your personality type or schedule can make the decision for you!
- Weather windows – You start in the desert when it’s nice and cool but you need to move fast enough to where you don’t get burned by extremely high temps as spring turns to summer. People night hike the low elevations, carry lots of water, and hope the rattlers leave them be. The first “gate” (or schedule impact) you get to is the Sierra Mountains at Kennedy Meadows South (rule of thumb says you shouldn’t enter the Sierras until June 1st). You want to wait to enter the high mountains until the high levels of snow melt enough for travelable passes. In high snow years this can be dangerous and really slow you down forcing you to get off the trail and resupply due to a slower than estimated pace (if you don’t think this is a big deal just Google PCT post holing, and imagine doing that all day).
- Fire danger – Fires are always a possibility in mid to late summer, and as you head north, northern Cali, Oregon, and Washington are prone to catching blaze. This is simply a roll of the dice and some people flip-flop (definition below) to avoid the fires.
- Snow (again) – Your mission at the end is to get to Canada before the snow starts to set in during late September and early October. If you’re too late, you won’t have the right gear to push the last few miles.
SoBo’ers:
-
- South bounders have all the NoBo problems in reverse. You have to wait for the snow to melt in Washington before you can start (usually July 1st), you are hit with forest fires right off the bat, you need to get out of the Sierras before the snow starts packing back in, and get to the desert and hope it’s not too hot (and there is water left). The population is much less and so is the support.
FlipFlopping:
-
- Flipflopping has means skipping a section and hiking the same section in reverse or another section until the conditions become better (too much snow, fires causing intolerable smoke, ect ect). Example: NoBo’ers who got to the Sierras too early came out at Independence CA, caught a ride to Ashland OR, hiked south back to where they exited and caught a second ride back to Ashland to finish the trail NoBo. This allows the snow to melt while you hike another section. I was lucky enough to not have to resort to this technique.
Step 2: Get to know the trail – Maps & Navigation – The PCT is a pretty beaten easily-followed trail, however there are some junctions that aren’t clearly marked and some Maps or GPS navigation on your phone or full on Garmin GPS would be a good idea. Plus water/camping callouts are by mile marker, so its good to have in conjunction with water reports.
Click for Map, GPX Files, and TrailGuide Details![]()

Maps and GPX Files: Hard copy maps can be downloaded directly: https://www.pctmap.net/
Trail Guide: This site has a ton of listed resources that you can download or buy to guide you for where to go in towns amongst a ton of other great resources. http://asthecrowflies.org/pctpacific-crest-trail-town-guide/
Navigation via GPS: SmartPhone Apps – Search for on your preferred App installer
-
- Guthooks – Upside to this app is it has the trail map plus comments from other app users about campsites and water sources all in 1 place. It is a spoon feeding no work type of app. The downside is that it costs $ (about $26 for the full thruhike in 2018). The only thing I have against the app is that it gives you so much that you don’t really have to talk to other hikers and somewhat takes away from the social experience. (This is the most user friendly and easy app to use)
- HalfMile – Pretty basic, has great maps, the trail, and water location. Doesn’t have a ton of camp spots listed past the desert, but it works if you want to go free.
- HikerBot – Basic tracking, free
- Locus Pro – This one takes some work; it is just a map program (almost any map you would want) that you can load GPX files and waypoints into. I have used this for years and didn’t want to buy a whole app specifically for the PCT, so I just grabbed the tracks and waypoints from the HalfMile website listed above and loaded them up. You have to load cache the map of the area prior to going out. Work, but worth it to me.
Step 3: Food and Water – Congrats you’ve made the plunge and got your permit! Now for the essentials: Food & water. This has everything to do with planning and schedule. You have to estimate your pace, imagine where you will be and what you will need. Everyone has their own dietary needs so I’ll focus on the planning aspect of Food & Water.
Click for Food Planning Details
Food: I started researching and pulled a list of all the resupply points close to the trail (hitches to town 40 miles or less). Once I had my list I planned resupplying every 3-5 days (sometimes longer though special areas like the Sierras where getting in and out is harder), using the mileage I assumed I would be hiking to set my schedule and selected resupply points dependent on convenience and price. (I assumed an average of 15 miles per day in the first month, 20 miles per day after that, 18 miles per day through Sierras, 30 miles per day through Northern Cali/Oregon, 25 miles per day in Washington. I factored in rest days into resupply days so this didn’t affect my average much, only affecting the dates of arrival by adding any non-hike (zero) days).
There are 4 main types of food resupply:
1) Mail yourself food – Set up your boxes before you leave (warning, you may become tired of eating the same thing so try and mix it up) and have a friend/fam send them to you; or you can actually mail yourself food from the trail (find a good store in a larger town and resupply yourself for the next month). Grab a USPS Priority Large box and start stuffing your food in! Here are some instructions for how to send yourself packages:
From:
Enter a return (home) address so it can be sent home if you miss the package for some reason.
To:
Your Name (Name on your ID, post office will ask to see it)
C/0 General Delivery
Address: List full address, City, State, the zip code
Please hold for PCT hiker: Name
ETA: DD/MM/YY
2) Buy food in town – Show up and pay whatever prices (sometimes expensive) for whatever they have on hand. Sometimes there is slim pickin’s due to a wave of hikers that come just before you.
3) Mix of the two – I set up 20 boxes before I left and hit up Costco for bulk buying. The rest of my food I bought on trail
4) Hire a company to send you food – I’m sure it can be expensive, but its an option if you don’t want to fool with doing it yourself. Here are some options:TrailSupply, ZeroDayResupply, SonoraPassResupply
Notes on selecting resupply locations:
-
-
- Convenience: Closer to the trail means a shorter hitch with a stranger as most of your resupplies will be off the trail. Let’s face it; if you are going to these towns (to resupply at a store or pick up your package) you will have to rely on the hospitality and humanity of other people in their strange metal sleighs that move faster than 3mph.
- Price and Selection: The smaller the town the smaller the selection and the higher the prices. In the towns where the prices for a packet of tuna is 3$ you may want to send yourself food in a Priority Mail box to avoid these high prices.
-
Here is my Excel File: I put this together which has all the convenient resupply points and I highlighted the resupply points I selected for my 2018 hike. This is JUST A PLAN/GUIDE! Be flexible, most convenient locations on the left side, my plan is on the right side of the Excel sheet.
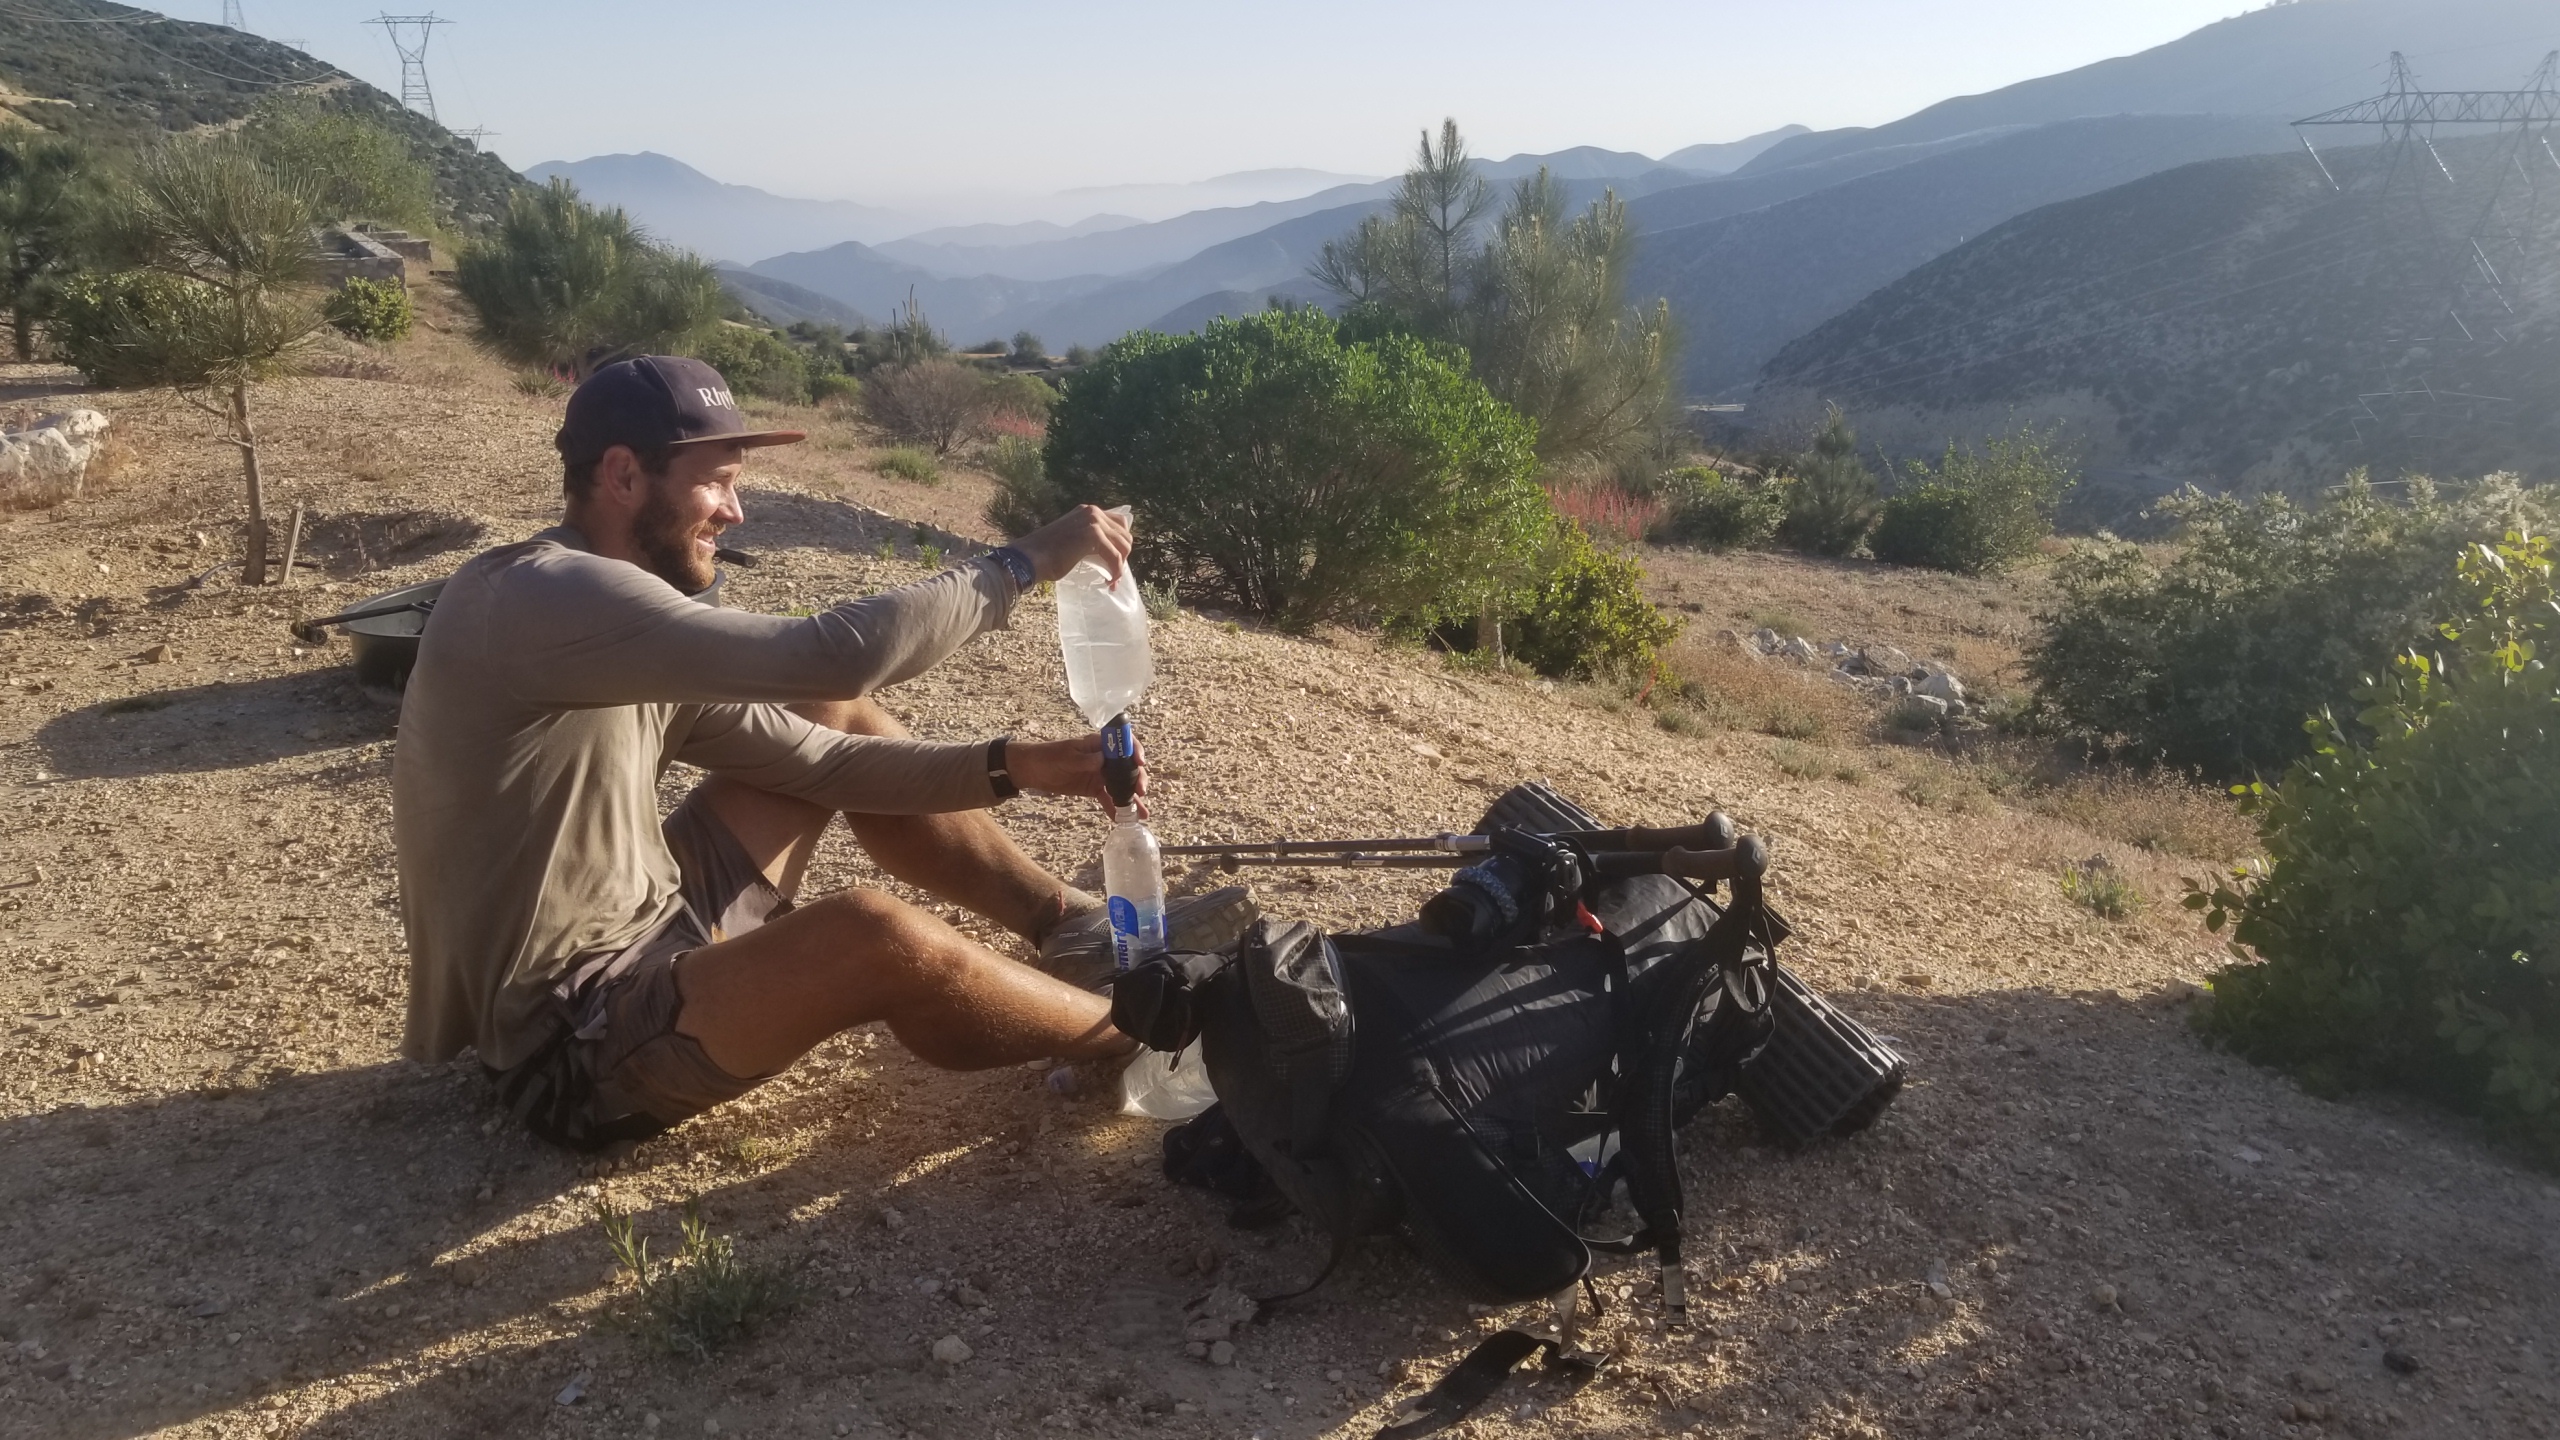
Water: Water is pretty simple overall, there are a few ways to get info (see below). My rule of thumb for carrying water is 1 liter of water for every 5 miles hiked. I know here in America we don’t usually go with liters, however most hiking gear for hydration is labeled in liters and the Smartwater bottles I used were 1 liter bottles.
-
-
- The Water Report can be downloaded onto your smart phone or printed out and carried with you. This tells you locations of all water sources and is updated by hikers via txt or email.
- The phone app Guthooks also has live water information. Comments in Guthooks will let you know if there is water at the next source.
- Water purification: See Gear Selection Section.
-
Step 3: Gear Selection – Well now that you’ve decided to leave society for a few months, figured out when you are starting, and where you’re going to stop for food, you need some gear to carry all that crap! Gear is life to people; they BELIEVE in their gear and spend a lot of money on it. That doesn’t mean you can’t go out there with a 70lb external frame pack, it just means you gotta work harder for it! I’ll stick to the basics of what you will need and give you examples of what you can choose, you can do your own selection from there (there is no 1 solution to life!).
Click for Gear Selection Details
Comfort Vs Weight – Every ounce counts! Ultralighters typically go as minimal as possible, whereas some people want to be comfy cozy at the toll of heavier gear. The fact is, the lighter you are; the faster you are. Is this important to you? Everyone has their sweet spot; and it’s a personal call. Do you want your heavy DSLR camera? Want your super comfy blowup sleeping pad? How about an extra pair of socks or underwear when your others are busy drying out after laundry? These are all questions you’ll have to answer yourself, however here are the basics of what you’ll need:
SideNote: Here are my gear lists (includes weight and links) for the whole trail:
PCT So-Cal Backpacking Gear List
PCT Sierra’s Backpacking Gear List
PCT Nor-Cal + OR Backpacking Gear List
PCT WA Backpacking Gear List
Here my gear rational and what I saw others doing on the trail:
Backpack: Your pack needs to fit all your gear, about 5 days of food, and carry anywhere from 2-6 liters of water (6 liters is extreme and you’ll only ever do that a handful of times in the desert). I prefer a pack with hip-belt pockets and side pockets to carry smart water bottles. I chose the EXOS Osprey 58 Liter pack, I already owned it before the trail, and why buy a new pack when I already have a perfectly good one! Here are some packs I saw on trail.
Sleeping Bag / Liner / Pillow: The coldest temps you will see on the trail are in the 20s (headed NoBo from mid-April to mid-Sept). I personally love a mummy bag, you can save some weight and get a quilt which cuts out as much weight as possible from some areas which one could argue are “extra”. Side note: quilters sometimes complain of drafts from the bottom where there is a hole from the quilt’s drawstring which when pulled creates a “toebox”. Some people sleep cold and need 10 degree bags with liners in them (even in 30 deg weather); this is all about knowing yourself and your gear. Other considerations include ethically harvested feathers for the down bags, and using synthetic bags if you are worried about being wet. Like I stated, this is all personal preference. Here are some examples of what I saw on trail:
Sleeping Bags/Quilts
Sleeping Bag Liners – Using a liner will keep the dirt and oils on your body off of the inside of your sleeping bag. Thus extending its life and loft!
Pillows – It’s comfy, let’s face it, this is a luxury (good sleep was a big priority for me), you could easily use your puffy or town shirt as a pillow.
Shelter/Tent: There are plenty of options out there, most all are expensive! Tarps are really nice on weight because they use your trekking poles to hold them up (downside is they must be staked out properly and a high wind at night could be troublesome). Free standing tents are great but weigh a bit more due to the poles but the upside is they don’t require staking out to stand erect. Bivy or just cowboy camping is another option. Remember it’s all about comfort vs weight. I saw some people carrying 2 man tents because they enjoyed the space, others cowboy camped every night. Here are the tents I saw out there most:
Cooking System: Cold soak or hot meals?! Comfort question once again. I saw many people choking down cold ramen and instant mashed potatoes so they could save themselves a pound of weight going stove less (every ounce counts remember). I’ll let you make your own decisions here, but this is what I saw on trail the most:
Stoves
ColdSoak Containers
Utensils:
Clothing: This could be like opening a can of worms, there’s such a HUGE amount of products out there for you to choose from. Here are the basics, carry ONLY what you need. If something wears out or doesn’t seem to be working for you just grab another from a hikerbox or send yourself one. Rule of thumb:
Shirts (x2) – 1 hiking shirt, 1 town shirt. I personally love smartwool to hike in; a lightweight shirt can be good in both heat and cold.
-
-
- Synthetic can be nice, but eventually the smell just doesn’t seem to get out of the shirt even after a wash.
- Wool kicks butt, it can wear down quickly (especially in the shoulders) – Price
- Cotton – Leave it at home
-
Mi- Layer – People LOVE their puffys which is no surprise in chilly weather. Here is what I saw out there:
Pair Socks (x3) – I started with 2, moved to 3 after accidentally losing a pair and getting stuck with just 1 pair for 3 days . . . got athlete’s foot . . .let’s not talk about it. Here is what I saw most on trail:
Shoes – People are crazy for shoes, pick your own religion here. Most people on trail rock trailrunners because they are light (1lb on your feet is equivalent to 5lbs on your back) and they have good breathability which means they dry quickly if they get wet (you will be dousing your shoes in creek crossings especially in the Sierras). Side note, you should plan to go through 5 pairs of trail runners (mine were lasting about 550 miles before the cushion broke down!) This is what I saw most people wearing:
Gators – Keeps the rocks out of your shoes, every time you stop to empty your shoes is time wasted. Light weight option I saw most on trail – Dirty Girl Gators – Website
Hat – Keep that head covered from the sun!
Buff/Handkerchief – Keep that sun off your neck! Wool , Synth
Rain Pants – I only carried these in Sierras and Washington. What I saw on trail:
Rain Jacket – I carried this the whole trek. It doubled as extra insulation when I was cold to lock in heat over my midlayer
Shorts (or pants) – I rocked a pair of swimming shorts the whole trail. Dried fast, lightweight, cheap (thanks Goodwill!)
Water Filtration – Sometimes size matters . . . and the longevity! There were mainly 2 filters out there, and then some people just straight up didn’t filter at all! You want good flow rate, but at the same time longevity. Side Note: I ditched my pack bladder and just used Smart Water bottles which I slid into the side pockets of my backpack for easy access. Switching to this system will help you know exactly how much water you have at one time, plus if a bottle gets too beat up you can always swap it out once you get to town.
-
-
- Sawyer Squeeze – Save yourself the trouble and get the full size version (it lasted me all 2650 miles with filtering every liter I drank). The flow will slow down, but usually not until 400 miles in. The Mini Sawyer quickly loses its flow capability even with back flushing properly (200ish miles). The Sawyer also screws right onto SmartWater bottles which is a plus as the bags that come stock with Sawyer WILL break! Be aware of this, after so many squeezes they will burst near the neck (no one wants to lose a few liters in the desert). I just used a SmartWater bottle as my “squeeze” dirty bag. Price , Website
- Katadyn BeFree – Has higher flow than the Sawyer out of the gate, but it starts to slow down after 200 miles. It will still filter – Price , Website
-
Electronics – It’s going to be hard to let go of electronics at home, but the ones you take on trail need juice. Navigation these days is primarily done with Smartphones. Any camera you would use or other nifty gadgets need to stay charged between towns (don’t forget to charge it up when you are in town).
SmartPhone – Primary use is navigation, then pictures, then internet and social media. Use your juice wisely. I used the Samsung Galaxy 8S+ (water resistant) with a holster that was on my pack’s shoulder strap for quick access. Phone, Holster
Camera – Tons out there, if you want those epic pictures that your smartphone can’t grab and have convinced yourself the weight is worth it, these are some of the cameras I saw on trail:
Battery Bank – Gotta keep these things charged! (Think weight vs charge capacity (mAh)
Duel Charging Block – Useful to quickcharge 2 things at once
-
-
-
- Anker Dual USG Charger – Price
-
-
Solar (didn’t actually see many of these, but I did see a handful. Northern Cali, OR, and WA are pretty forested)
-
-
-
- Suntactics Solar – Website
-
-
Bluetooth Keyboard – I blogged every night and this keyboard was the key to making it happen. Without it I would have been reduced to T-Rex thumbing the day’s journey. Price
Special Equipment – A few areas have special requirements, namely, the Sierras and Lassen National Park. Bear canisters are required between Kennedy Meadows South (mile 702) and Sonora Pass (mile 1017) and then again in Lassen Volcanic National Park (mile 1343-1363). You can avoid Lassen requirement by hiking through the area in 1 day (it’s 20 miles and you’ll be cranking by mile 1343). Side Note: I carried my bearcan all the way to South Lake Tahoe because it cost me 11$ to ship home filled with clothes, whereas shipping from Kennedy Meadows North was 25$ full, 20$ empty.
Bear Canister – Required (full list of approved cans are here: https://www.nps.gov/yose/planyourvisit/containers.htm) , this is what I saw most on trail:
IceAxe – In high snow years you’ll need this to self arrest over the Sierra Mountain Passes (I’ll let YouTube take over on the ‘how to use’). This is what I saw most of:
-
-
-
- Black Diamond Raven Pro IceAxe – Price
-
-
MicroSpikes – Some years (like 2018) the snow will be melted enough where this is all you need, other years you may need full on crampons. Price
Umbrella – These guys were pretty popular on trail. People would use them for sun protection as well as rain in Washington (NoBo frame of time). Price
First Aid – Last but not least, safety (N.B. I am not a doctor or a professional healthcare provider; consider your own safety needs in first aid)! You would be surprised about how little you actually need to carry. The mentality is to carry enough to take care of minor scrapes, scratches, blisters, sun block, and if it is something more serious you will be coming off trail for treatment anyway.
GPS Unit – if something serious were to happen (rattle snake bite, broken leg, heart attack, anaphylactic shock, ect ect) and you don’t have cell signal, a GPS unit can hail for rescue. Plenty of options out there:
Simple bandage – I just carried gauze pads and Luko tape to make custom bandages
Thread/Floss and needle – This can be used to pop blisters, dig out cactus needles/thorns, or used to sew up a shoe or pack that is starting to come apart – Price
Salt – sounds strange, but if you start to cramp up and you haven’t had enough salt, throw some in your mouth.
Sunblock – Take care of that skin kids!
-
-
- Banana Boat Sunsceen Stick – The stick is great because you don’t have to spread sunscreen all over your body w your dirty hands (cause god knows where those have been!) – Price
-
Hand Sanitizer – No sinks out there, clean your hands (also never handshake, always fistbump! Fewer germs spread that way)! Price
Ibuprofin – Carry a small bottle, pretty handy for headaches and annoying body aches.
Toiletries – Lets face it everybody goes. Grab your essentials: Toilet Paper, Hand Sanitizer, Tooth Paste, Tooth Brush (yeah thats right cut that bad boy in half so save a few ounces!), and of course WetWipes. The PCTA requests that you pack ALL your TP out, so remember to have a small baggy handy for this. Sanitize them hands afterwards! Its a dirty job, but someones gotta do it!
-
-
- The Deuce #2 – Dig them holes 6″ deep! Price
-
Step 4: Getting to the trailhead and Trail Angels – Now that you’ve done all the hard work to make sure you have what you need to survive for 4-5 months, you need to get to the trail and start walking!
Click for Trail Angels and Trailhead Logistics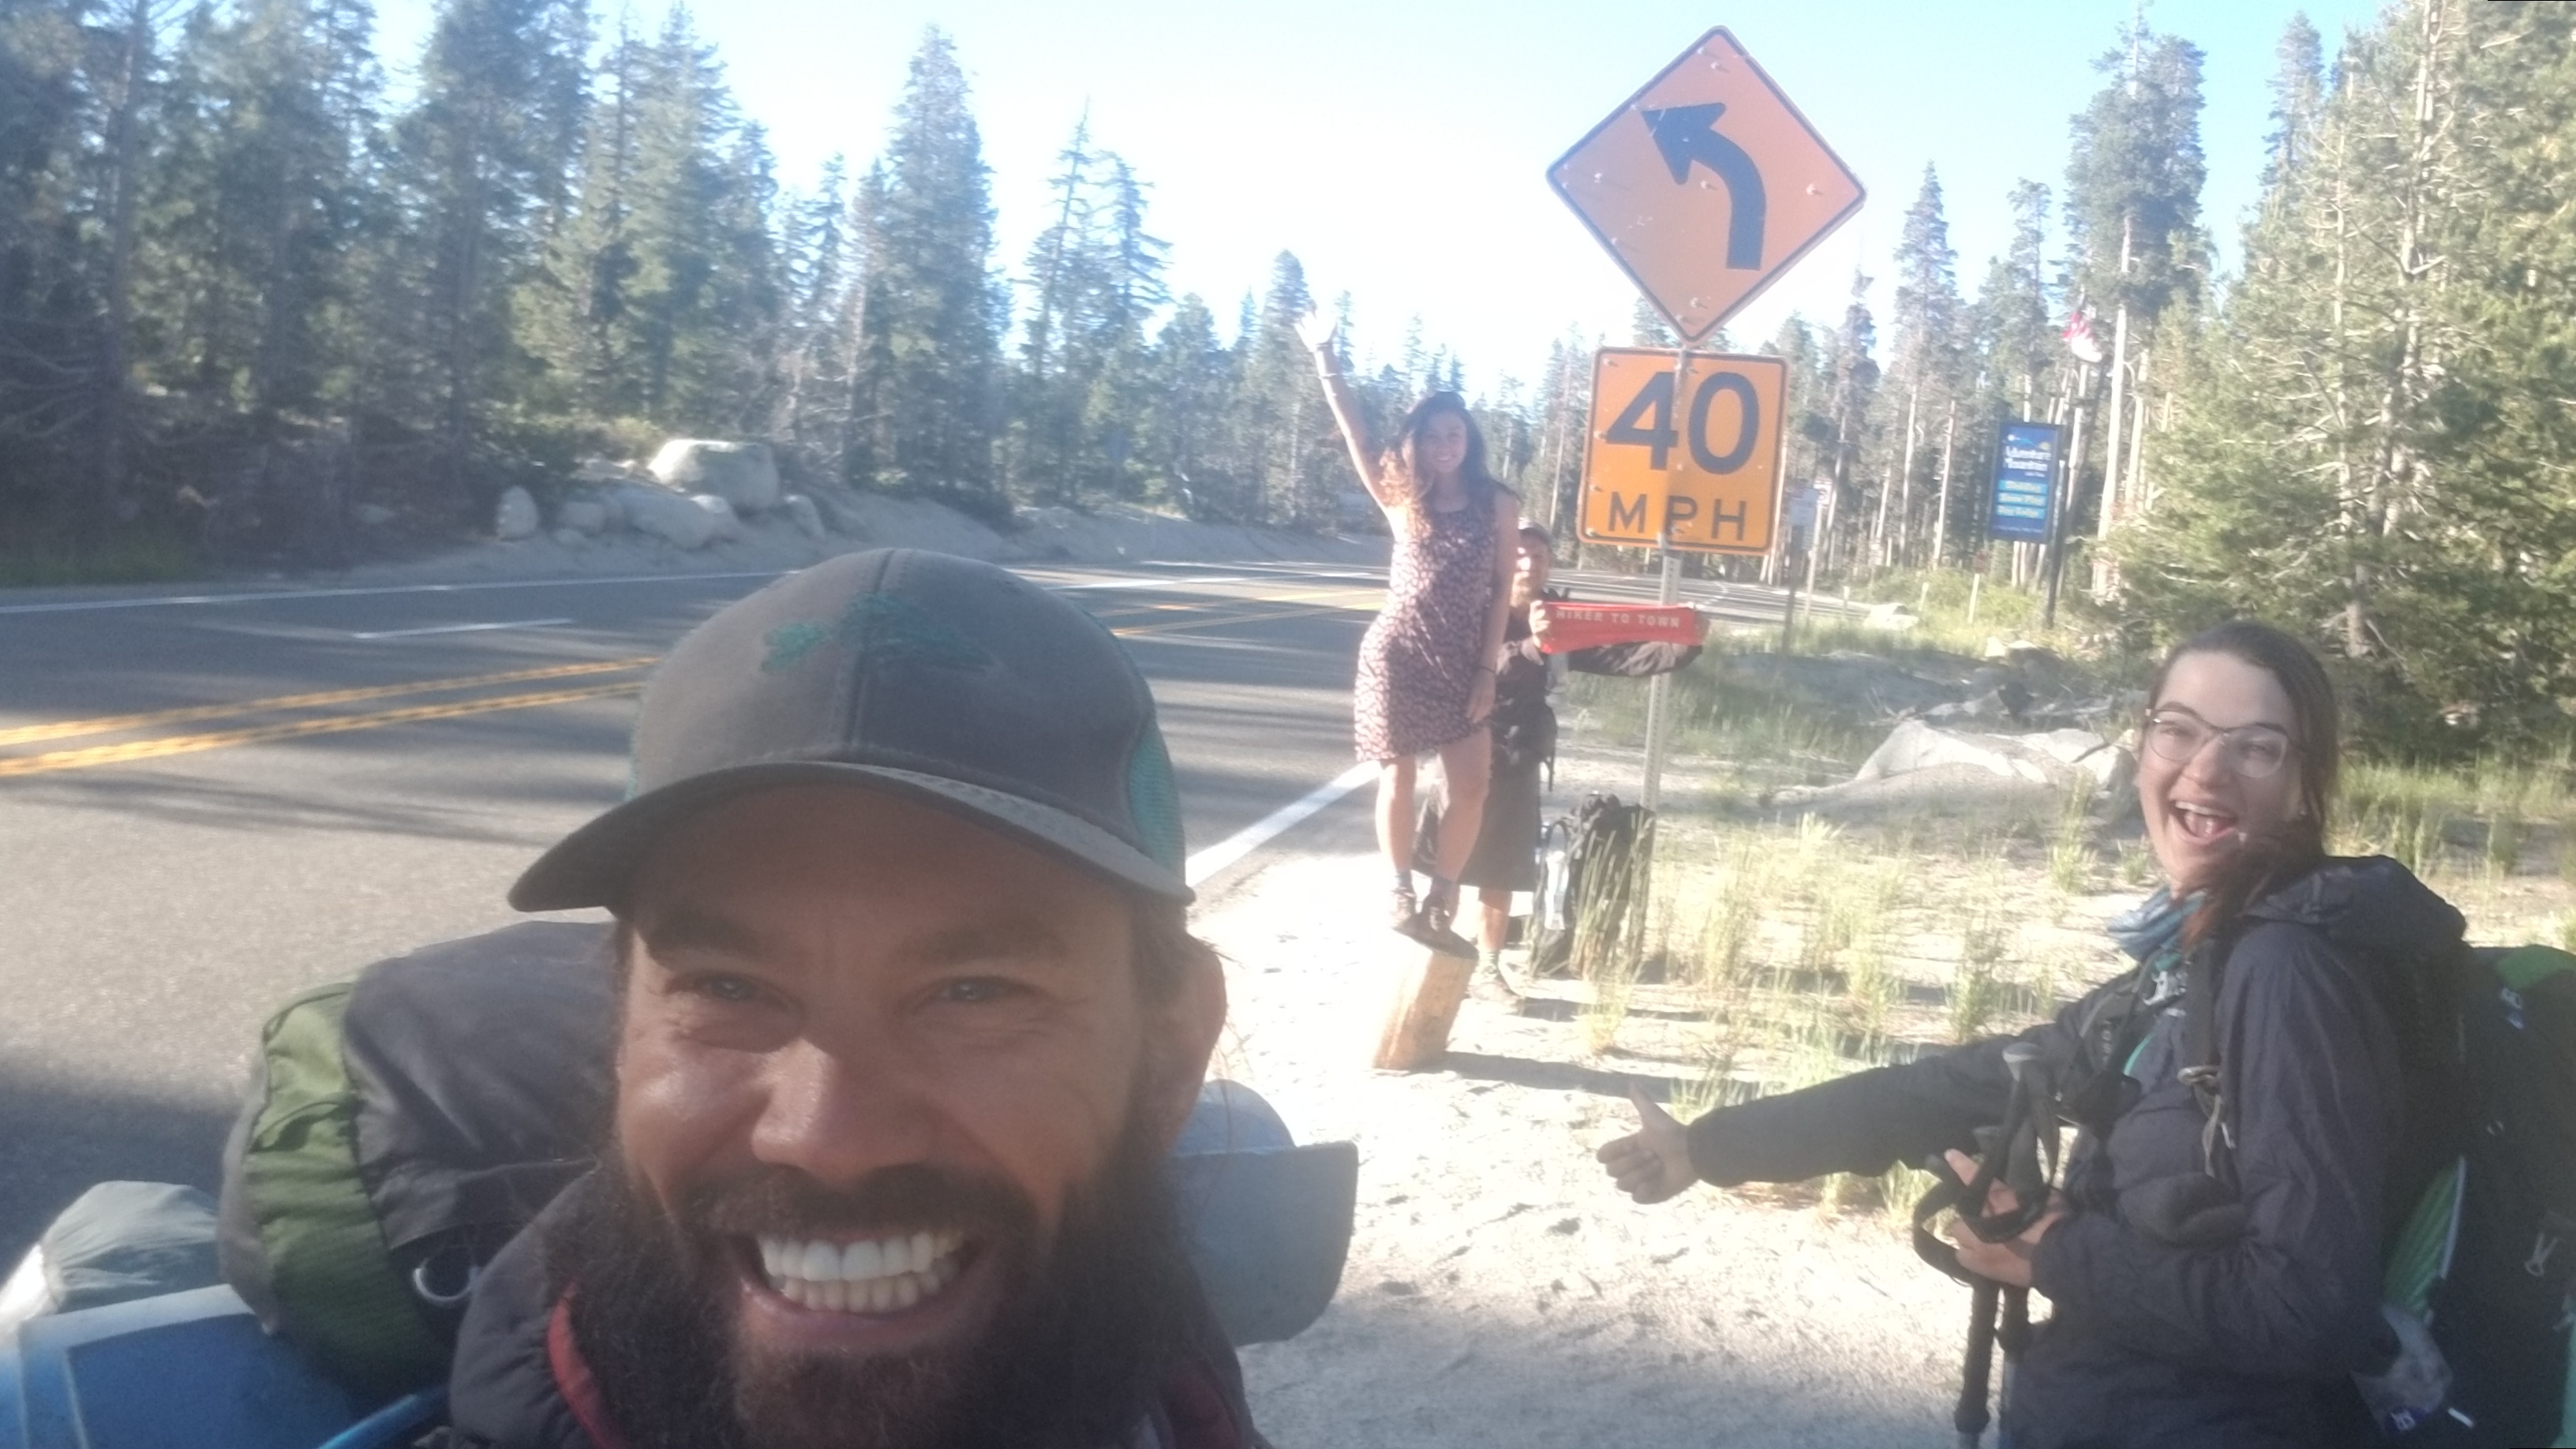
Trail Angels – These are people who have either hiked the PCT in some way shape or form or really love the trail and want to support the hikers attempting the cross country trek. They will give you refuge from the storm in their homes, rides to/from trailheads, feed you, give you trailmagic, receive packages for you at their home, and all around turn your day. There is a list of trail angels online: http://trailangellist.org/pacific-crest-trail/
Getting to/from the Southern Terminus trailhead:
-
- Scout and Frodo – These 2 trail angels will pick you up from the airport, house you for a day or so, and then get you to the trailhead on your start date (contact them in advance). They are pretty cool. You can do like I did and force a friend to drive you there and hike the first section with you and cook you a big dinner and breakfast on the grill before kicking you out onto the trail like the hiker trash you are!
- This site has bus details to get you there: http://asthecrowflies.org/pctpacific-crest-trail-town-guide/
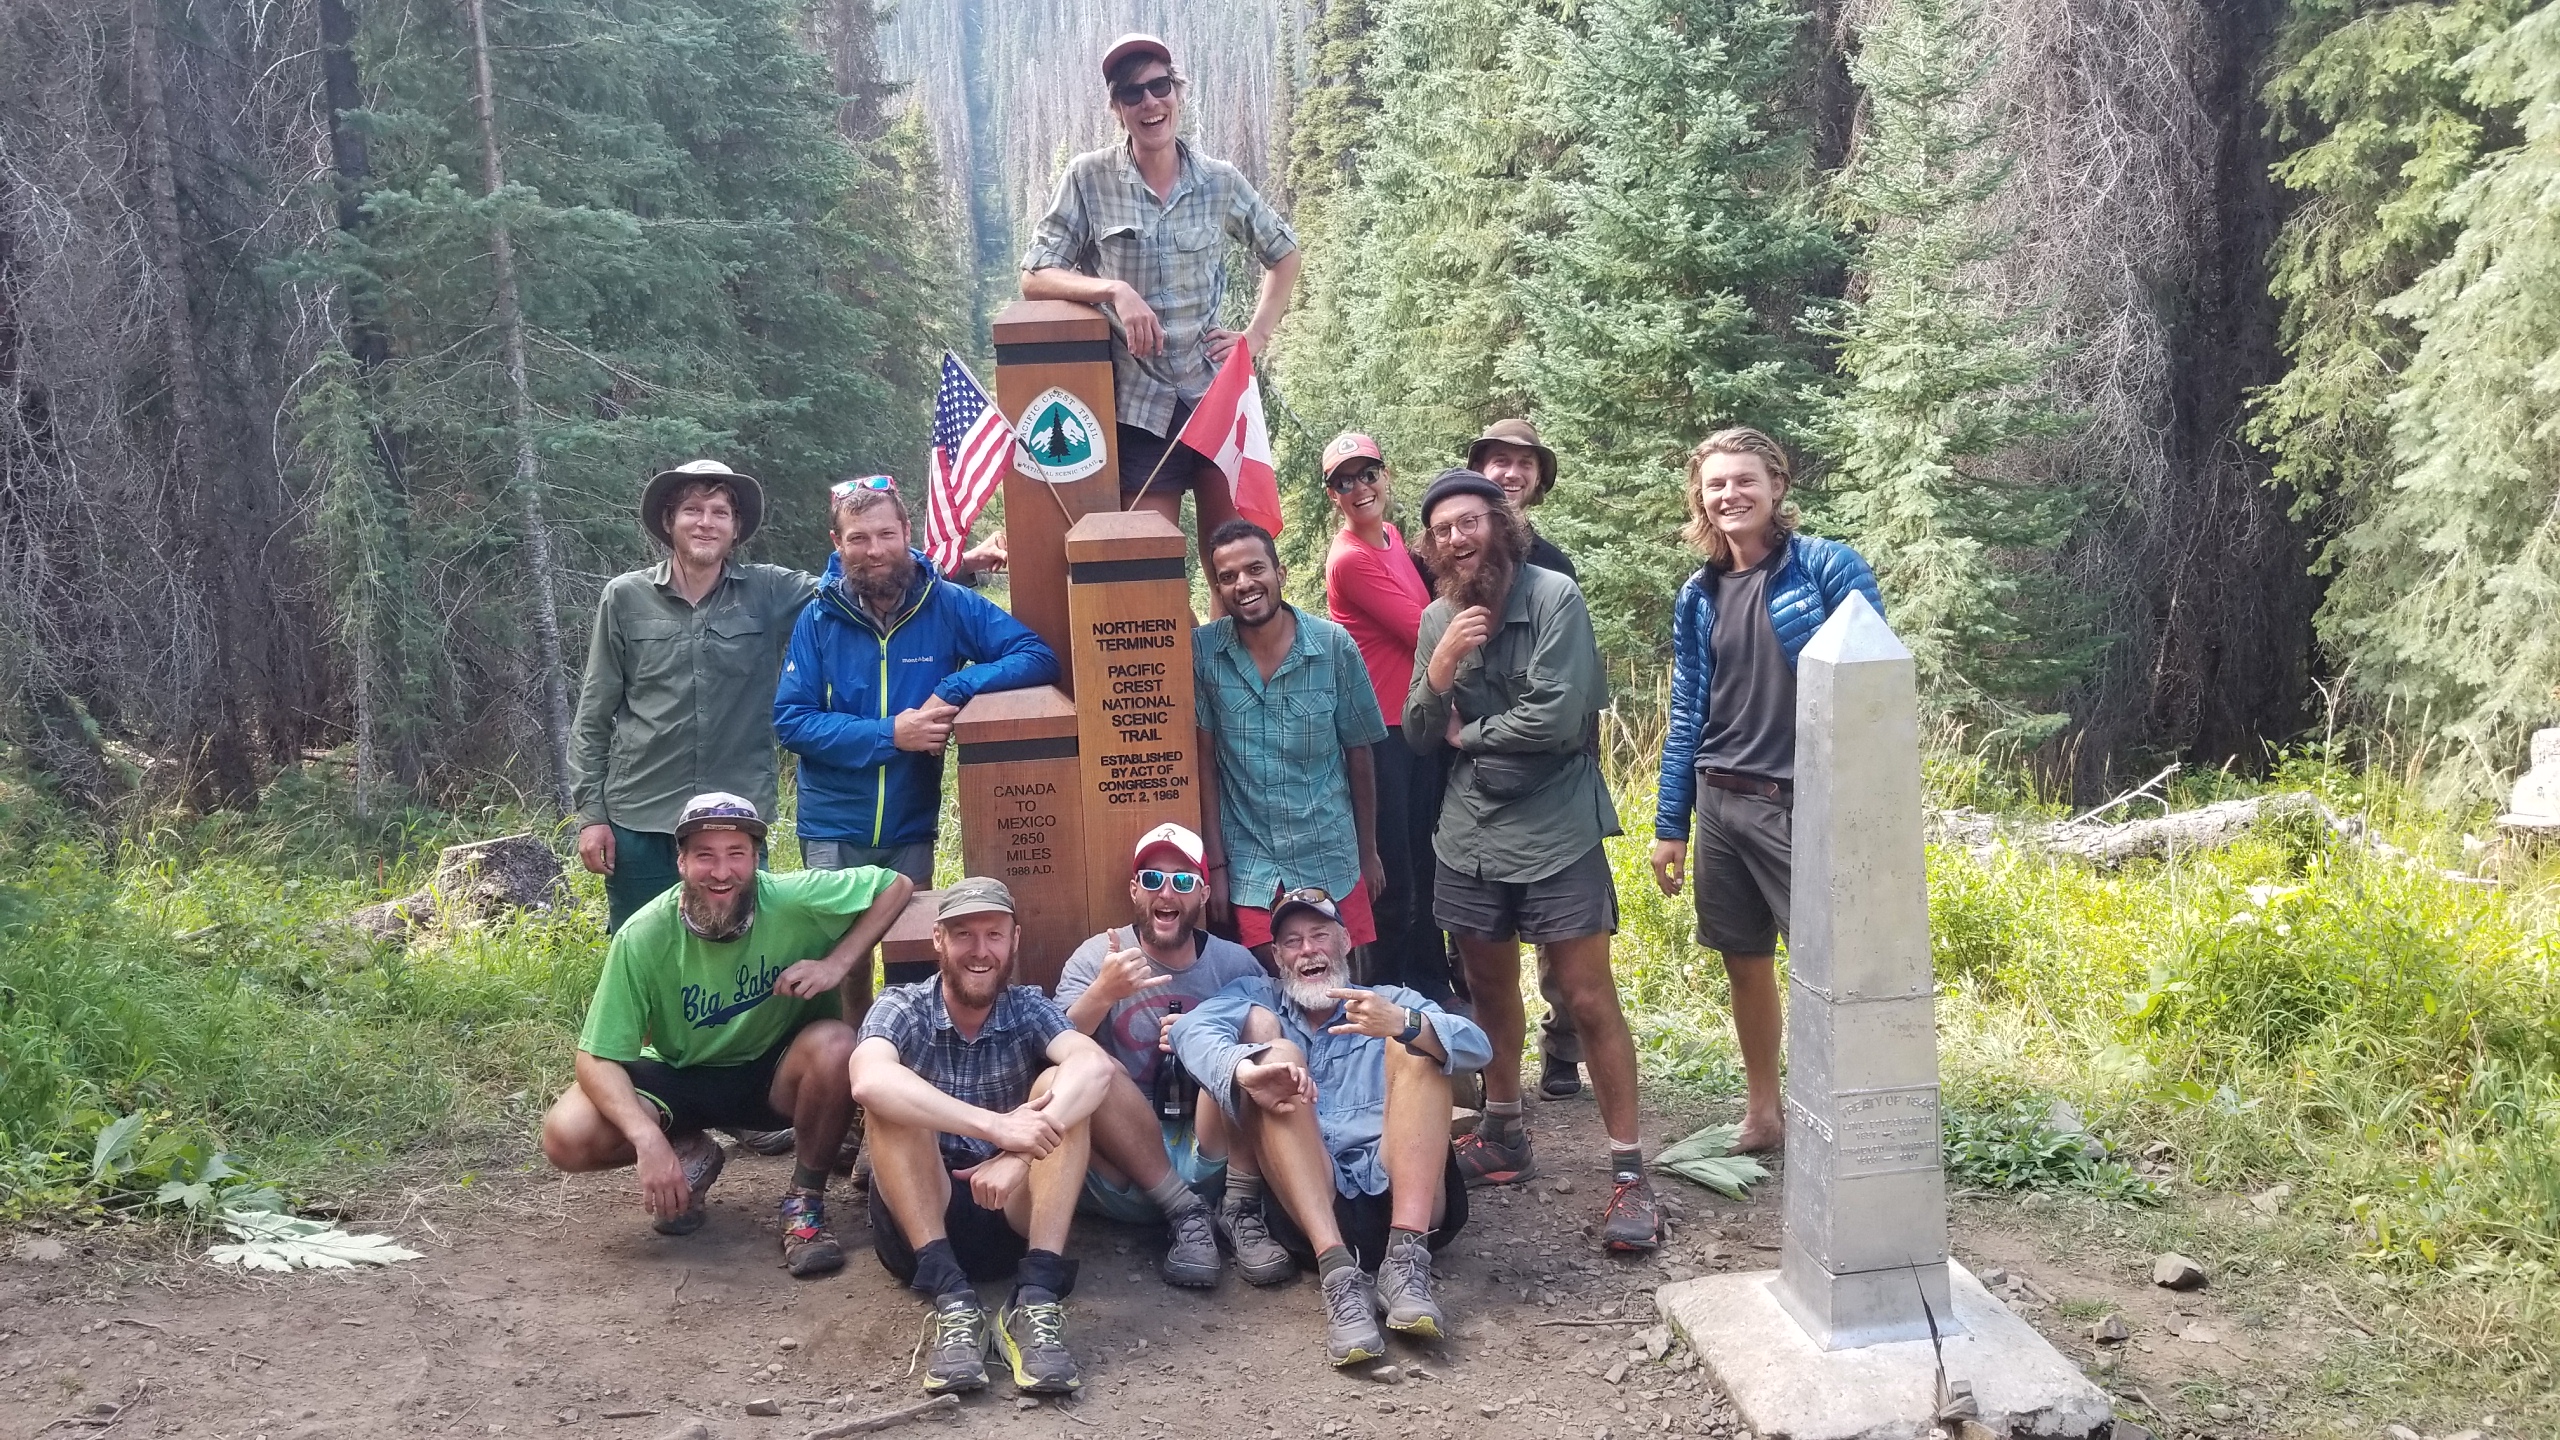
Getting to/from the Northern Terminus trailhead:
There are 2 main options here:
1) Hike into Canada – Once at Manning Park, take a bus/hitchhike/carpool to get back to the states. You MUST have a PCT Canada entry permit (some people have issues obtaining one if they have have ever had a DUI) to walk into Canada via PCT.
2) Hike back to Hearts Pass – Once back at the pass, throw your thumb out and hitch into Mazama. From Mazama you should be able to hitch over the 20 to Seattle.
Large group accommodating Trail Angel stops: Hiker Heaven, Casa De Luna, Mike’s Place (it’s an experience . . . ), Hiker Town (also an interesting experience . . .), there are a ton of trail angels in town that are on the list that will host you.
Trail Angels are going out of their way because they love the trail and they love you stinky hikers, love them back a little, drop some cash on them if they will let you.
Step 5: Don’t stress and enjoy! Looking back I realized that “the trail provides!” All this “planning” only gets you so far. Remember that life happens while you’re busy making plans. Your schedule will change, you’ll be faster or slower than you originally thought. You’ll meet new friends on the trail, have a shoe blow out on you, loose a pair of socks, have to wait on a post office to open, or wait for a package lost in the mail, or get sidetracked by some sick trailmagic in the middle of nowhere, or perhaps you’ll find a really hospitable town and decide to take an extra zero to really take it in. No matter what, woohsaahhhh it’s all going to work out as it should! Happy trails!
If you guys are interested in prepping for other thru-hikes check out MyOpenCountry’s Thru-Hiking 101 Guide which takes a holistic approach to the big US thru-hikes. Good luck out there!