Category Archives: Hiking Philosophy

The Most Deadly Class – The Relationship of Risk and Rock
As I continue seeking adventure, it seems as though my eyes continue to seek out routes that are more difficult, not just physically and mentally, but also vertically. As climbing continues to steepen, and the difficulty increase, so does the classification of the route. As posting continues I will be mixing in both hiking treks and climbing adventures so I wanted to define a few terms to ensure that my posts are understood . . . “The more you know”.

Before I jump into definitions I want to touch on a subject that no one likes to talk about: Death. Dying is an inevitable part of life, but its timing can be greatly influenced by the choices and decisions you make with risk management on any adventure. The death zone is considered to be climbing above 30 feet of exposure above the ground. Essentially if you fall, you die from the injuries sustained from such an accident. I will be focusing on deaths due to falls for each route classification as to help define the danger and risk taken in participating in each activity.
Table 1. Route Classifications by Difficulty
| Route Classifications | |
| Class 1 | Walking an established flat, easy trail, much like a sidewalk. |
| Class 2 | Hiking a steep incline or decline. |
| Class 3 | Scrambling a steep hillside, moderate exposure, and hands are used in climbing. |
| Class 4 | Scrambling up steeper yet, with hands, on exposed faces which the potential of falls that could cause serious or possibly fatal injury. Ropes and rock protection are sometimes used. |
| Class 5 | Free Climbing (Free from Aid): This technical climbing is accomplished using one’s hands and feet on the rock to ascend the route. It is free from any aid such as pulling on a rope or any other protection. Any fall from a Class 5 route would most likely be fatal without protective gear. Rope and rock protection are required. |
| Class 6 | Aid Climbing: This form of technical climbing is used when there is an absence of hand and foot holds for the climber to use to ascend a route. The climber must use aid from pitons, hangers, hooks, and an assortment of gear to ascend the route. Any fall from a Class 6 would most likely be fatal without protective gear. Rope and rock protection are required. |

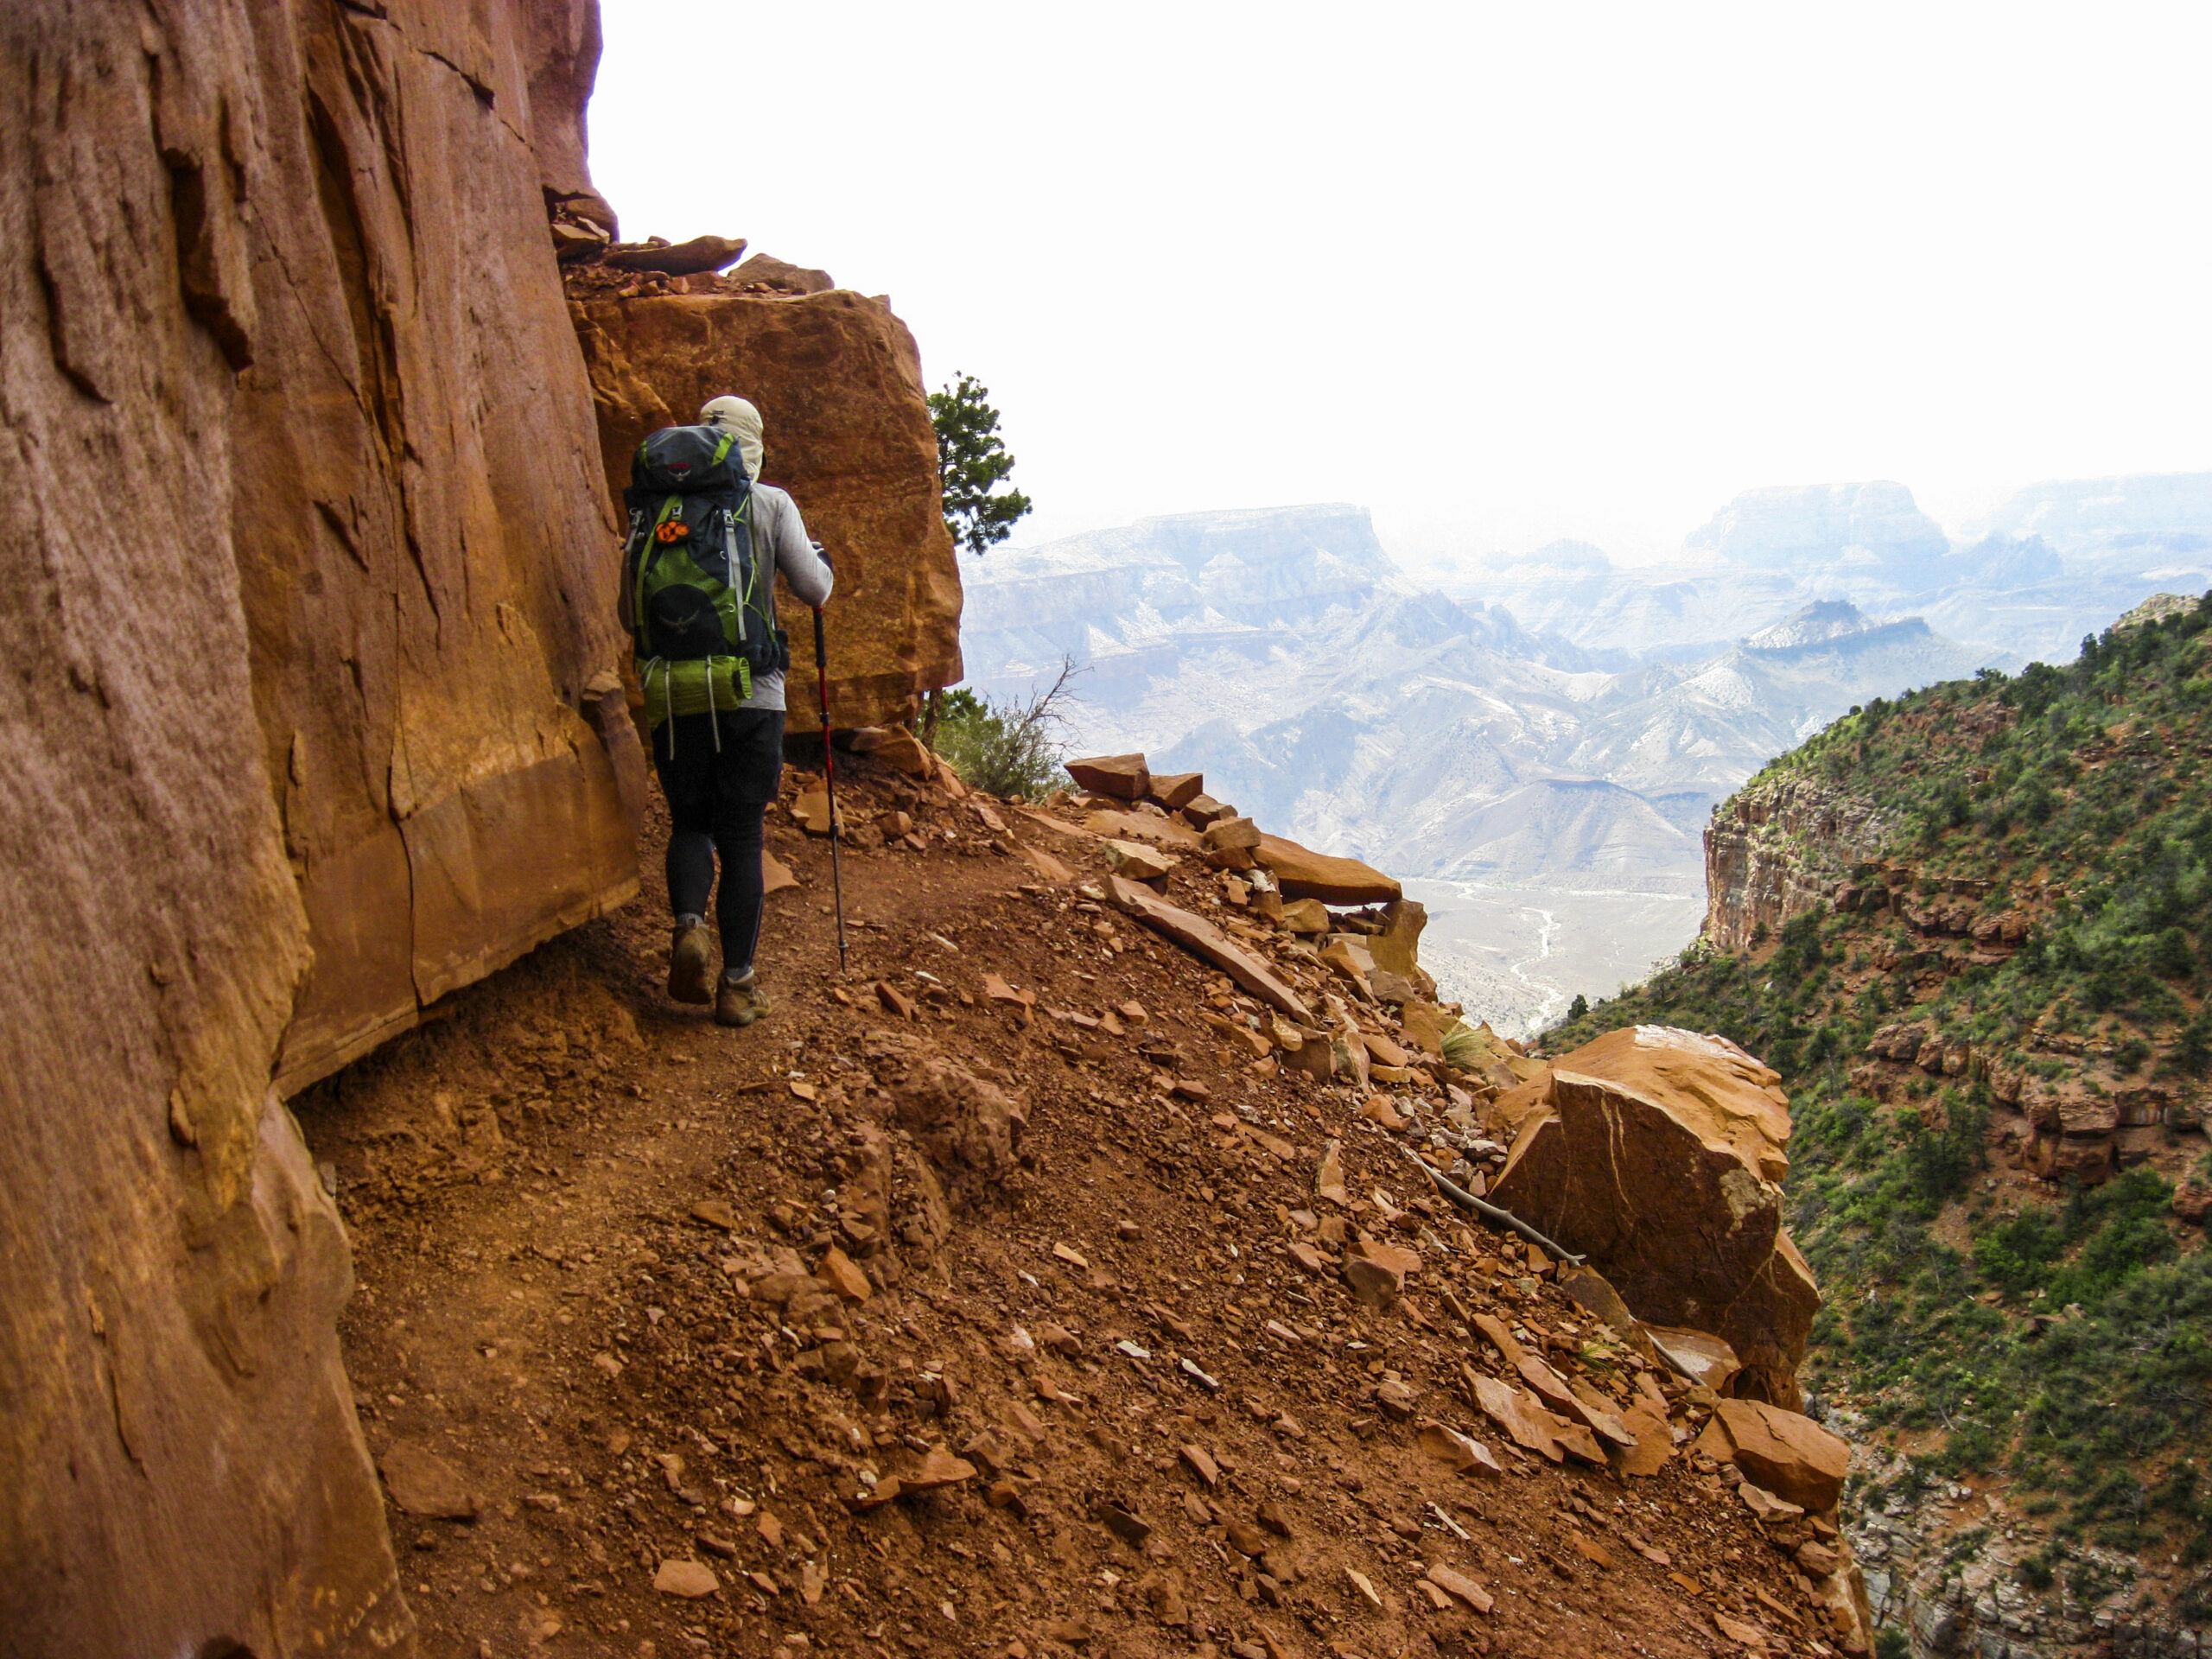
Class 1-3: Hiking & Easy Scrambling – Most people understand pretty easily Class 1-3 as they have walked, hiked, and scrambled to get to the top of a mountain. There is no gear required for this kind of terrain.
- Fall occurrence: Low, Death risk: Low, Gear Required: None.
- Annual Deaths: 5 deaths from falls, 35 total (NPS SAR Data)
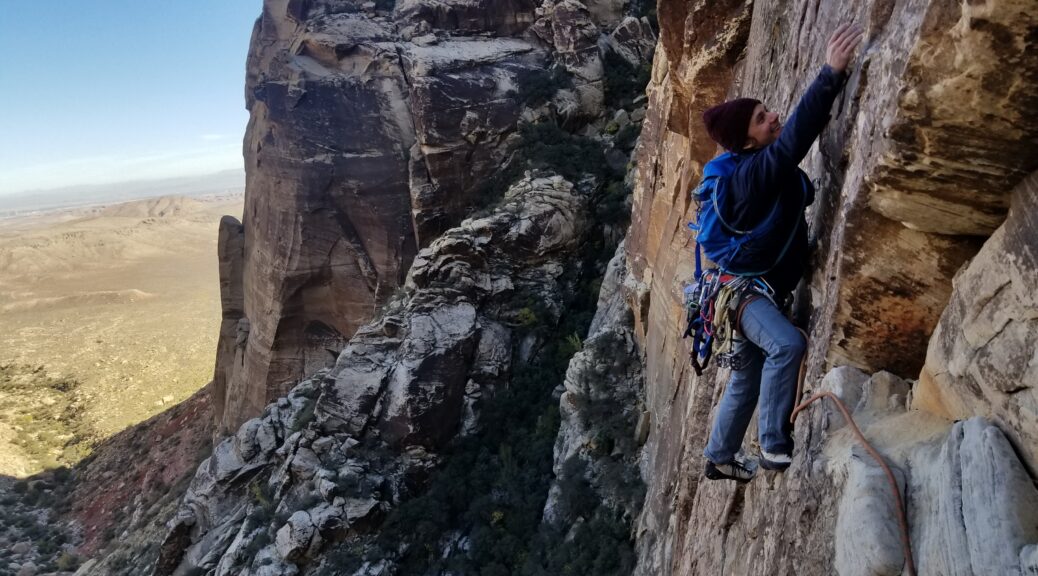
Class 4: The Most Deadly Class – Scrambling on fourth class can be very dangerous as the scrambling becomes more vertical and exposure to drop-offs becomes inevitable. The problem lies within knowing when to pull out a rope for technical climbing using fifth class techniques and when to go for it with no ropes. Setting up belay stations, using rock protection, and climbing using fifth class techniques is time consuming and sometimes not worth climbing just 10’ of rock. On the other hand, fourth class can be very exposed and a mistake on easy climbing may leave you falling to your death. Because the nature of fourth class is almost always subjective, it can be the most dangerous leaving the safety protection up to the climber’s discretion rather than a requirement.
- Fall occurrence: Med, Death risk: Med-High, Gear Required: None/Subjective.
- Annual Deaths: 10 (Rocky Mountain Rescue Group 1998-2011)
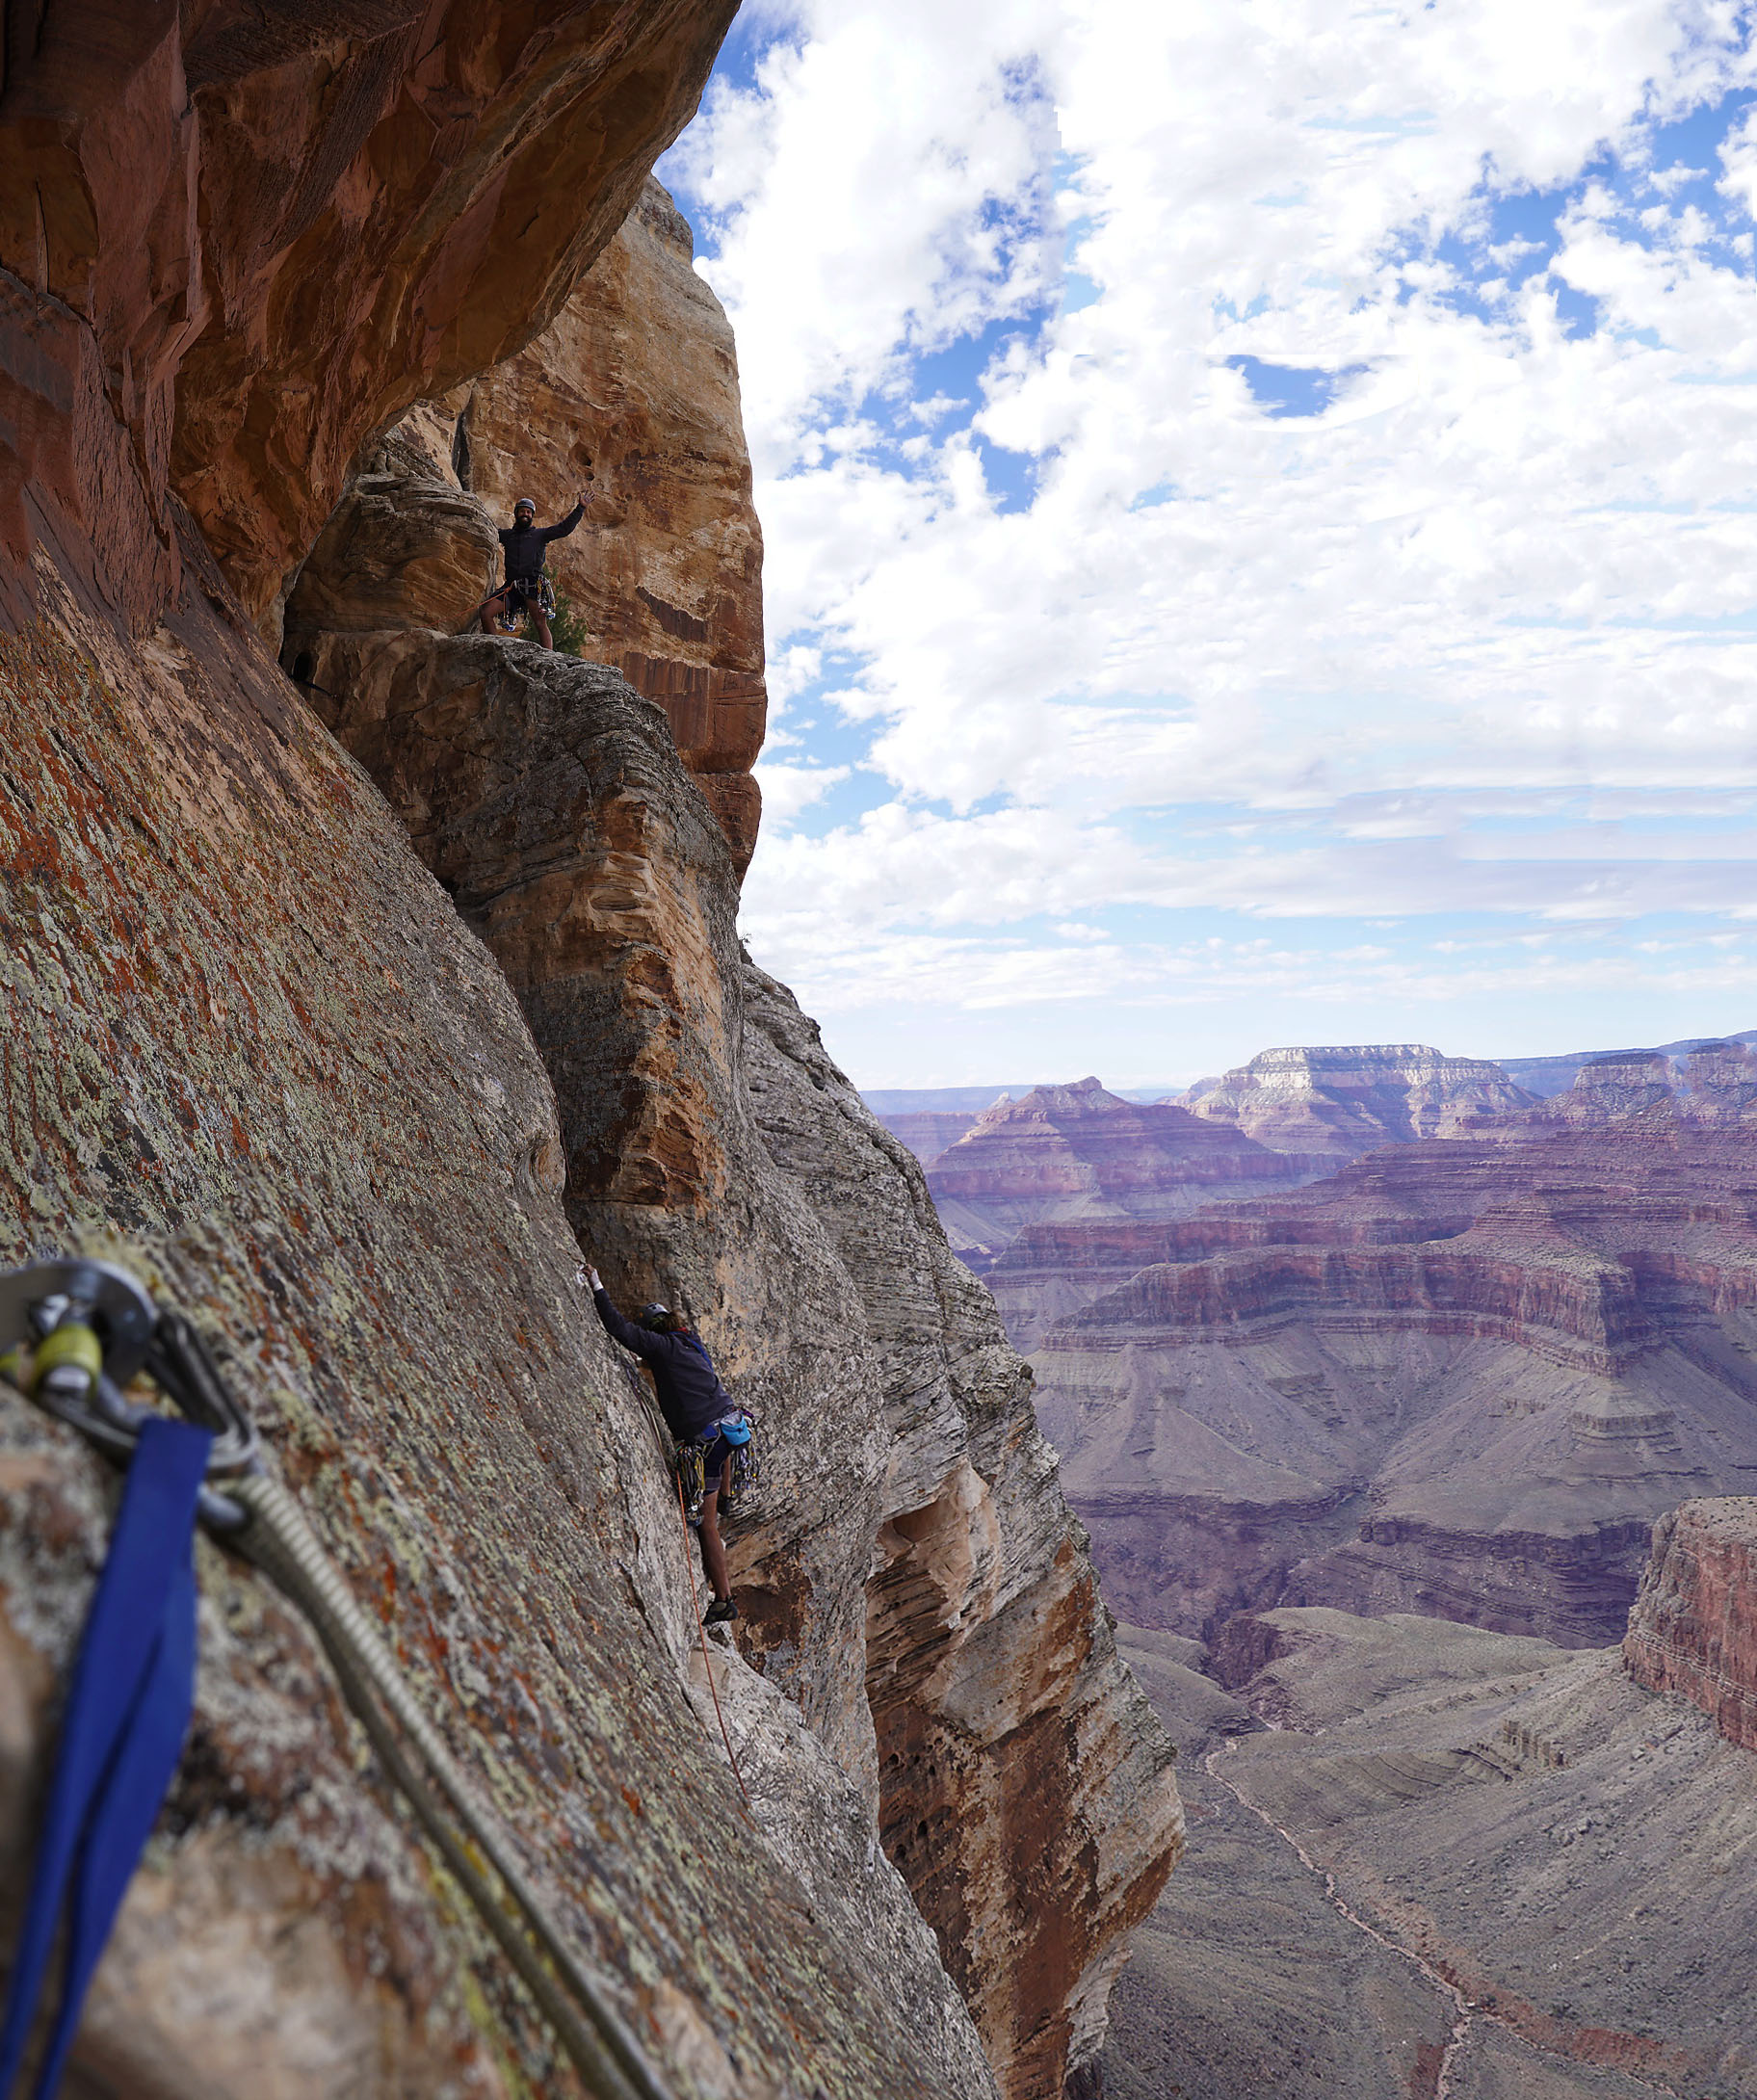
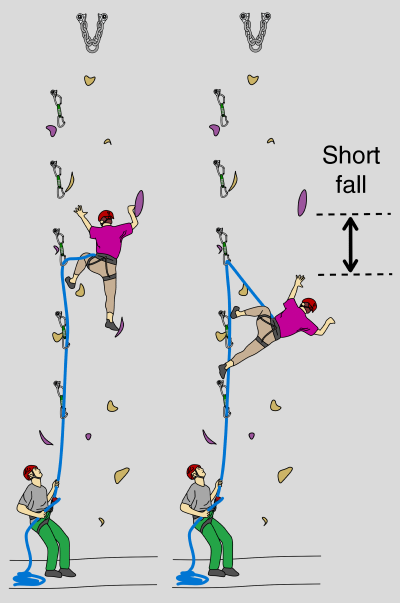
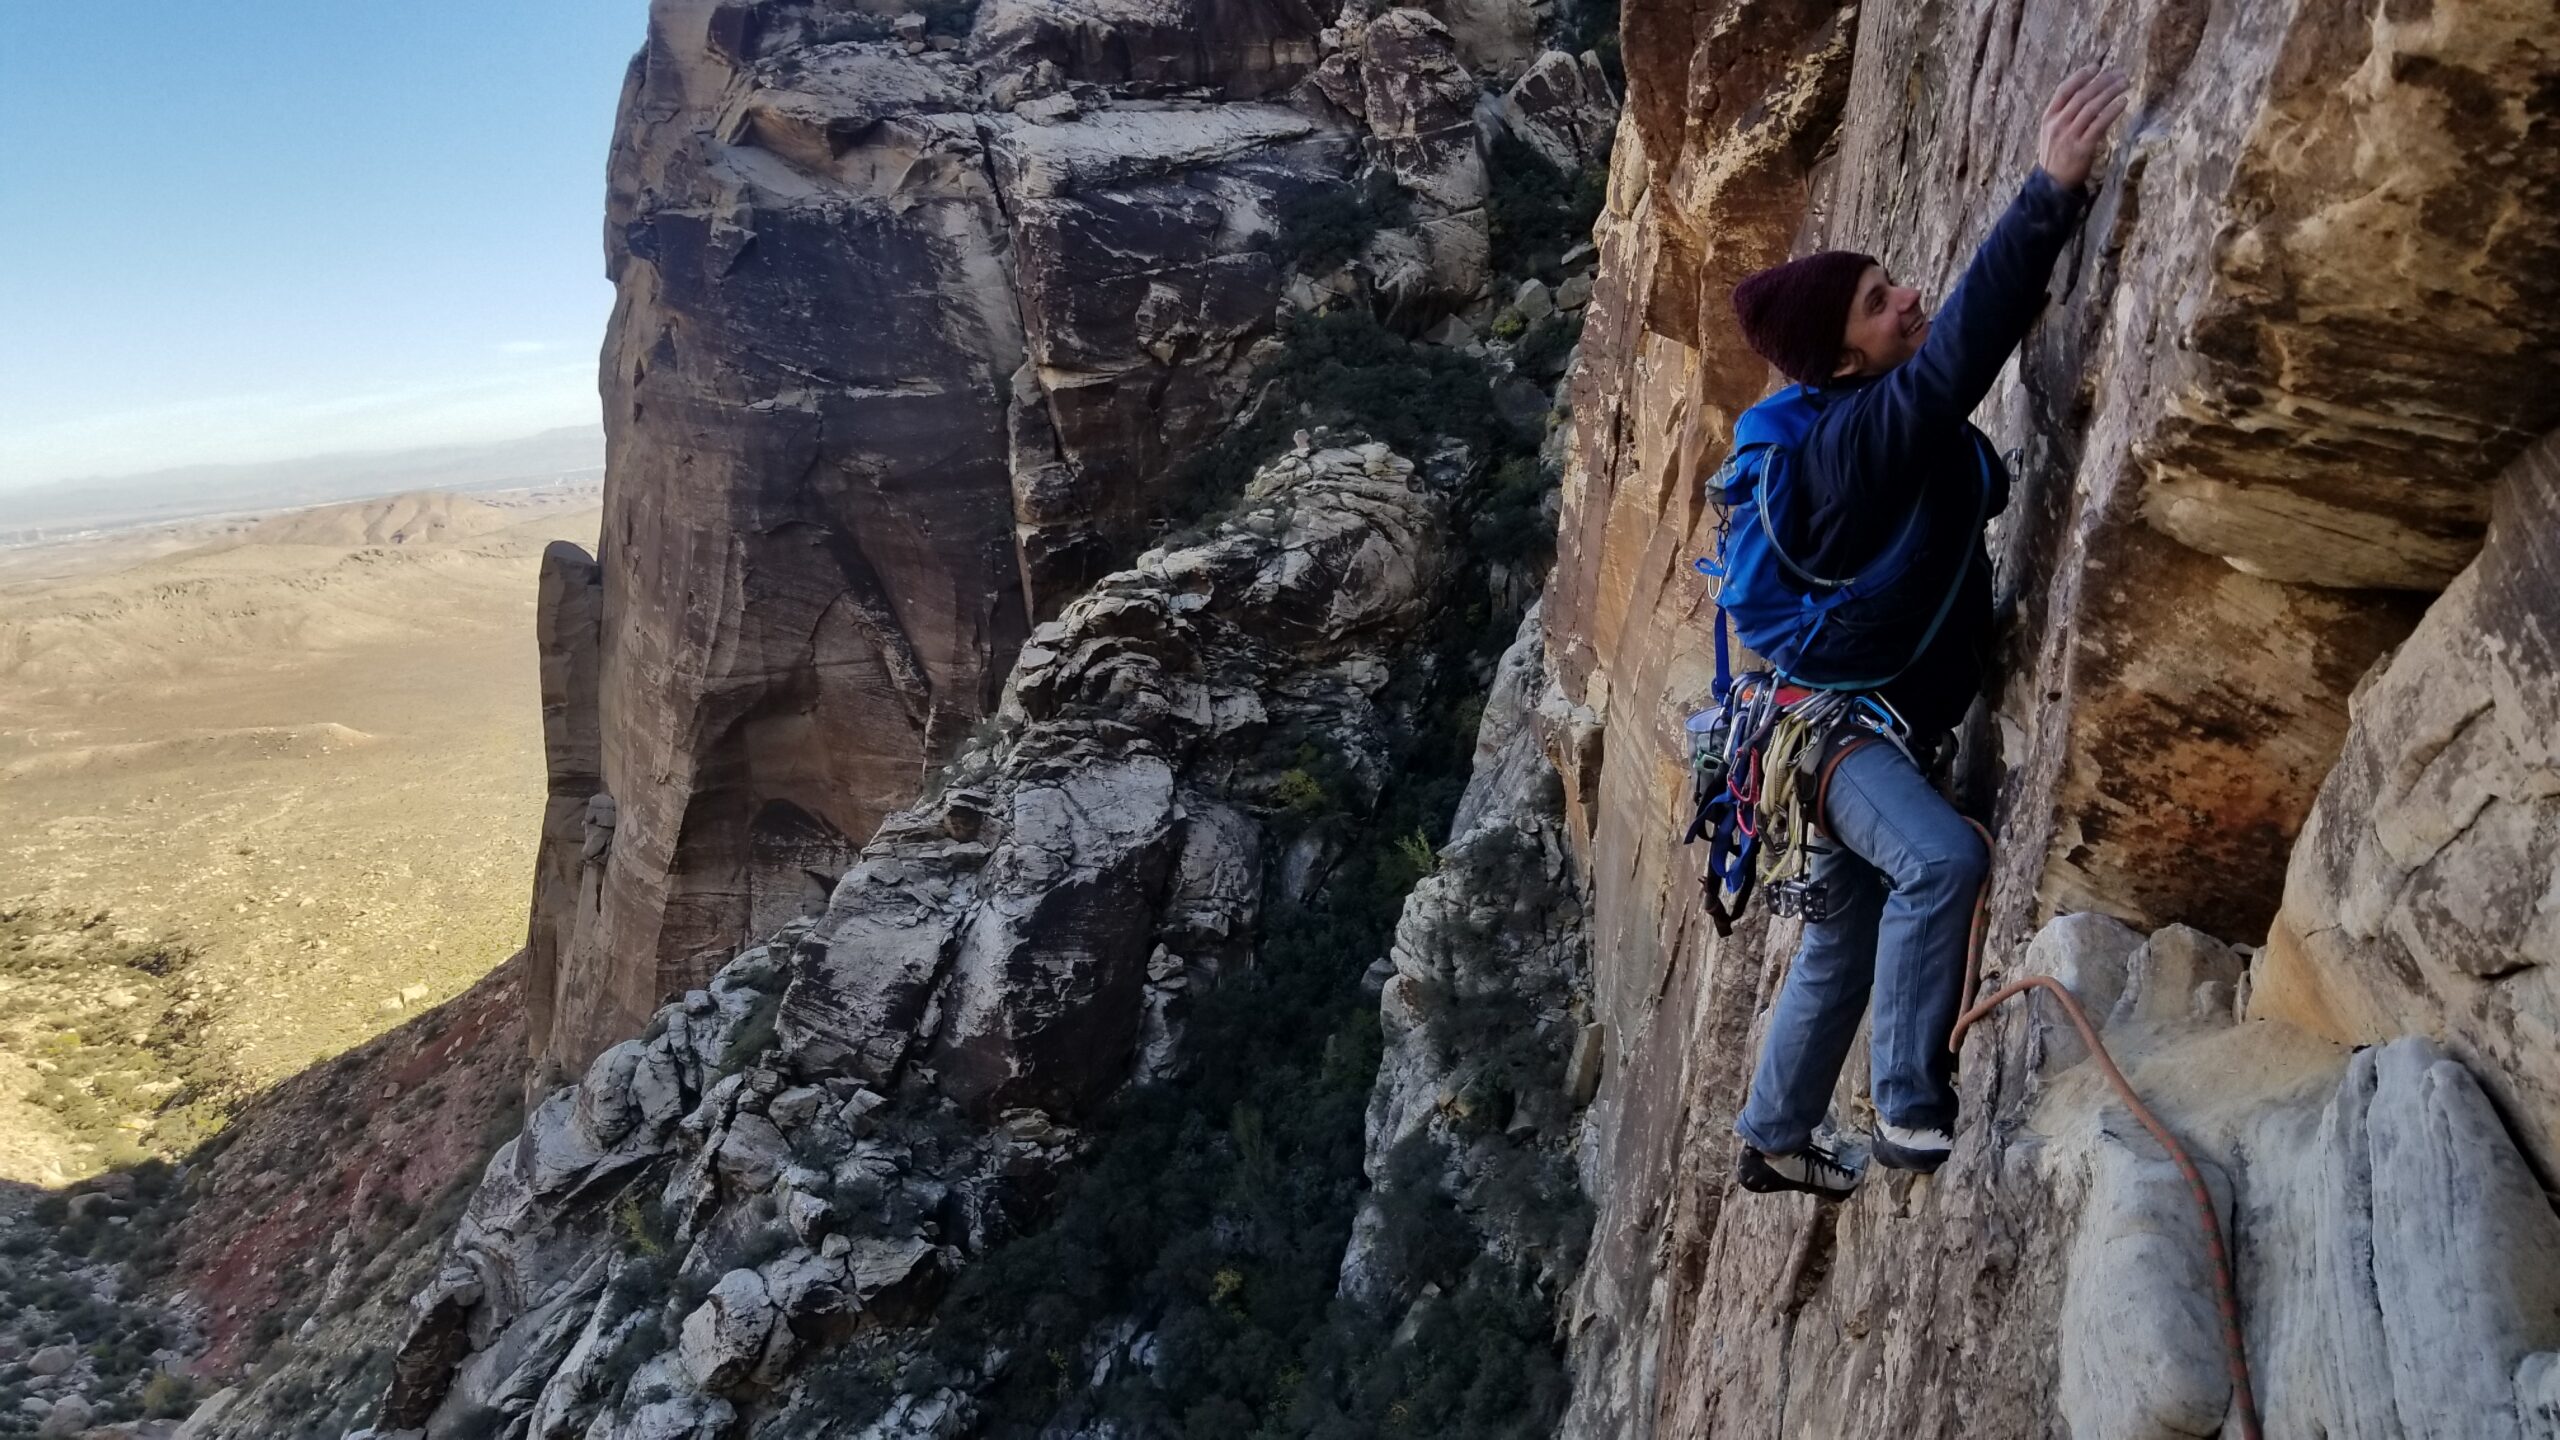
Class 5: Free Climbing (Free from Aid) – This technical climbing class involves using your own physical power (hands and feet) to ascend a route or rock face from bottom to top. Due to the fact that this form of climbing would certainly result in death in the event of a fall, certain specific gear is used to prevent injury. This form of climbing requires two climbers, a rope, helmet, harness, belay device, quick draws, and some sort of protection. Protection can be either pre-fixed bolts in the rock (Sport Climbing) or traditional gear that can be later removed once the climb is complete (Trad Climbing). The two climbers consist of a leader and a belayer (aka a follower in multi-pitch climbs), which are connected by a rope tied with a knot into harnesses which each climber wears. The belayer uses a belay device connected to their harness which clamps on the rope between the climbers which allows them to slacken (“give”) or tighten (“take”) in the amount of slack in the rope between the two climbers. The belay device also acts as an assistant or stopper in catching their leader in the event of a fall.
The leader’s job is to ascend the route, clipping their end of the rope into protection using a quick draw as they ascend. The belayer’s job is to feed rope through the belay device at the same rate as the leader ascends the wall, leaving just the right amount of slack in the rope. Too little slack and the lead climber is hindered and not able to clip into the protection or ascend further by being held back by the tautness in the rope: this is called “short roping”. Giving out too much slack in the rope could result in the leader hitting the ground or “decking” due to the excess slack in the event of a fall. If the belayer executes their job well, the leader would only fall a distance twice the length of rope above their last piece of protection (plus a little length from rope stretch and from slack in the rope between the two climbers).

Protection types: There are 2 types of rock protection including fixed bolts and traditional gear and the climbing style associated with each is called Sport Climbing or Trad Climbing respectively.
Sport Climbing – Fixed bolts are used when there are not a lot of options to use natural features in the rock to protect the climber with traditional gear. In this case the first ascent climber establishes the route by drilling bolts with hangers attached into the rock at either evenly spaced or hard portions of the route where a fall could occur, to protect the climber from falling. As the leader climbs they use quick-draws to clip one end into these permanent hangers to connect the other end to their climbing rope.
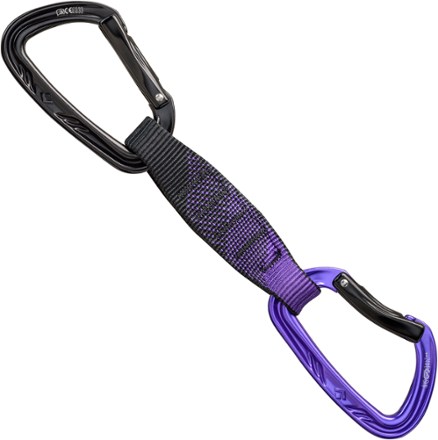
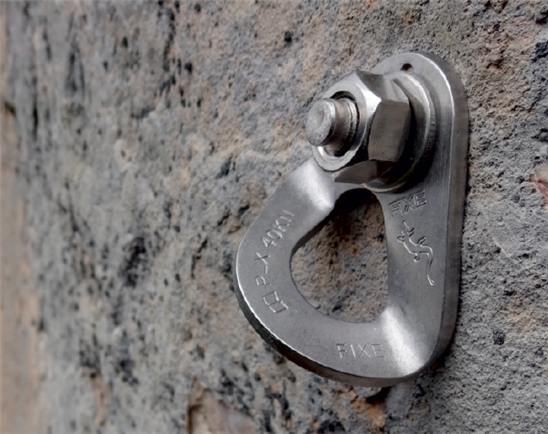
Quick-draw Bolt & Hanger
Trad Climbing – Traditional gear utilizes natural features in the rock to create a temporary anchor point that can later be removed by the follower. Traditional gear includes a variety of both passive and active gear. Passive gear such as nuts, monkey fists, and slings has no moving parts and is put into place to fit naturally occurring rock features. Active protection includes cams, ball nuts, big bros, and other pieces of equipment that have moving parts i.e. spring loaded lobes that expand into naturally formed features. Active gear has a larger range of versatility for different sized cracks in comparison to passive gear. Once put into place, the leader once again uses quick-draws to clip one end into the trad gear and connect the other end through their climbing rope. As you can imagine, carrying both trad gear and quick draws up a route can become very heavy which is why some climbers prefer Sport Climbing to Trad Climbing.

Climbing grades in 5th class are divided by difficulty starting at the easiest 5.1 and going to hardest 5.15. Once the level of 5.10 is achieved the grades are subdivided into 4 more sub-ratings suffixed with letters a,b,c,d respectively increasing with difficulty (Example: 512a is harder than 5.11d). The hardest rock climbing in the world at the moment is a 5.15d (video) which pushes the abilities of the human body to its absolute limit to climb a route free of aid.
- Fall occurrence: High, Death risk: Low-Med, Gear Required: Helmet, Harness, Rope, and Rock Protection.
- Annual Deaths: 5 (NPS SAR Data)
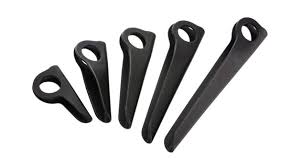
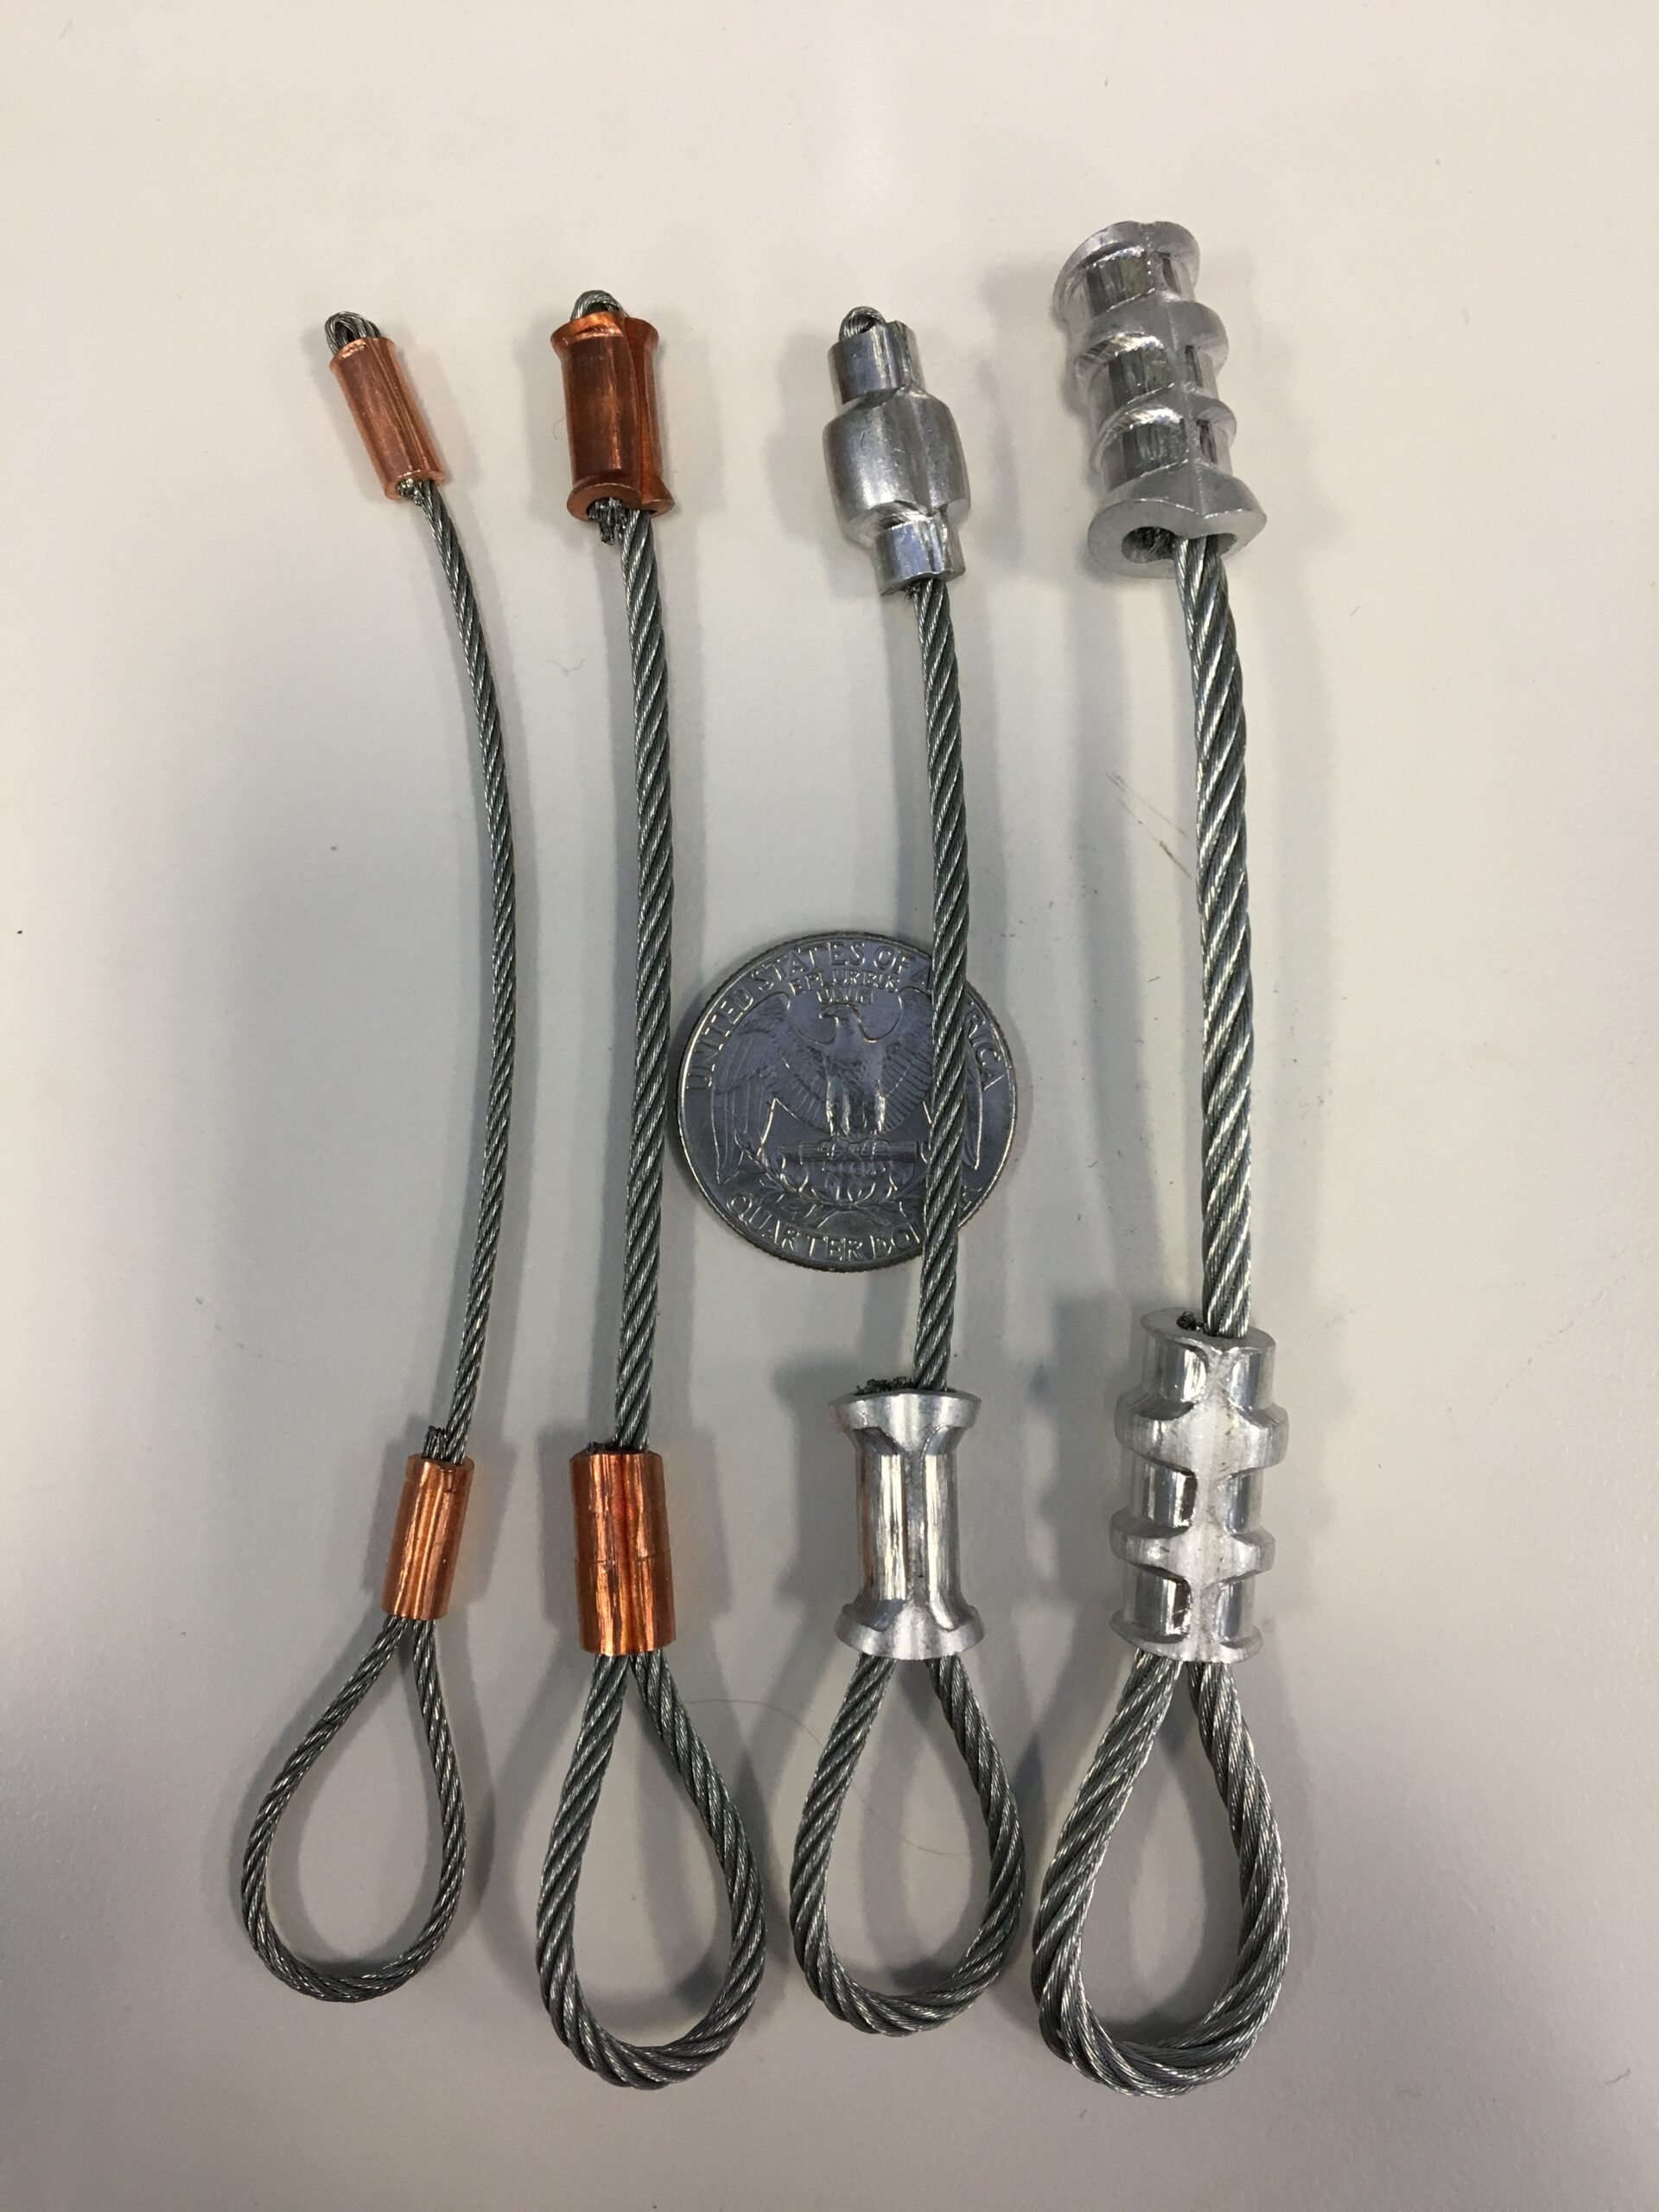
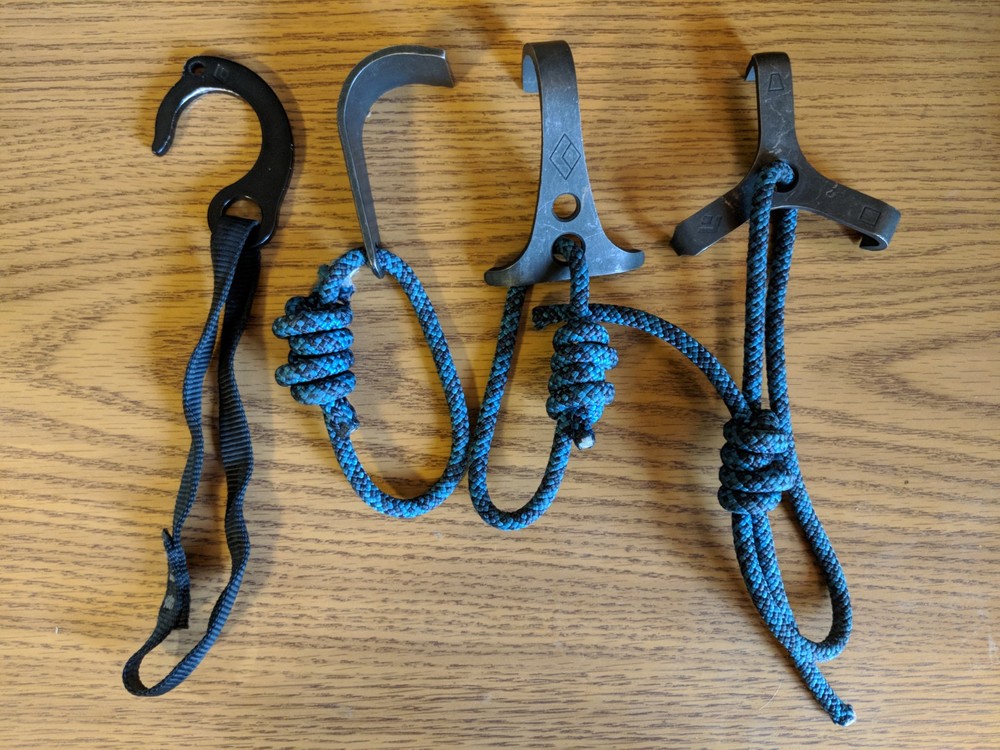
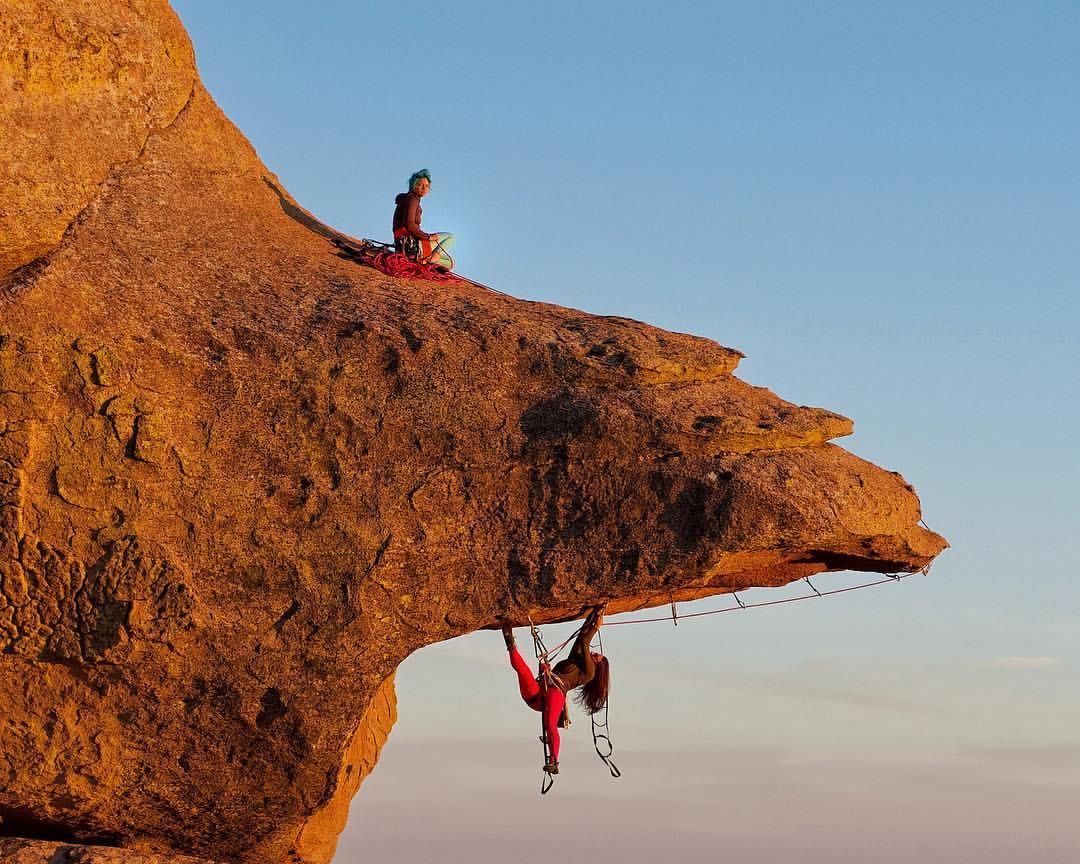
Class 6: Aid Climbing – Aid climbing comes into play where there are no holds or features that can be used to ascend a route with just your hands and feet. A crack system could shrink too tight to fit your fingers in, however you can still utilize a hook or hanger connected to a webbing ladder which the leader can step up into to ascend the route. The roped climbing techniques from Class 5 climbing are still utilized (lead climber, belayer, rope, harness, helmets, etc), however the protection changes to hangers, hooks, and pitons (protection such as nuts and cams can still be utilized). The leader uses these anchor points to pull on with a ladder system to ascend the route. Instead of only relying on the gear in the case of a fall, it now becomes the vehicle through which the leader climbs. There are 2 types of aid gear, removable and fixed. Gear such as hooks, hangers, nuts, and cams are only temporary anchors and can be removed cleanly. Gear such as pitons and copperheads are hammered into the rock and left behind as a permanent anchor point. Unlike bolts in sport climbing, pitons are like a wedge that are hammered in quickly but are not as reliable in the long term as fixed bolts are.
Aid Climbing grades range from A1 to A5, and from C1 to C5. ‘A’ grades refer to anything that will need a hammer (placing pitons or copperheads), whilst ‘C’ grades are used if the pitch can be climbed without using a hammer, i.e. ‘clean’.
- Fall occurrence: High, Death risk: Low-Medium, Gear Required: Helmet, Harness, Rope, and Rock Protection.
- Annual Deaths: Included within Class 5 deaths: average of 5 per year (NPS SAR Data)
Table 2. Climbing fatalities by climbing activity (1998–2011) in Boulder Colorado
| Activity Type | Number of Fatalities |
| Un-roped climbing | 9 (39%) |
| Lead fall | 5 (21.5%) |
| Rappelling | 3 (13%) |
| Anchor failure | 2 (8.5%) |
| Rock fall | 2 (8.5%) |
| Mountaineering | 2 (8.5%) |
| Total | 23 |
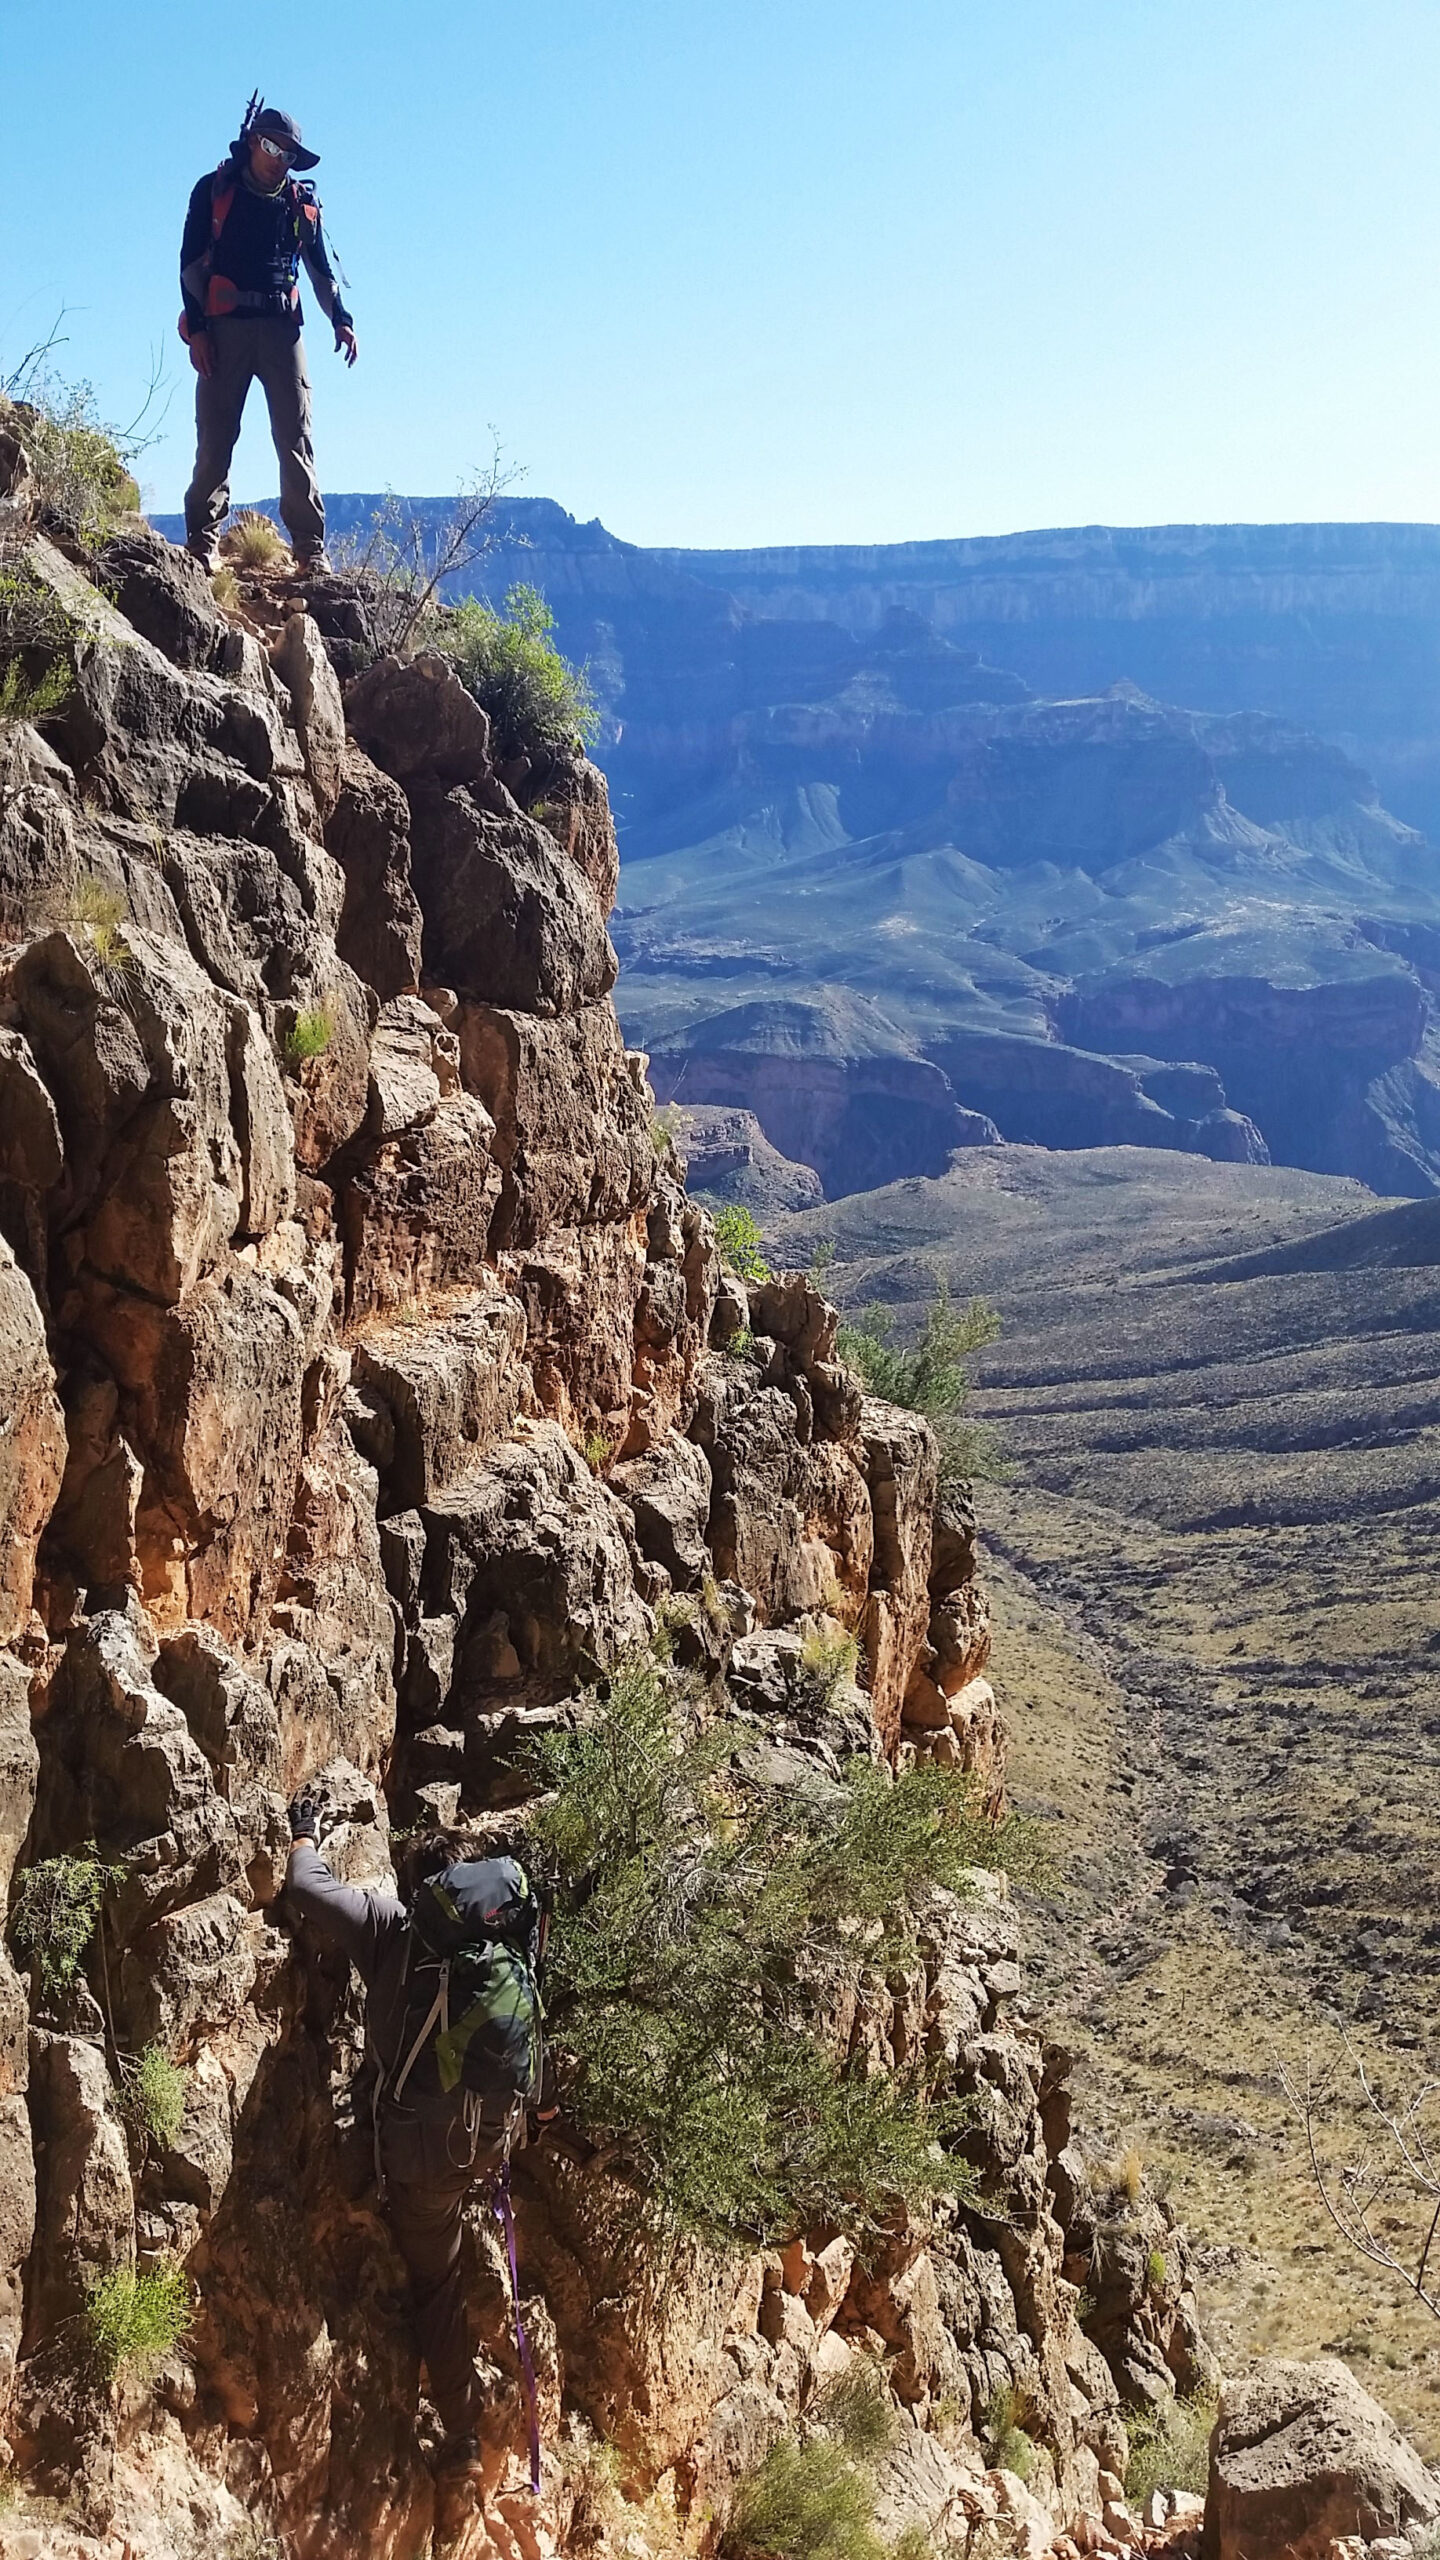
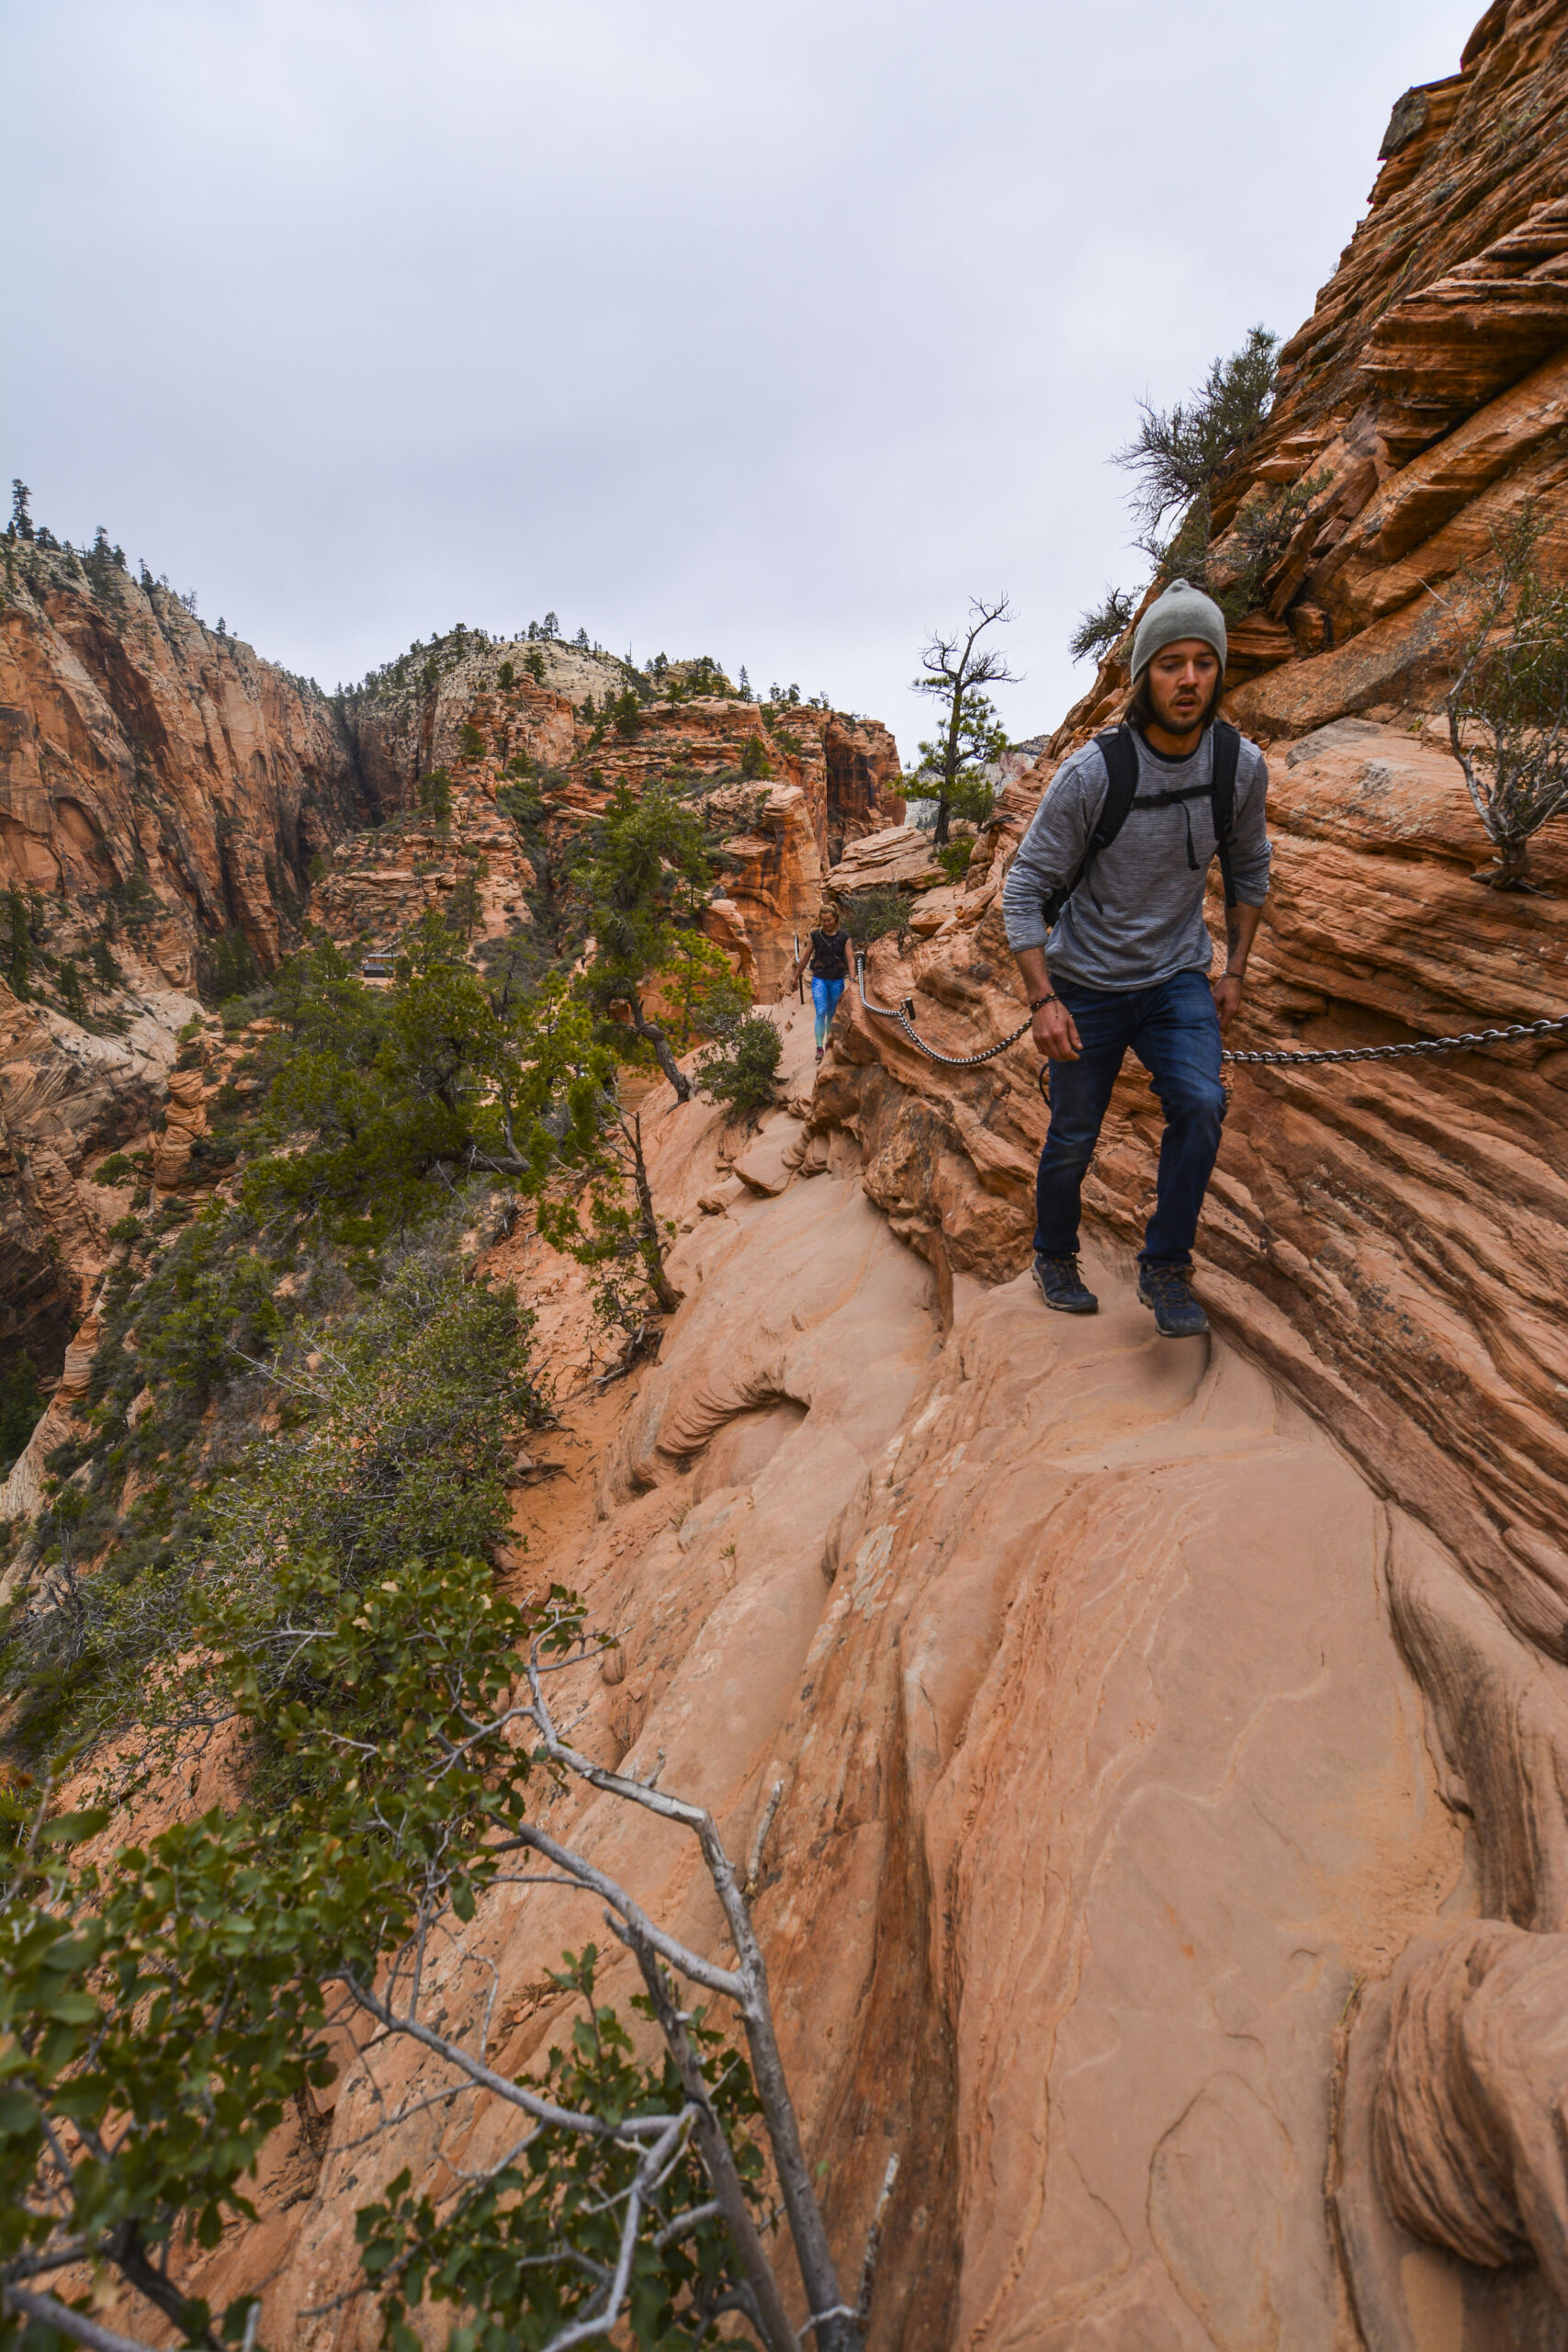
Exposure: Cliff Edges and Drop-offs – When you hear someone say “That’s an airy traverse” or “It’s an exposed walk” they are referring to the likelihood of coming close to a cliff edge where there are large drop-offs. You can encounter exposure on Class 1-3 pretty often but in most places these edges are protected by handrails to keep everyday hikers safe from going over the edge by accident. Angels Landing in Zion National Park is known for its exposed cliff edges; however you are only on Class 1-3 during this hike. Exposure in Class 4 and 5 climbing are inherent to the classification thus already come with a higher risk of injury when falling from one of these routes.
Conclusion: The bottom line here is that it’s up to you to be responsible for your own safety. The level of danger in climbing can be assessed by looking at the likelihood of a fall vs the risk of death if a fall were to occur. As you move into class 4 from class 3 you transition from a low likelihood of a fall to a high likelihood of a fall which may or may not result in death. This uncertainty and the lack of ropes for protection makes this the most deadly class with respect to falls, even though it is not the most physical or mentally difficult climbing. The fact remains that the death is preventable if you rope up when needed.
Most people in the general public are afraid of exposure to heights and drop-offs. It’s that queasy feeling that rises up in our stomachs and send tingles up our spine. It’s our brain telling our body that there is imminent danger and you need to be on high alert! You can make this go away with practice and time. This is how rock climbers, window washers, skyscraper construction workers, and other people in high exposure activities look calm and collected. It doesn’t mean the danger isn’t there, it just means the skills they have developed help decrease the risk of a fall. You can decrease the likelihood of a fall by increasing your rock climbing/scrambling skills thus becoming more comfortable and competent on vertical terrain. However, don’t let your ego and confidence be your only guiding principles, listen to your gut and make smart decisions. Once you do gain competence with climbing skills, rock climbing can be some of the most rewarding, enjoyable, and exhilarating experiences as you play an active role in the relationship of risk and rock.
Obviously the definitions for the route classifications are only a light overview to understand some of the terms used in my blog posts and are not meant to be an all encompassing document as they only scratch the surface. I also do not include statistics to compare the number of hikers vs climbers in relation to falls in the mindset that any fatality is unacceptable. There are so many other topics that could be touched on here: Free Soloing, Rope Soloing, Ice Climbing, Bouldering, etc but that’s for a different discussion.
For further reading please check out:
- Climbing and Bouldering Ratings: https://www.rei.com/learn/expert-advice/climbing-bouldering-rating.html
- Aid Climbing Ratings: https://www.vdiffclimbing.com/bigwall-grades/
- Takeaways from 2017: https://www.rei.com/blog/climb/top-5-takeaways-from-accidents-in-north-american-climbing-2017
- What’s killing Americas Hikers: https://skyaboveus.com/climbing-hiking/Whats-Killing-Americas-Hikers
- Boulder Co Deaths: https://static1.squarespace.com/static/552e8f43e4b07f0b3920027b/t/566b0151e0327ccd996817f3/1449853265496/2012_WEMJ_RMRG_Rock_Climb_Accidents.pdf
- Allure of Free Soloing: https://www.liveabout.com/dangerous-allure-of-free-solo-climbing-755444
Backcountry Route Finding and the Cairn Controversy
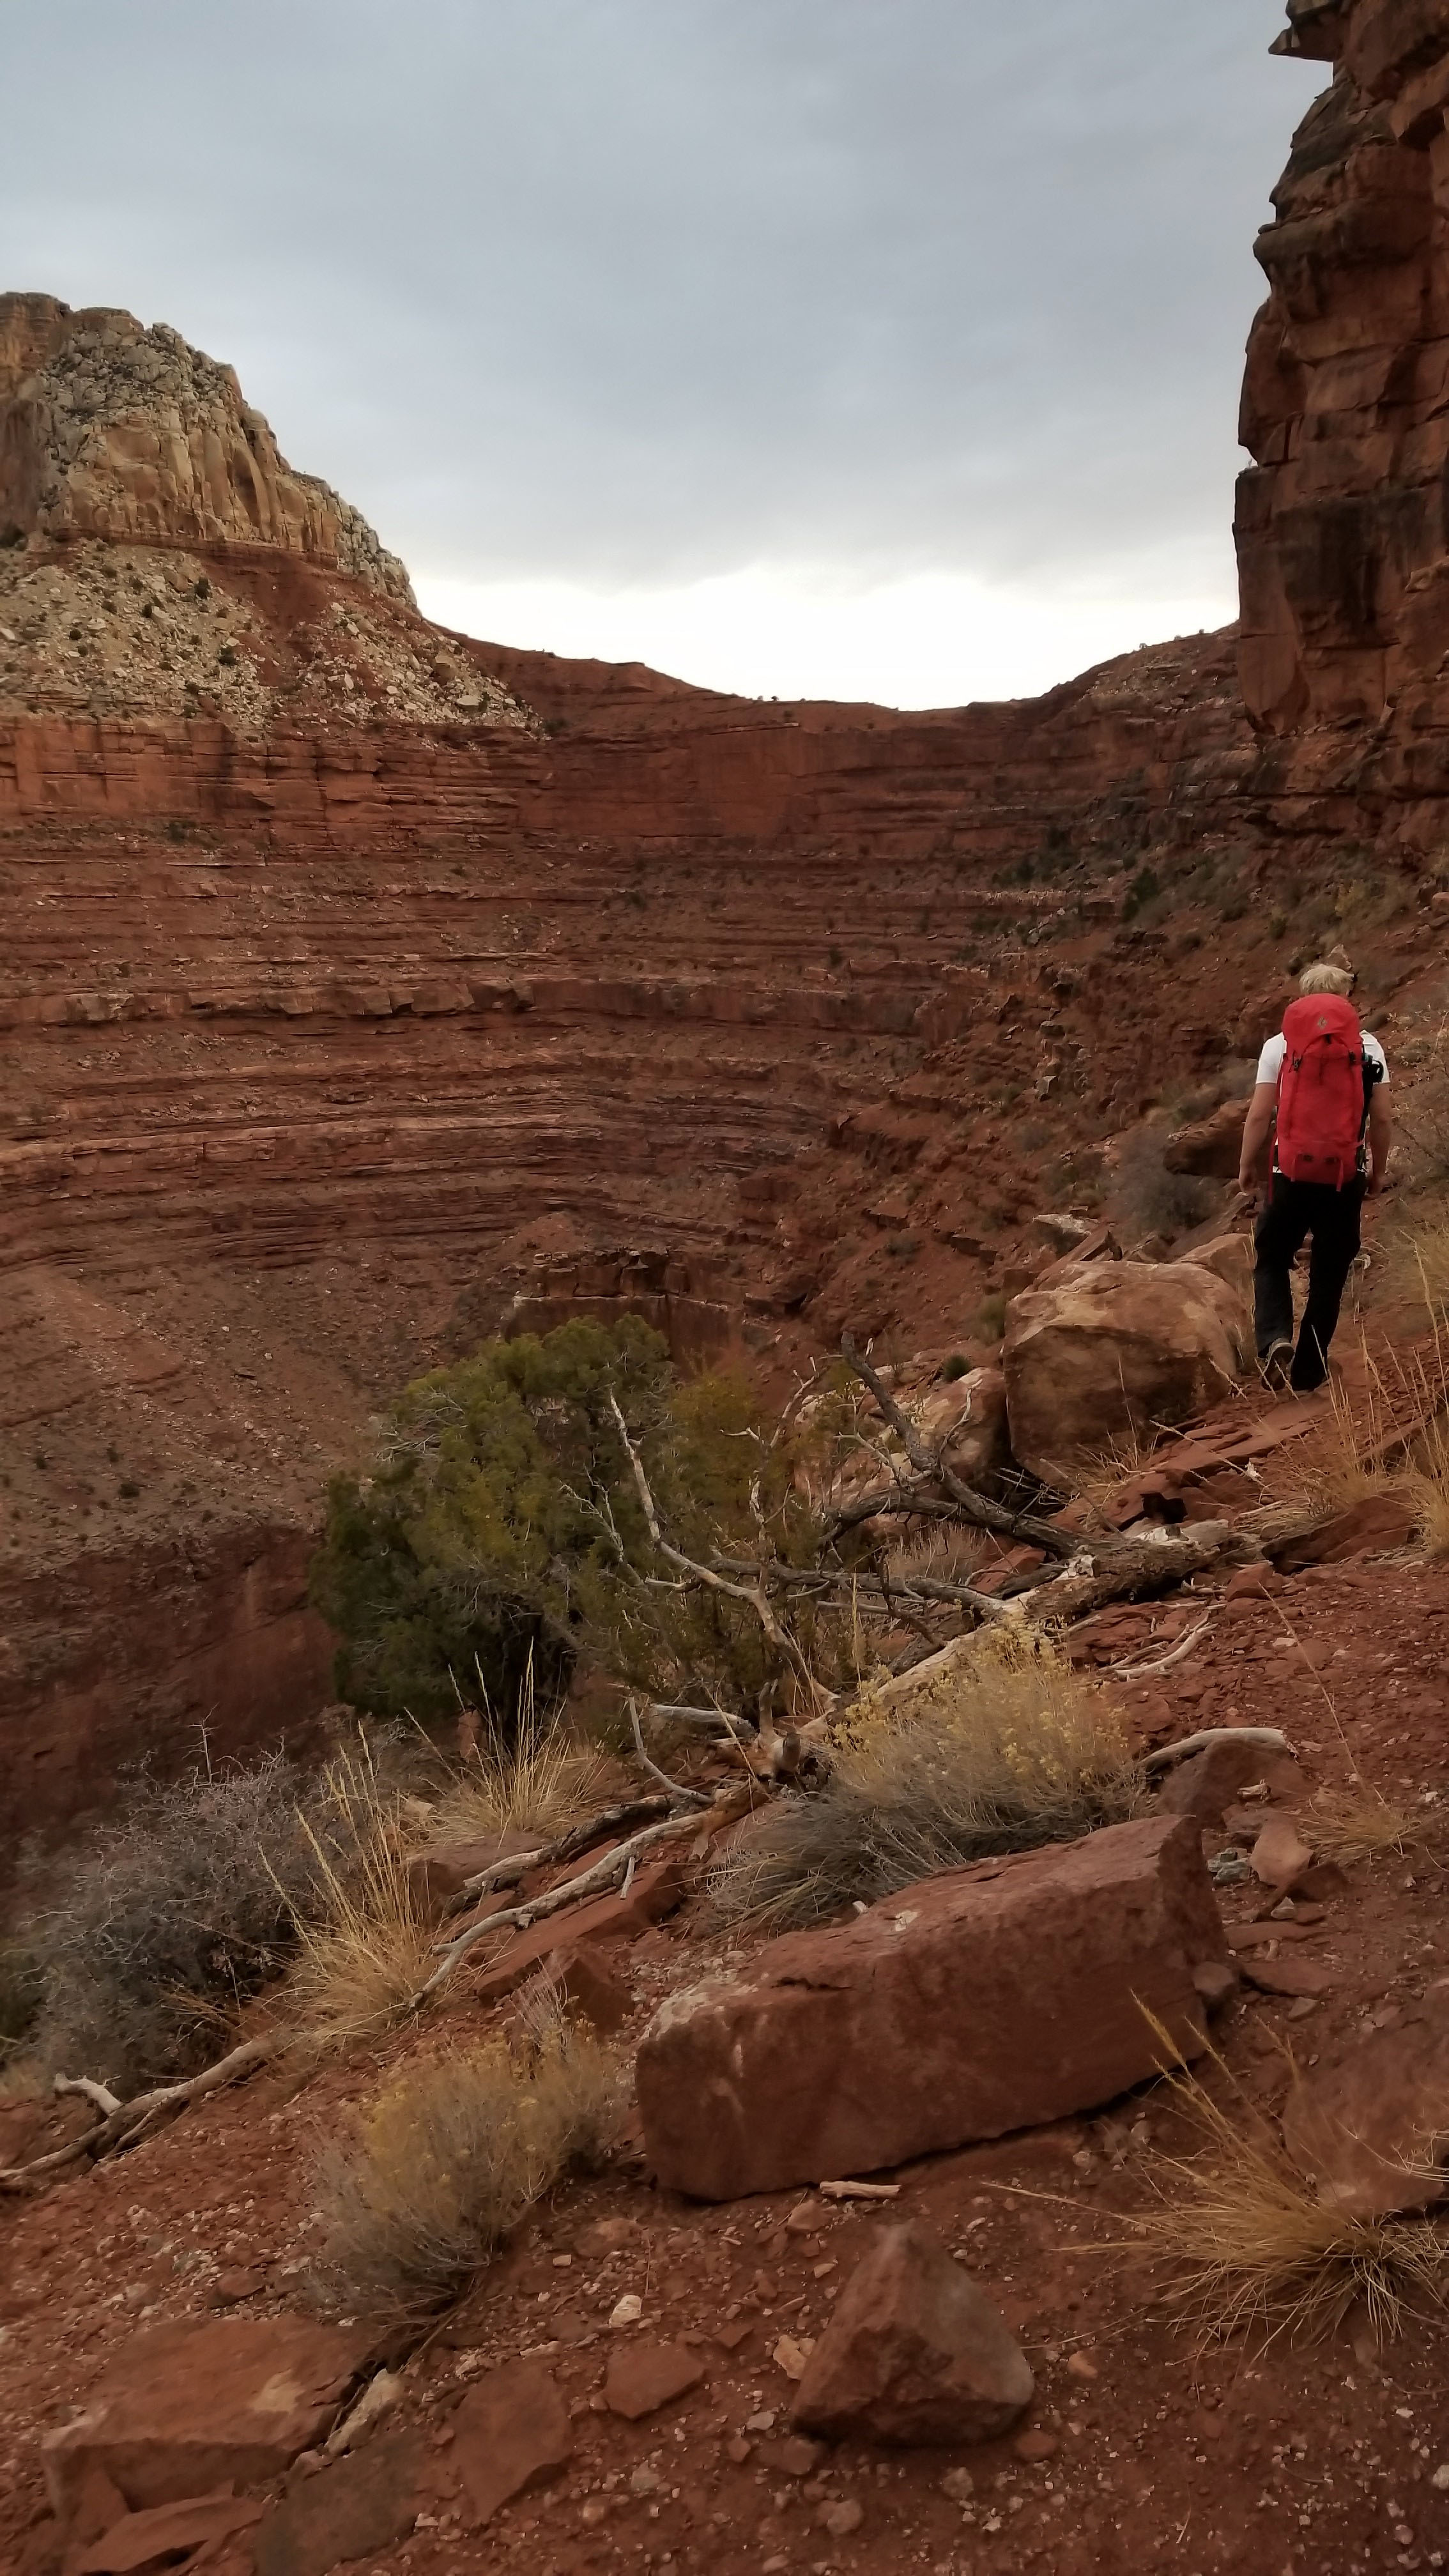
Back country route finding skills are critical in finding your way through the mountains safely on less traveled paths. Most trails are well maintained and obvious, but as you venture further into the unknown, the skills required keeping you safe change. It’s not just about mindlessly clicking along at 3mph, keeping on trail and only monitoring your water and food. Routes as opposed to trails can be faint, unpredictable, and hard to follow. Good route finding involves proper research, looking at maps and GPX tracks, noticing signs of foot travel, locating cairn markers, and self rescue.
Before I jump into the meat of it, why care? Why not tread wherever you like?! Good route finding not only keeps you safe and on track, but also saves the plants and animals in the region from unnecessary harm. Some landscapes take a long time to recover once trampled. By trampling on desert soil crust (which is alive), and stepping on plants native animal species rely on, both set precedence for future trekkers to follow in your footsteps and cause lasting damage that may have a farther reach than you think. Sometimes off trailing is warranted, but just try to tread lightly and think about the lasting impact your footsteps have on a landscape and its inhabitants. 
Research and Planning
Do some research before you go. See if anyone has completed your track before, and if so read about the hard to navigate areas and study them well. Look at topo maps, make a track, understand possible cliff drop-offs, dead ends, and places that could be dangerous to foot traffic or places where it could be easy to get turned around. For some more rugged tracks where hitting the right notch in a ridge line is important, pictures of the route can be helpful, especially in climbing or scrambling routes.
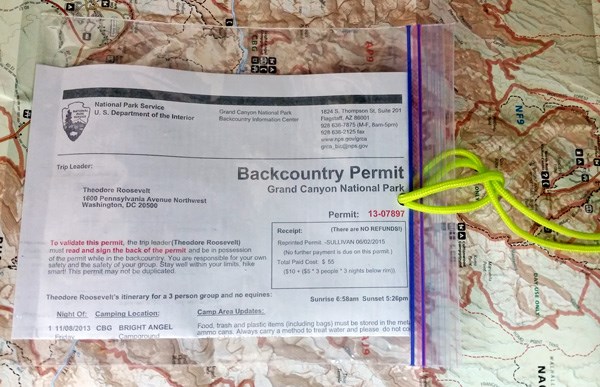
Also in your research, be sure to understand the land ownership. Are there any restrictions? Special permits? Trespassing laws? Are you trekking on National Forest, National Park, National Monument, BLM, State, Private, State Land, or Indian Reservation? Each land ownership comes with different rules and regulations you can reach out to the appropriate administrator (Private land owner, Indian Affairs Committee, National Park Back country Office, BLM Office, etc) in the area to make sure you are legal in your venture. Be sure to know what you are getting into before you go.
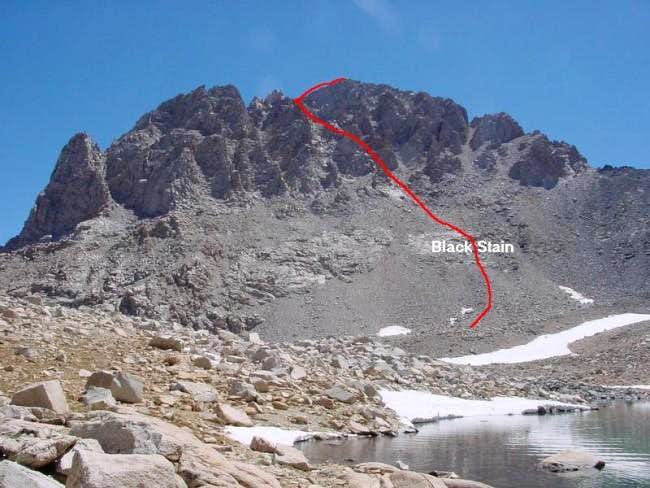
Example: Here is a photo from a trip report on Mt Williamson which gives a visual line of the approach for the summit. This can be crucial info in safely finding your way to the top!
GPS Tracks + Maps
Always carry two forms of navigation (GPS + maps or pictures of your route). Global Positioning Systems (GPS) can be very helpful in following your intended path; however you must be able to not completely rely on them. A GPS track (GPX is the file type) is only meant to get you in the general vicinity and it’s up to you to find the path and follow it. GPS track drawn improperly can also lead you off cliff sides and over untrackable terrain, so be careful when creating them. There are a number of devices for using GPS tracks such as Garmin and even phone Apps, such as LocusPro. If you are using your GPS you should have a paper map and compass as your secondary for any trek.
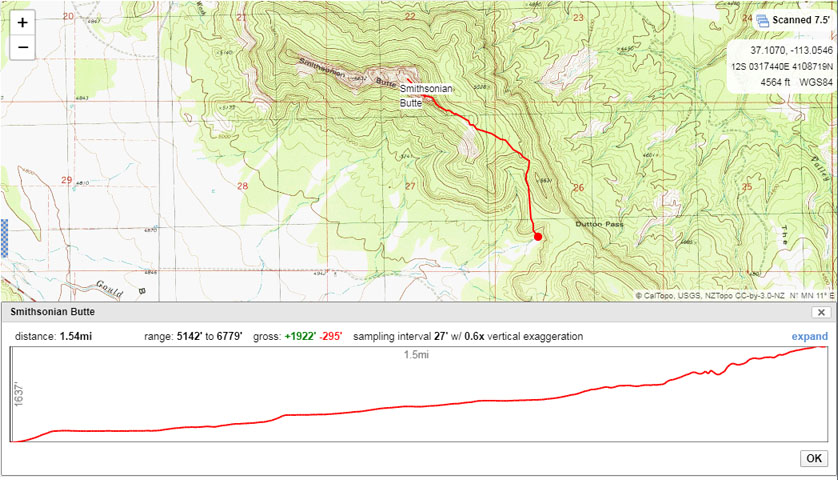
CalTopo is a great resource for manually drawing GPX tracks with almost any map layer you would like. It also has land ownership layers so you can understand the regulations of the area you plan to trek in.
Reading the Route
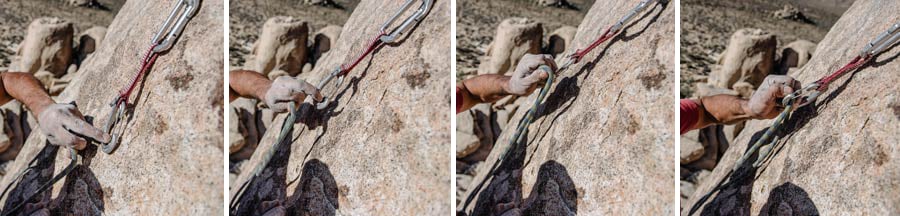
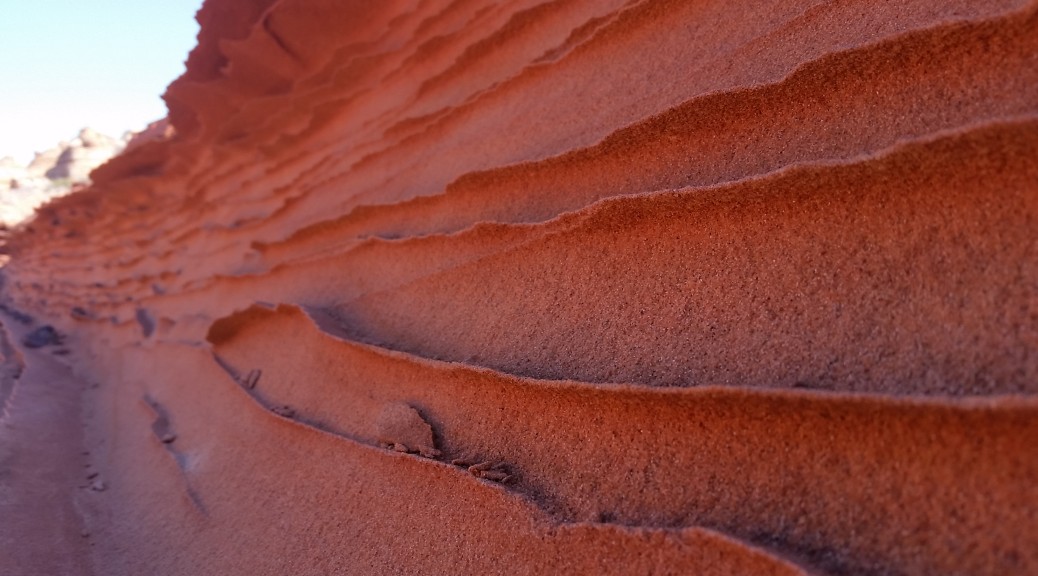
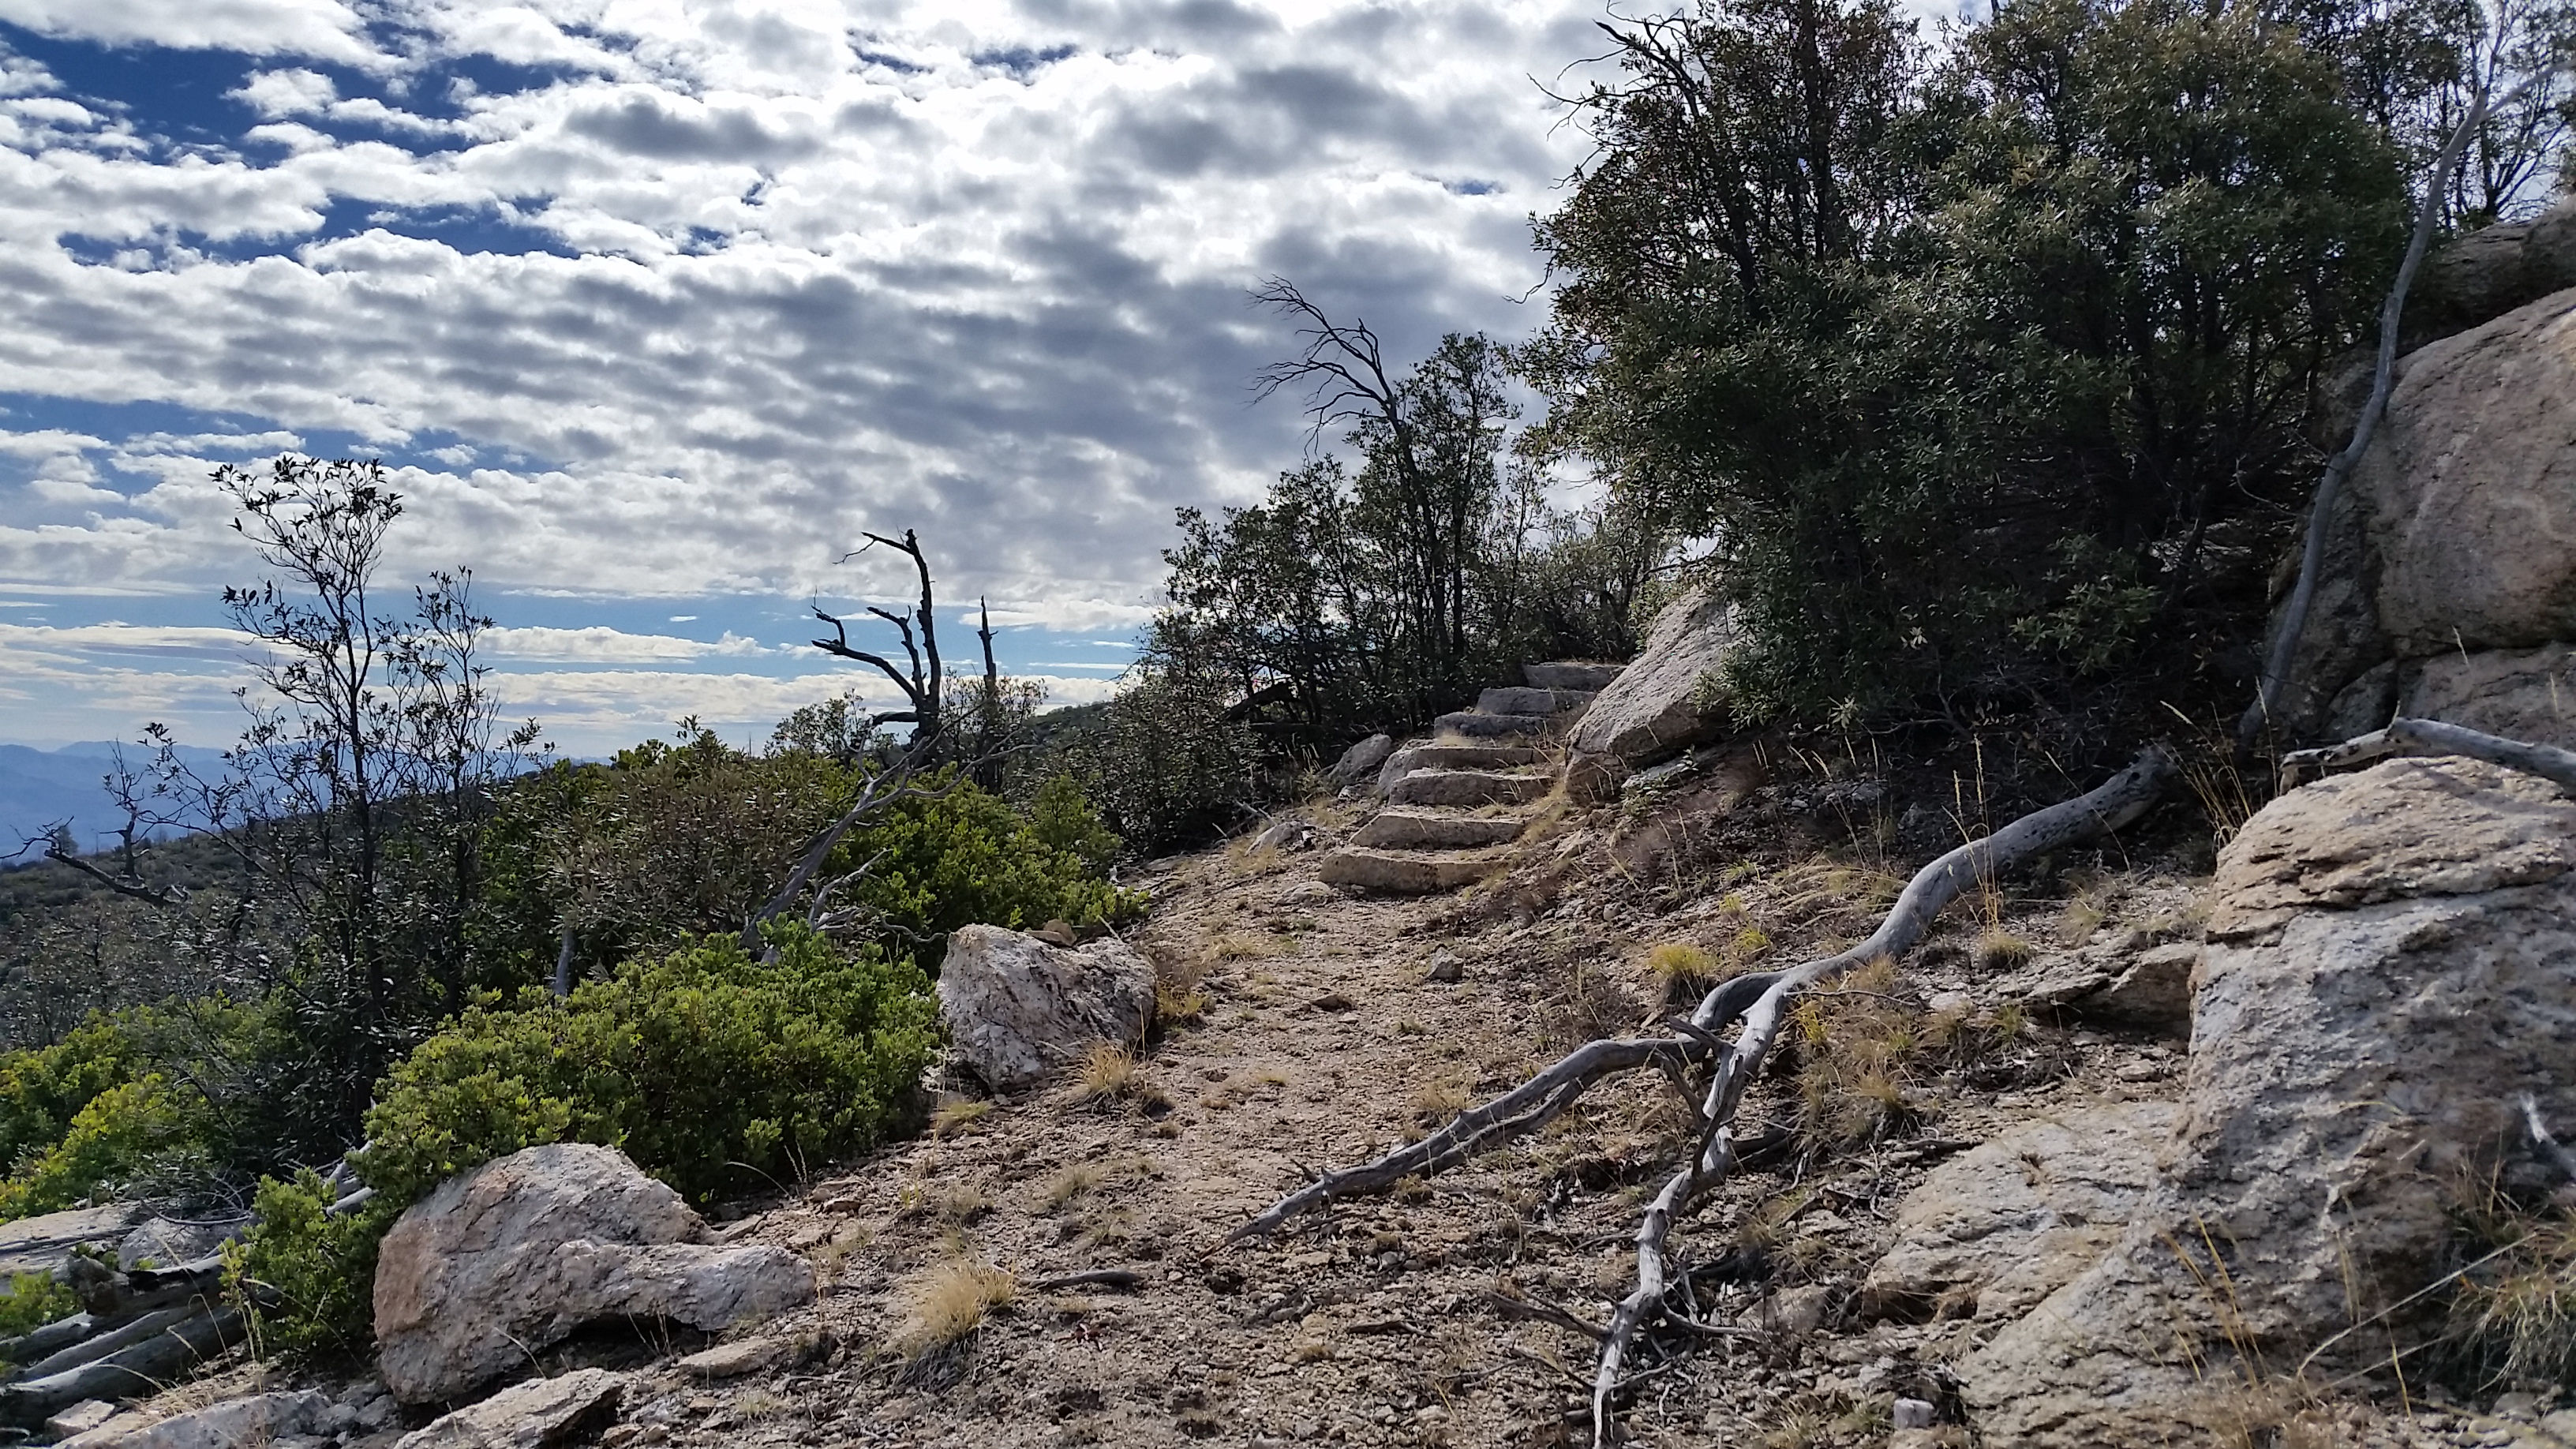
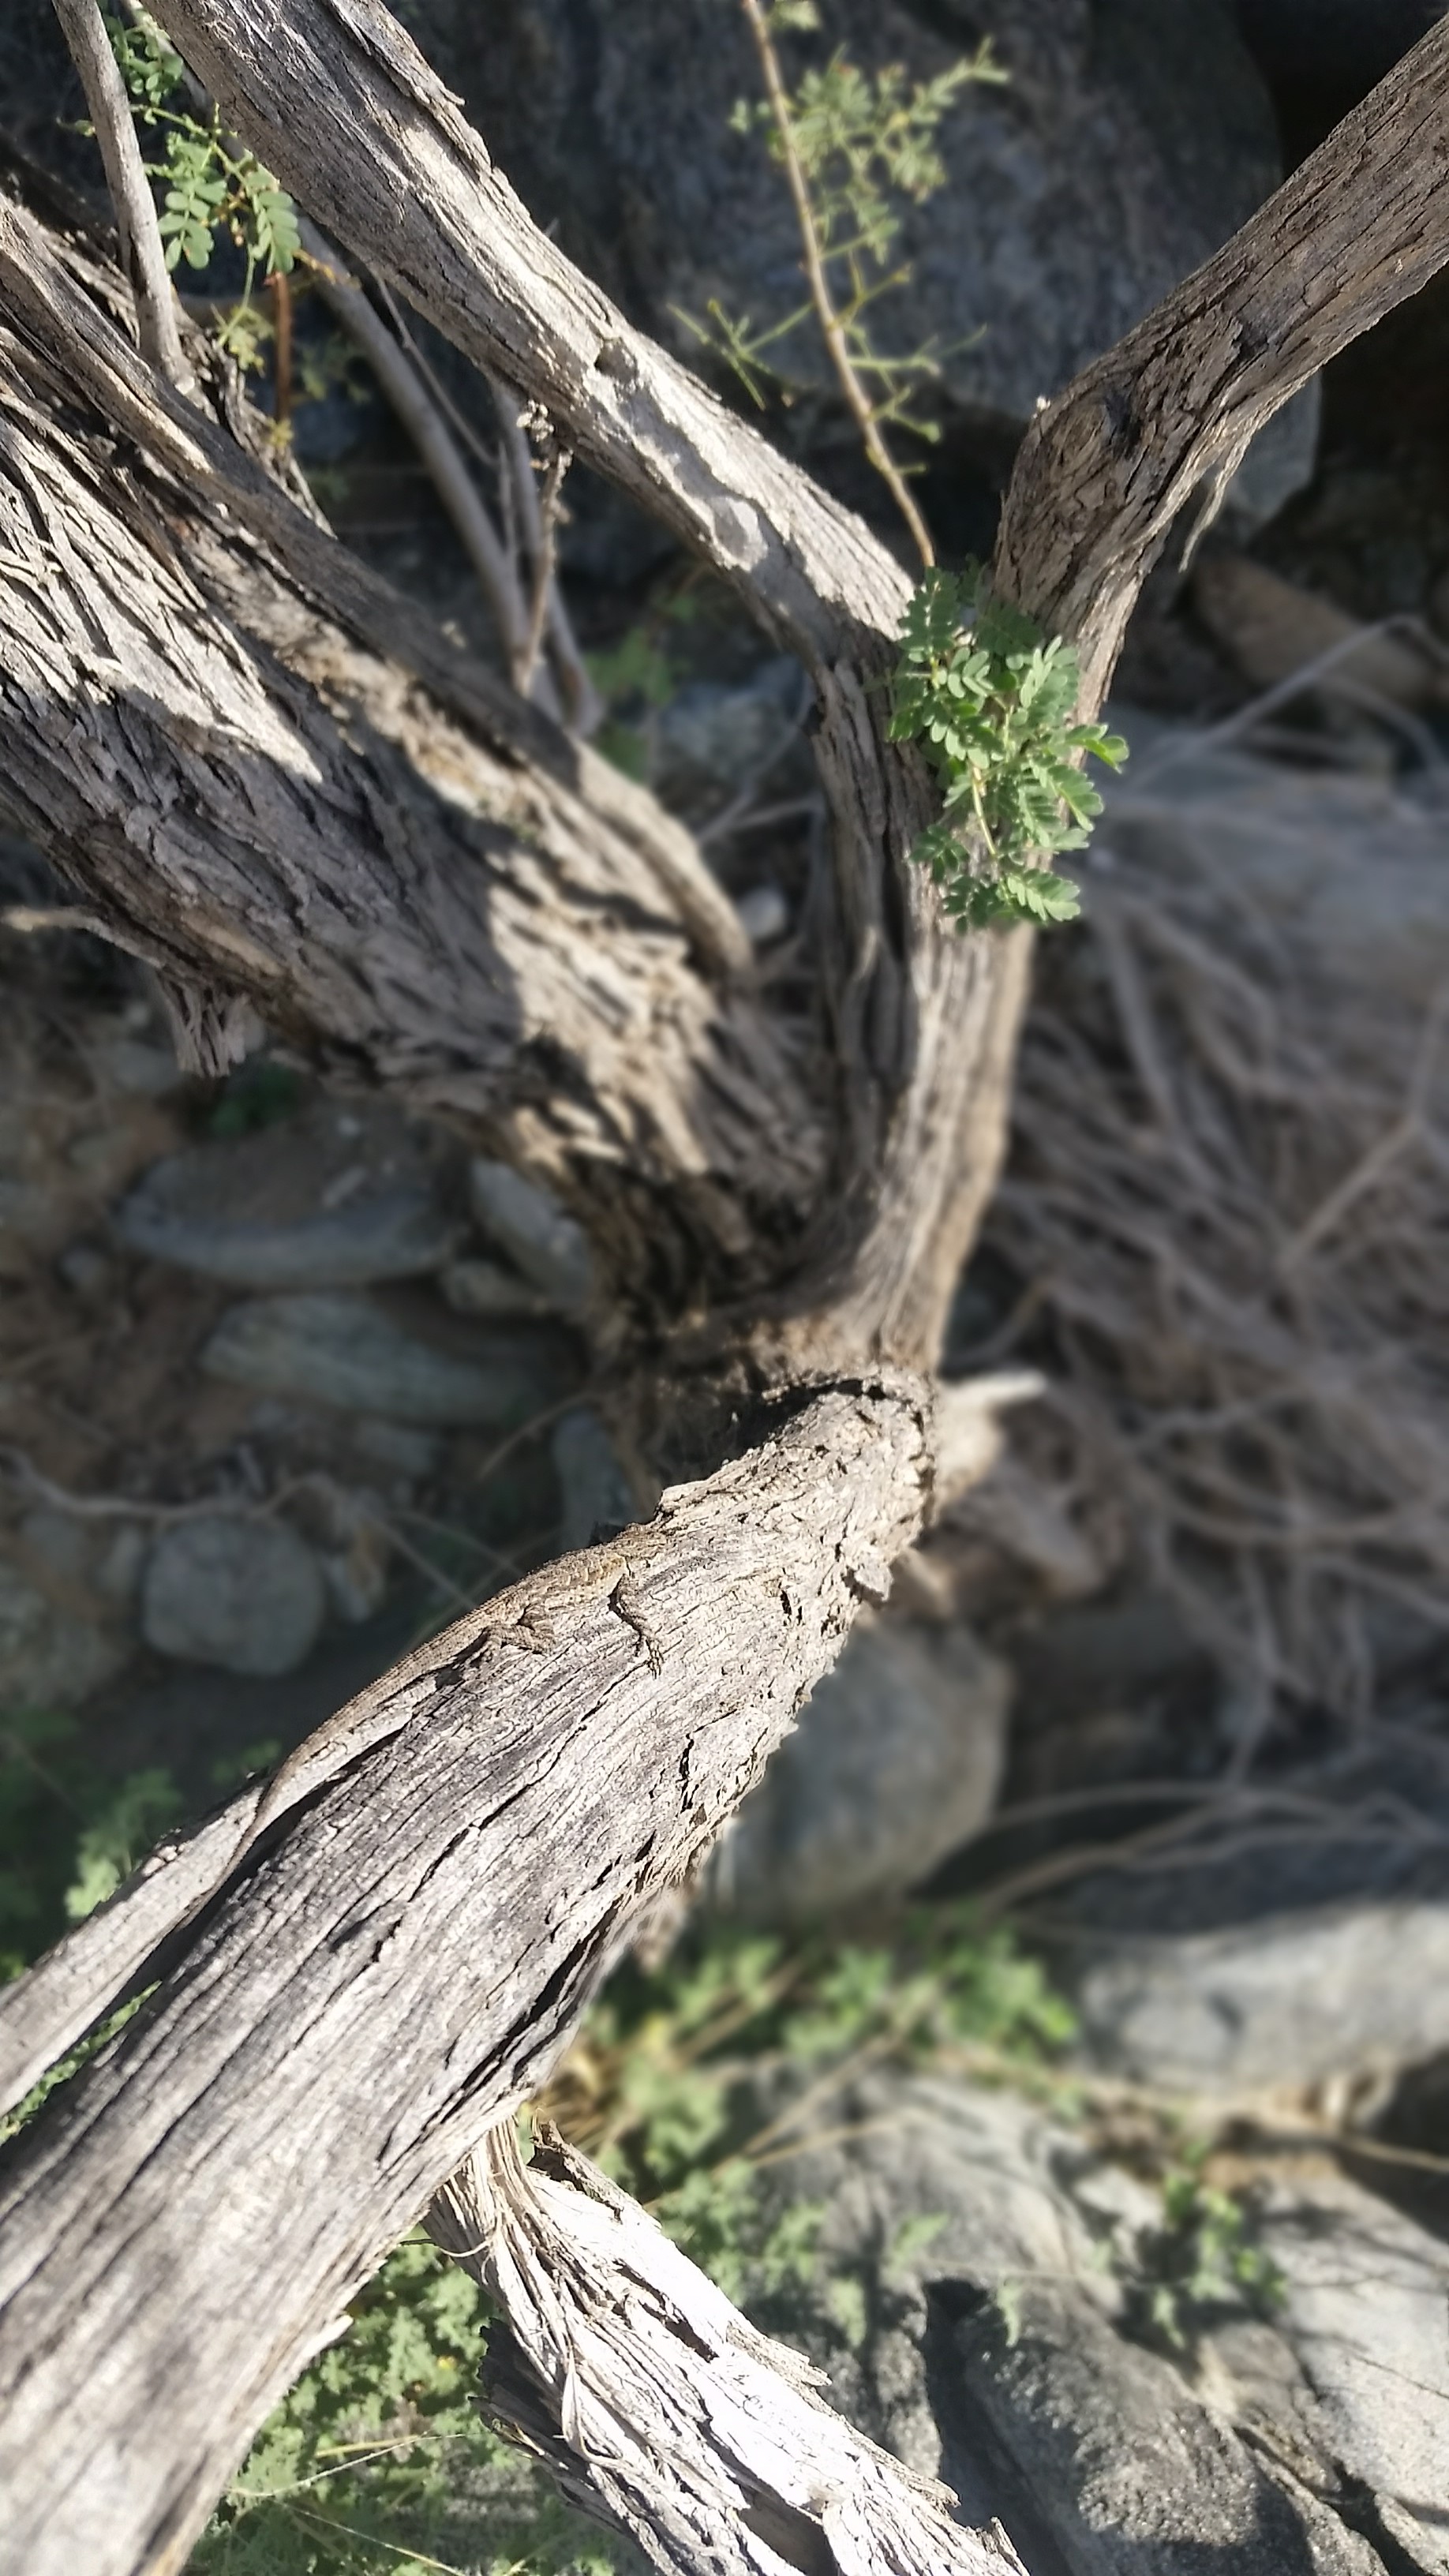
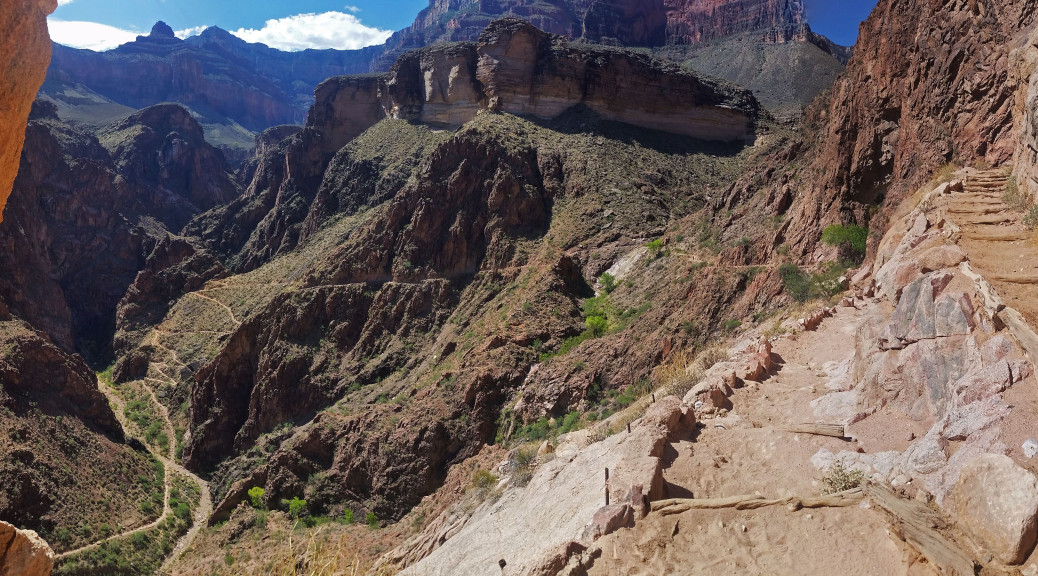
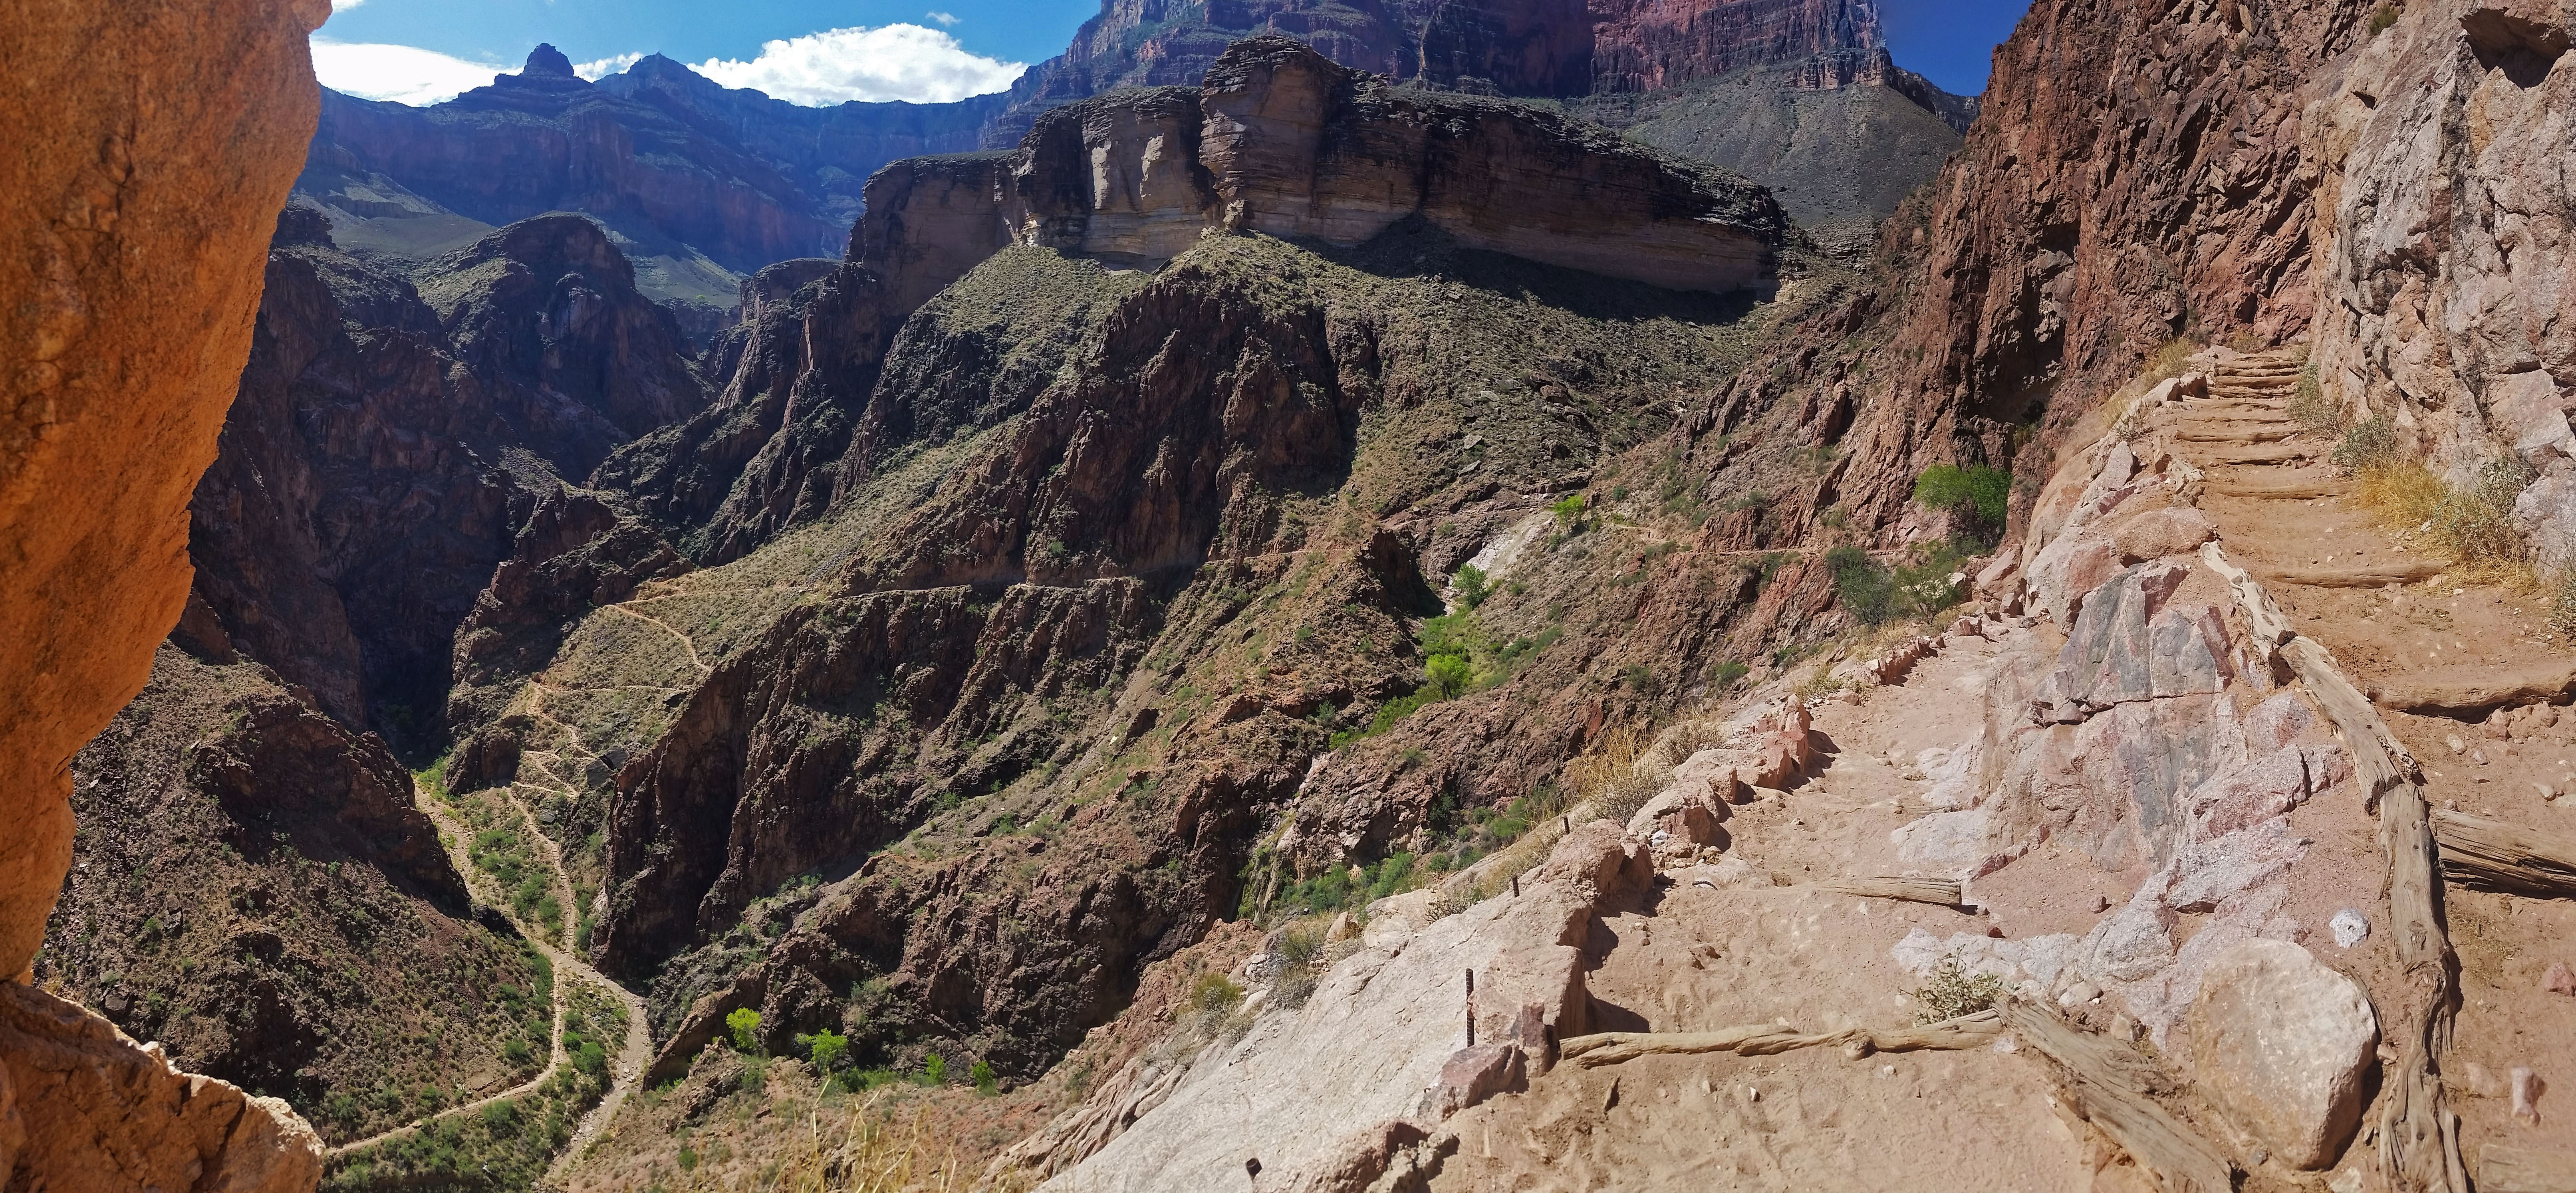
Being able to read the signs of a route are critical to following the path. Patted down grass, broken tree limbs, compacted down dirt, dirt smudges from feet on rock faces, shiny tree limbs or rock features from continual contact with sweaty hands, vee shaped indents in a riverbank, obvious notches or breaks in a ridgeline, slight discoloration of the ground in contrast to its surroundings… seeing that path of least resistance across a landscape can guide your way. The more you practice these techniques, the better you get at reading landscape like a book and keeping yourself on track. Remember that not every track may be your route, for example natural washouts from water runoff and animal tracks will leave an imprint on a landscape, but doesn’t necessarily mean they are the right path. Think of this like practicing to be a tracker, read the signs, know the way. Some signs can be very obvious, like a cairn.
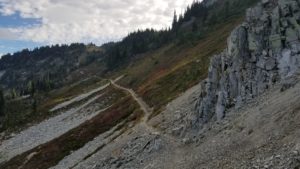
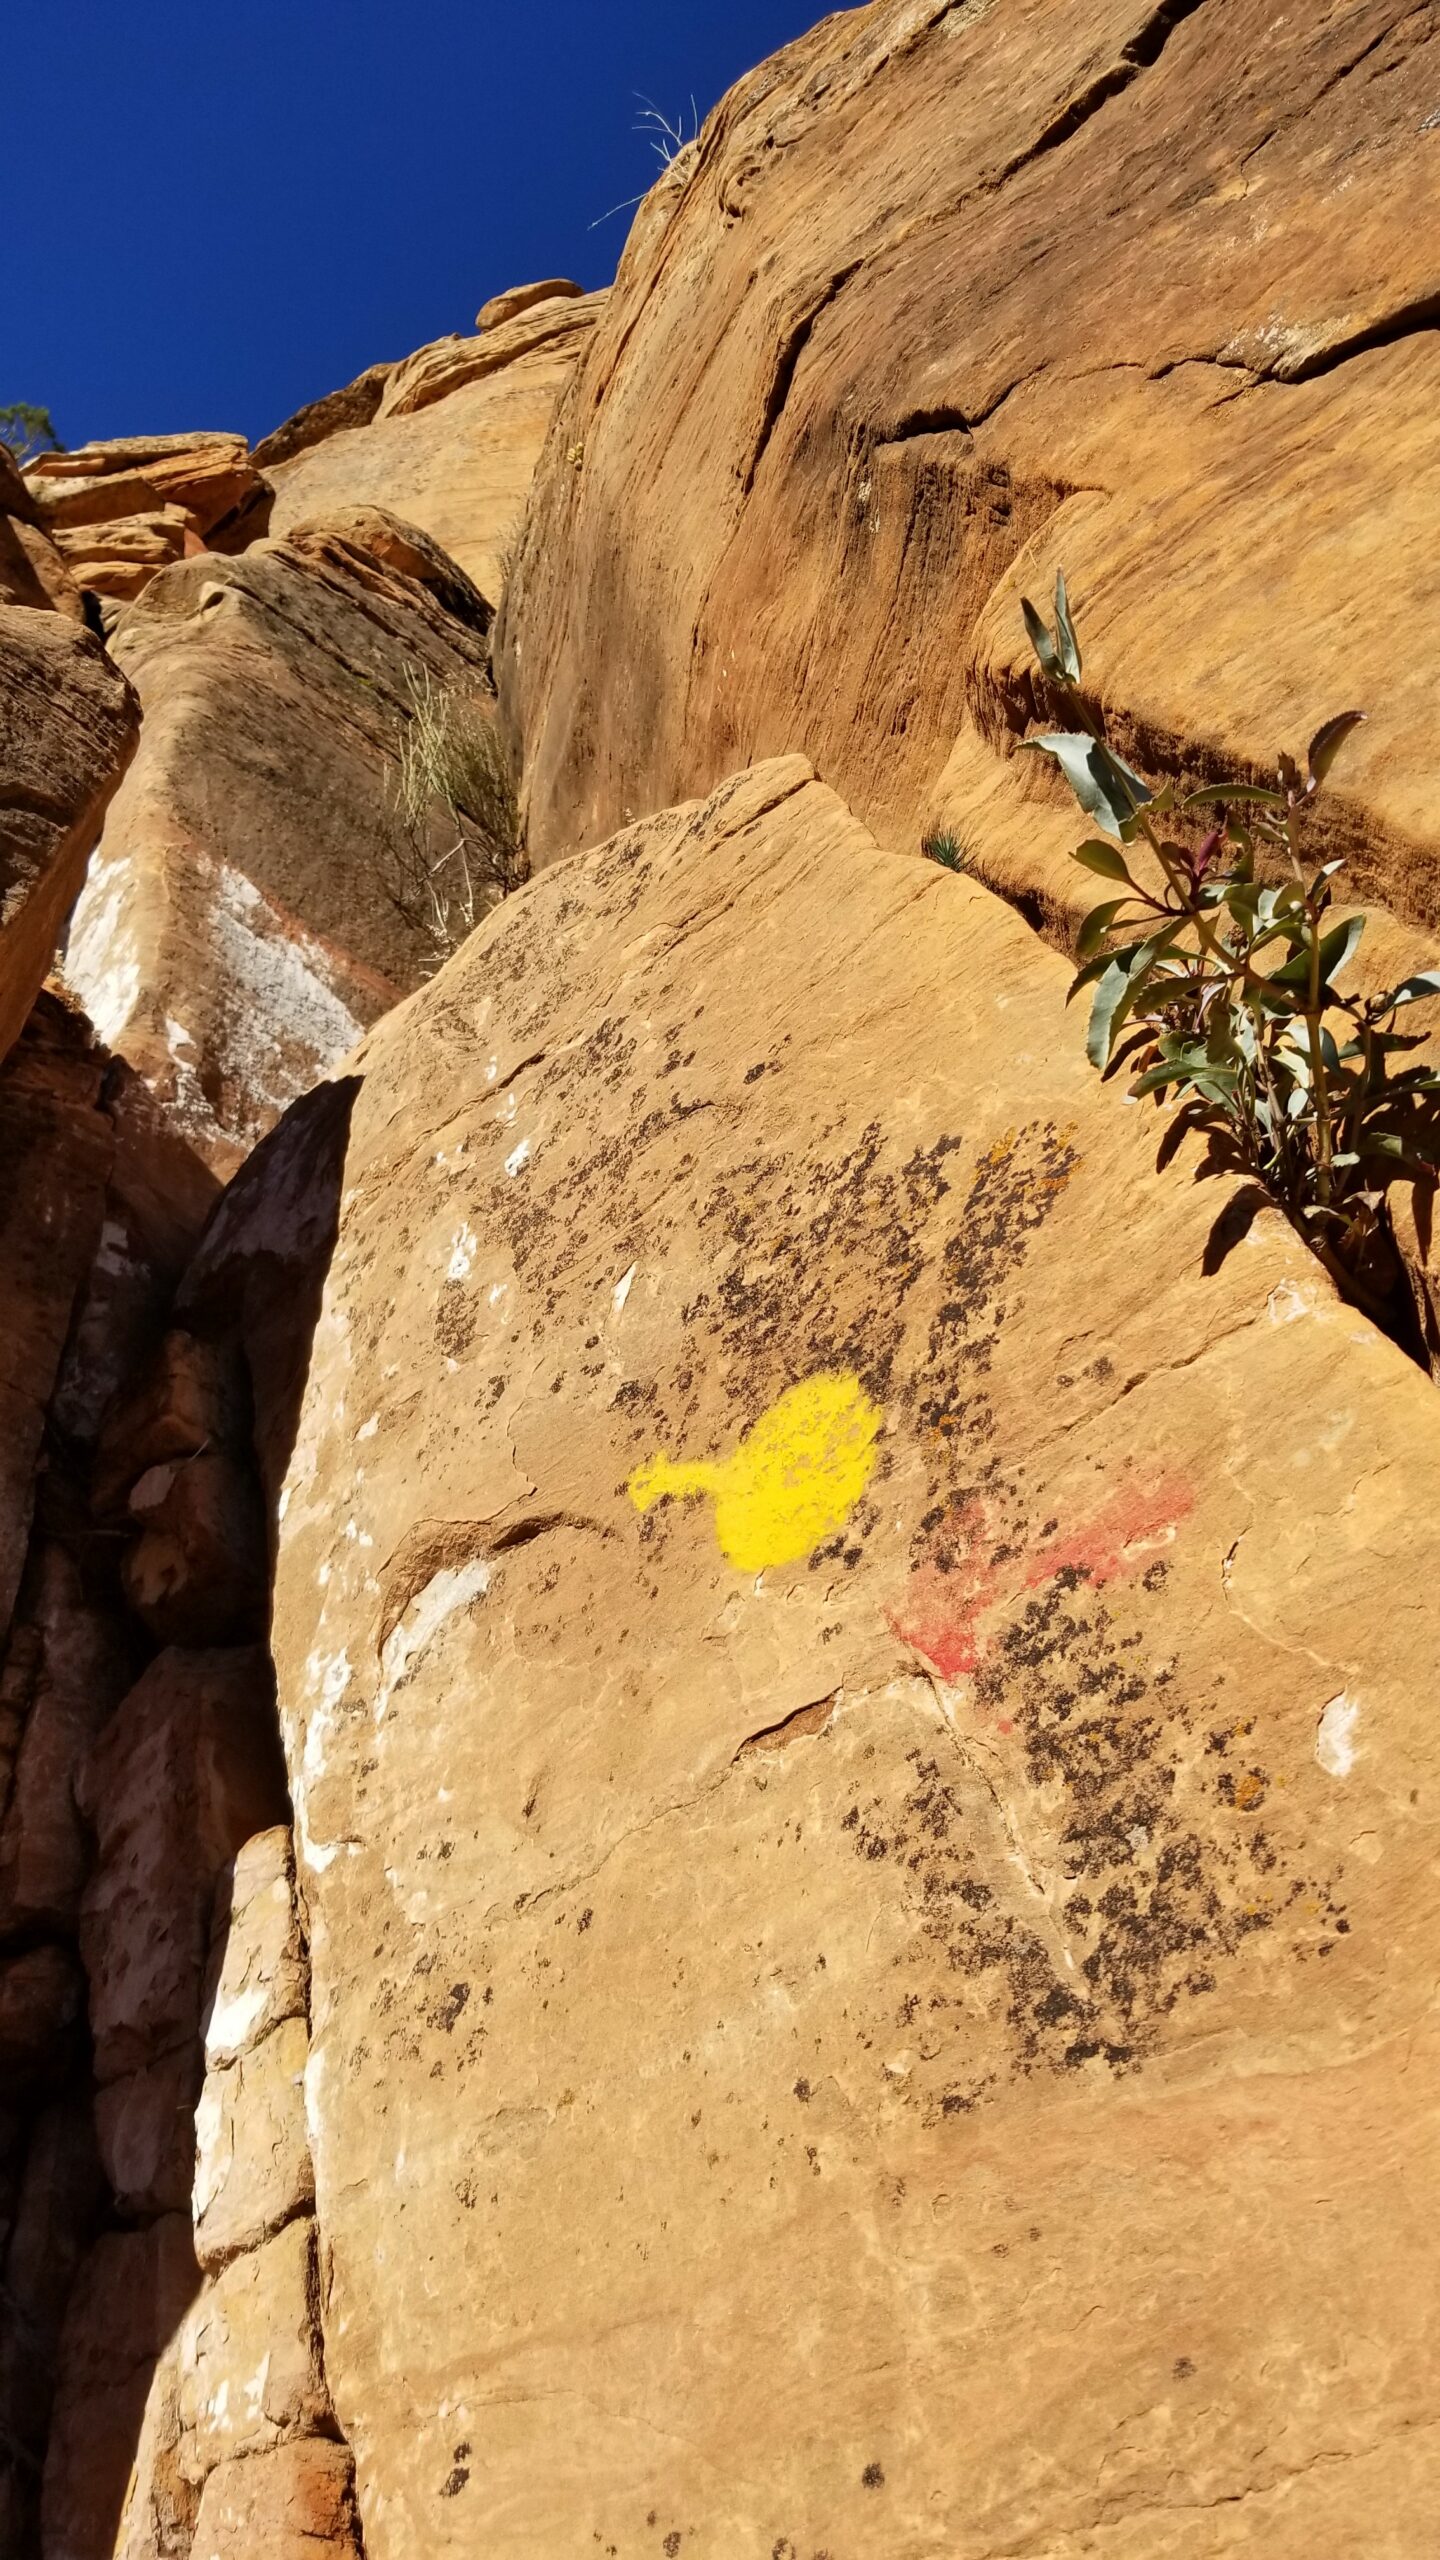
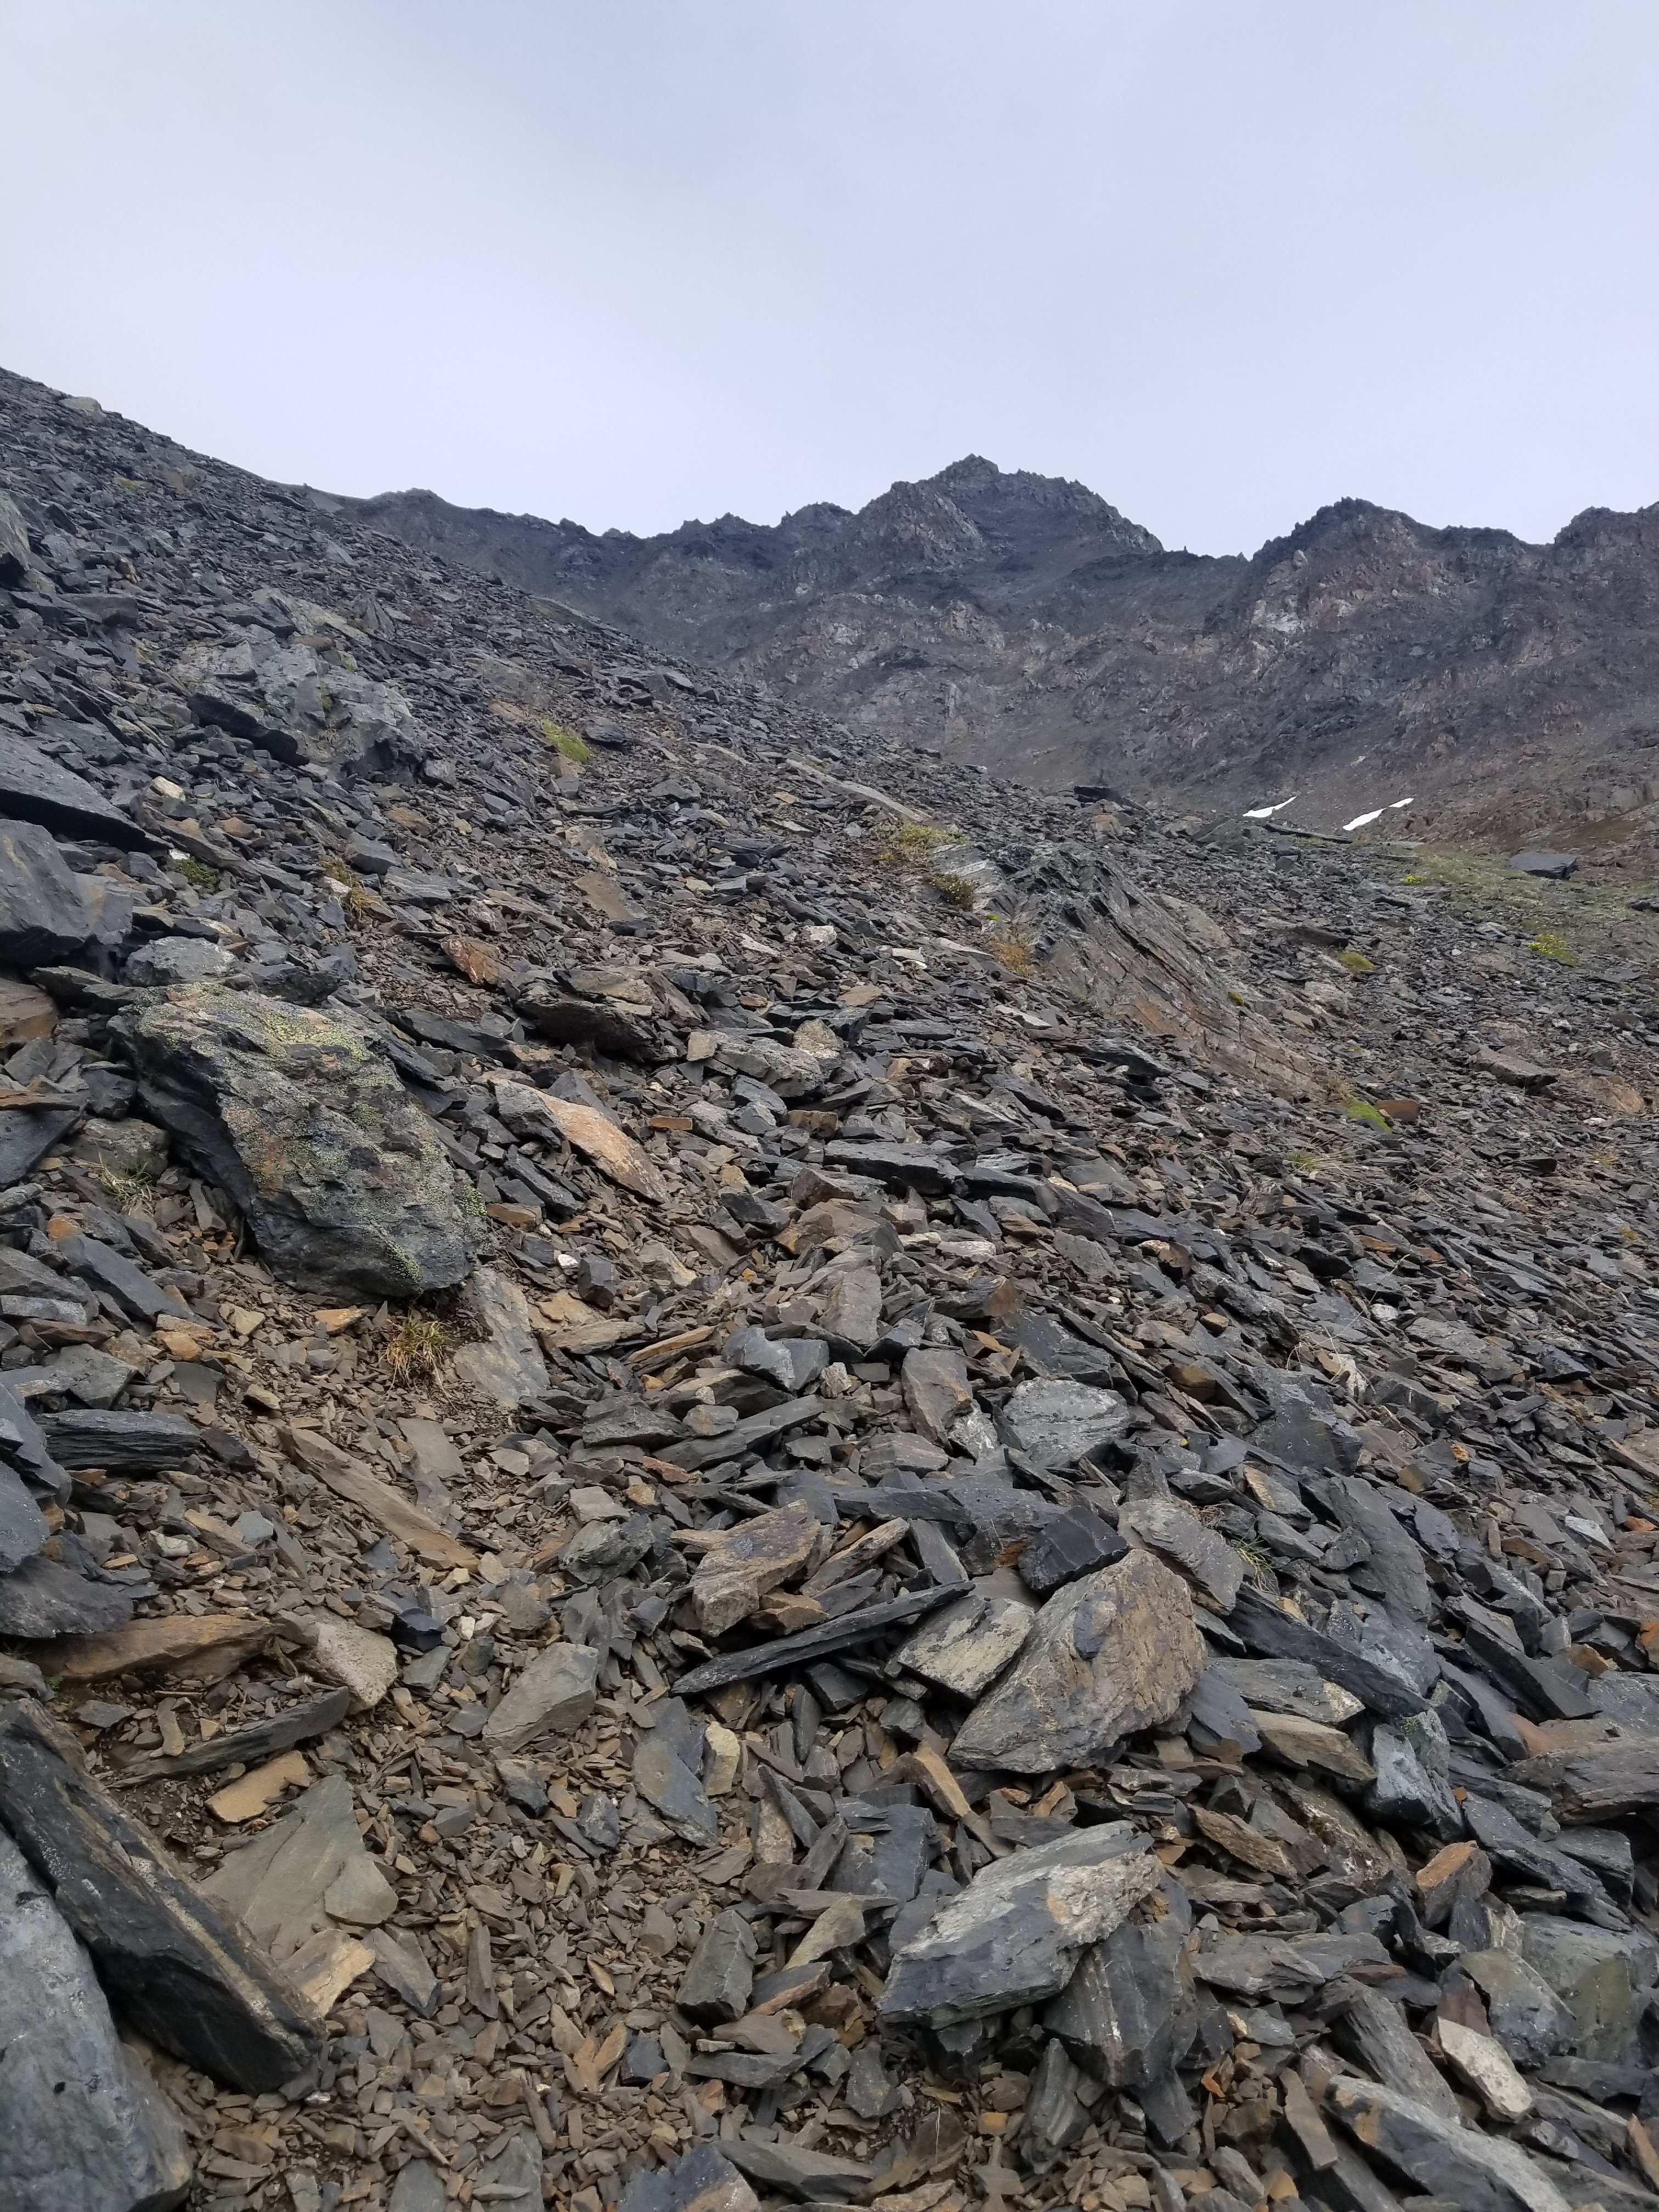
Here are a few examples of signs that you’re on the right track: indents in the rocks, impressions in the dirt, even spray paint from an old Via Ferrata route, and of course cairns.
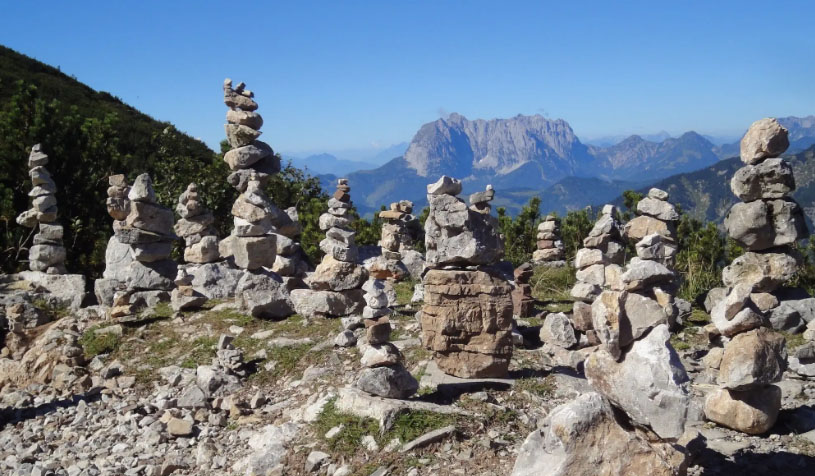
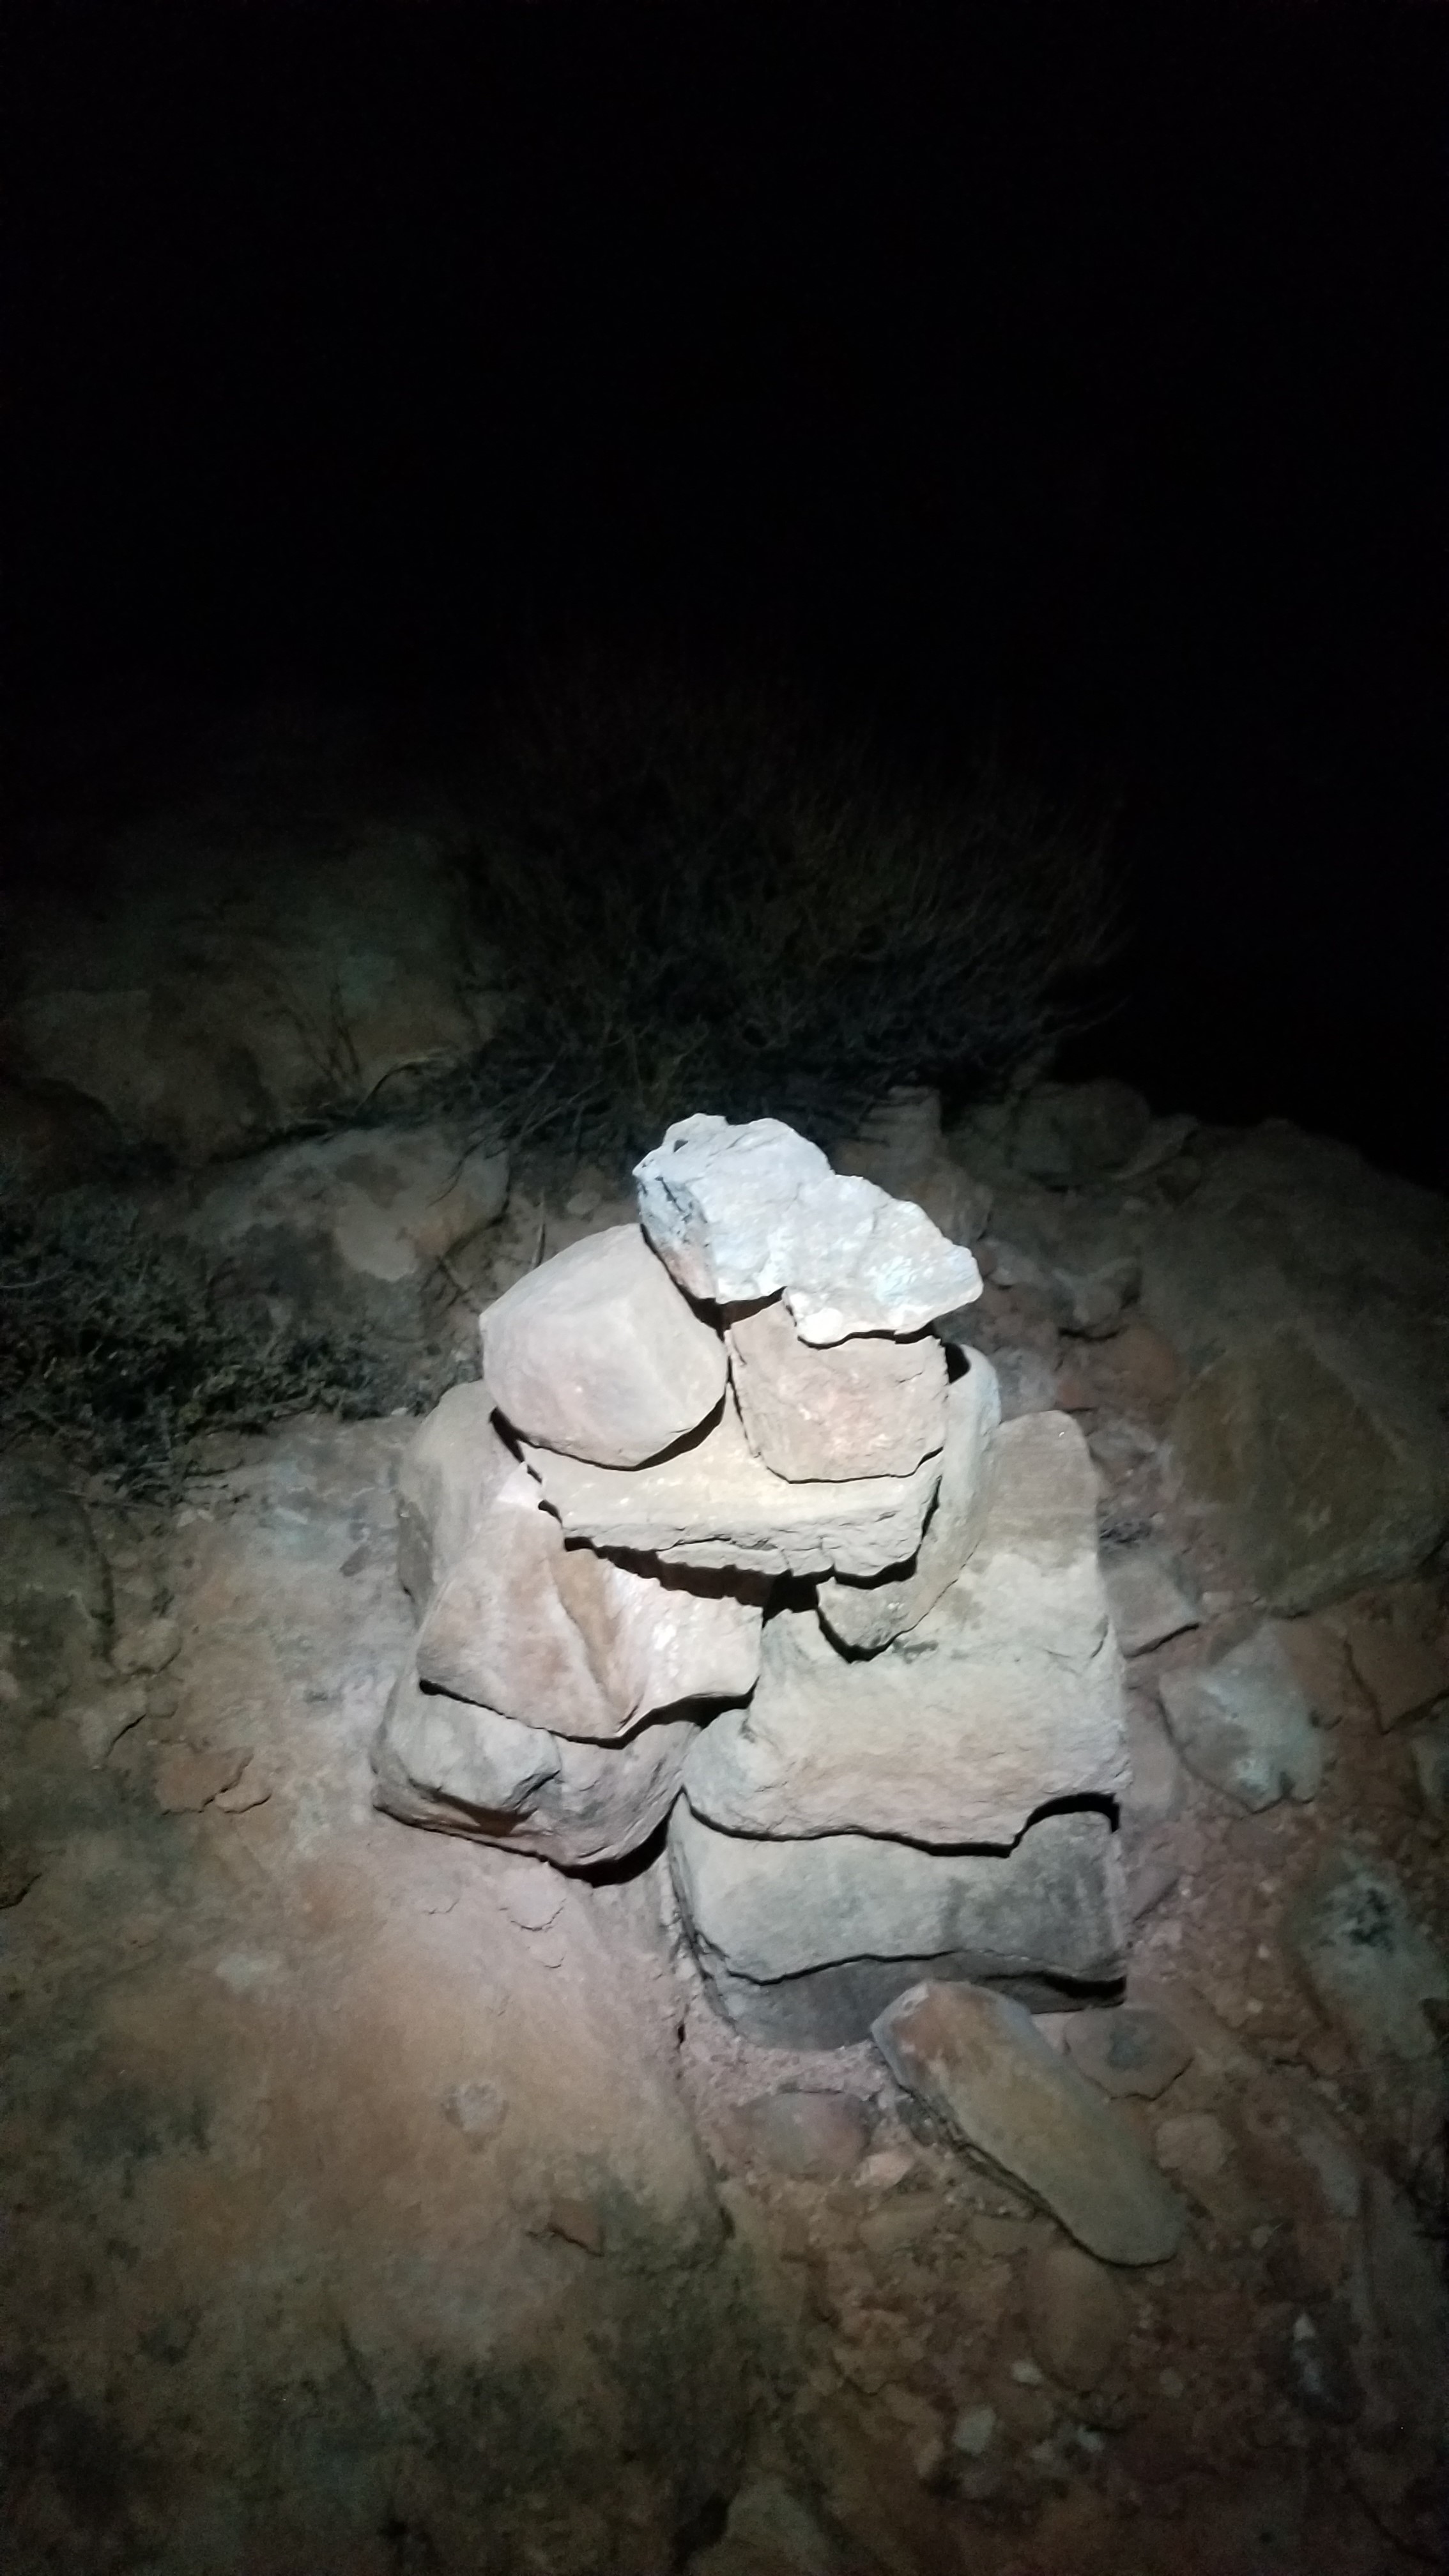
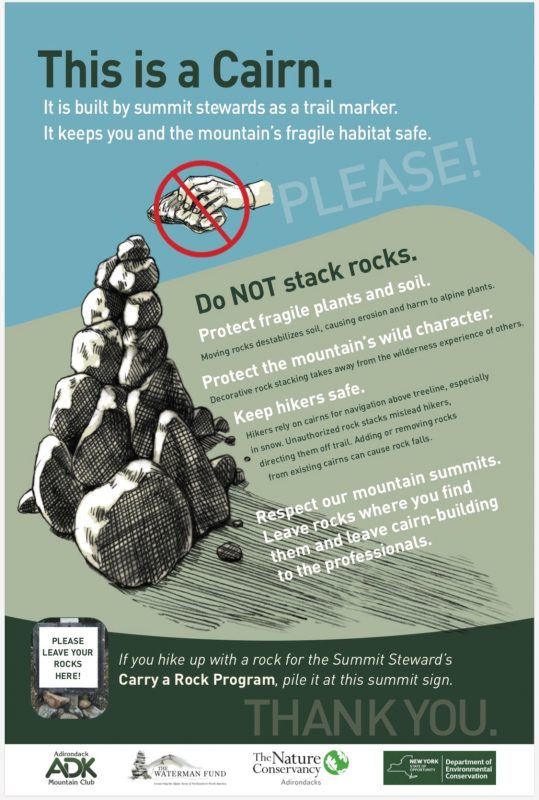
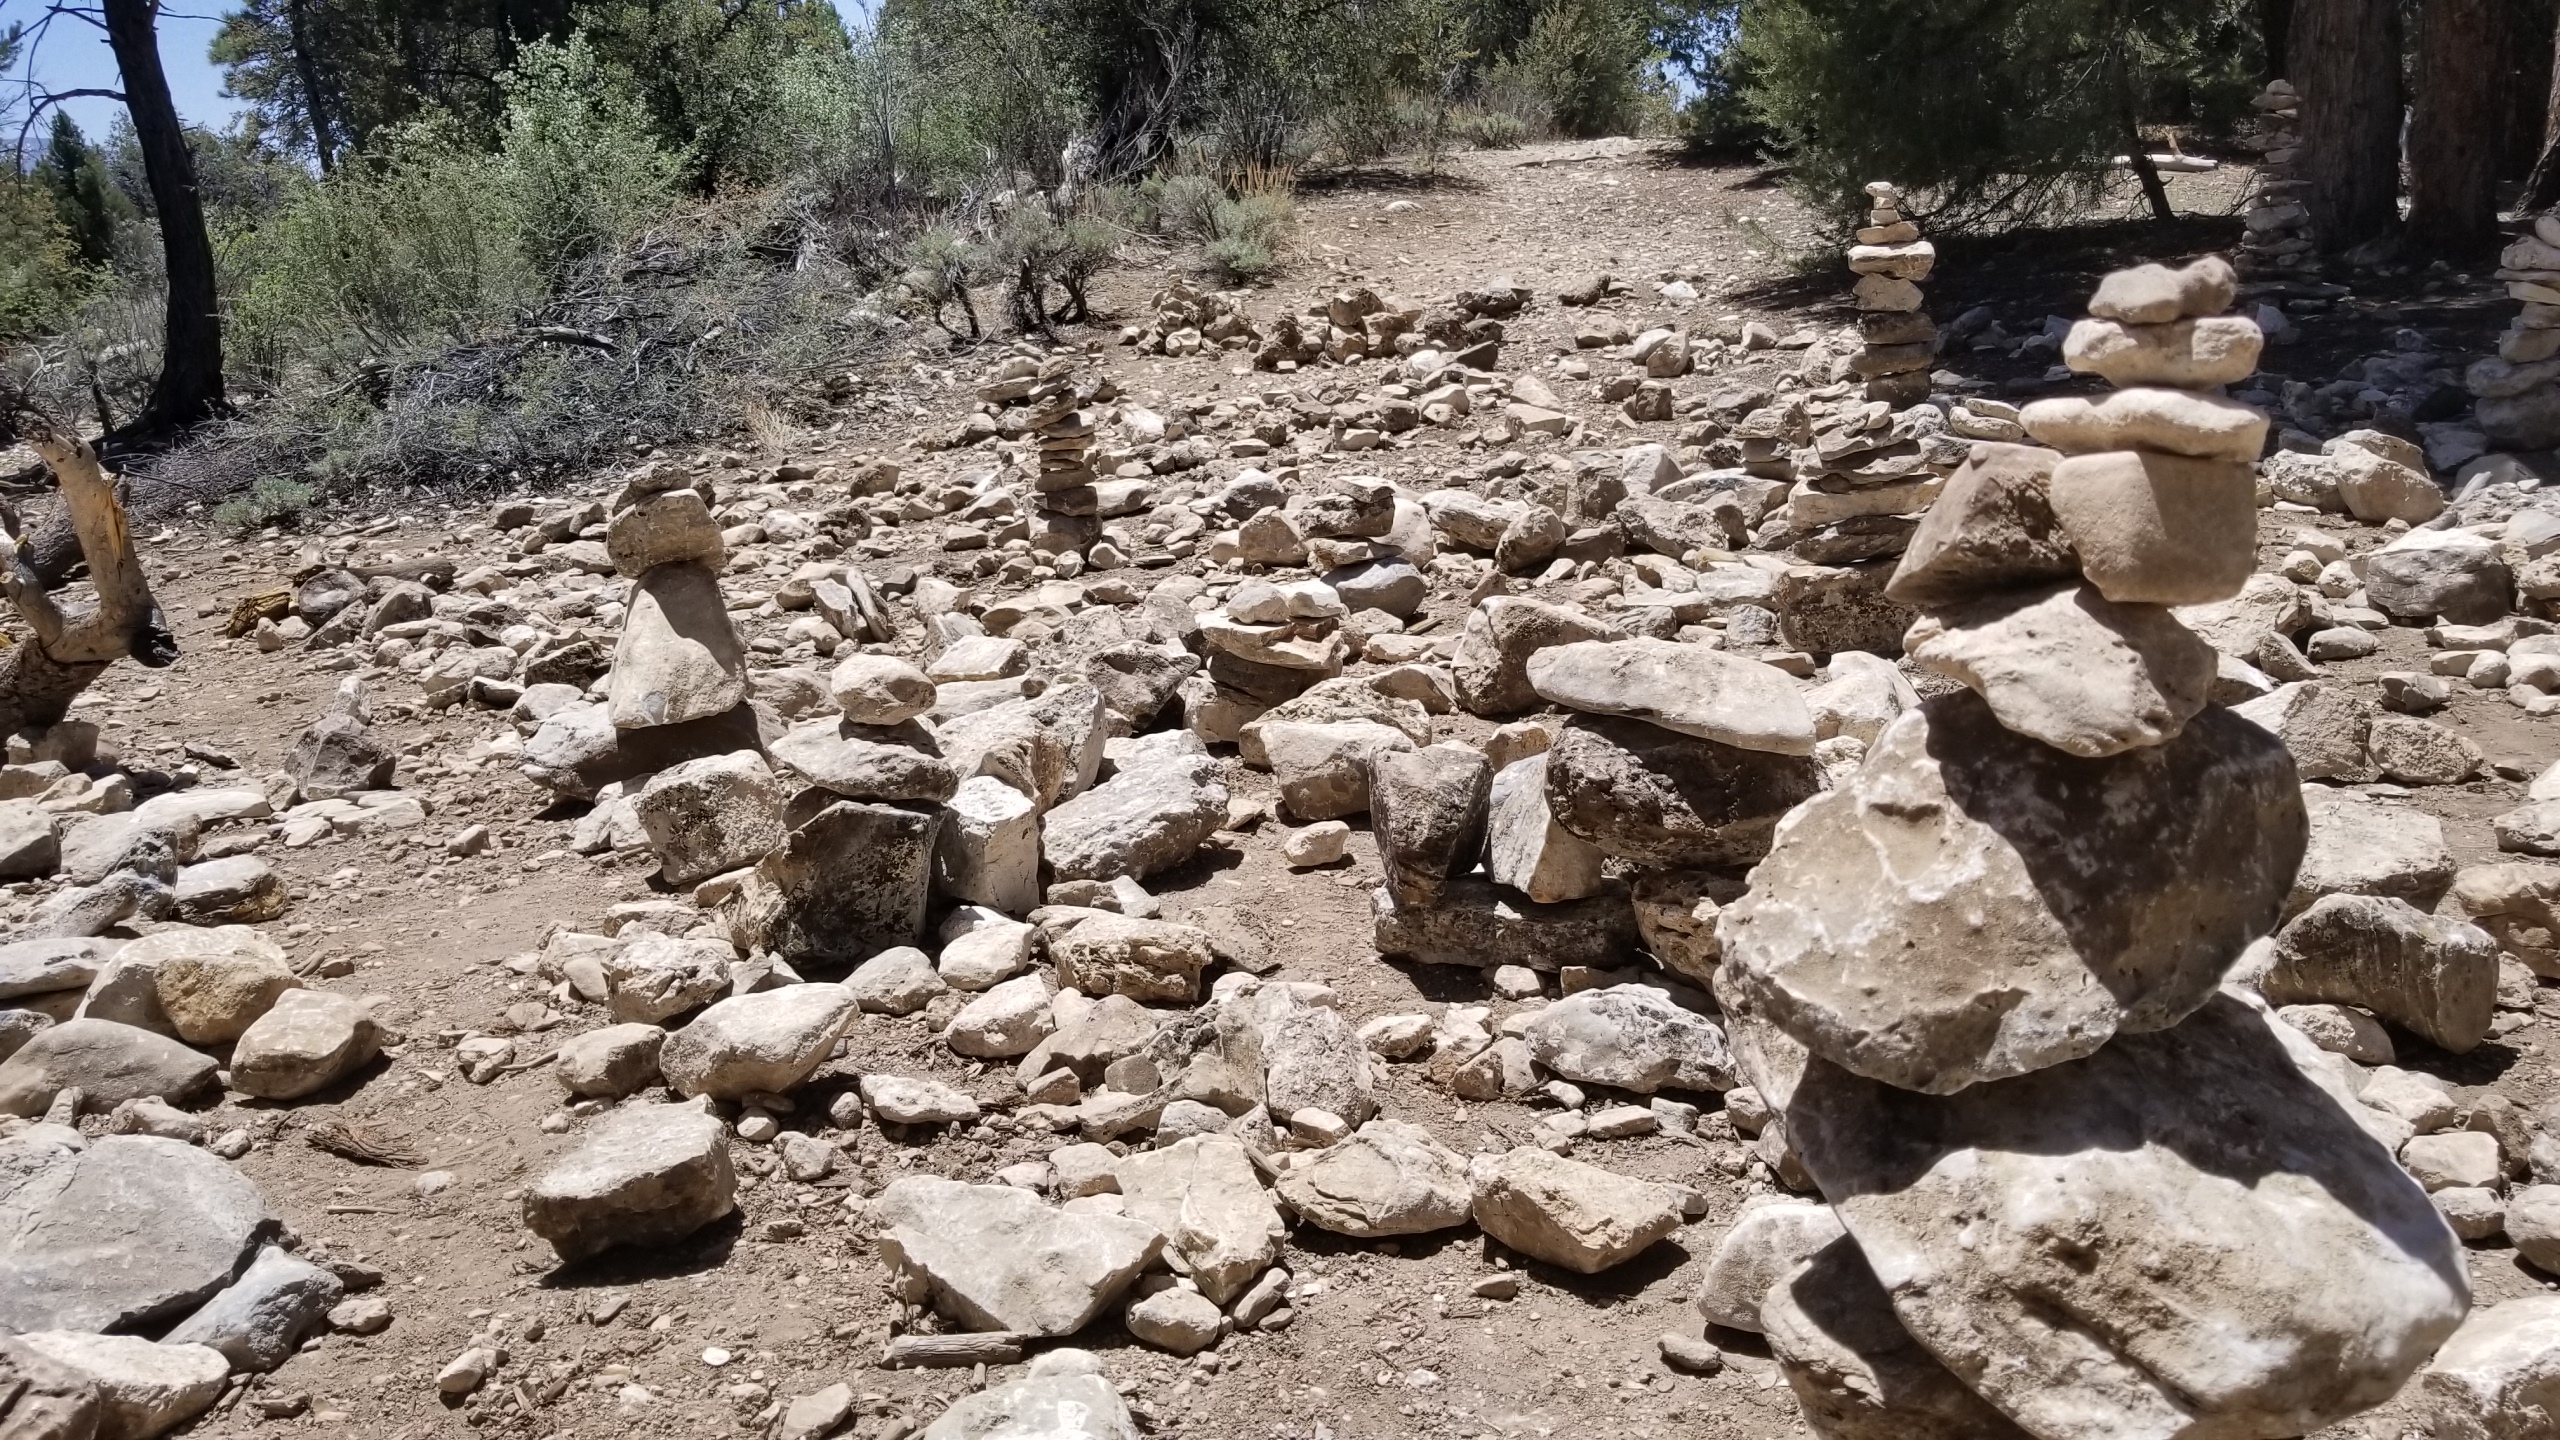
The Cairn Controversy
A cairn is a small rock stack that someone left behind like a breadcrumb trail to help guide future trekkers to find their way. The challenge here becomes when a cairn violates leave no trace, and instead of being a useful tool to guide trekkers through a route, it takes away from experiencing nature. Cairns are not needed on very established trails where is it very obvious where to go and are trekked by thousands of people per year. Establishing a cairn on a well marked trail is discouraged by all the park services across the states, and even though they can be pretty, they aren’t necessary. The exception here is when you are traveling on a route, not a trail, and sometimes cairns can be critical in saving a life, keeping trekkers on route and keeping them from getting lost.
Self Rescue – Getting Lost in the Backcountry
Now you’ve done your research, know the general neighborhood of where you are going, let’s start trekking! The biggest challenge sometimes is when you have lost the trail and there is no more sign of it. Your padded grass, cairns, and any sign of a route have all vanished leaving you in wonder of where to go. There is a simple solution to fix this.
TURN BACK. This very simple rule has saved me so many times. Most people want to push forward and heroically find the path once again. Save yourself a lot of trouble and just turn around and go back the way you came until you find the last notable sign (like a cairn) that you are on route. Start searching for the next sign and often you will find where you went wrong and get back on the right track. If you see that many people have made the same mistake you have (by show of footprints), sometimes it’s good to barricade off the side trek with a rock line or sticks to ensure future trekkers don’t make the same mistake. Before you do this, be absolutely sure that what you are blocking off isn’t another track.
In the worst of cases and you are utterly lost and your maps and GPS navigation have failed you, you can rely on a SPOT tracker, InReach, or other forms of signals to bring rescuers to your aid. Surviving in the wild is a different discussion all together. Conclusions
Be smart, plan your trek, and understand the requirements of the journey you’re about to embark on. Watch for trail signs, use your intuition, stay on track, and make good judgment when boldly going into the unknown. Stays safe out there guys, and never stop exploring!
References:
- GPX Creation – CalTopo
- Phone Map App – LocusPro
- LNT – Leave No Trace Ethics
- InReach & SPOT trackers
- Maps can be purchased online, in parks, or at your local hiking shop.
A Hikers Approach To Trail Running

I’m sure all of you have seen the minimal pack wearing, bright shiny shoes wearing, sport glasses and bandana having shirtless (a good portion of the time) trail runners galloping past most hikers on any given trail. By that opener, you could probably guess that I am no trail runner. I’m just not built for it, and I don’t have the love for it like some, but if challenged I will rise to the occasion.
Back in the spring, my buddy Rene invited me to a race called “Gaspin’ in the Aspen” up in Flagstaff, AZ, which will take place this weekend. Having plenty of time to prep, I accepted the invitation and signed up. As previously stated, I’m not a trail runner, but I’ll fill you in on a few secrets I’ve learned during the course of my short training period.
Secret 1: It takes only 3 skills to trail run: throttle control, obstacle tracking, and pushing through the pain!
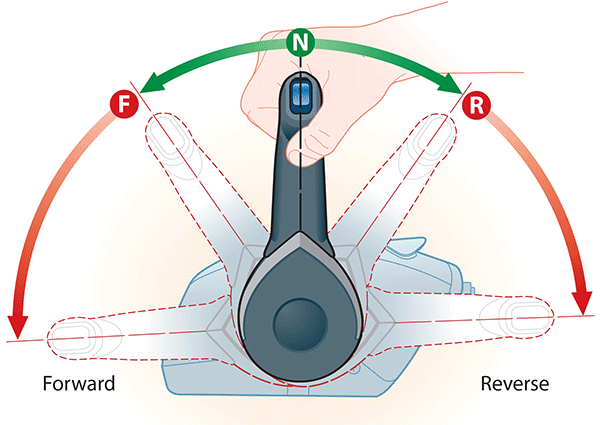
Throttle Control – When I trail run, I try and keep a running pace going the entire time. When I hit a tough grade, I try to pull the throttle back as far as I can without actually slowing to a walk or hiking pace. It’s like climbing a hill in a “granny gear” (lowest gear) in your car… you may not be going fast, but you’re still making progress. With most people, even running in your “granny gear” is faster than a hiking pace in the long run. When you get to an easier grade or a downhill, you can open back up a little more or even crank her wide open.
Obstacle tracking – Keep a look out far ahead of you to know what the grade will be like and anticipate it. Use your energy efficiently and wisely, you don’t want to run wide open on a downhill if you have a steep ascent right after. At the same time, be sure to use your immediate scanning skills to make sure you don’t trip on a rock or root, or run yourself right off the trail to avoid an obstacle. Alternately scanning near and far constantly will keep you on your feet and knowing what is to come so you can keep your run going.
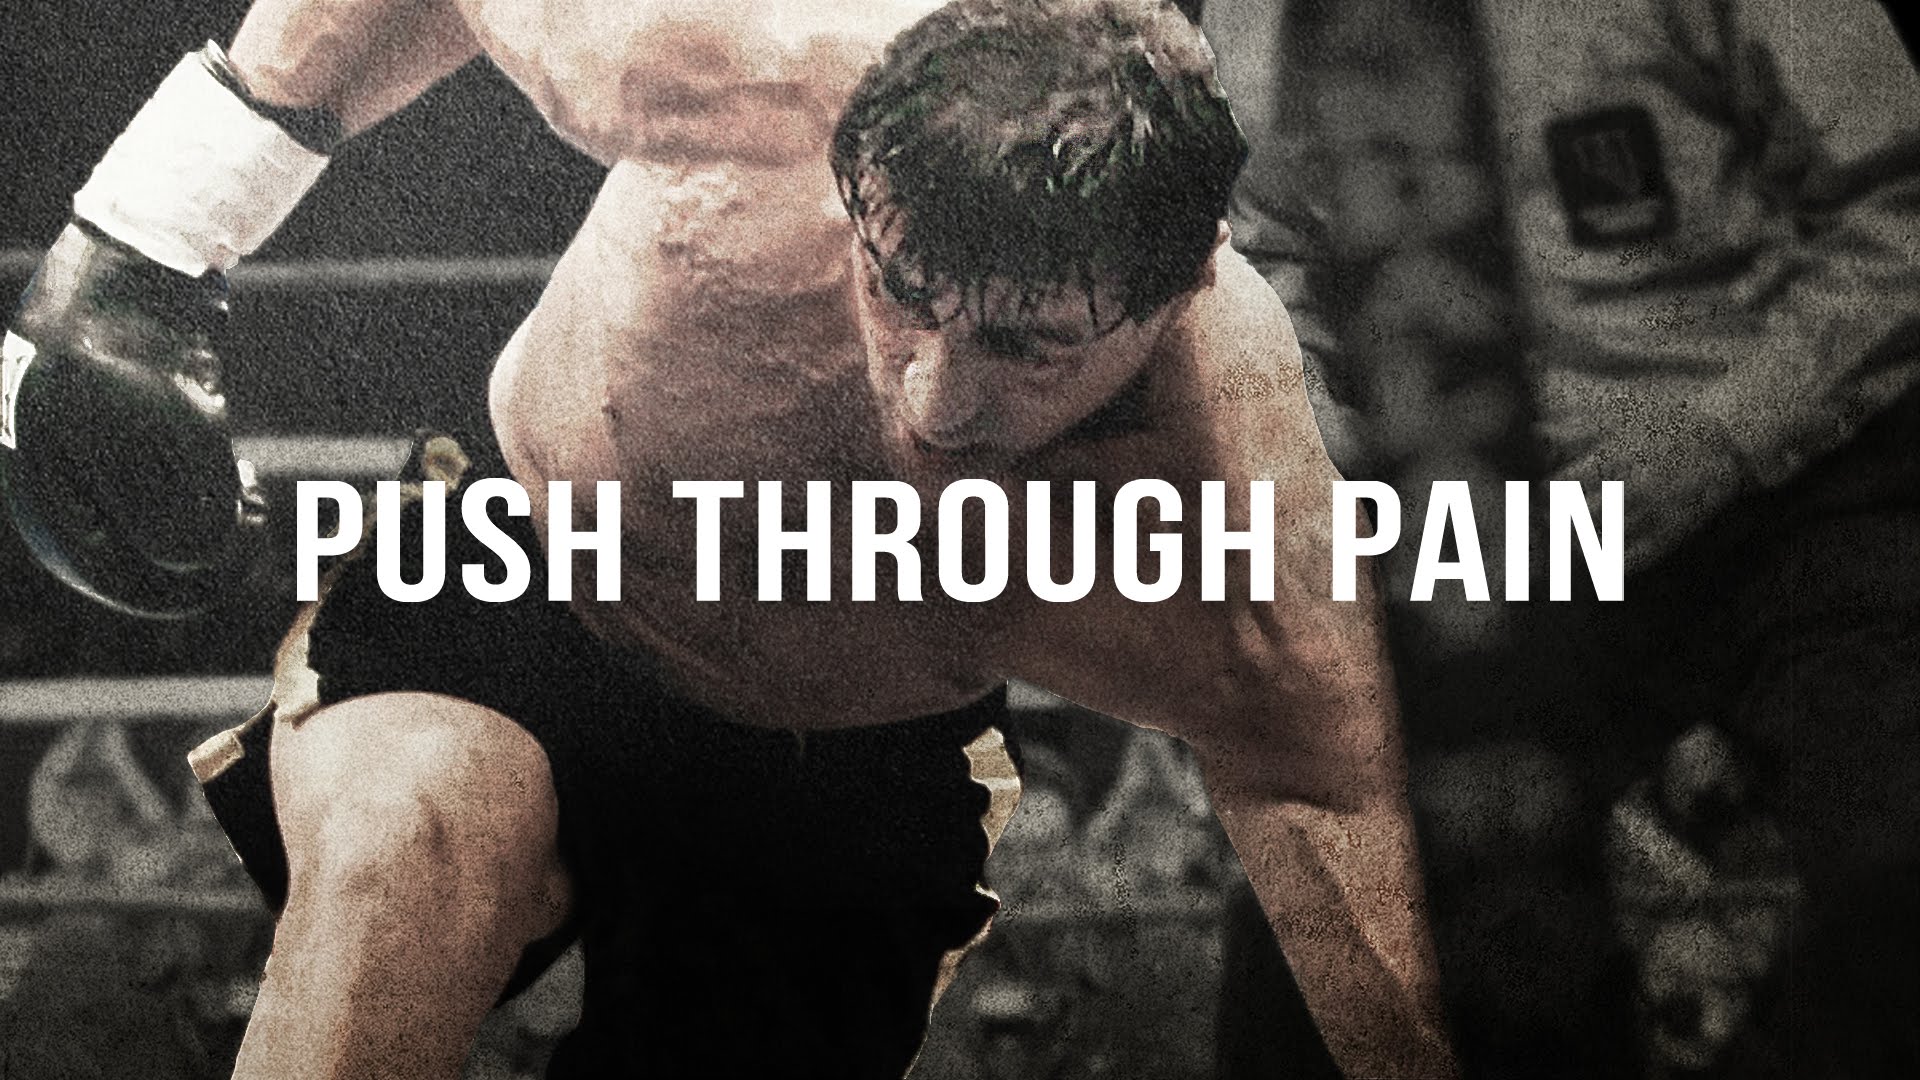
Push through the pain – You will get to a point where the grade seems to be too much to run it. Don’t give up! Keep pushing little by little, using your throttle control to ease the pace, and before you know it you’ll find yourself at the break. People are always underestimating their limits, and you’ll surprise yourself by digging deep and not backing down to the challenge!
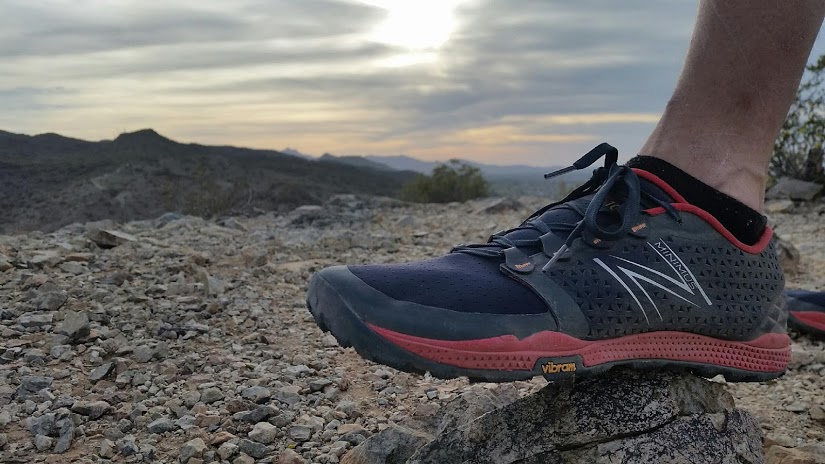
Secret 2: There is no special gear.
You don’t need magical $200 shoes, or a backpack made from space-age materials, or shorts bright enough to need sunglasses just to look at. Just throw on a hiking boot or regular ol’ running shoe, grab your raggedy backpack from high school, put on the shorts you just mowed the lawn in yesterday, and get out there and get after it. Sure there are the $200 shoes designed specifically for trail running, and they do help a little, but at the end of the day it’s not the shoe that makes a trail runner. It’s taking the first step off the couch and onto the trail that gets you there (granted you’ll probably new lighter gear down the line if you really love trail running).
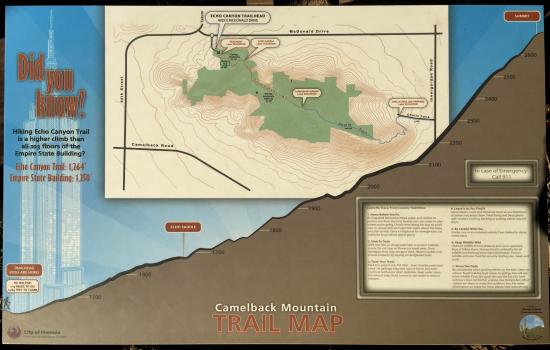
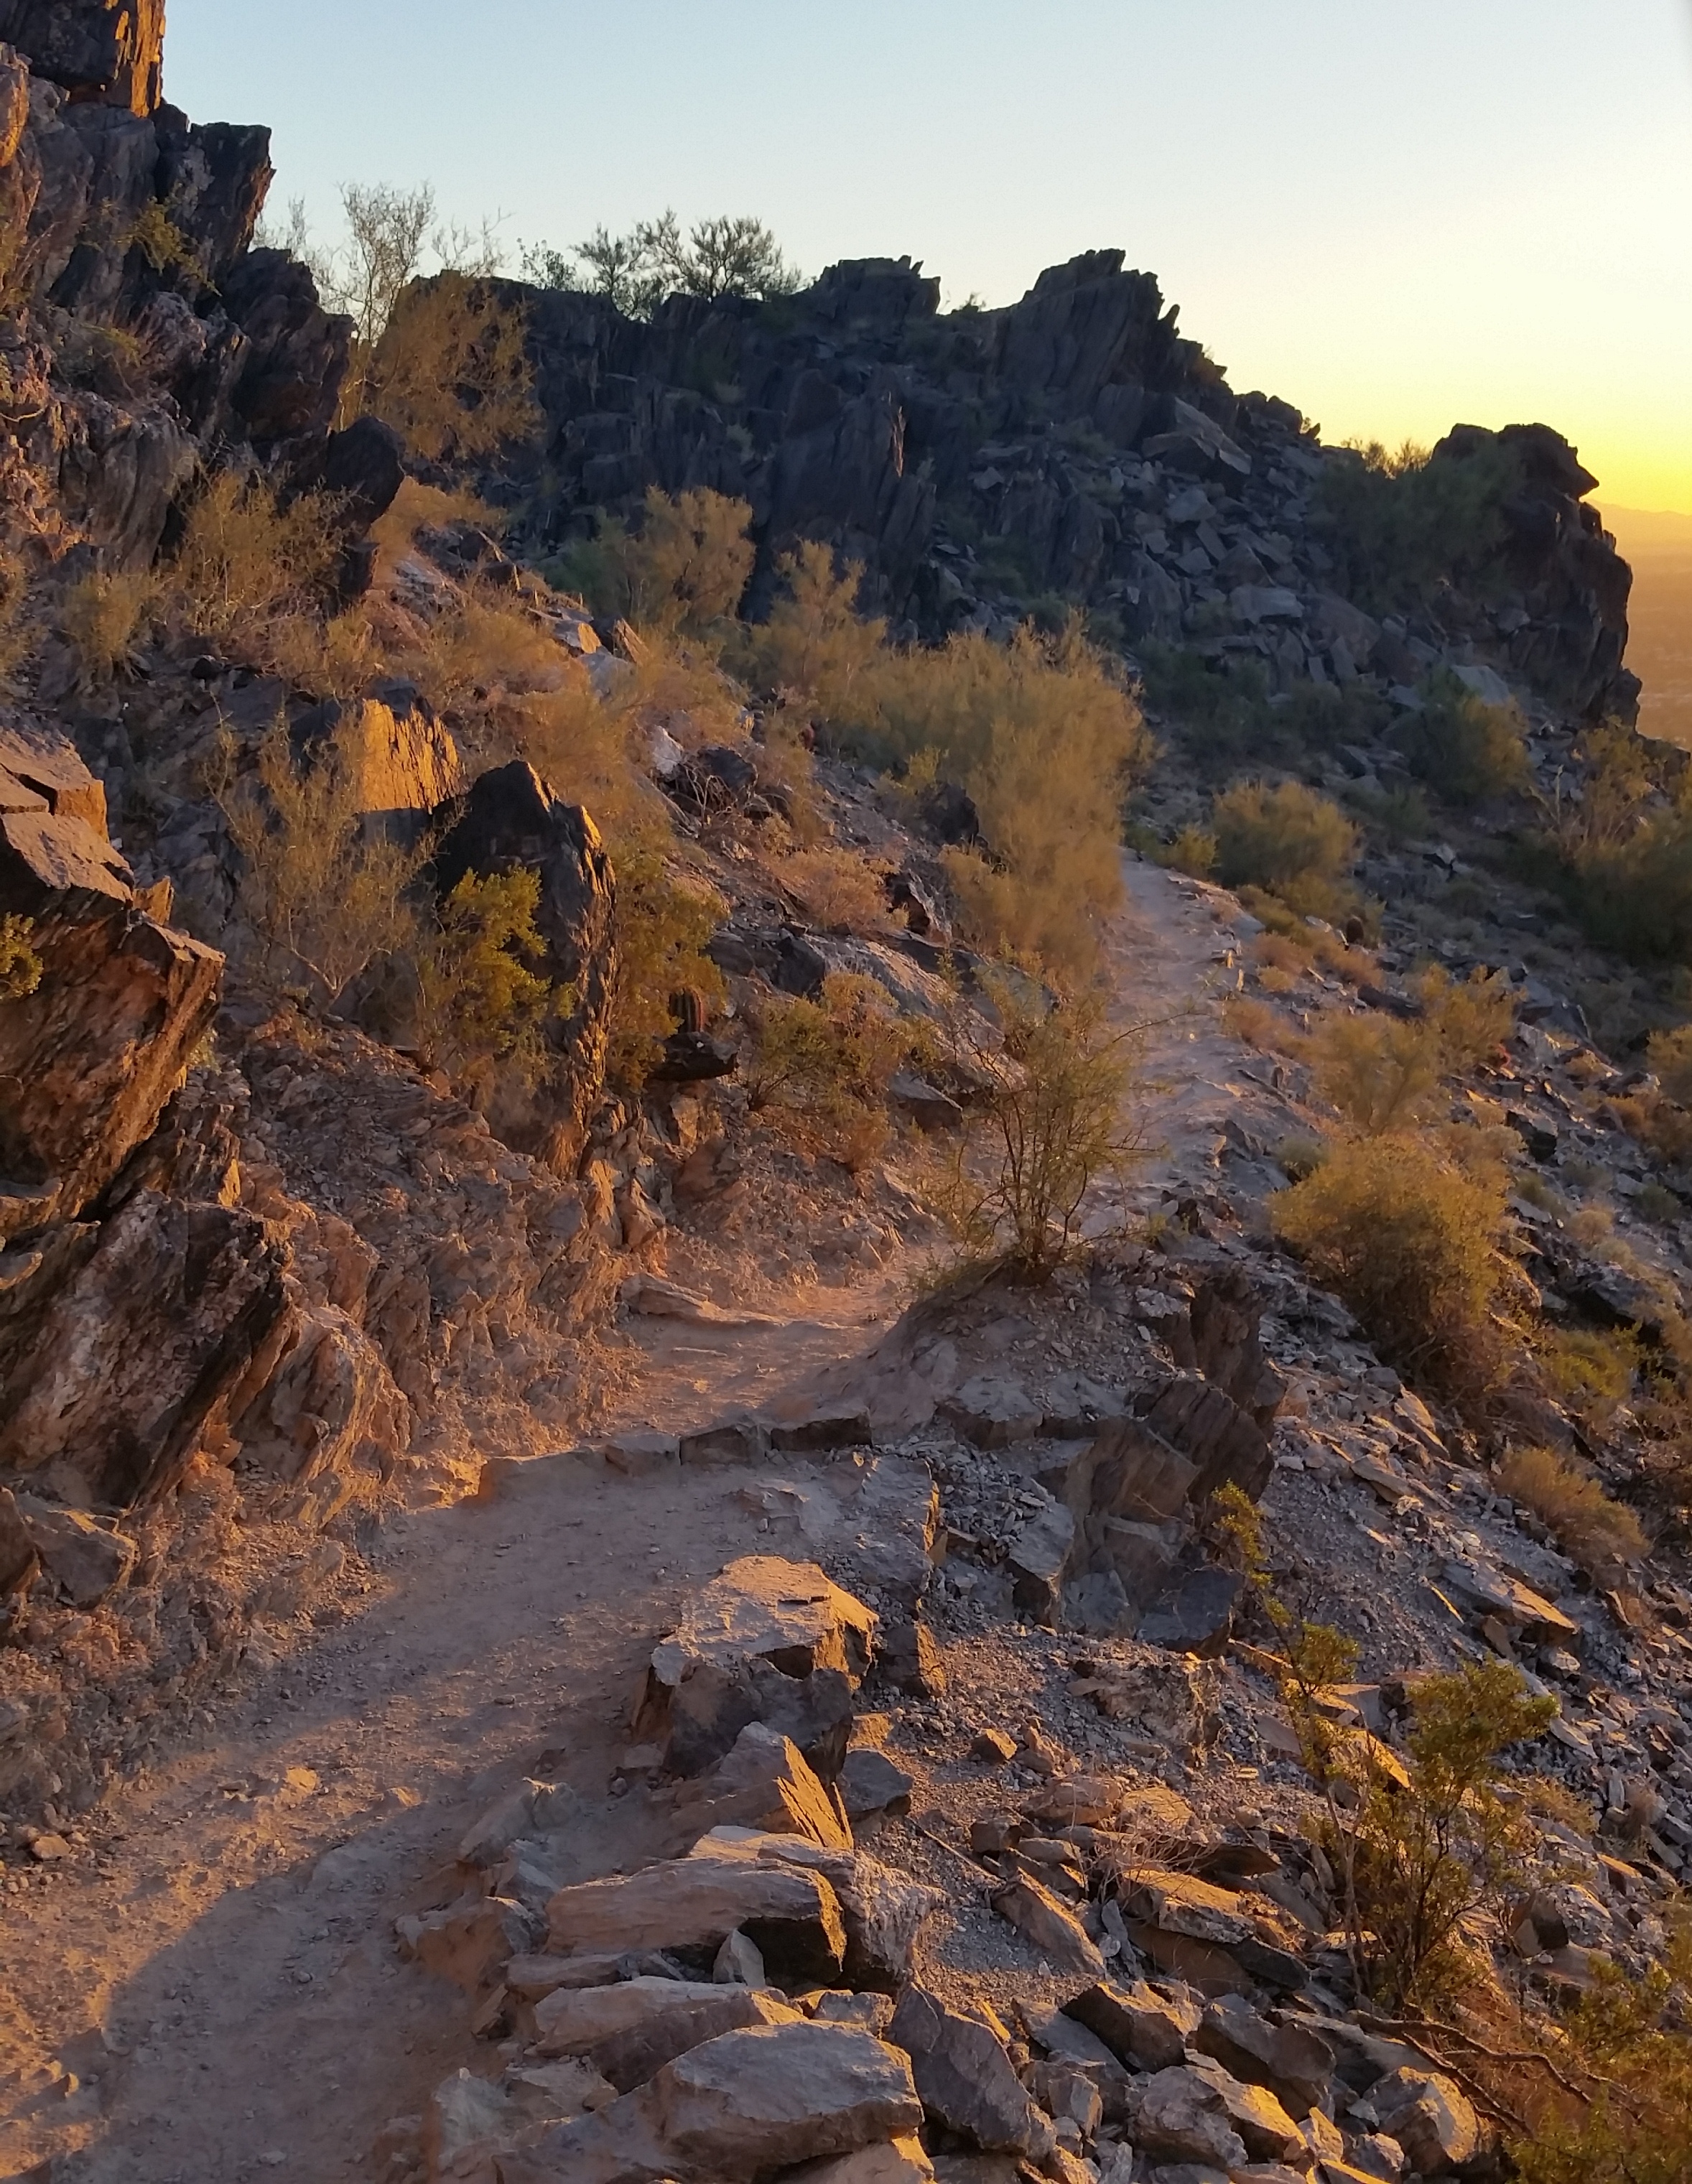
Just recently, I trekked up Camelback Mountain (Phoenix AZ), a pretty steep grade at 1000 feet altitude per mile, and put these a few of these secrets to the test. About ¾ of the way up in 105 degree heat I just plain ran out of steam and had to switch back to hiking. Nonetheless, throttling back and pushing through a few of the steeper parts really made all the difference in how I felt about the run overall. I never thought I’d make it even that far up the mountain running the entire way. Get out there and keep pushing the limits, you may surprise yourself!
Curiosity – The power that propels you
Curiosity is a funny thing. What’s over that’s ridge? What’s past that chute? What’s just around the bend in the trail? What can you see from the peak? A rustle of leaves just feet away behind a bush, a rattle from an unseen snake, a rock wall staring you in the face standing between you and a peak. What’s that? Can I make it? How far can I go?
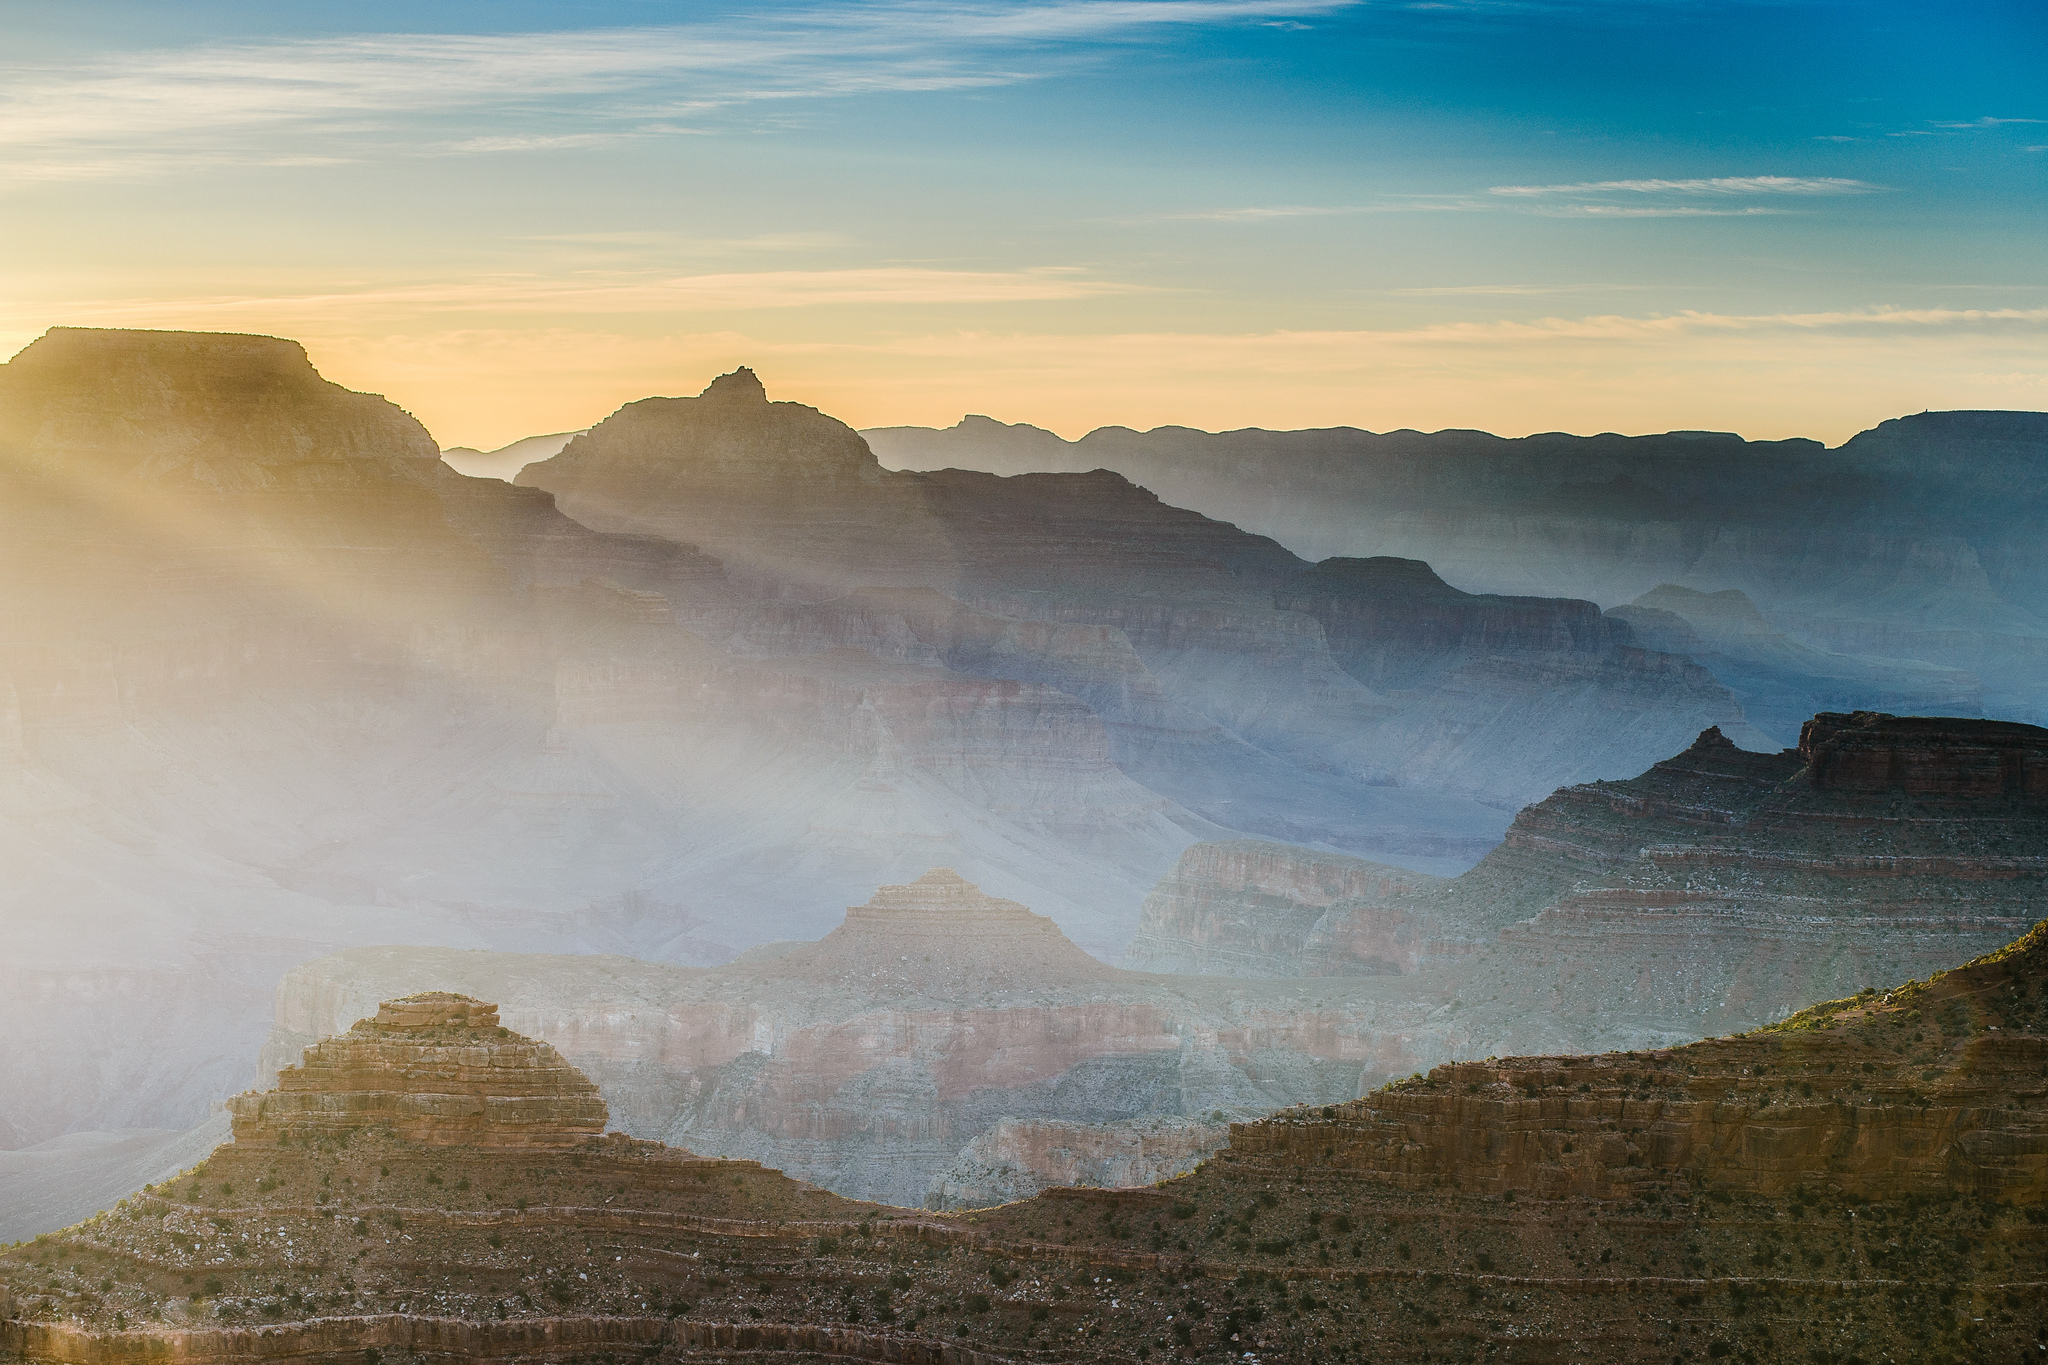
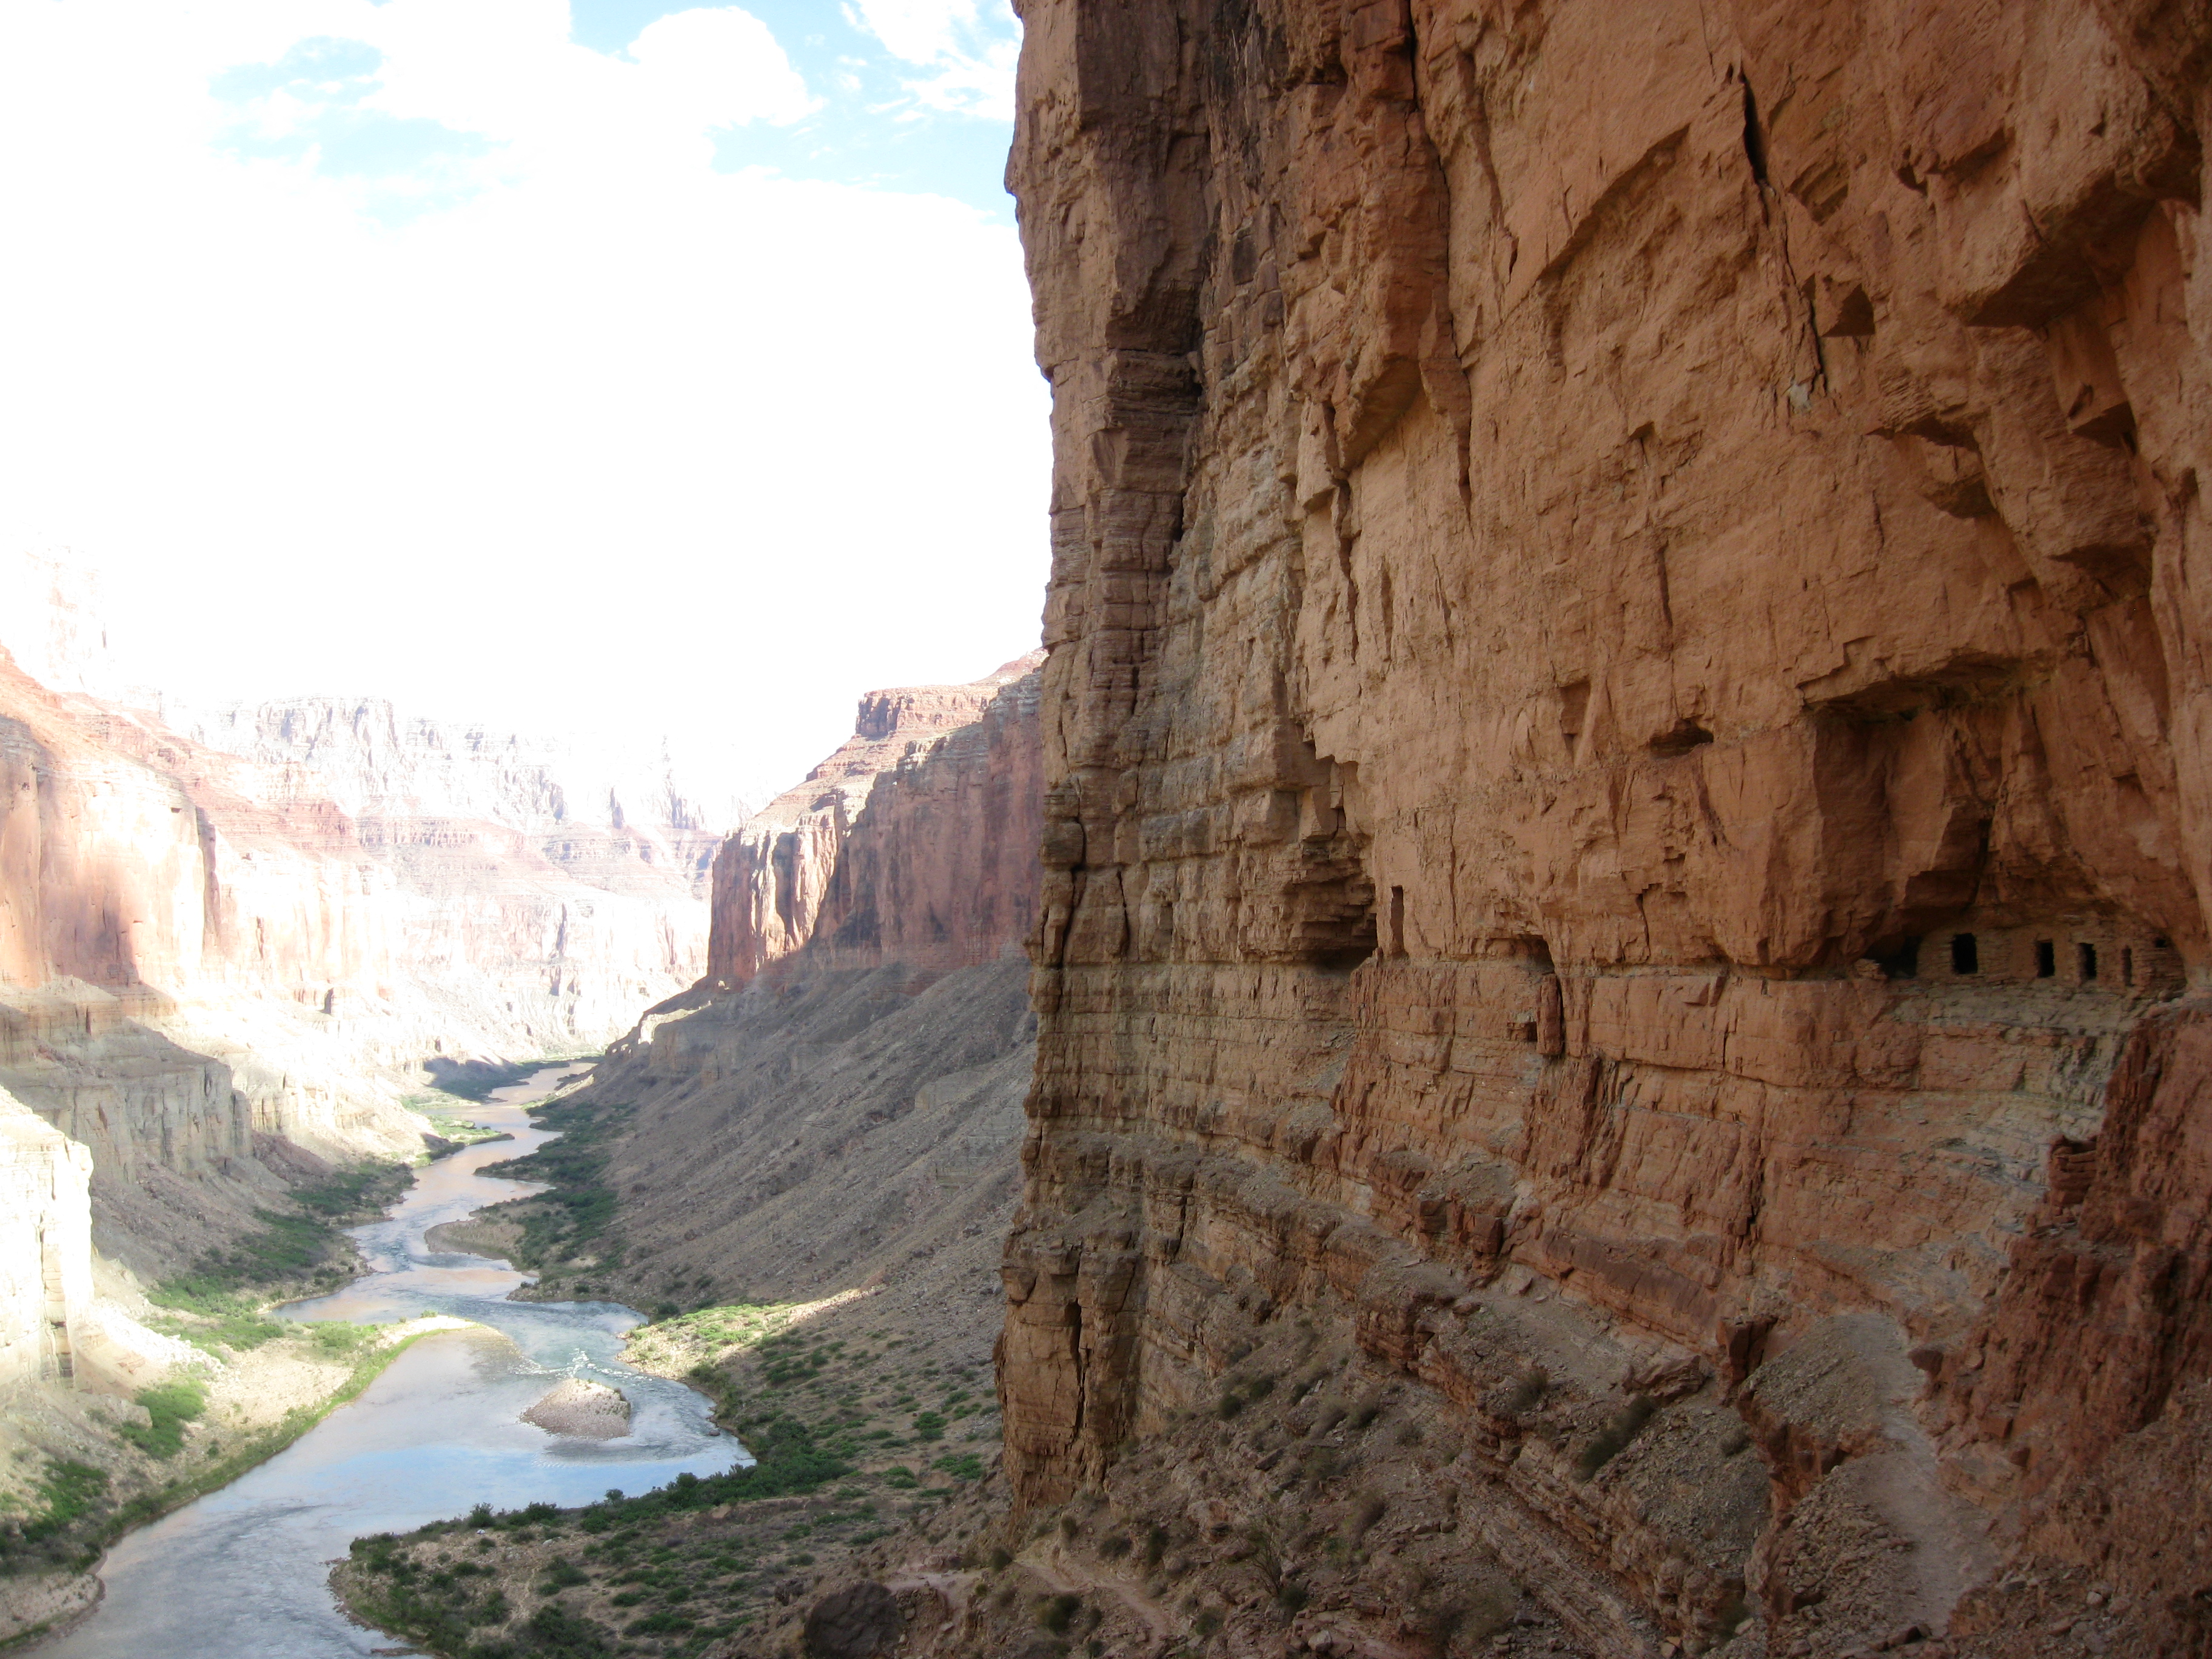
I remember looking at buttes in the Grand Canyon and thinking “I wonder if anyone has ever been up there.” I sometimes thought about what it would look like if you could paint the canyon with neon footsteps where humans have been since the canyon formed. It would be an awesome sight to see. How many people have stood where I have stood, touched the rocks I’ve touched, been the places I’ve been. Lastly, where has no one been, can I get there? The unknown; it’s the definition of adventure.
There is always something else to learn, always a new adventure to have. If you get to the end of your fulfillment in one medium/discipline you push to the next or find a new way to push the current medium/discipline to a new level. Find something new to try, hone your craft, become better, explore, share your experience. There are so many places to see, experience, and there is no reason for you to ever run out. If you find yourself complacent, take a step back, appreciate what you love, and re-evaluate what is important. Remember that no matter how hard you try you can never fully know everything there is to know, there is a beauty in that. So be curious, it is a power that can propel you.
Pain and Push – your Will can take you there
Suffering is something everyone talks about on the trail. There is a physical and mental limit to what you can push the human body. Everyone has their own limit, in every class of adventurer. Some people hit a mile and they can’t push further, some people hit 100 and are ready to go some more.
I have done some endurance related hiking in the past; pushes through long days, head lamp strapped on going into the night because the sun set and you’re still on the trail working. Starting before the sun is up to make sure to give yourself that chance to reach summit, or your target of the day.
I remember when I first started hiking I heard about people night hiking, I thought to myself, “that’s the stupidest thing ever!” I was only hiking a few miles at a time in the beginning. As I pushed into bigger and longer hikes it became apparent that attempting to accomplish 20+ miles days, at a hikers pace, one would be forced into the night. Headlamps became a necessity and it expanded my comfort zone. It’s funny how the mind can expand and the body adapt.
These bigger hikes, with big gain, sometimes into higher altitudes, made me realize that there were many of my own limits that were challenged and my comfort zone grew it many ways. On many treks I just remember feeling worked, miserable, stomach turning, unable to consume food. Physical limits had been met, red lining the whole way, gas tank on empty, mind going to places it’s never been, wanting to quite, give up, seeing things that weren’t there.
A lot of that goes away when you realize that the only person that can get you to the finish is yourself. No one can hike your hike for you; sometimes it’s a head down, grind on, one foot in front of the other push to finish. But even if you’re the only one that can get you out, its nice to have a friend trekking with you. Sharing the same pain, some of my best friends I have were made while out suffering together.
People have a fantasy in their head about trails, treks, and adventures; they idolize it in a way. I think many of those fantasies are born from the curiosity or the need to feel accomplishment of hitting the target and the memory of all the pain it took to get you there vanishes. No matter what the challenge, the cold, the distance, the difficulty, the pain, it’s the will that gets you there. Don’t give up, push a little further, you can make it, your will can take you there. See you all out there on the trail!