My buddy Stevo’s Trail Runners – Instagram: stephensmr2
I’m sure all of you have seen the minimal pack wearing, bright shiny shoes wearing, sport glasses and bandana having shirtless (a good portion of the time) trail runners galloping past most hikers on any given trail. By that opener, you could probably guess that I am no trail runner. I’m just not built for it, and I don’t have the love for it like some, but if challenged I will rise to the occasion.
Gaspin in the Aspen – One of many trail running events you can sign up for (sometimes its nice to have a goal to work towards)
Back in the spring, my buddy Rene invited me to a race called “Gaspin’ in the Aspen” up in Flagstaff, AZ, which will take place this weekend. Having plenty of time to prep, I accepted the invitation and signed up. As previously stated, I’m not a trail runner, but I’ll fill you in on a few secrets I’ve learned during the course of my short training period.
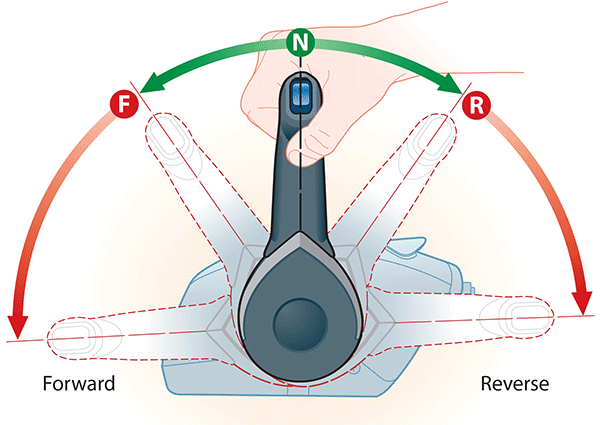
Secret 1: It takes only 3 skills to trail run: throttle control, obstacle tracking, and pushing through the pain!
Throttle Control – Pull back if the grade is too steep to maintain a jog
Throttle Control – When I trail run, I try and keep a running pace going the entire time. When I hit a tough grade, I try to pull the throttle back as far as I can without actually slowing to a walk or hiking pace. It’s like climbing a hill in a “granny gear” (lowest gear) in your car… you may not be going fast, but you’re still making progress. With most people, even running in your “granny gear” is faster than a hiking pace in the long run. When you get to an easier grade or a downhill, you can open back up a little more or even crank her wide open.
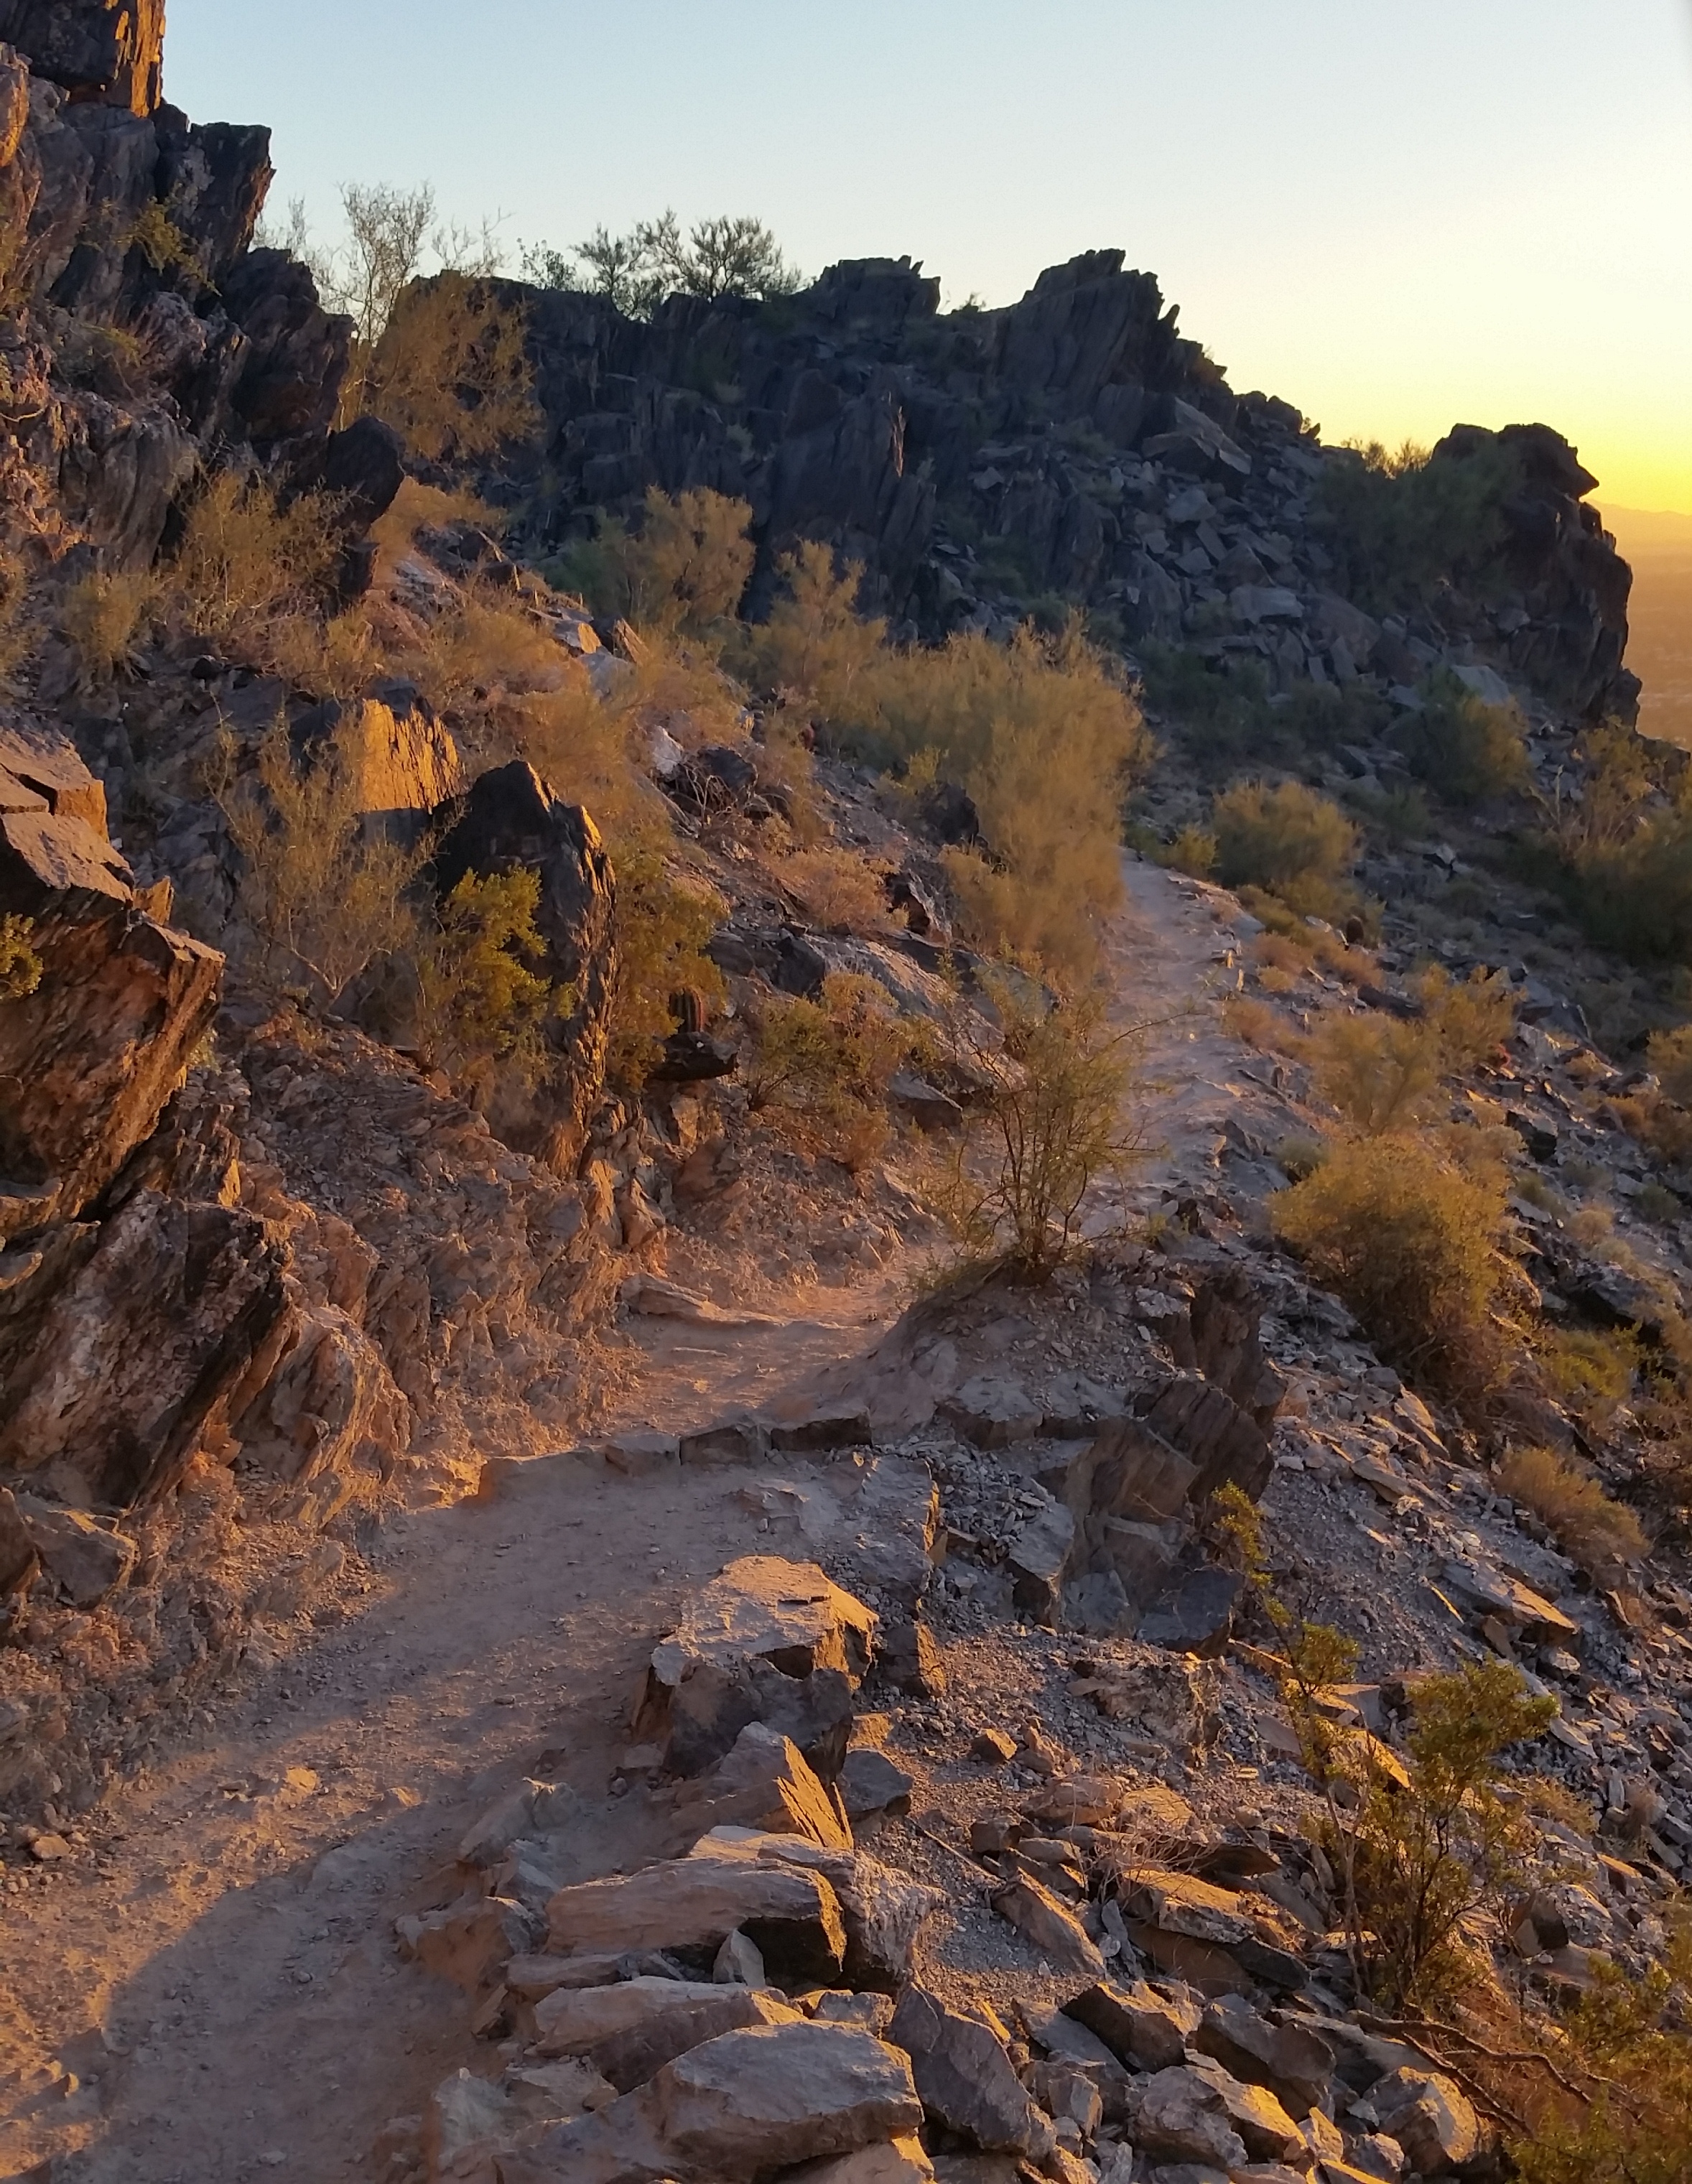
Obtacles – Some trails are more chunky than others – Squaw Peak
Obstacle tracking – Keep a look out far ahead of you to know what the grade will be like and anticipate it. Use your energy efficiently and wisely, you don’t want to run wide open on a downhill if you have a steep ascent right after. At the same time, be sure to use your immediate scanning skills to make sure you don’t trip on a rock or root, or run yourself right off the trail to avoid an obstacle. Alternately scanning near and far constantly will keep you on your feet and knowing what is to come so you can keep your run going.
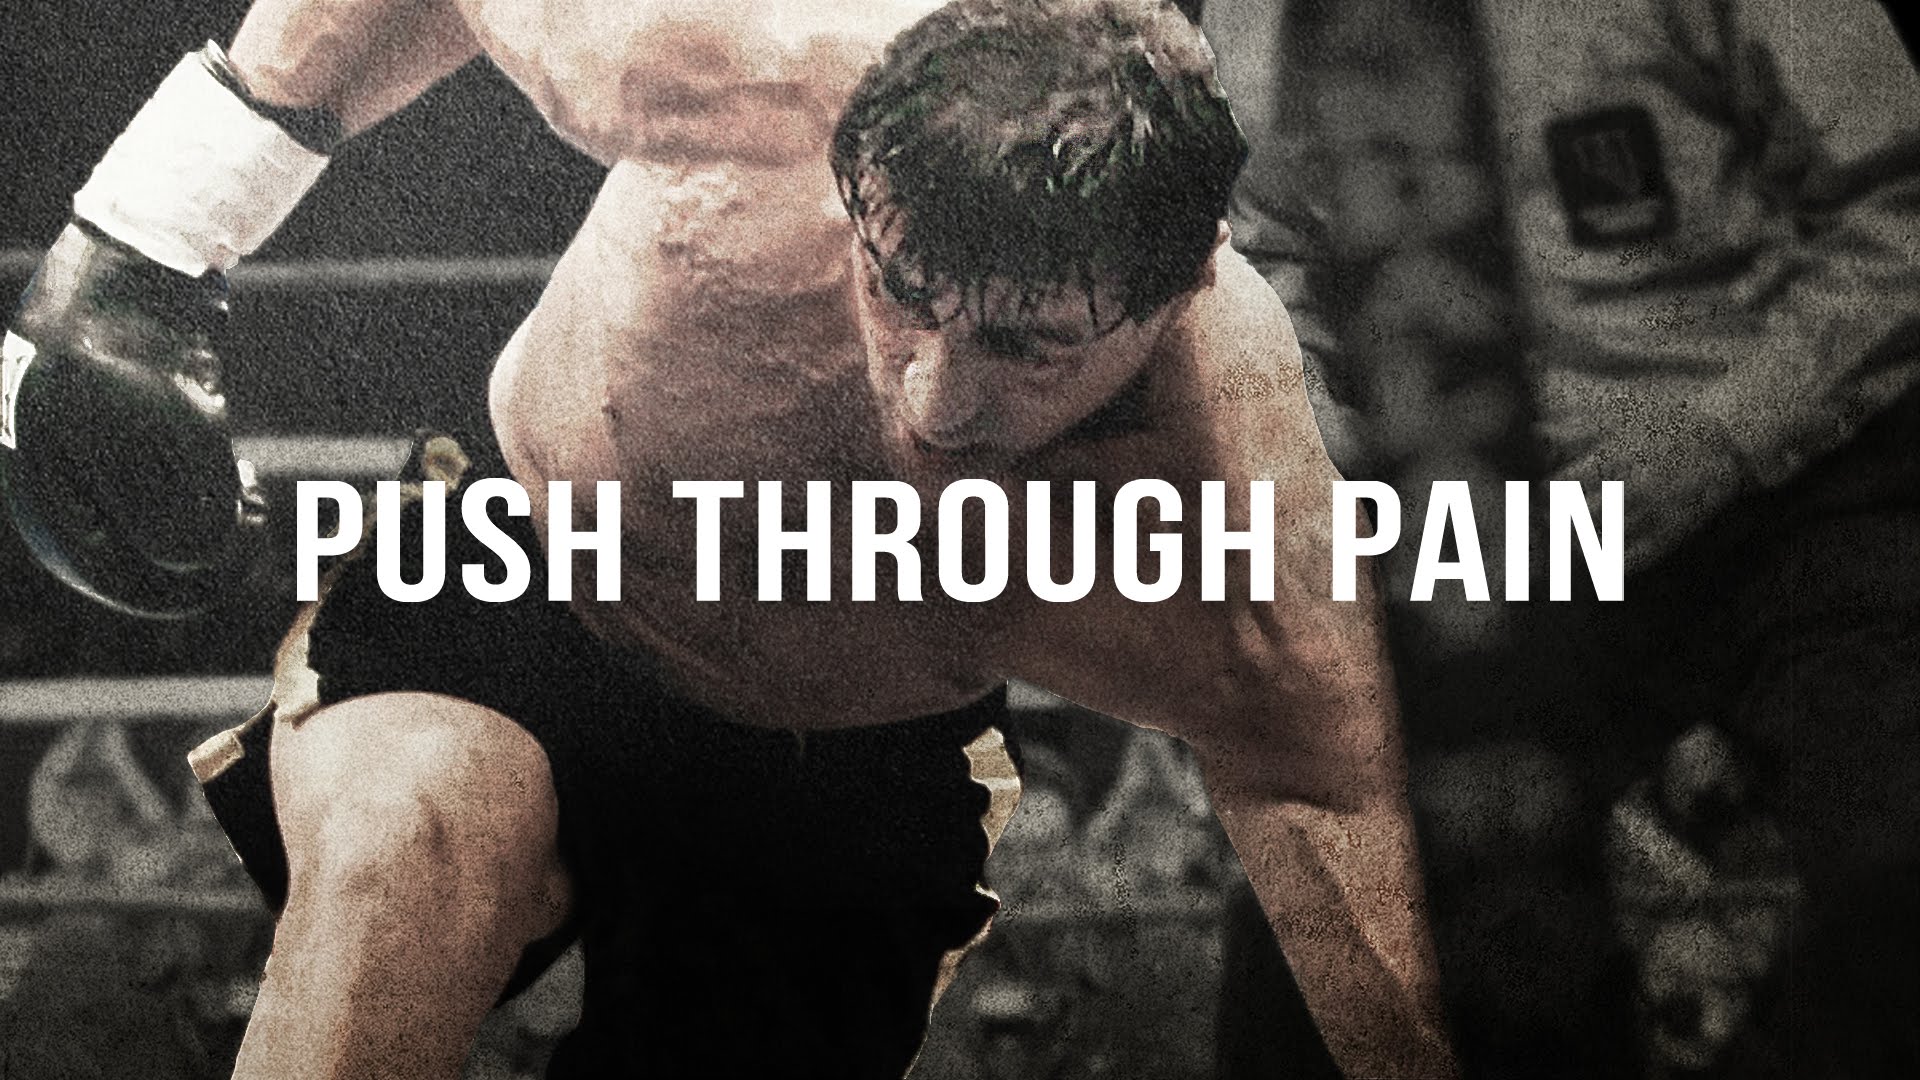
Adriiiiiiaaaannnnnn!!!!
Push through the pain – You will get to a point where the grade seems to be too much to run it. Don’t give up! Keep pushing little by little, using your throttle control to ease the pace, and before you know it you’ll find yourself at the break. People are always underestimating their limits, and you’ll surprise yourself by digging deep and not backing down to the challenge!
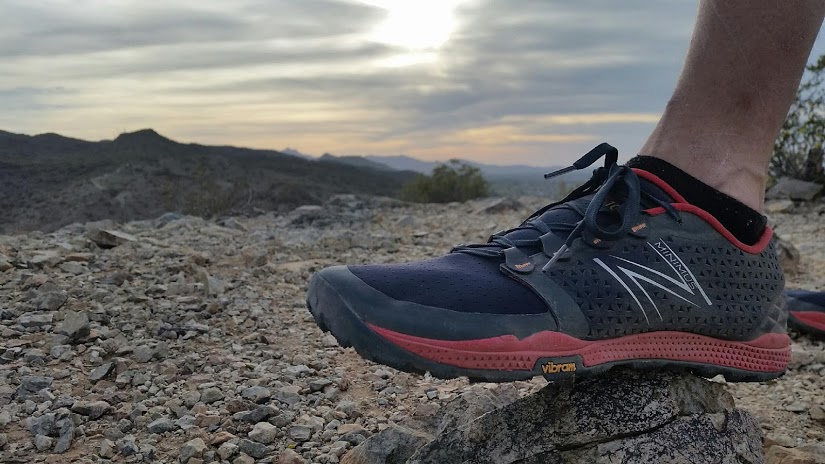
Secret 2: There is no special gear.
You don’t need magical $200 shoes, or a backpack made from space-age materials, or shorts bright enough to need sunglasses just to look at. Just throw on a hiking boot or regular ol’ running shoe, grab your raggedy backpack from high school, put on the shorts you just mowed the lawn in yesterday, and get out there and get after it. Sure there are the $200 shoes designed specifically for trail running, and they do help a little, but at the end of the day it’s not the shoe that makes a trail runner. It’s taking the first step off the couch and onto the trail that gets you there (granted you’ll probably new lighter gear down the line if you really love trail running).
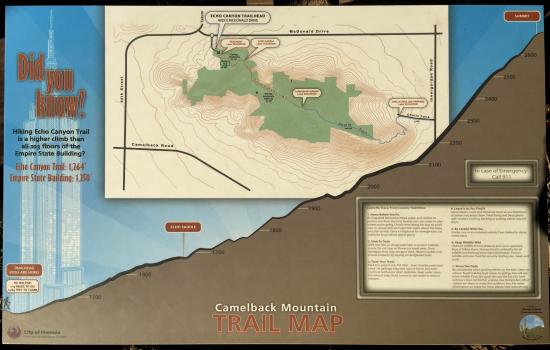
Camelback Mountain – Phoenix AZ elevation profile plot
Just recently, I trekked up Camelback Mountain (Phoenix AZ), a pretty steep grade at 1000 feet altitude per mile, and put these a few of these secrets to the test. About ¾ of the way up in 105 degree heat I just plain ran out of steam and had to switch back to hiking. Nonetheless, throttling back and pushing through a few of the steeper parts really made all the difference in how I felt about the run overall. I never thought I’d make it even that far up the mountain running the entire way. Get out there and keep pushing the limits, you may surprise yourself!
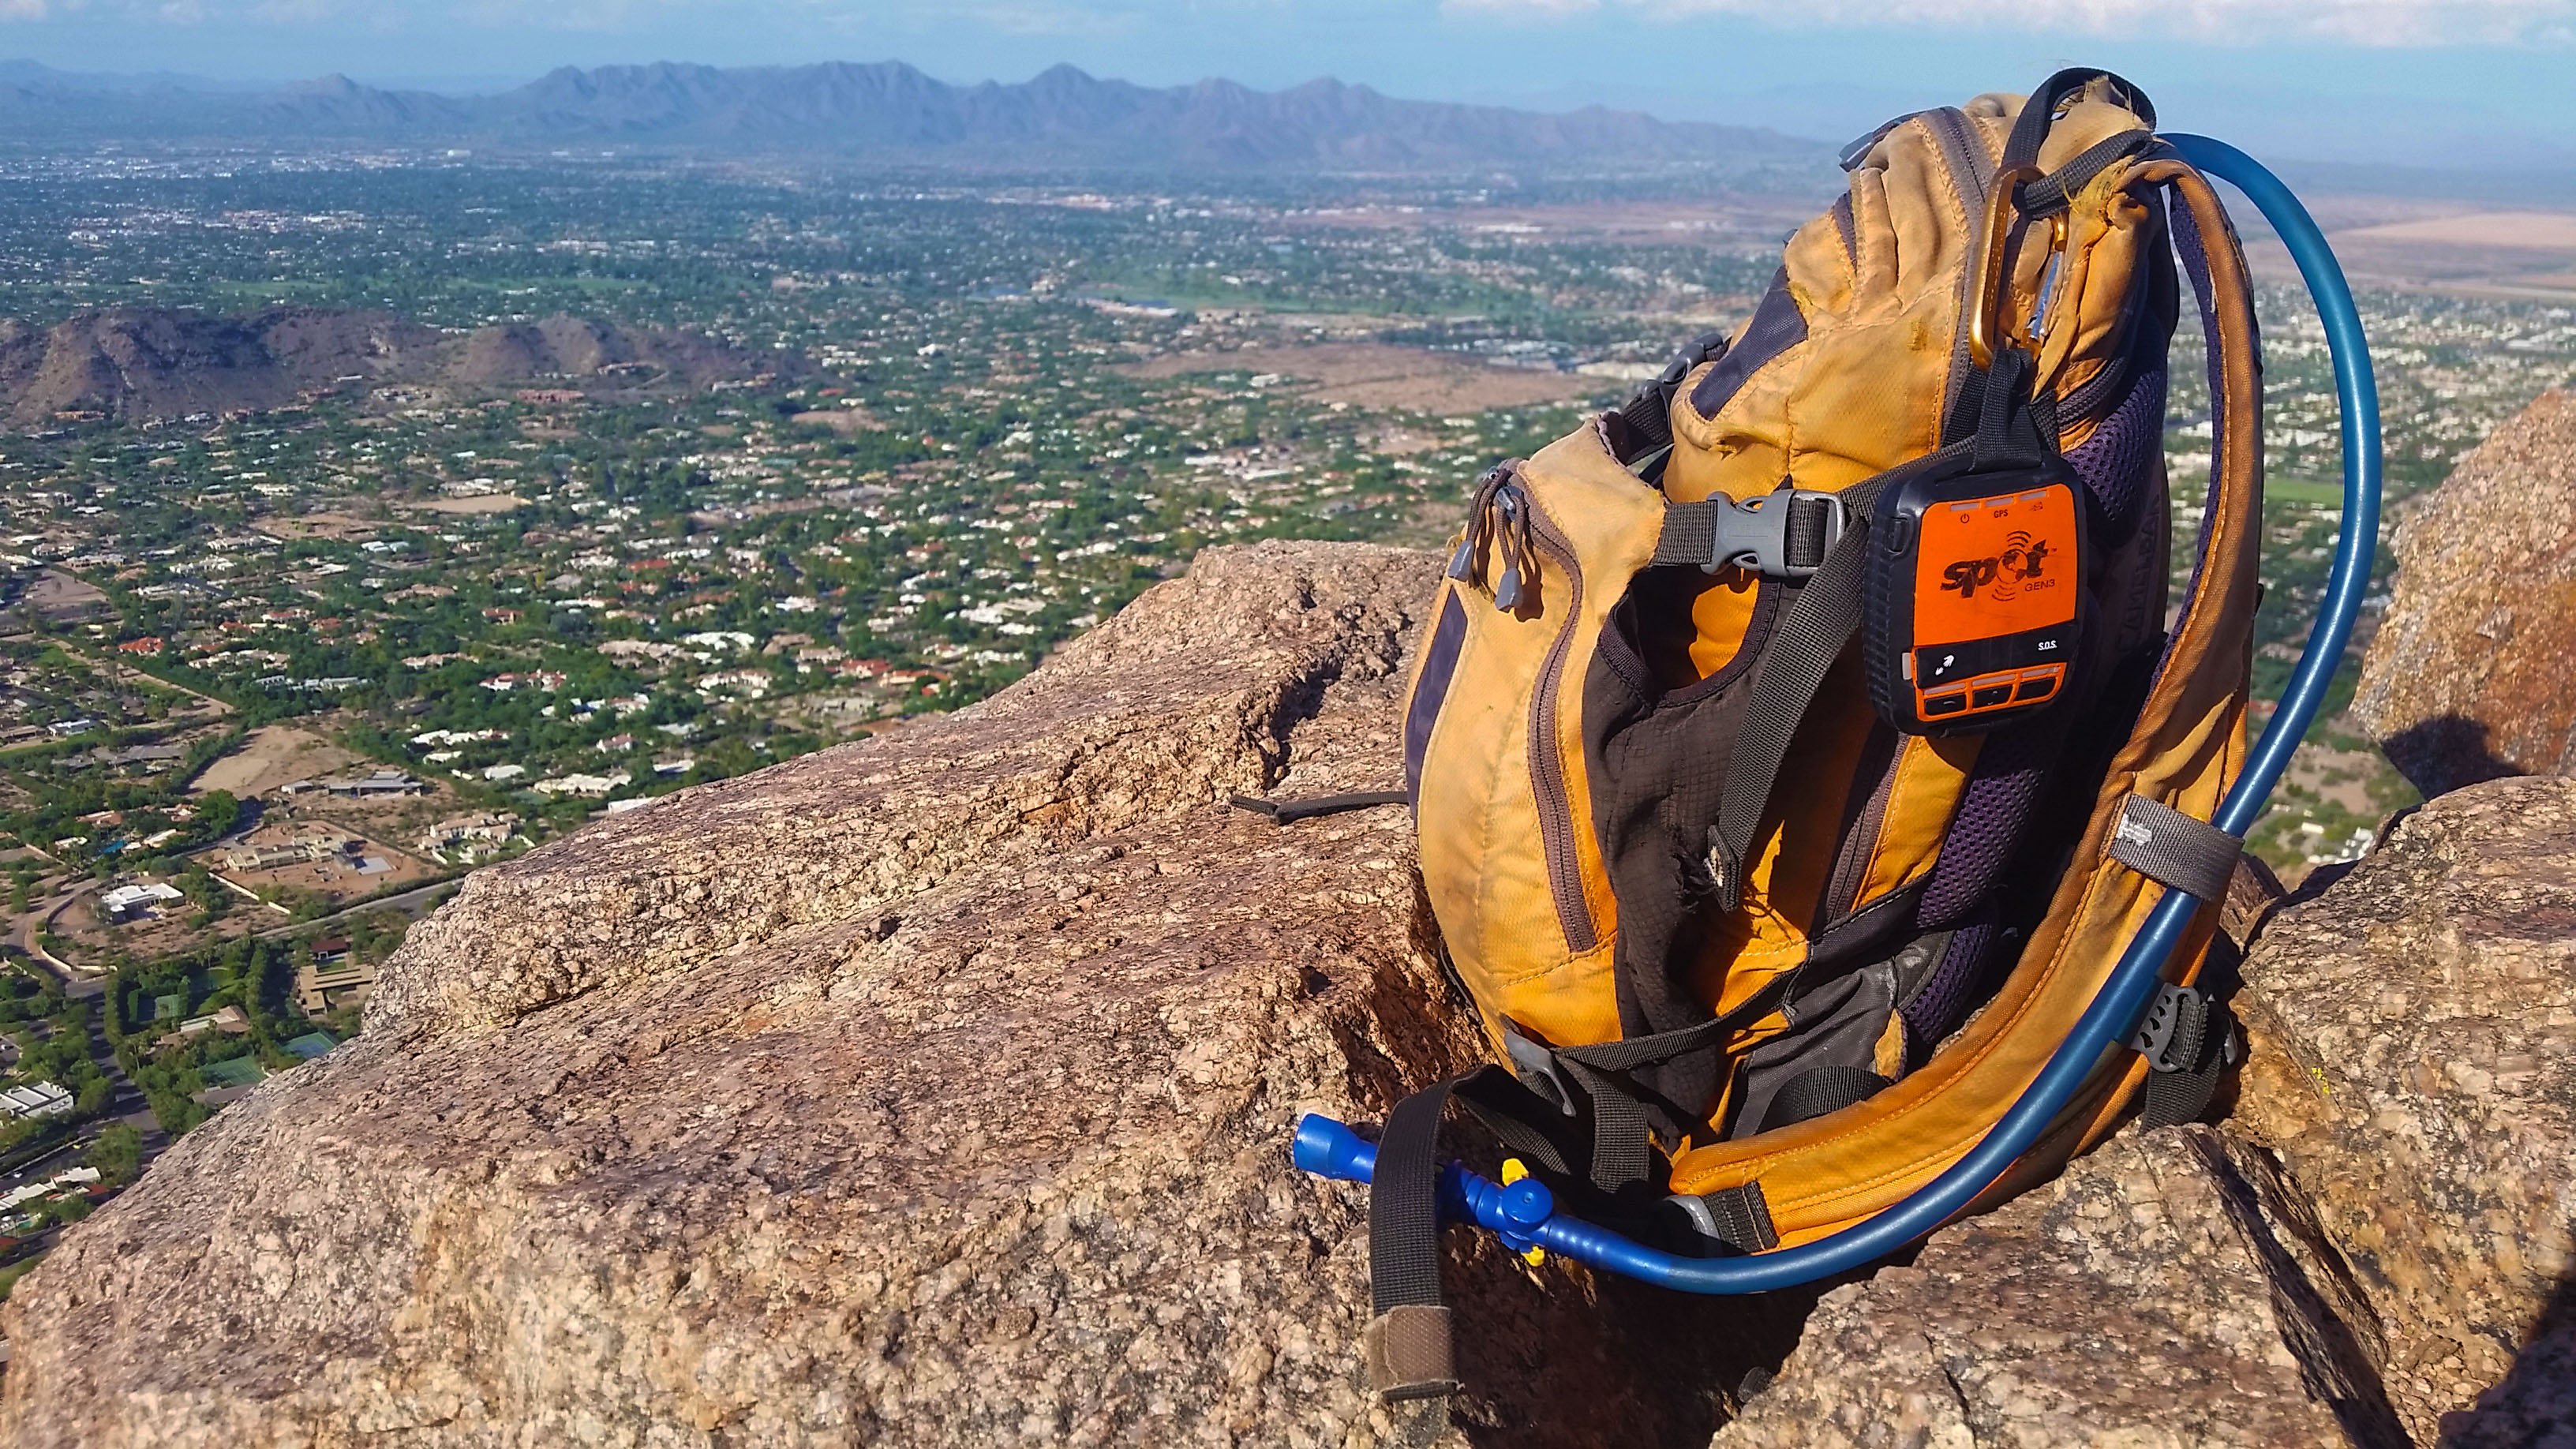
I don’t talk about safety a whole lot in my posts, but I do mention that many times I am out on these treks solo. The saying goes “You should never hike alone”. For the most part I totally agree with this philosophy, you should always hike with a partner! In my case, however, it is sometimes hard to find someone willing to go on the types of treks I am interested in (interest, physical capability, suffer capacity, schedule conflicts, you name it). I choose to go against convention and hike alone at times because I have found that if I were to wait on someone else, I’d be at home on the couch, wondering what views, experiences, and adventure I was missing out there on the trail.
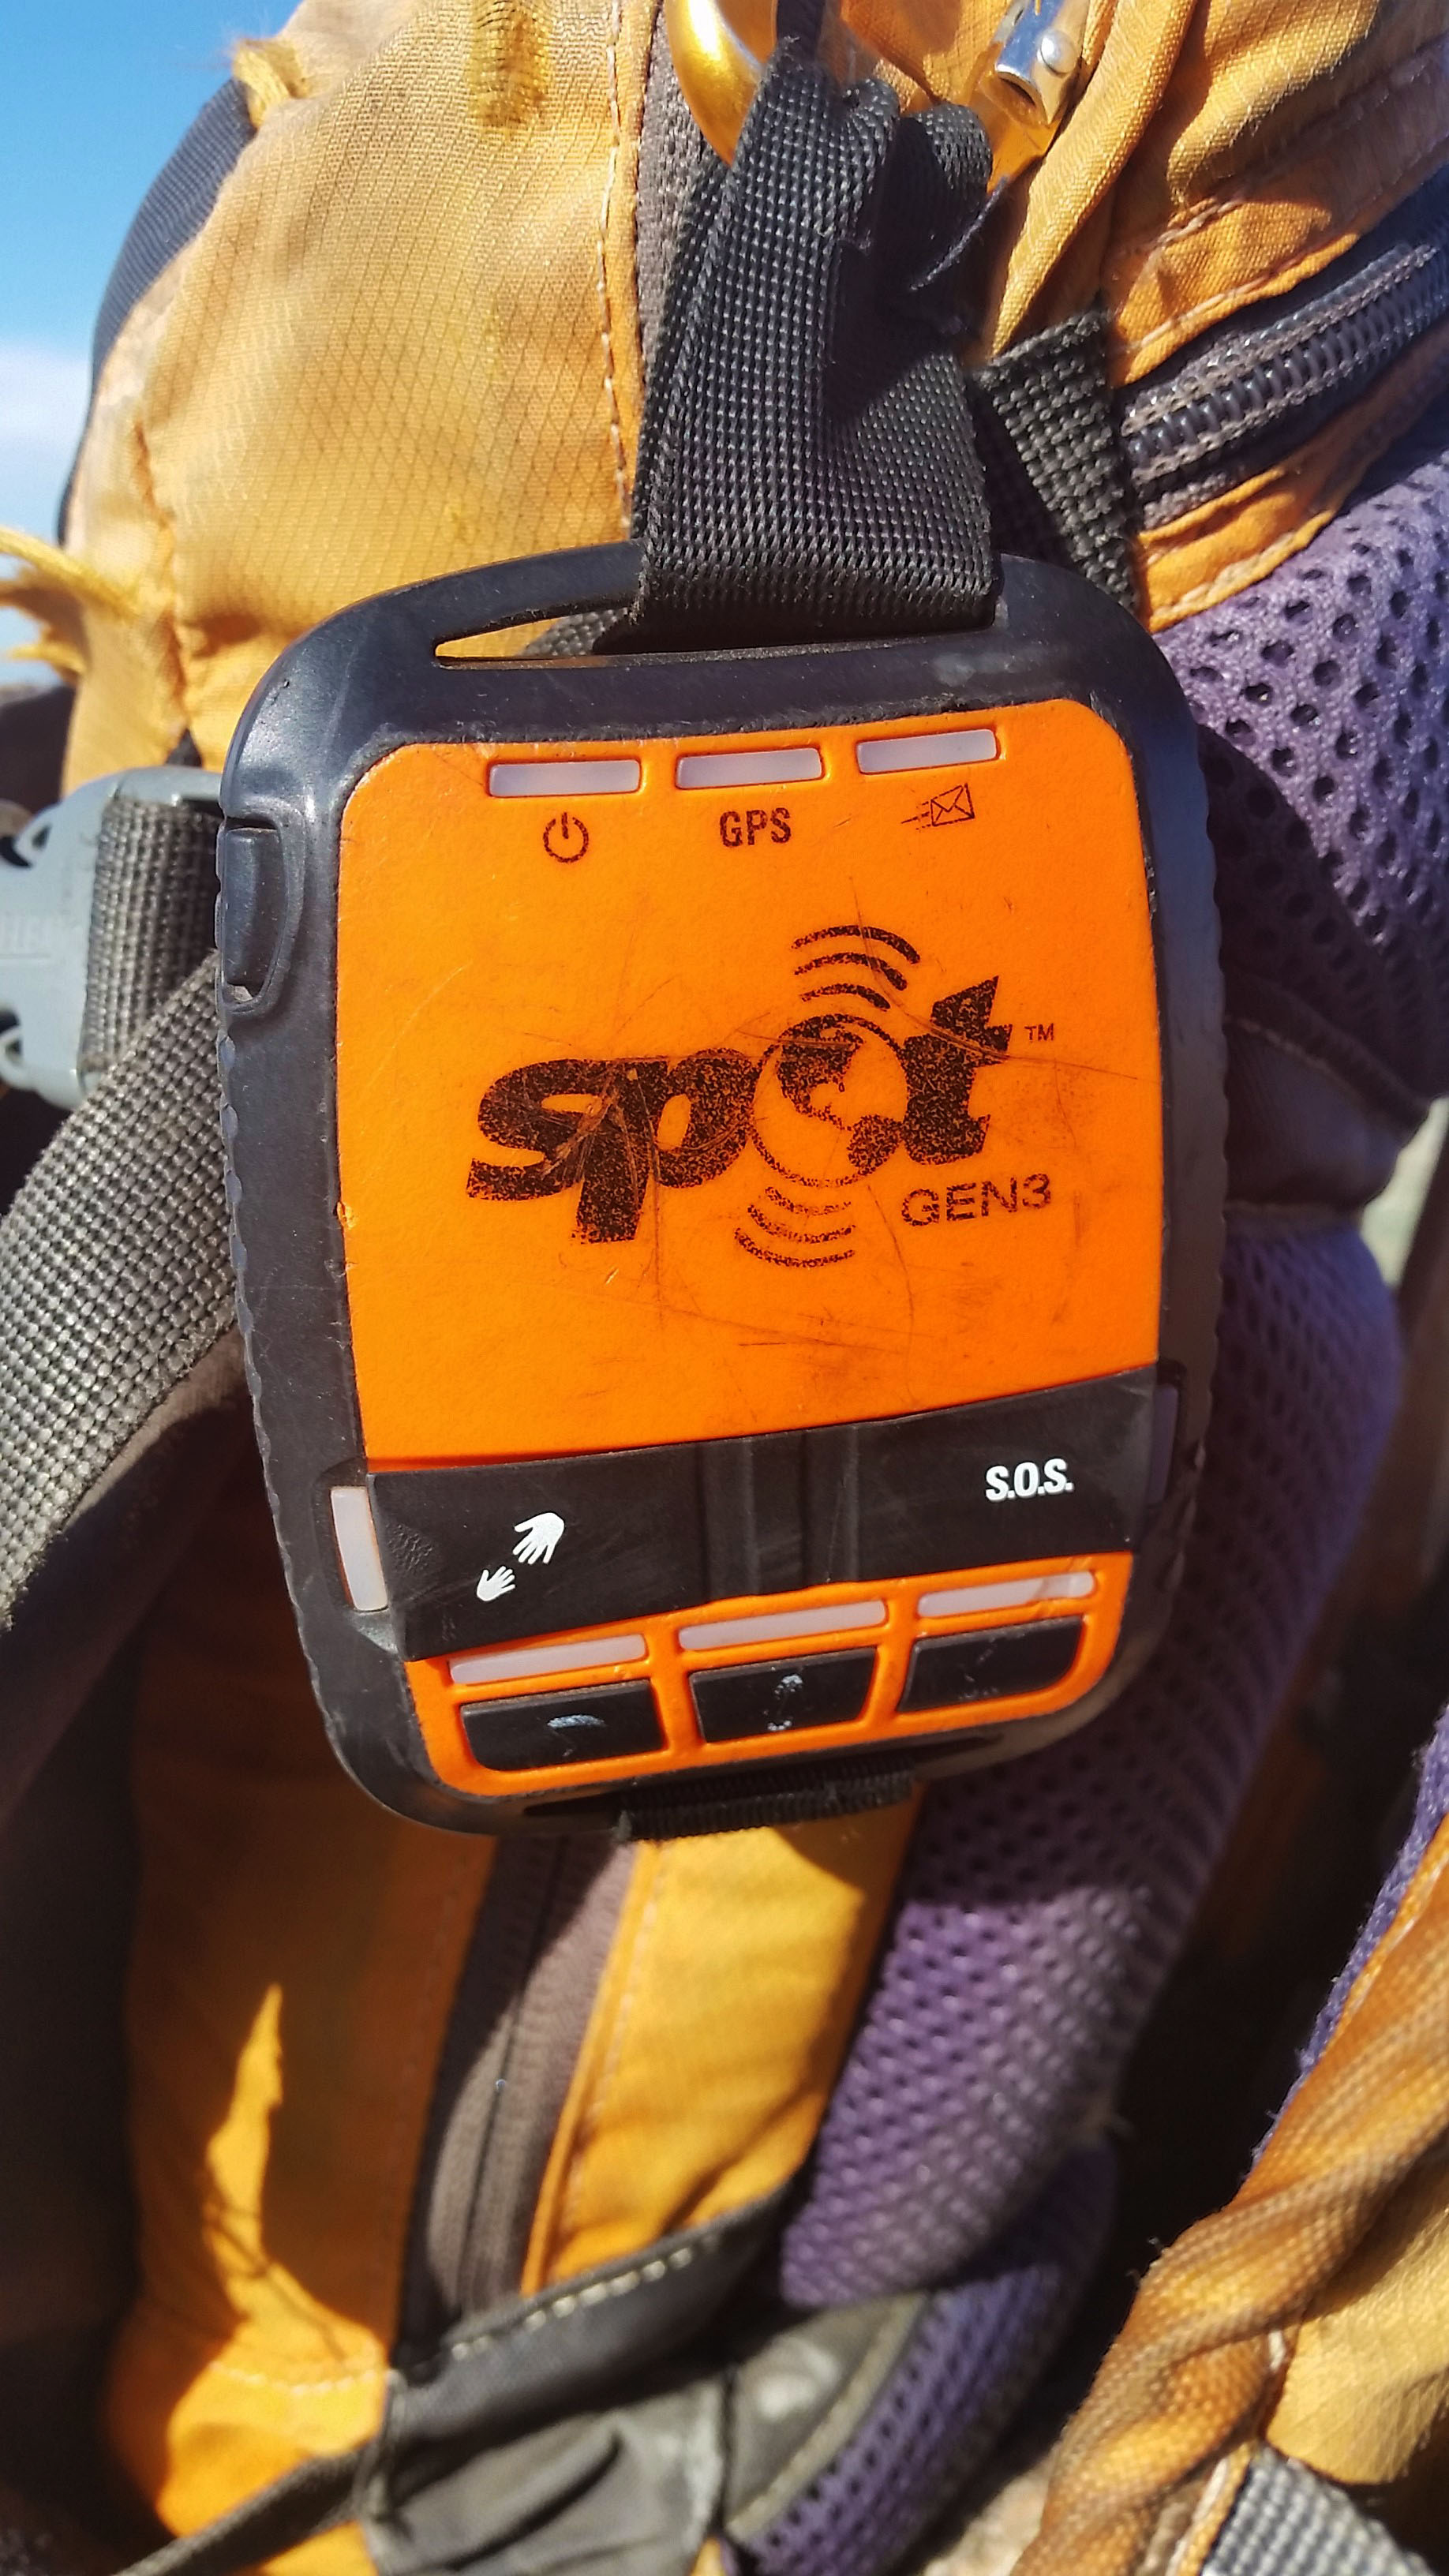
Little worn, but still works awesome!
In those rare occasions that you do find yourself heading out there alone, the next best thing to having a hiking partner is the SPOT tracker. There are many great features to the tracker (I have the Gen3), such as having your family and friends at home track your progress via GPS. You can also send simple pre-setup messages, and the tracker will provide confirmation that the messages have in fact sent.
The most significant feature is of course the safety part with the “Help” and “S.O.S.” buttons. “Help” sends a message to a select few people that you determine that pretty much says “Come get me outta here, I’m not dying, but I’m stuck/ran out of gas/food/etc!” The “S.O.S” button sends a message to the cavalry to come get you by any means necessary, and they (GEOS) will pick you up anywhere in the world. Of course it will be a little hard to pick you up if you wind up stranded in say, North Korea, but they work with local rescue and even go as far as contacting the embassy and consulate of the registered owners’ nation of citizenship in efforts to get assistance out to the location. At any rate, nomatter where you are hiking, hike smart! A little piece of mind can go a long way to push your treks further and harder to see new things you never could before!
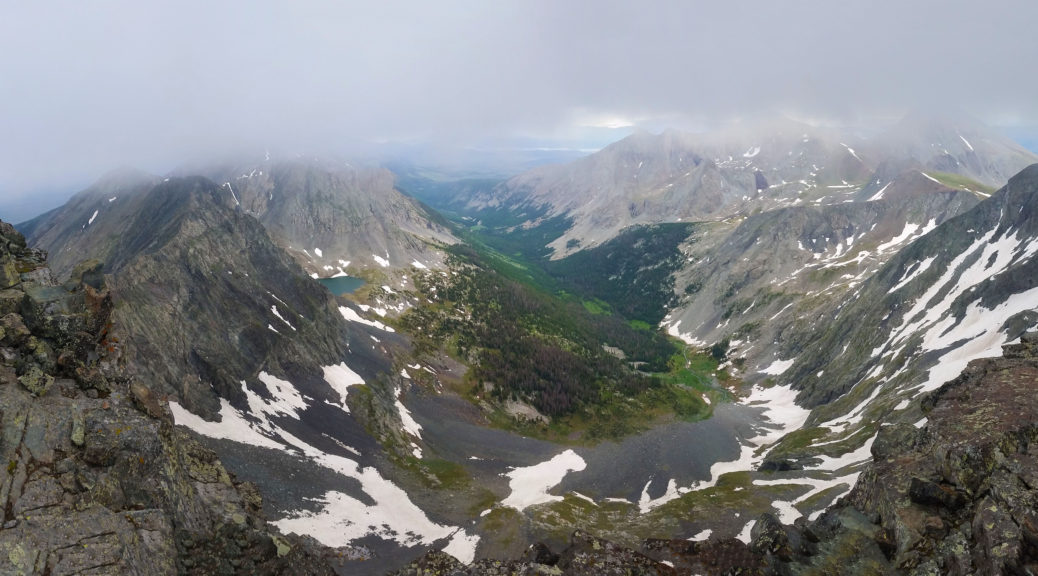
View From camp at 12,200 feet the afternoon before the climb
My stomach flip flopped as we pulled up to the Blanca Peak trailhead. I am not the biggest fan of sitting in the backseat of vehicles, and something about not being the pilot just throws me into nauseous spins. As the truck came to a stop, I threw open the door and practically fell out of the truck. Feet were finally back on the ground! My buddy Stevo, his gal Annalise, and I decided to go to CO for a week and explore the outdoors. Stevo was from Durango and wanted to go back to his mother land, see some family, and show Annalise around his old stomping grounds. Of course I was there to hunt down a few 14ers. We were about 5 days into the trip and sitting in the truck for longer than a few hours had me begging for a bag on my back and some good trail time. I planned on backpacking up towards Lake Como and sleeping for the night, then waking the next morning and attempting to take on Little Bear Peak ( ft.), Blanca Peak (14,345 ft.), and Ellingwood Point (14,042 ft.). I would then return the same way I came and grab a ride back to camp with Stevo’s family at The Great Sand Dunes National Park.
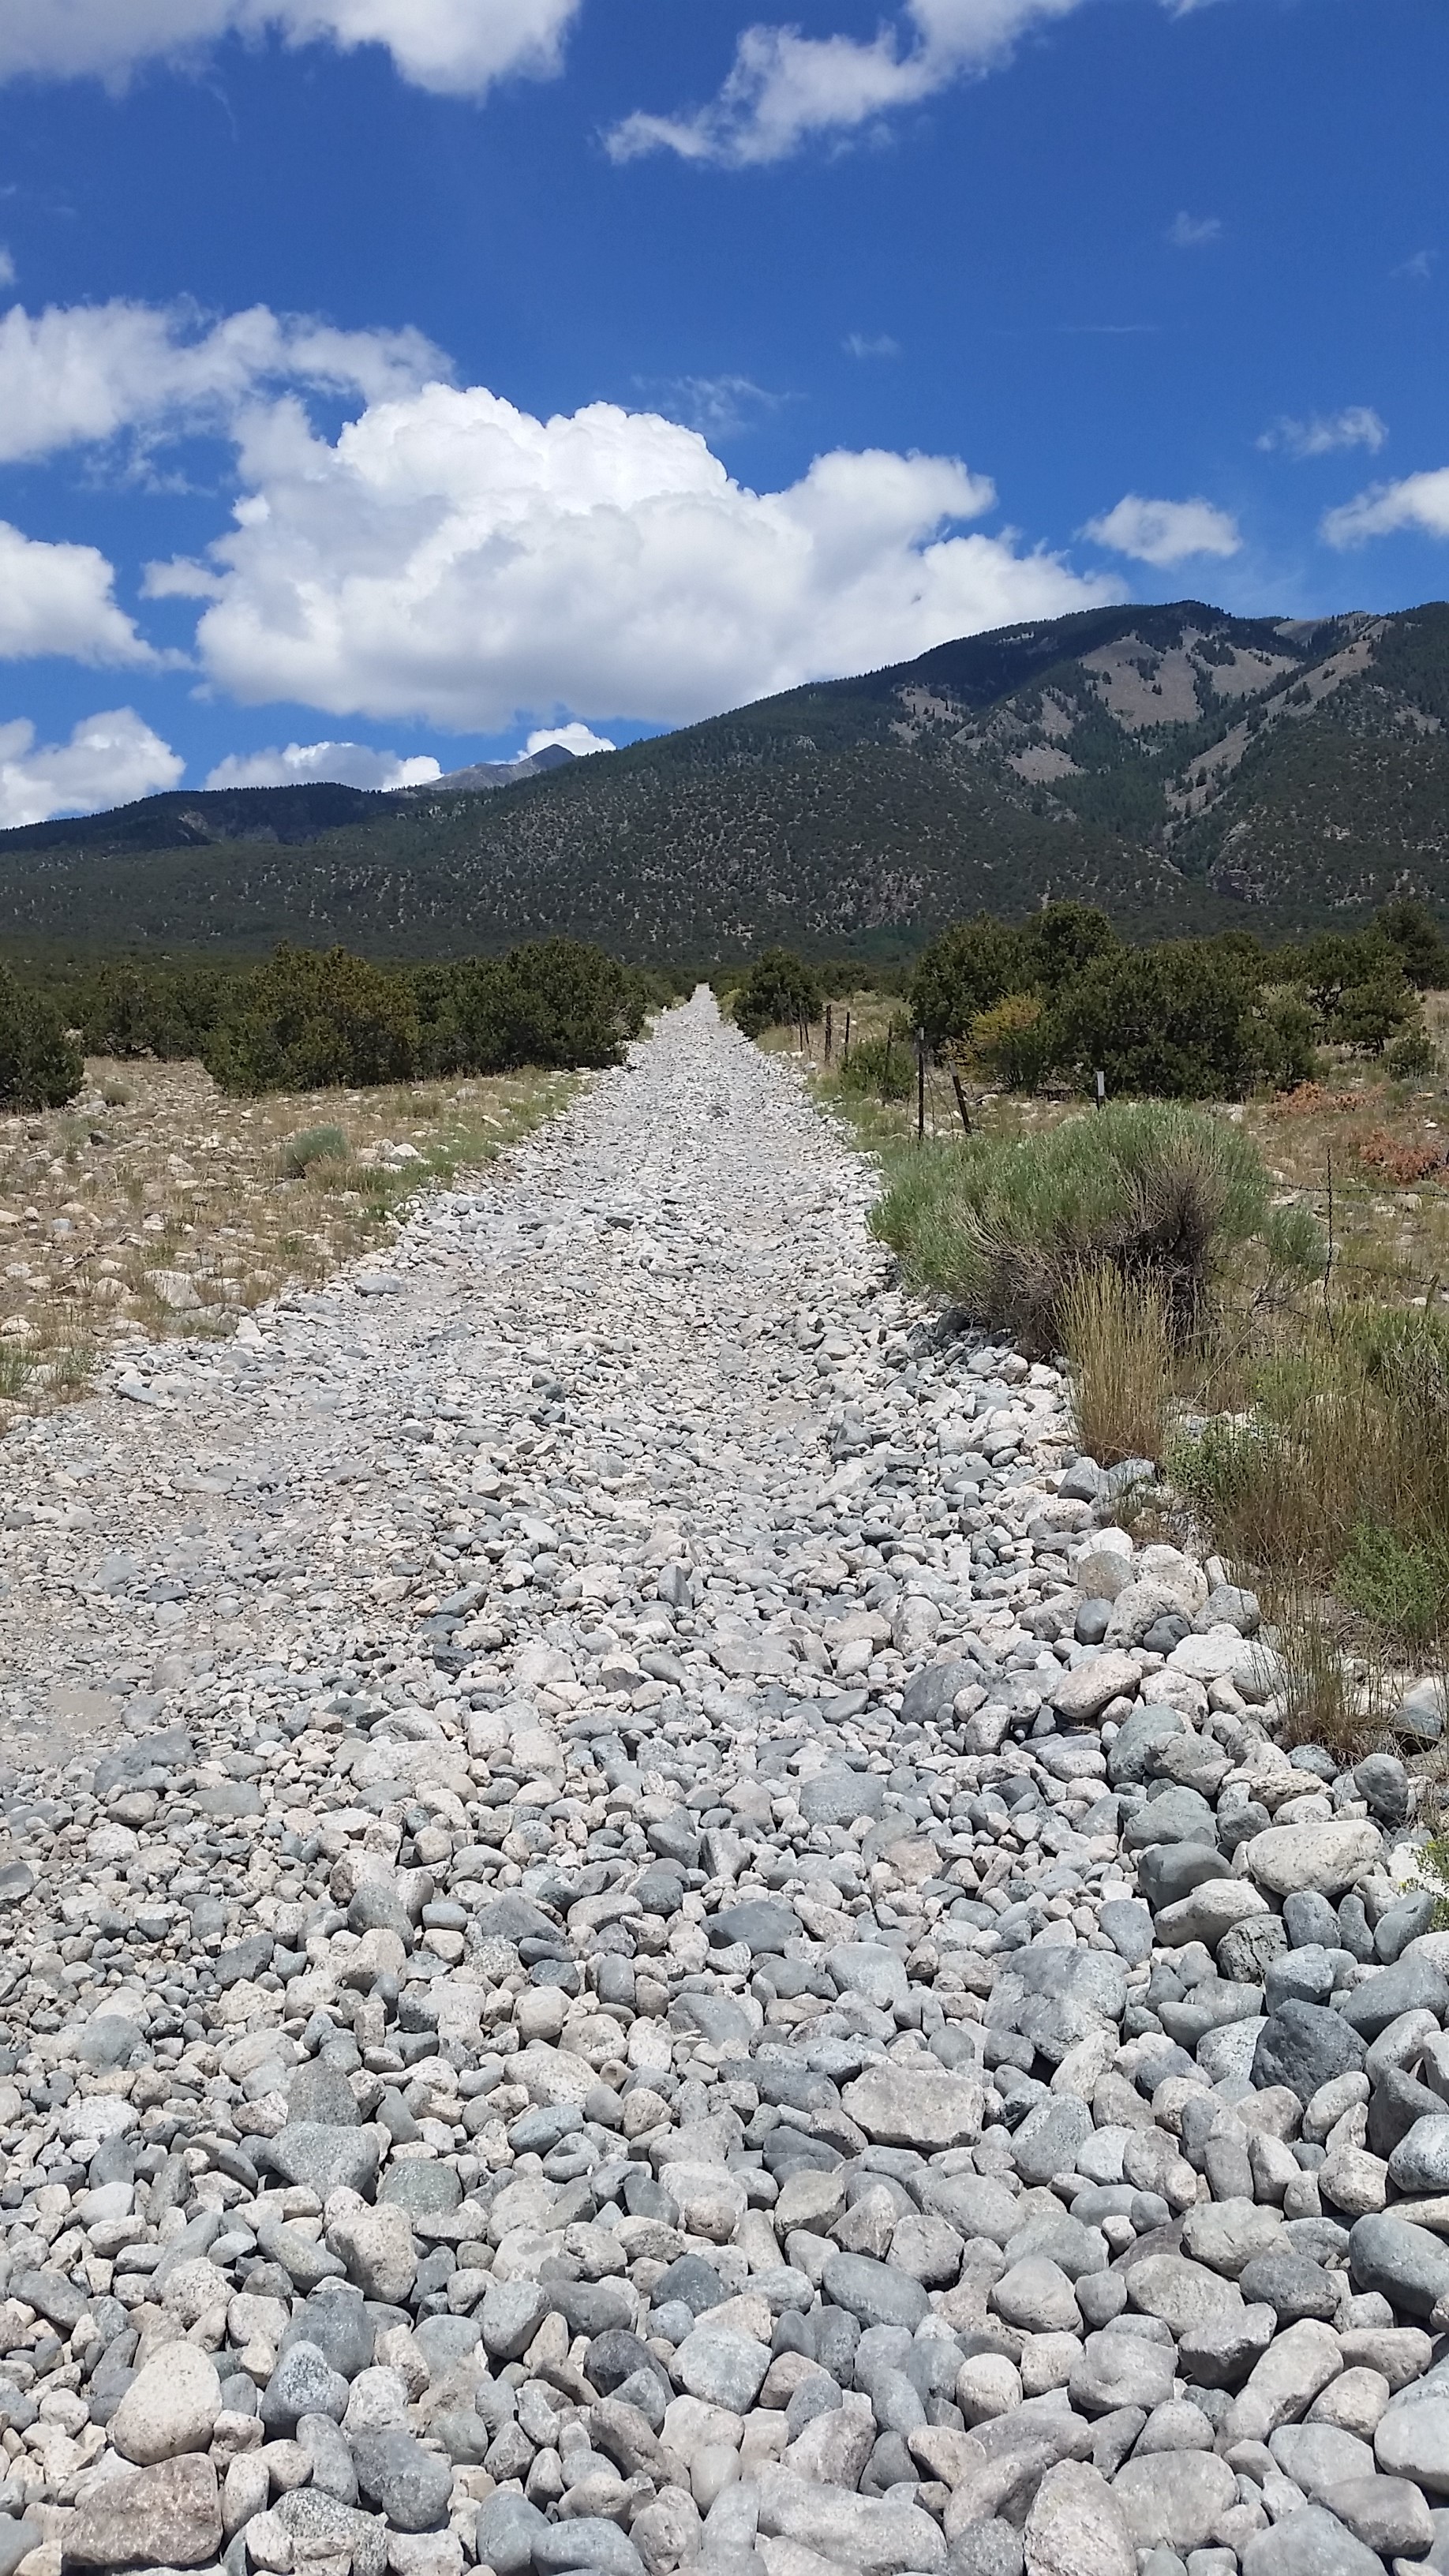
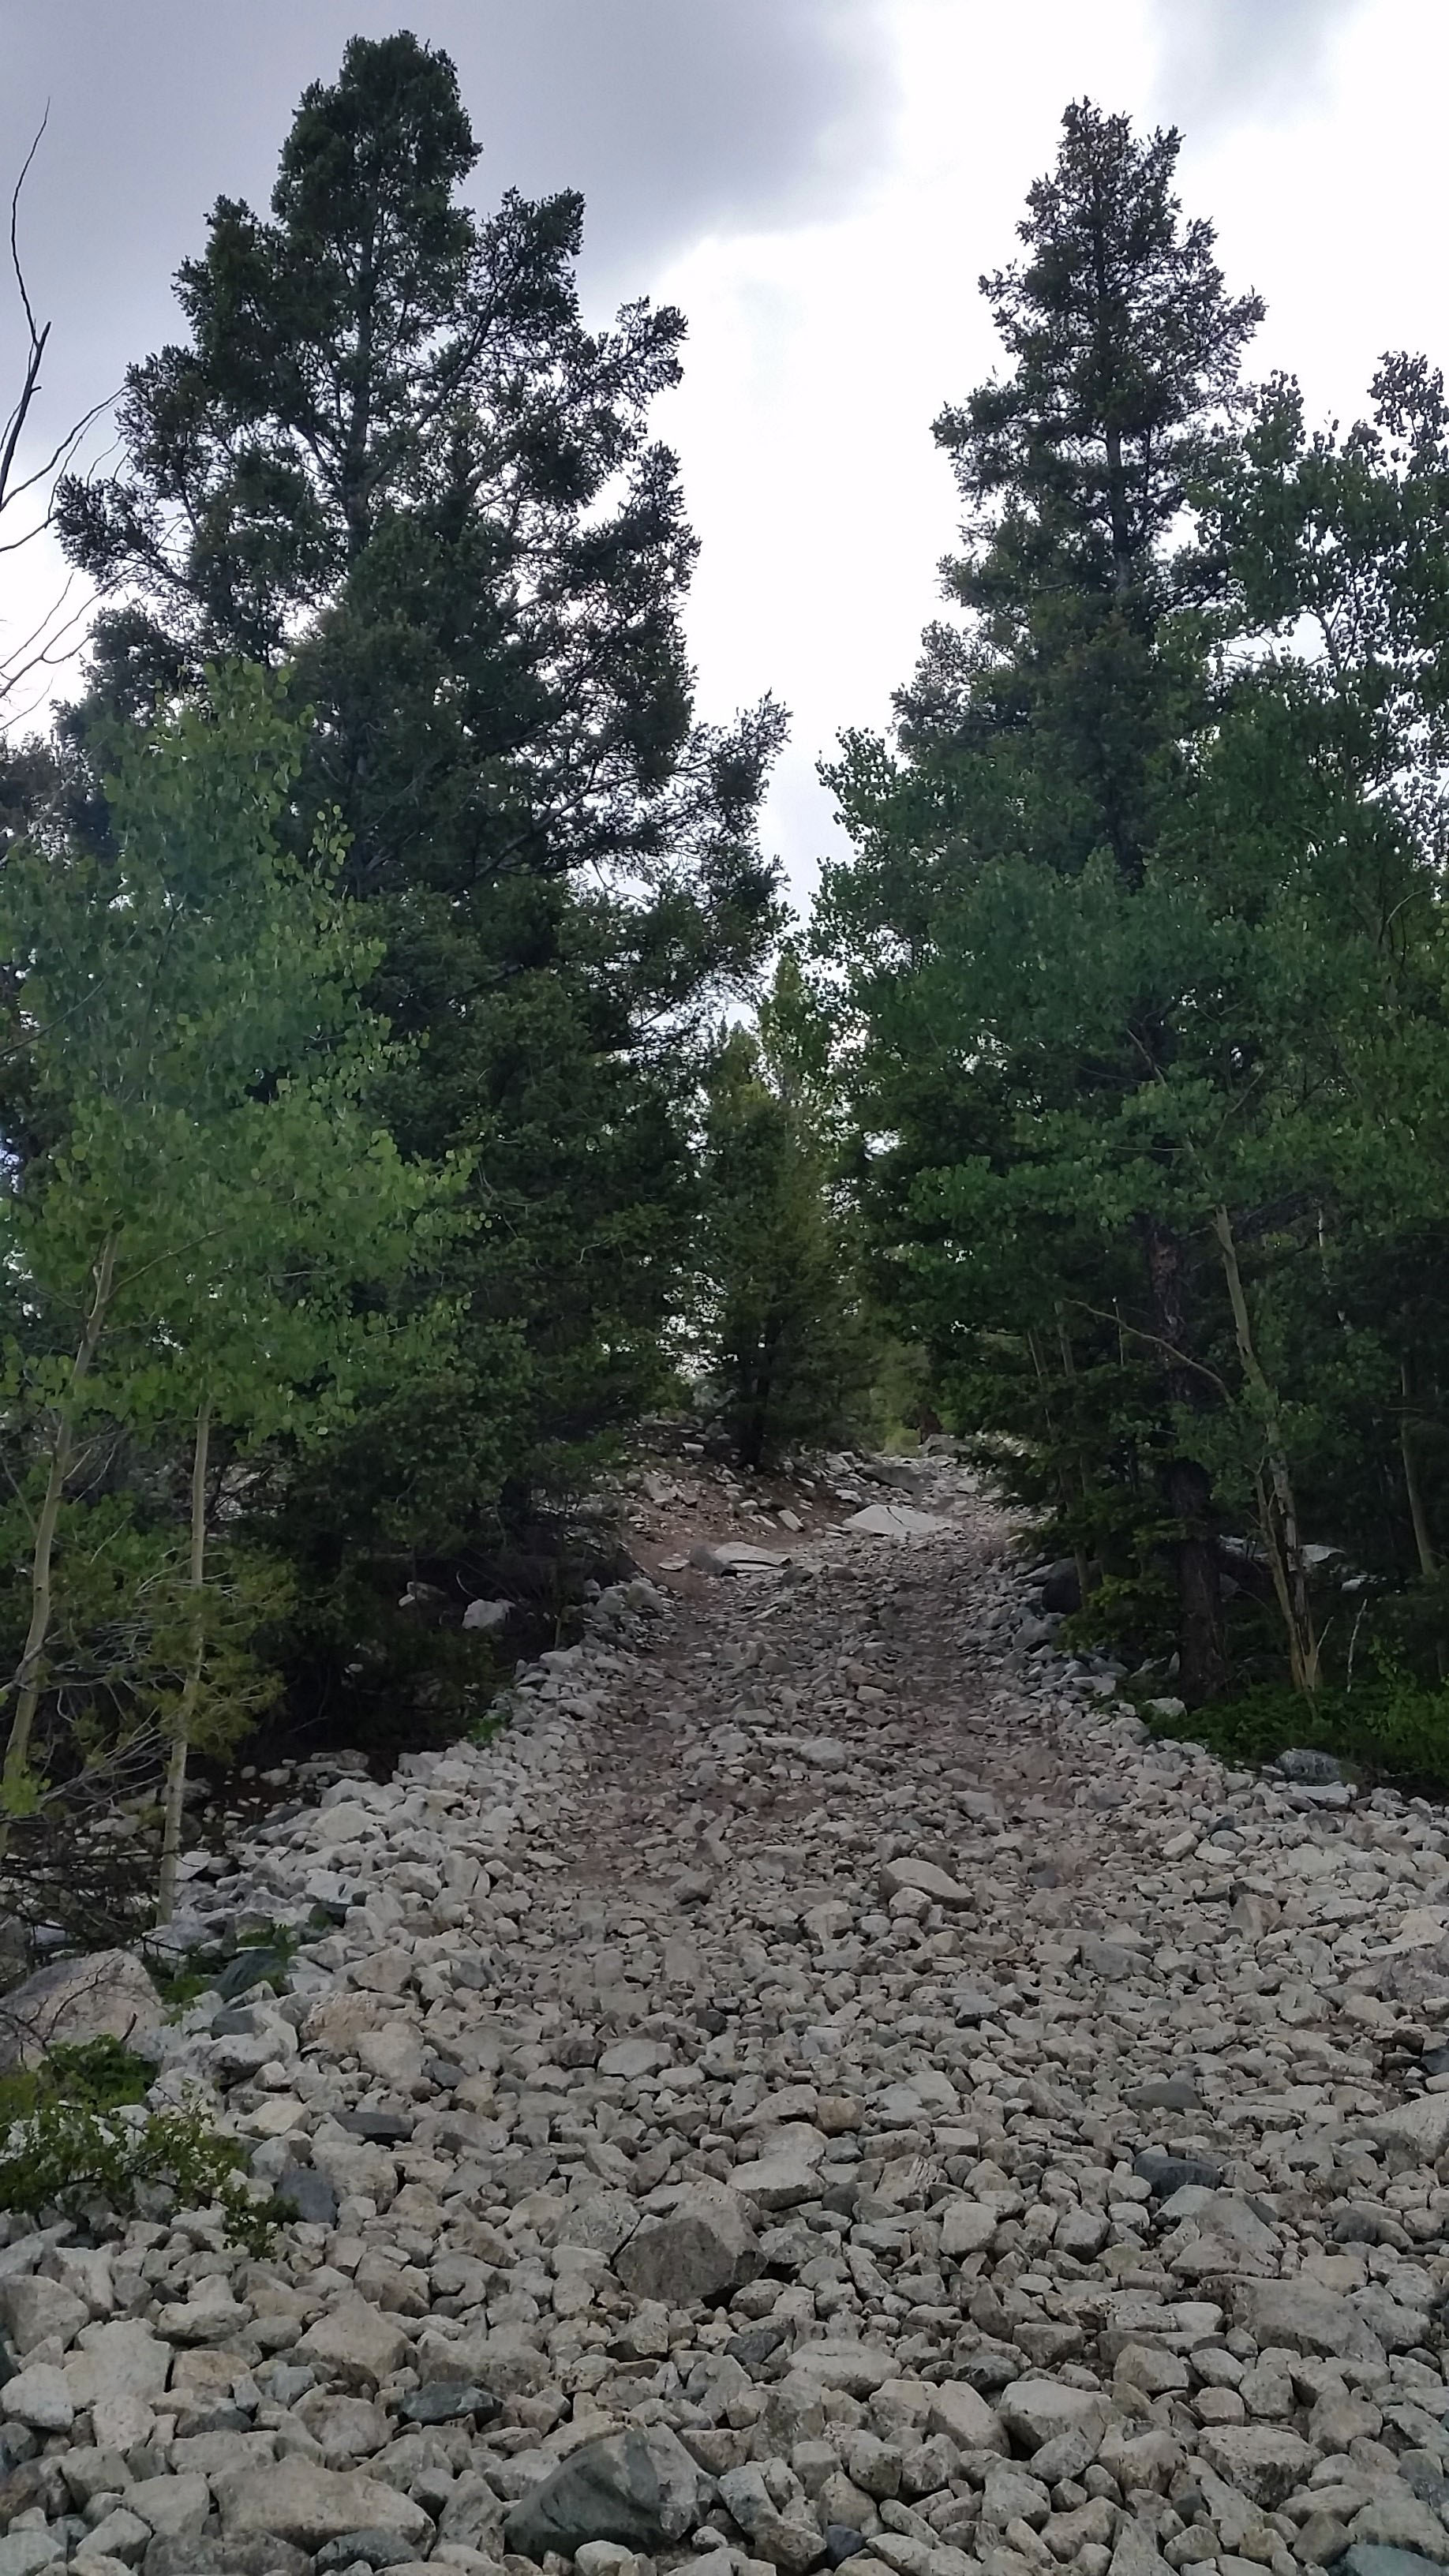
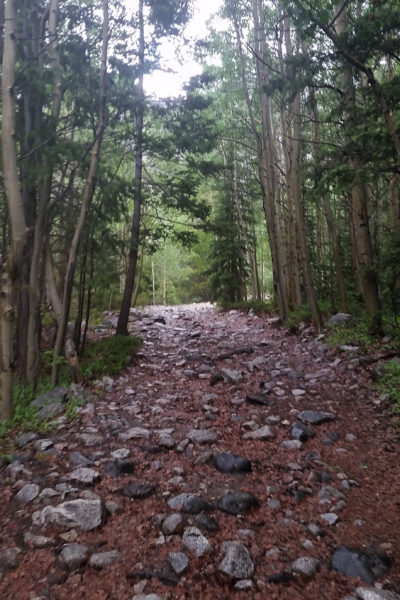
The start of the climb, the road gets pretty chunky from here
I wasn’t much in a talkative mood as I slowly gathered my things, my stomach still performing acrobatic feats. It was pretty warm at 2pm, but even in the heat I pulled on my long sleeve smartwool shirt and long pants (rolled up of course) because I knew the temps up at 12,000 feet where I would be camping and hiking would prove to be much cooler. Pack strapped, glasses on, and trekking poles in hand I waved goodbye to Stevo and Annalise and headed up the boulder covered dirt road that lead to Lake Como. Chunky and hot describes well the climb to the tune of 3,900 feet gain in 5.5 miles with a 30 pound backpack on. There was no one else around as I climbed through the high desert surroundings. The road snaked back and forth across the face of the mountain, every once in a while giving glimpse to the peaks above.
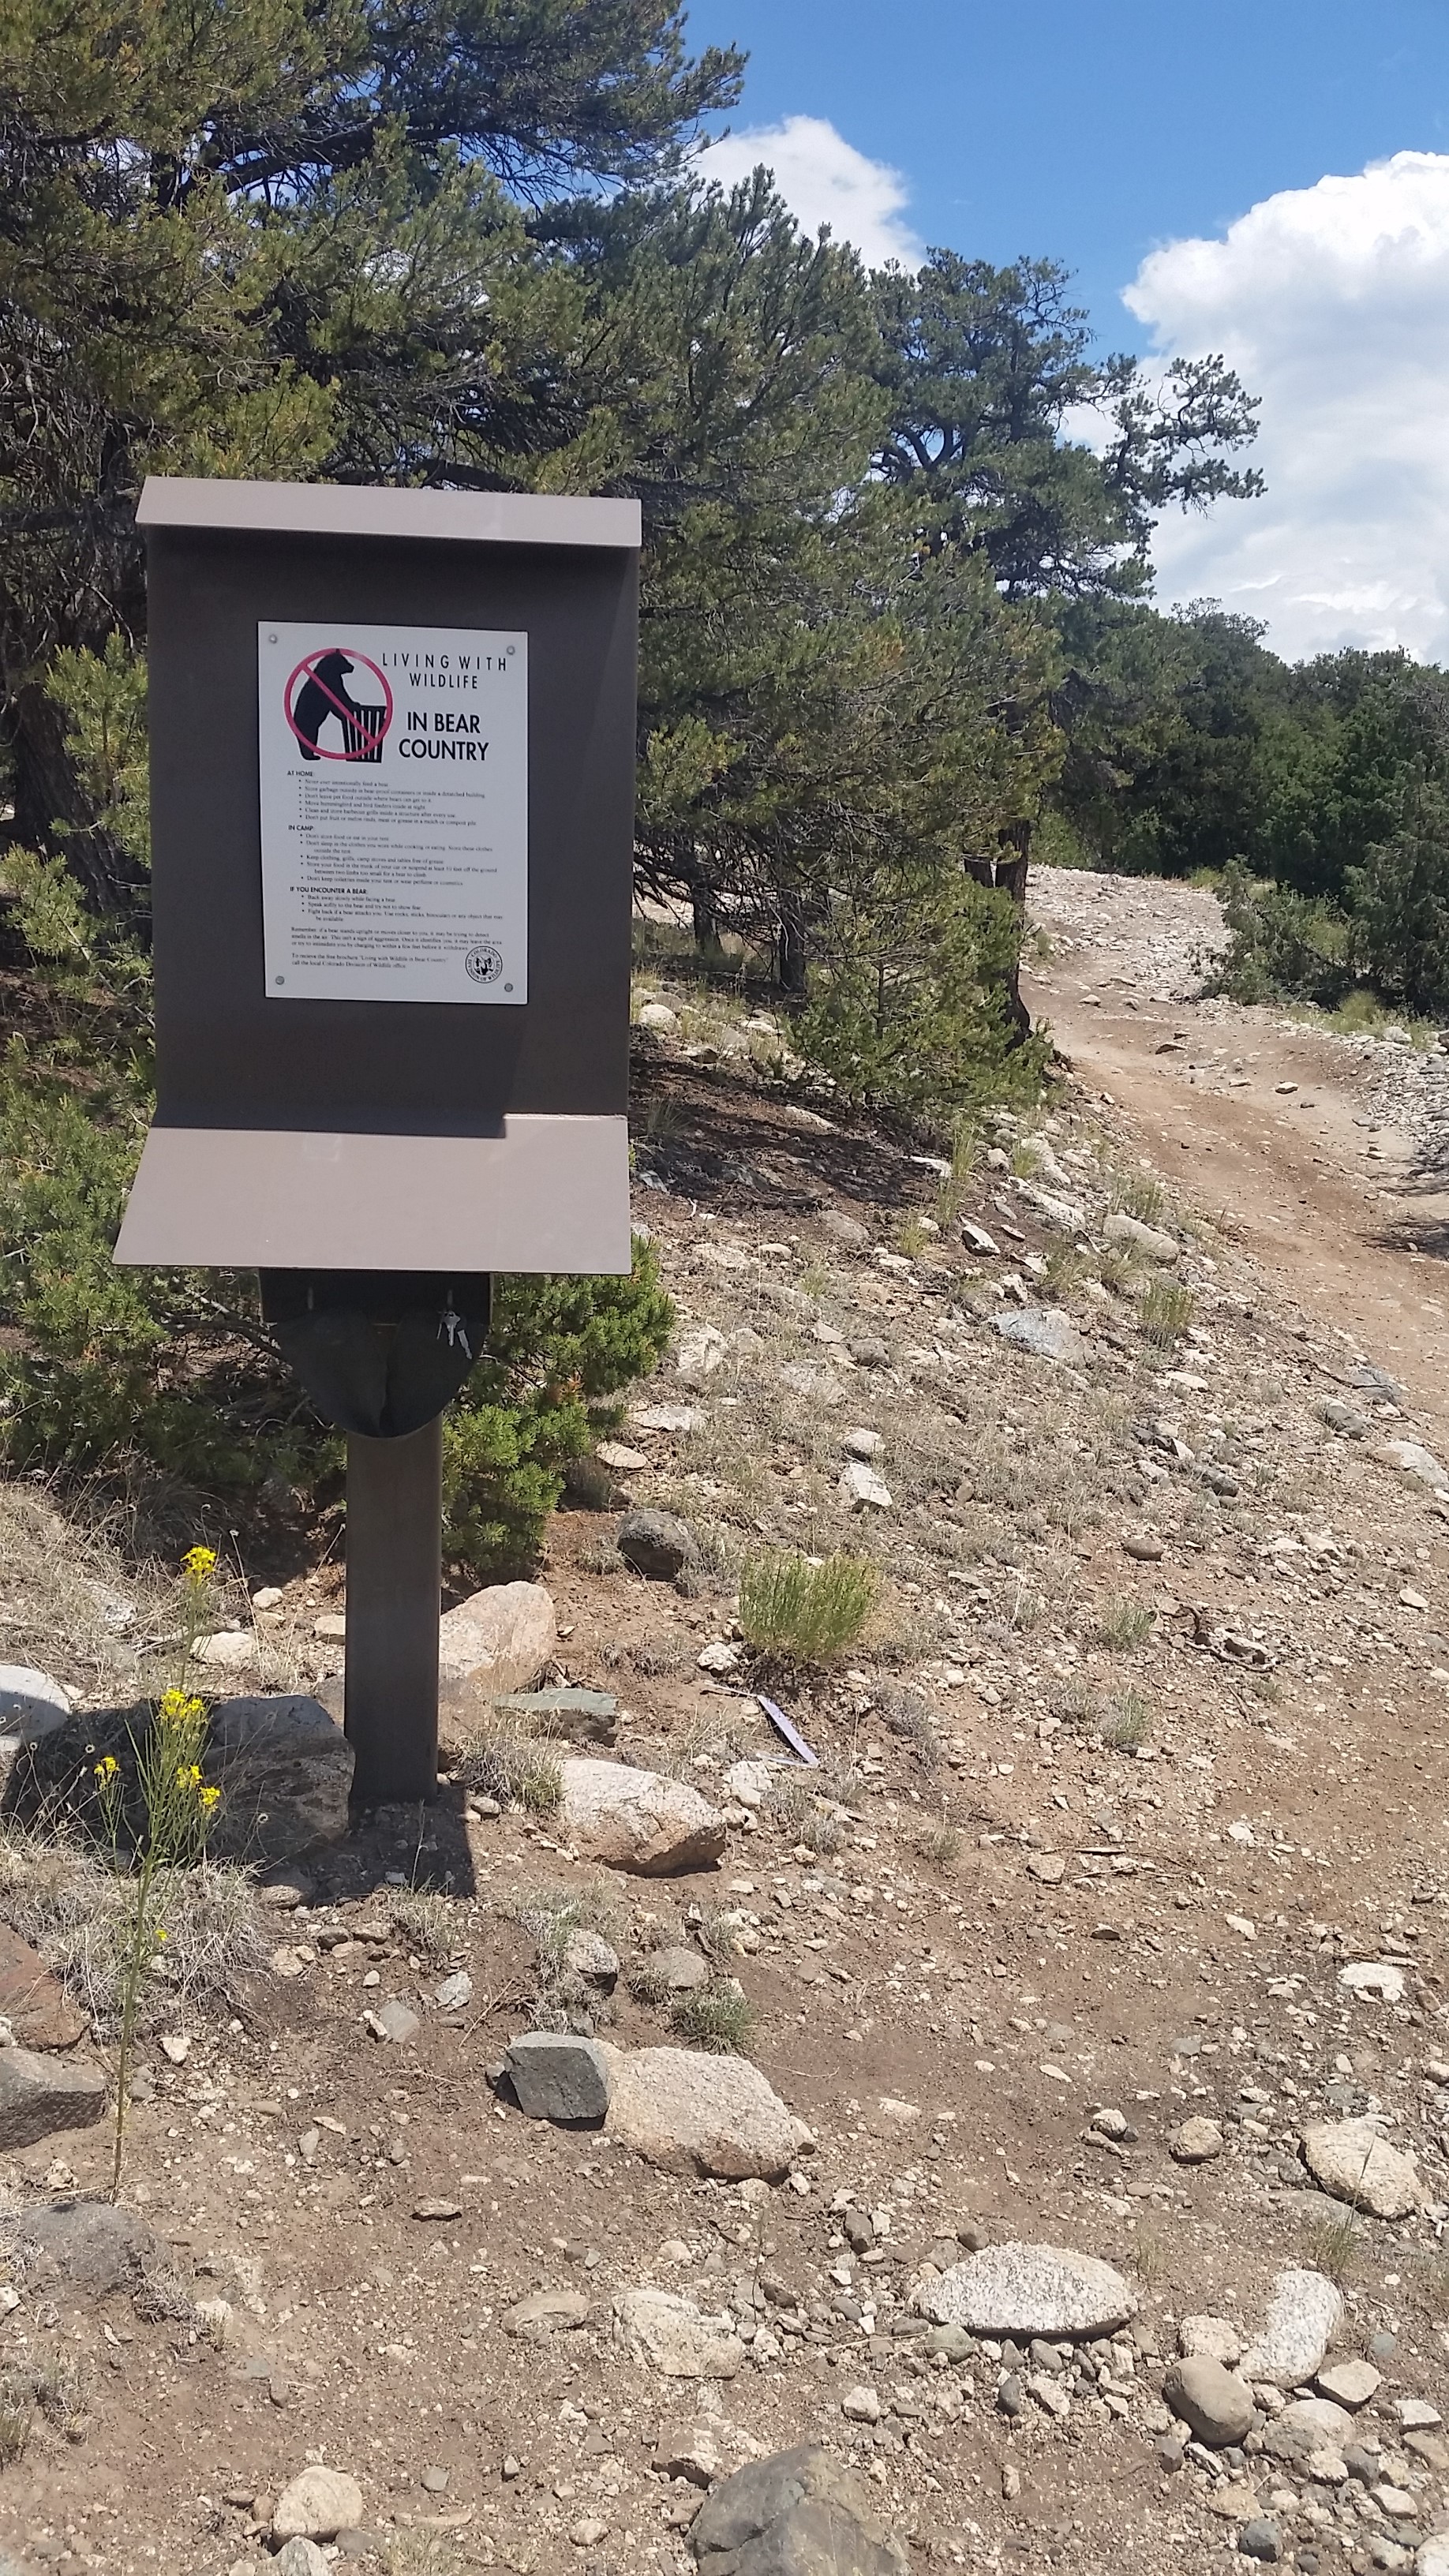
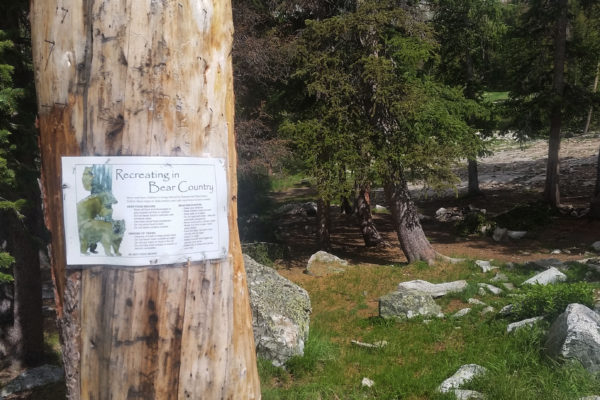
We Cant Stop Here . . . Its Bear Country!
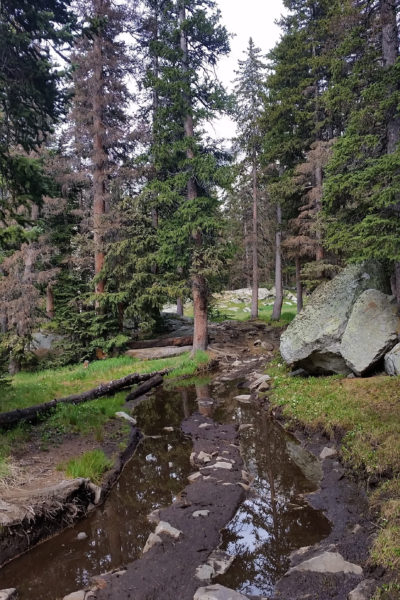
Finally I pushed up into canopy cover which was a relief from the sun beaming on my head. There was an inviting creek crossing the road where I paused a moment to take in the sight. I dipped my hand into the cool creek and threw some in my mouth to wash around before spitting it out and pushing on. The last thing I needed was to get sick on the way up to altitude. I felt something wet hit my shoulder. I glanced up into the sky and watched a cloud rolling in full force, just starting to dump a bit of rain on my head. I quickly pulled my raincoat and pack cover out. Thunderstorms in CO afternoons at altitude have never been my favorite (lightning at alt = no bueno). As quickly as the rain came, it moved on, much to my enjoyment.
Clouds forming as I climbedFinally pushing into the trees before it started to rain on me
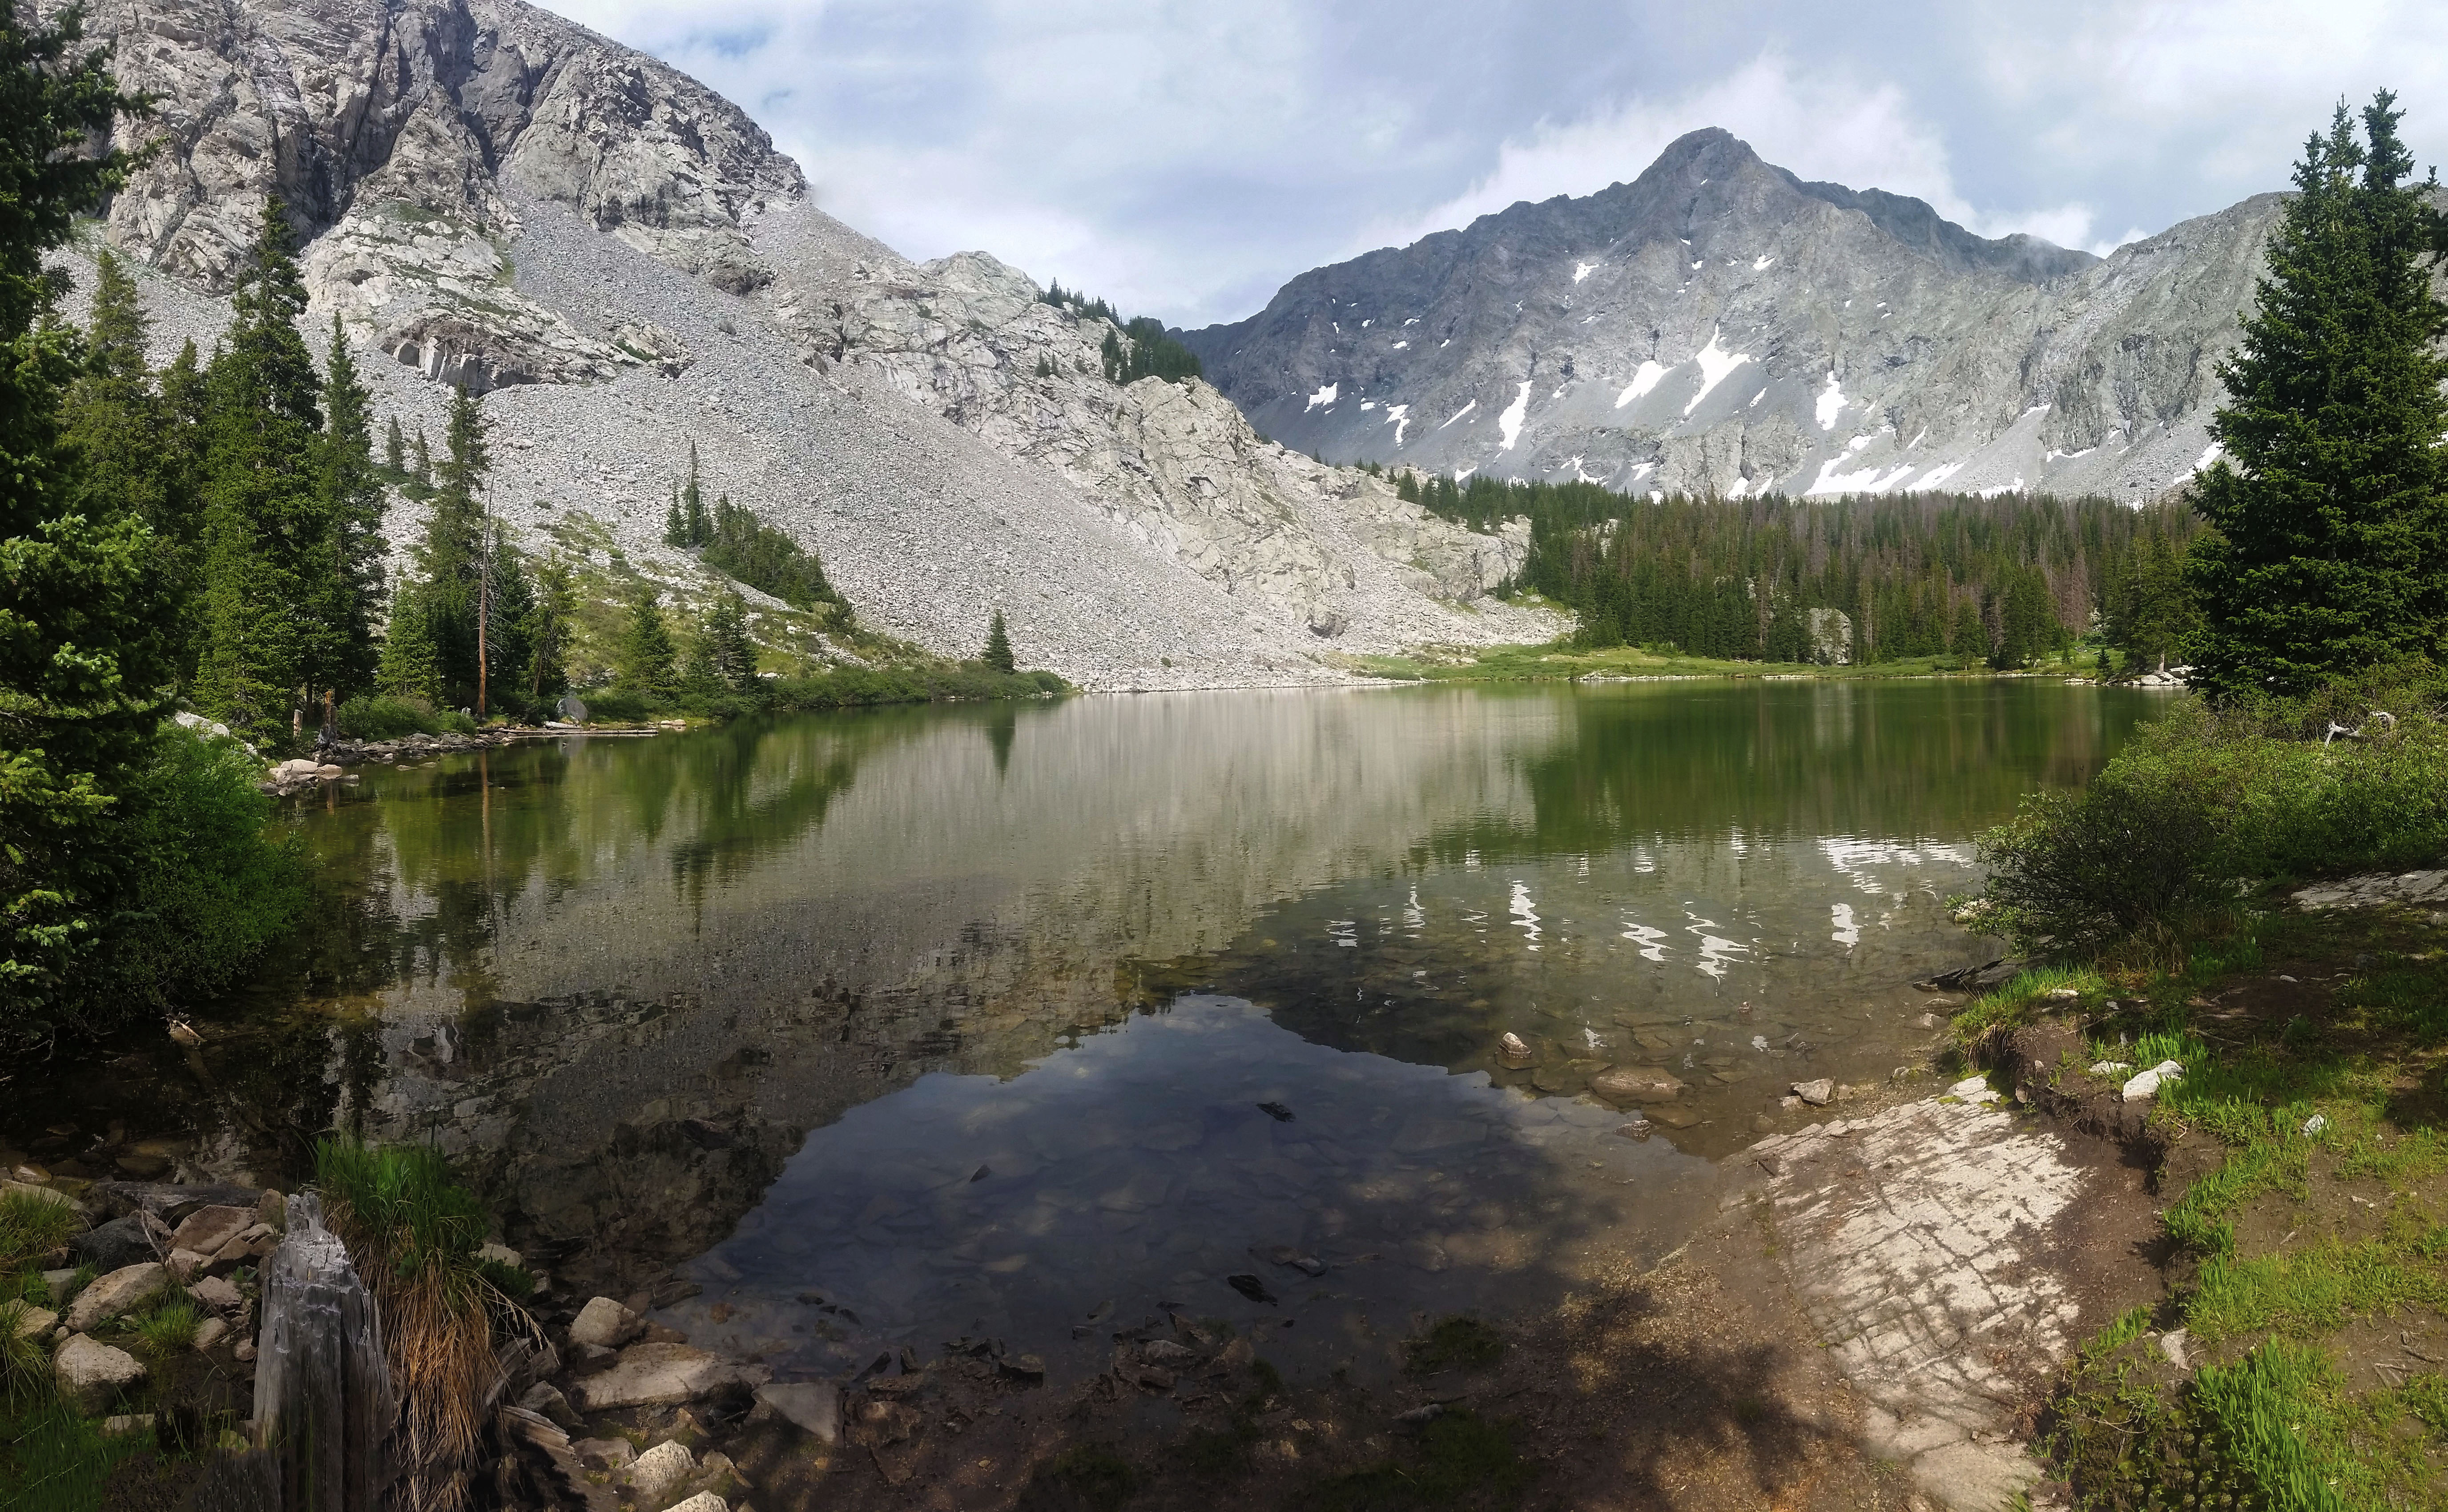
I hiked on for a few more miles to the entrance of the upper valley that houses Lake Como. Another beautiful place! High pines surrounded the lake, shading the area and giving shelter to the bears in the area (according to all the warning signs on the trees). I hiked around the lake looking for a suitable camp to stop for the night when I ran into two other backpackers, Doug and Stacy. They were all smiles and in the middle of cooking dinner as I walked into their camp. They were there for the summit as well and had brought their 2 kids with them (14 and 10 years old). What an awesome little family unit! Doug had mountaineered for some years and now that the youngest was old enough, he was pushing them all to new heights and experiences!
Lake Como, getting closer now!Skirting around Como towards camp
Doug had done Little Bear Peak in the past and knew about the sketchball upper Class 4 traverse to Blanca Peak. “It’s a little sketchy, and I heard about a guy bringing climbing shoes for the traverse” he told me. This didn’t boost my confidence at all. On top of that, the clouds overhead didn’t look the best for summit, and I had heard the only time you should do Little Bear is in perfect weather.
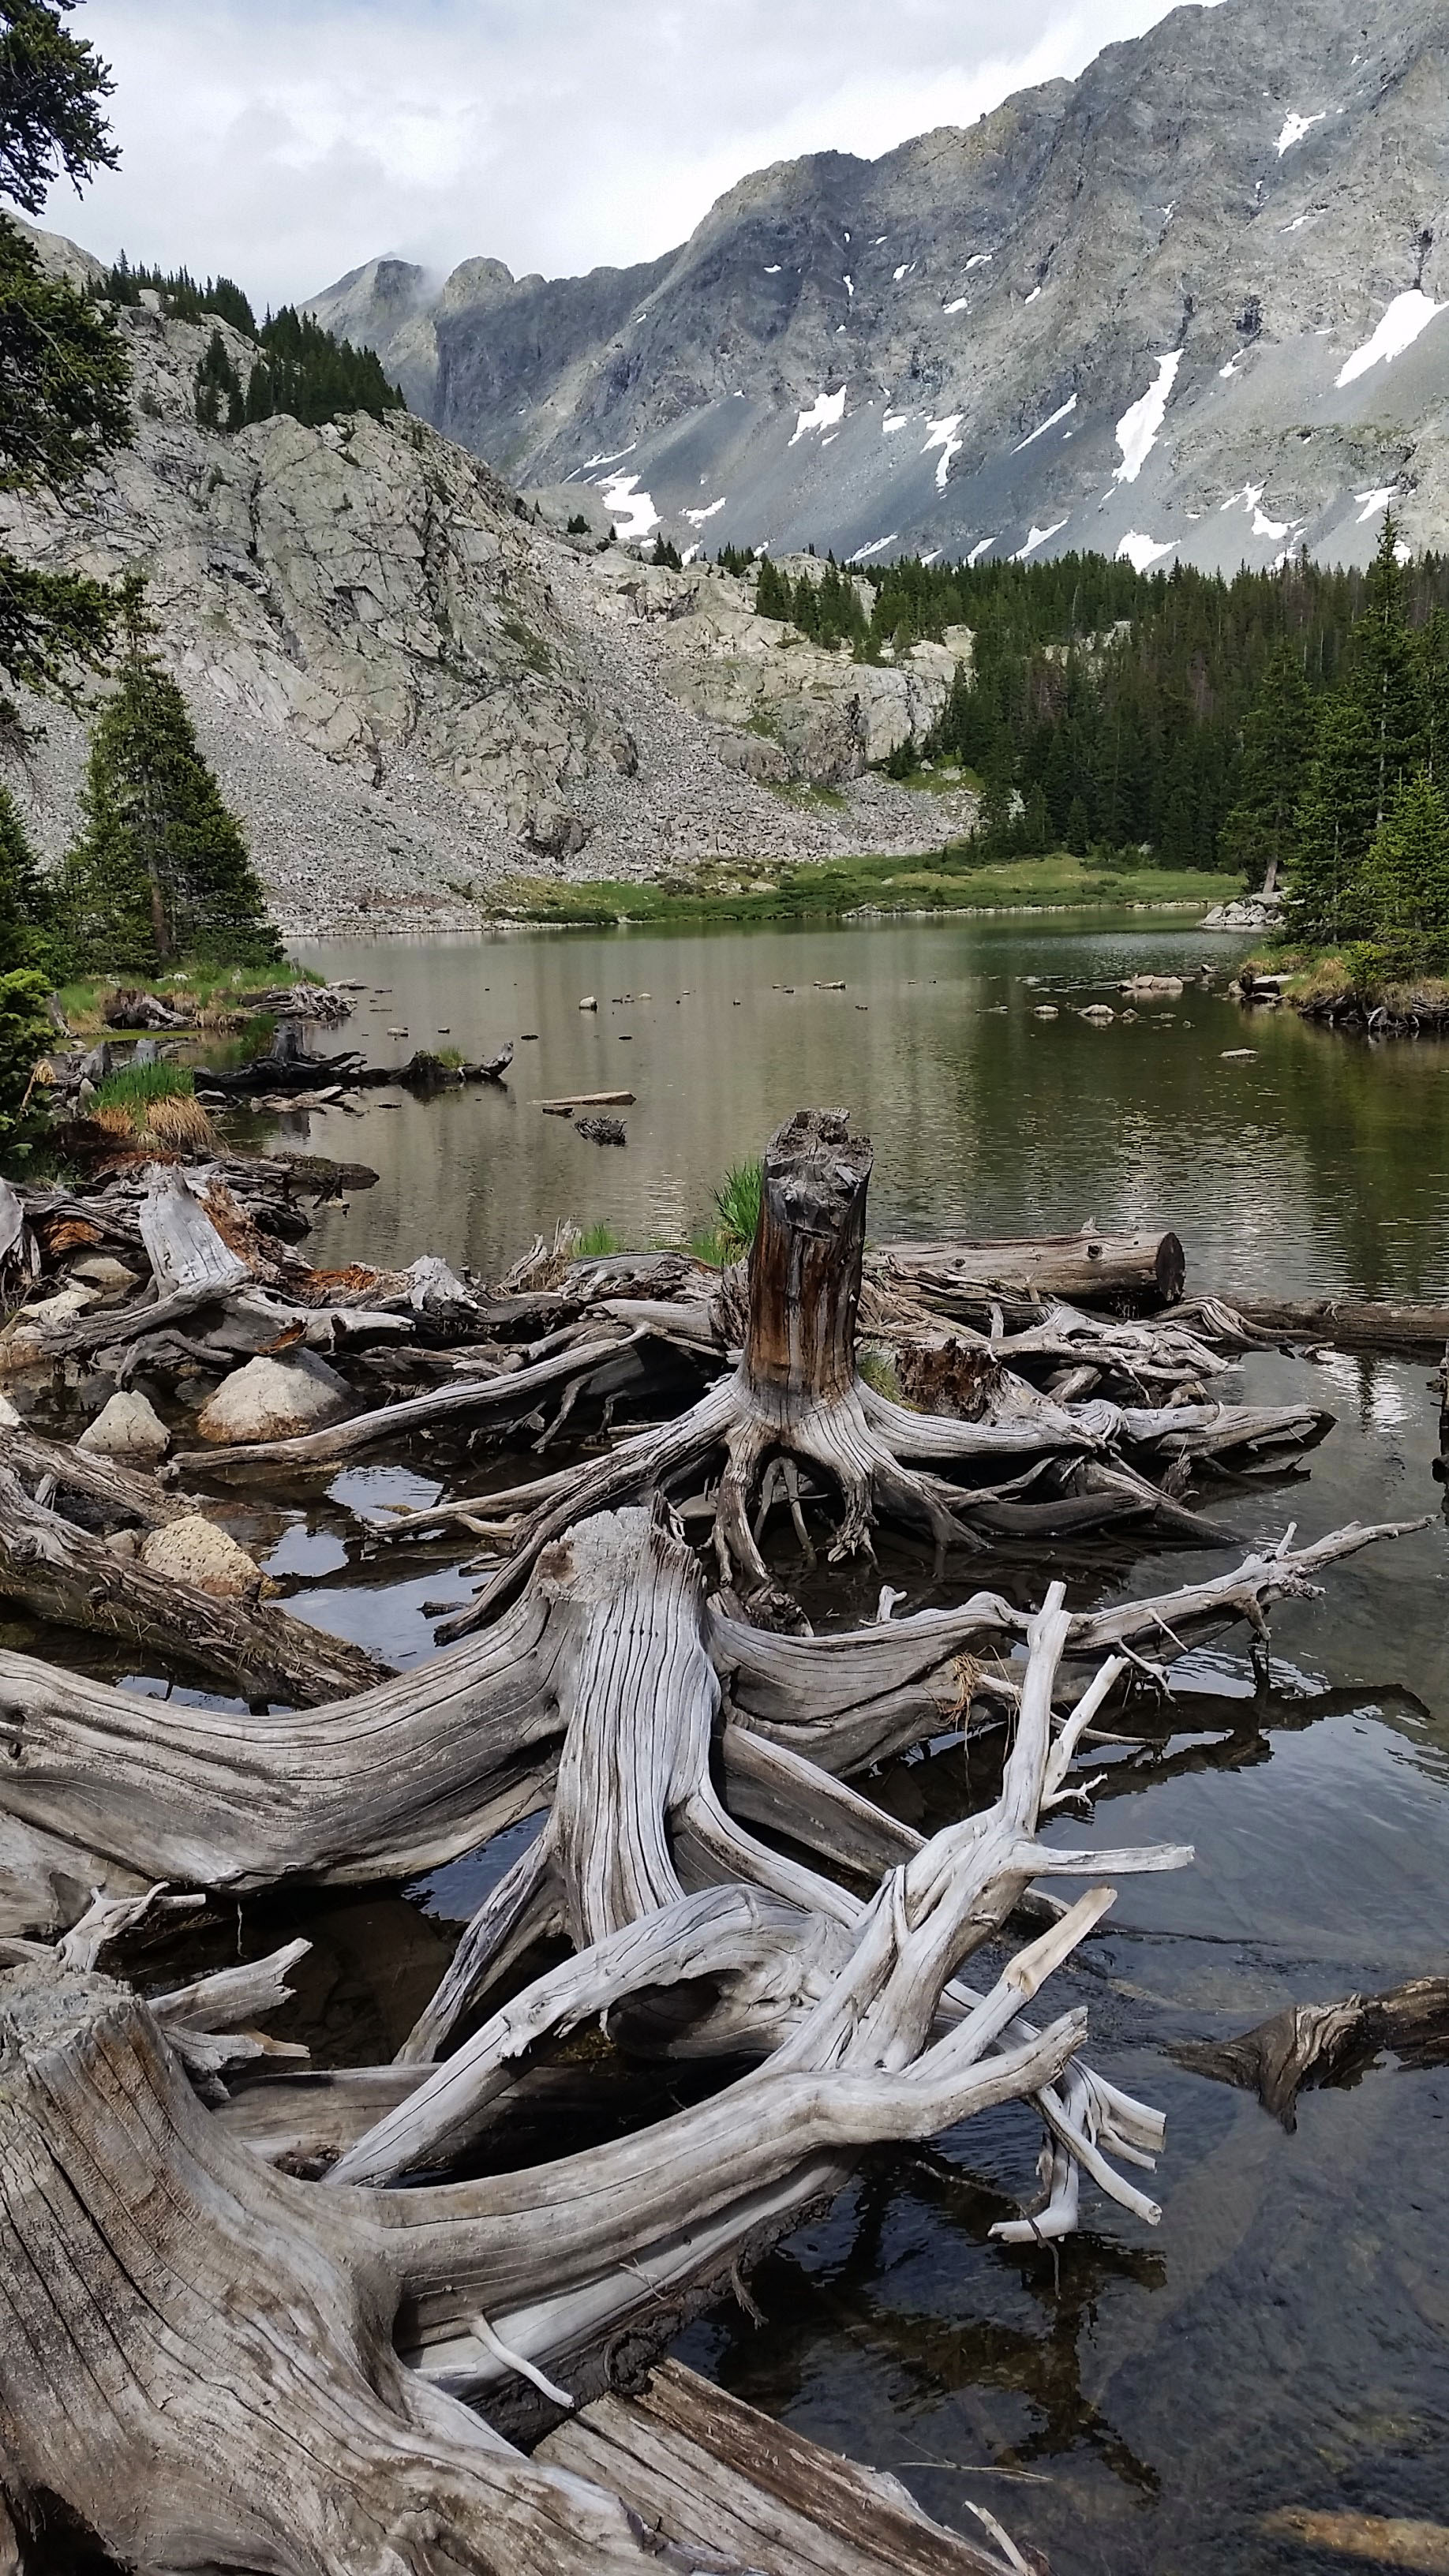
Beautiful lush green flora around Como
I said my goodbyes and pressed further up past Como to one of the smaller lakes. The tall trees around Lake Como were all but gone and only short hip high shrub remained. I set up my tent and made dinner. The marmots here were relentless and practically walked up and tapped me on my shoulder asking me for handouts. After finishing my Mountainhouse meal I threw all my food into 1 bag and piled it under a large stack of rocks (no trees to hang food from), gambling that no bears would come up this far and marmots weren’t strong enough to move the rocks. As I got ready for bed I watched marmots run up to the rock stack, sniffing furiously at the contents below. If they got to my food I would have to turn back and couldn’t summit the next morning. I crossed my fingers and went to bed.
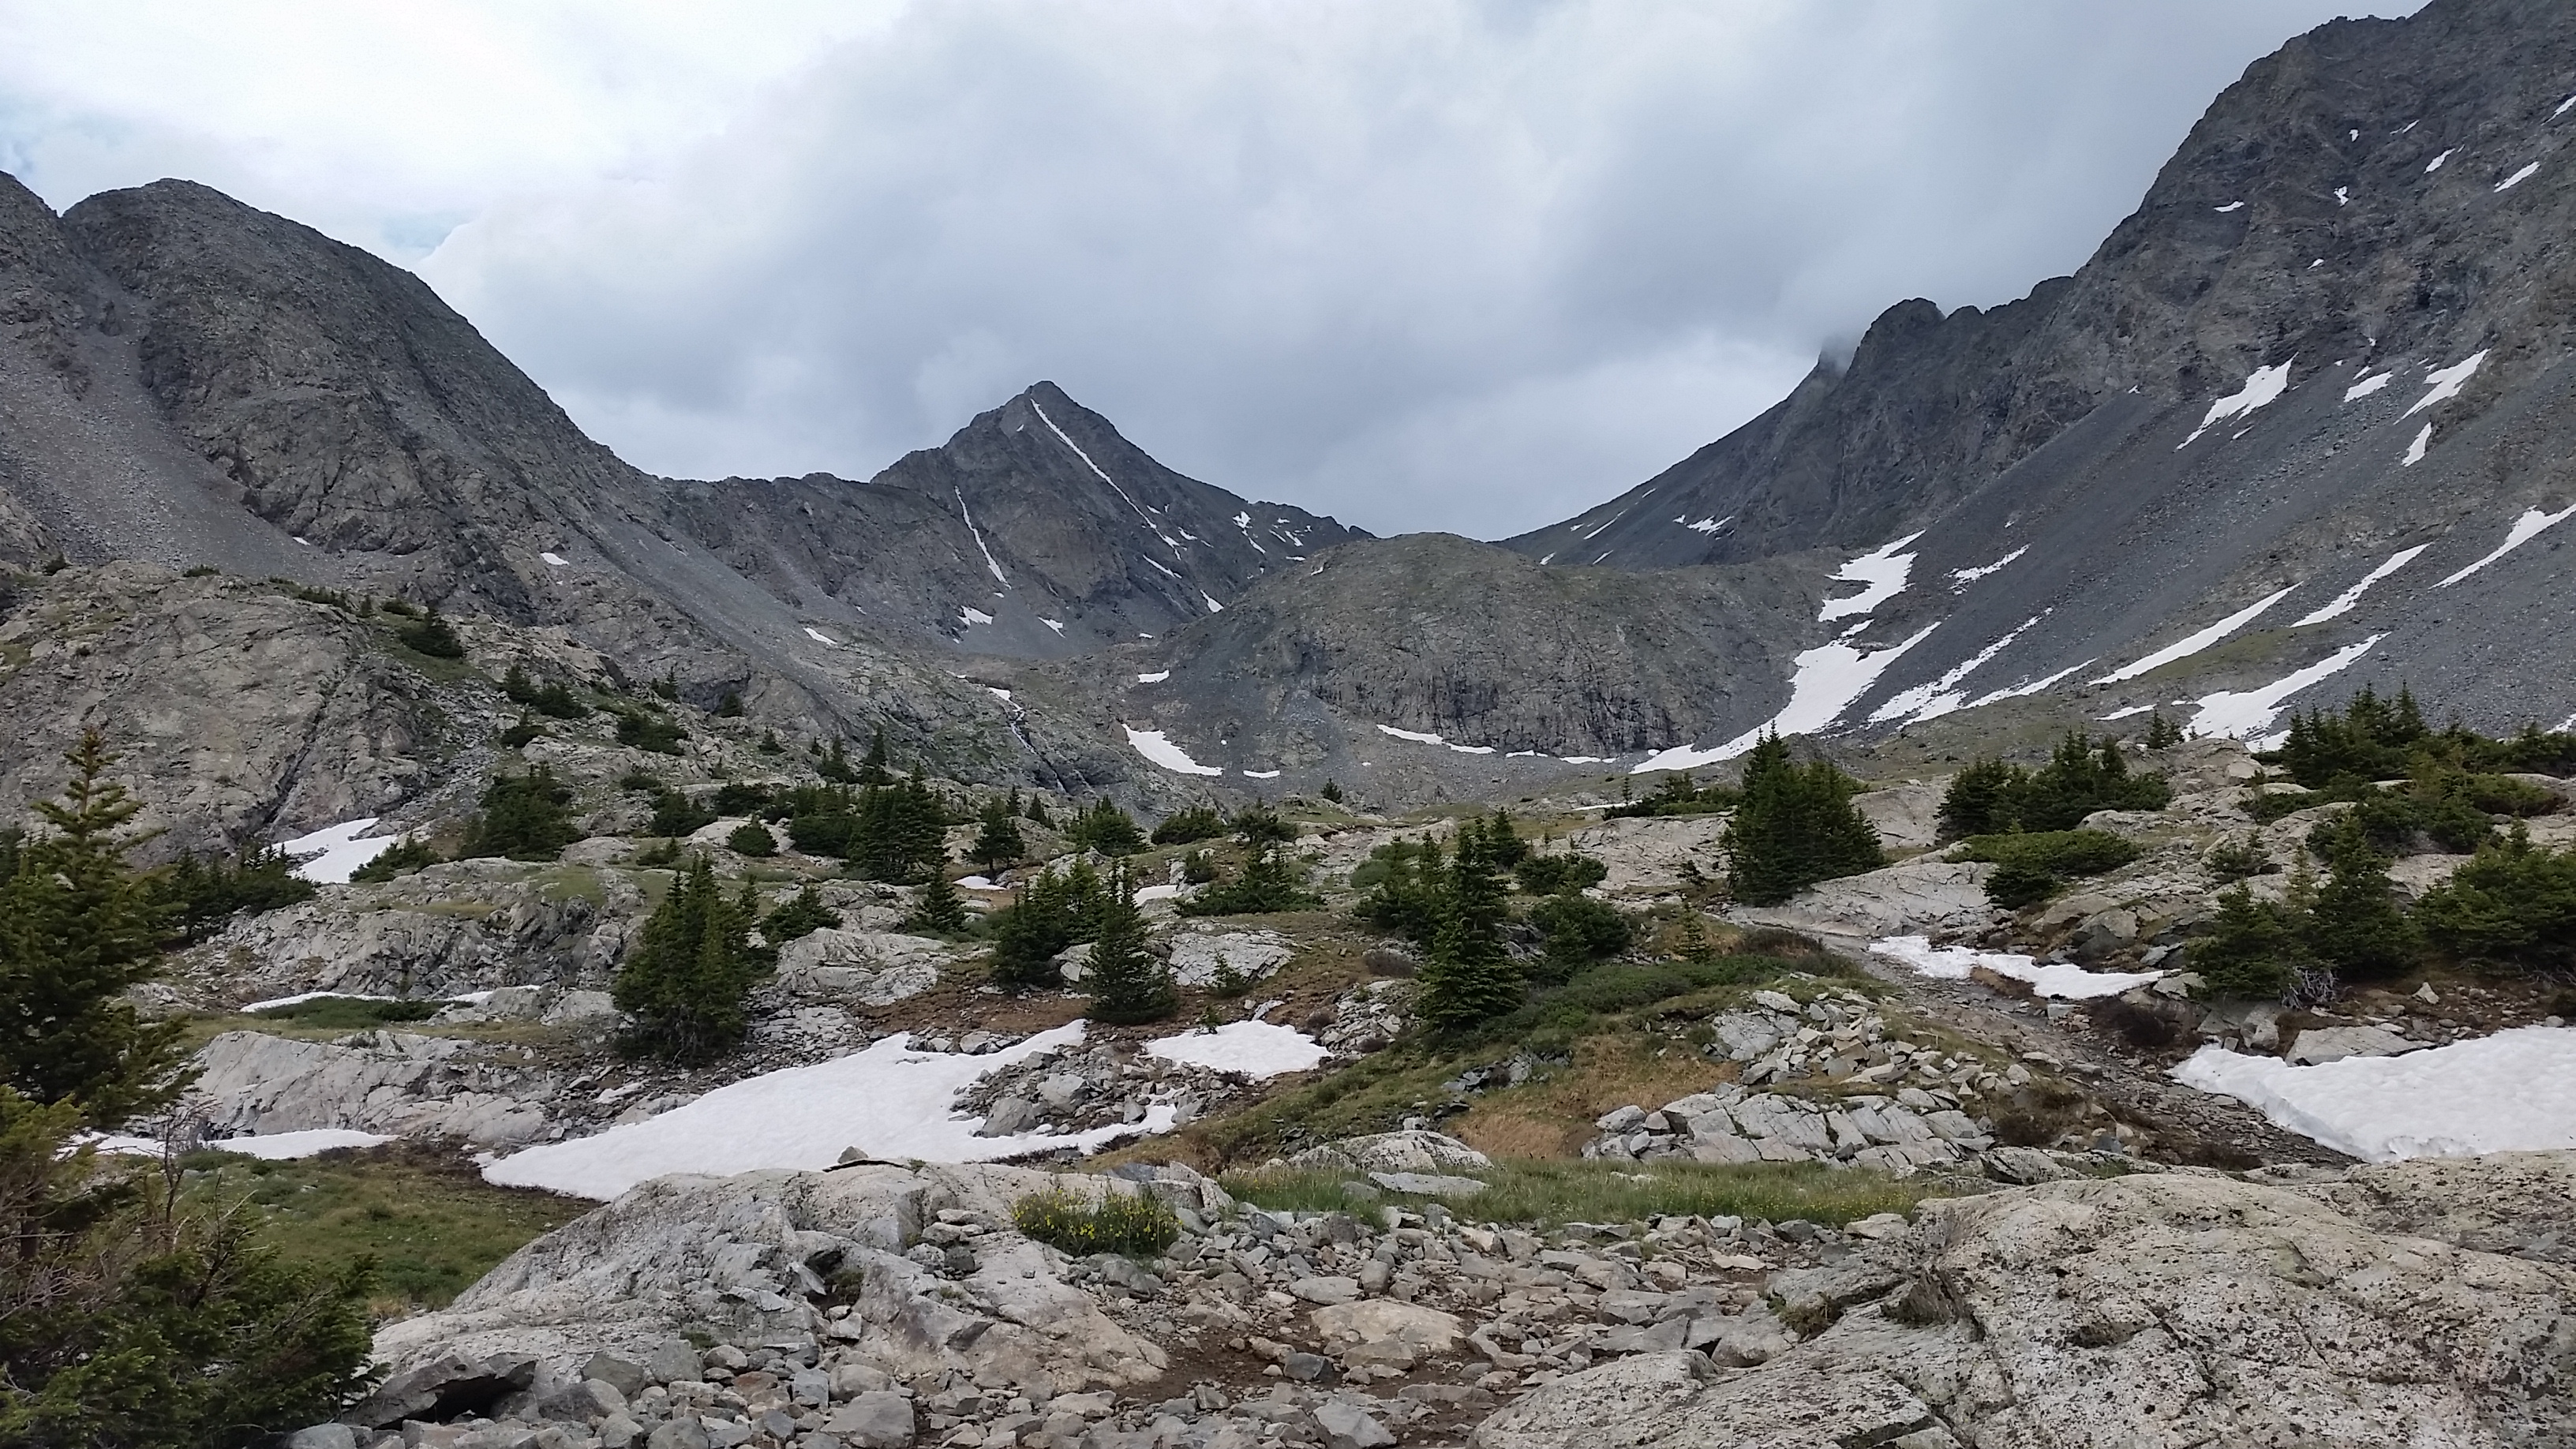
Higher into the Alpine I pushed, the trees turned to shrubs
Waking early at 4 am to rain on my tent I prepped my bag and stuffed water and snacks for the day in. Searching, searching . . . no headlamp. What a bonehead move! After checking everything, I realized I must have left it in Stevo’s truck after using it the night before. Welp, I had to make the best of it. I set my alarm for 5am and went back to sleep. Beep beep beep, lets try this again! Sleeping at 12,200 is always tough but I had to get motivated. I saw a few headlamps in the distance which could only be Doug and crew, but the light was just enough to see without one so I leapt from my tent and took off. The trail climbed up the large waterfall feeding the small lake I camped next to. At the top of the fall I met up with Doug and family who were all smiles, even the kids, pushing up a huge peak in the dark. After quick greetings I pressed on.
Time to get moving, upward, into the cloud!
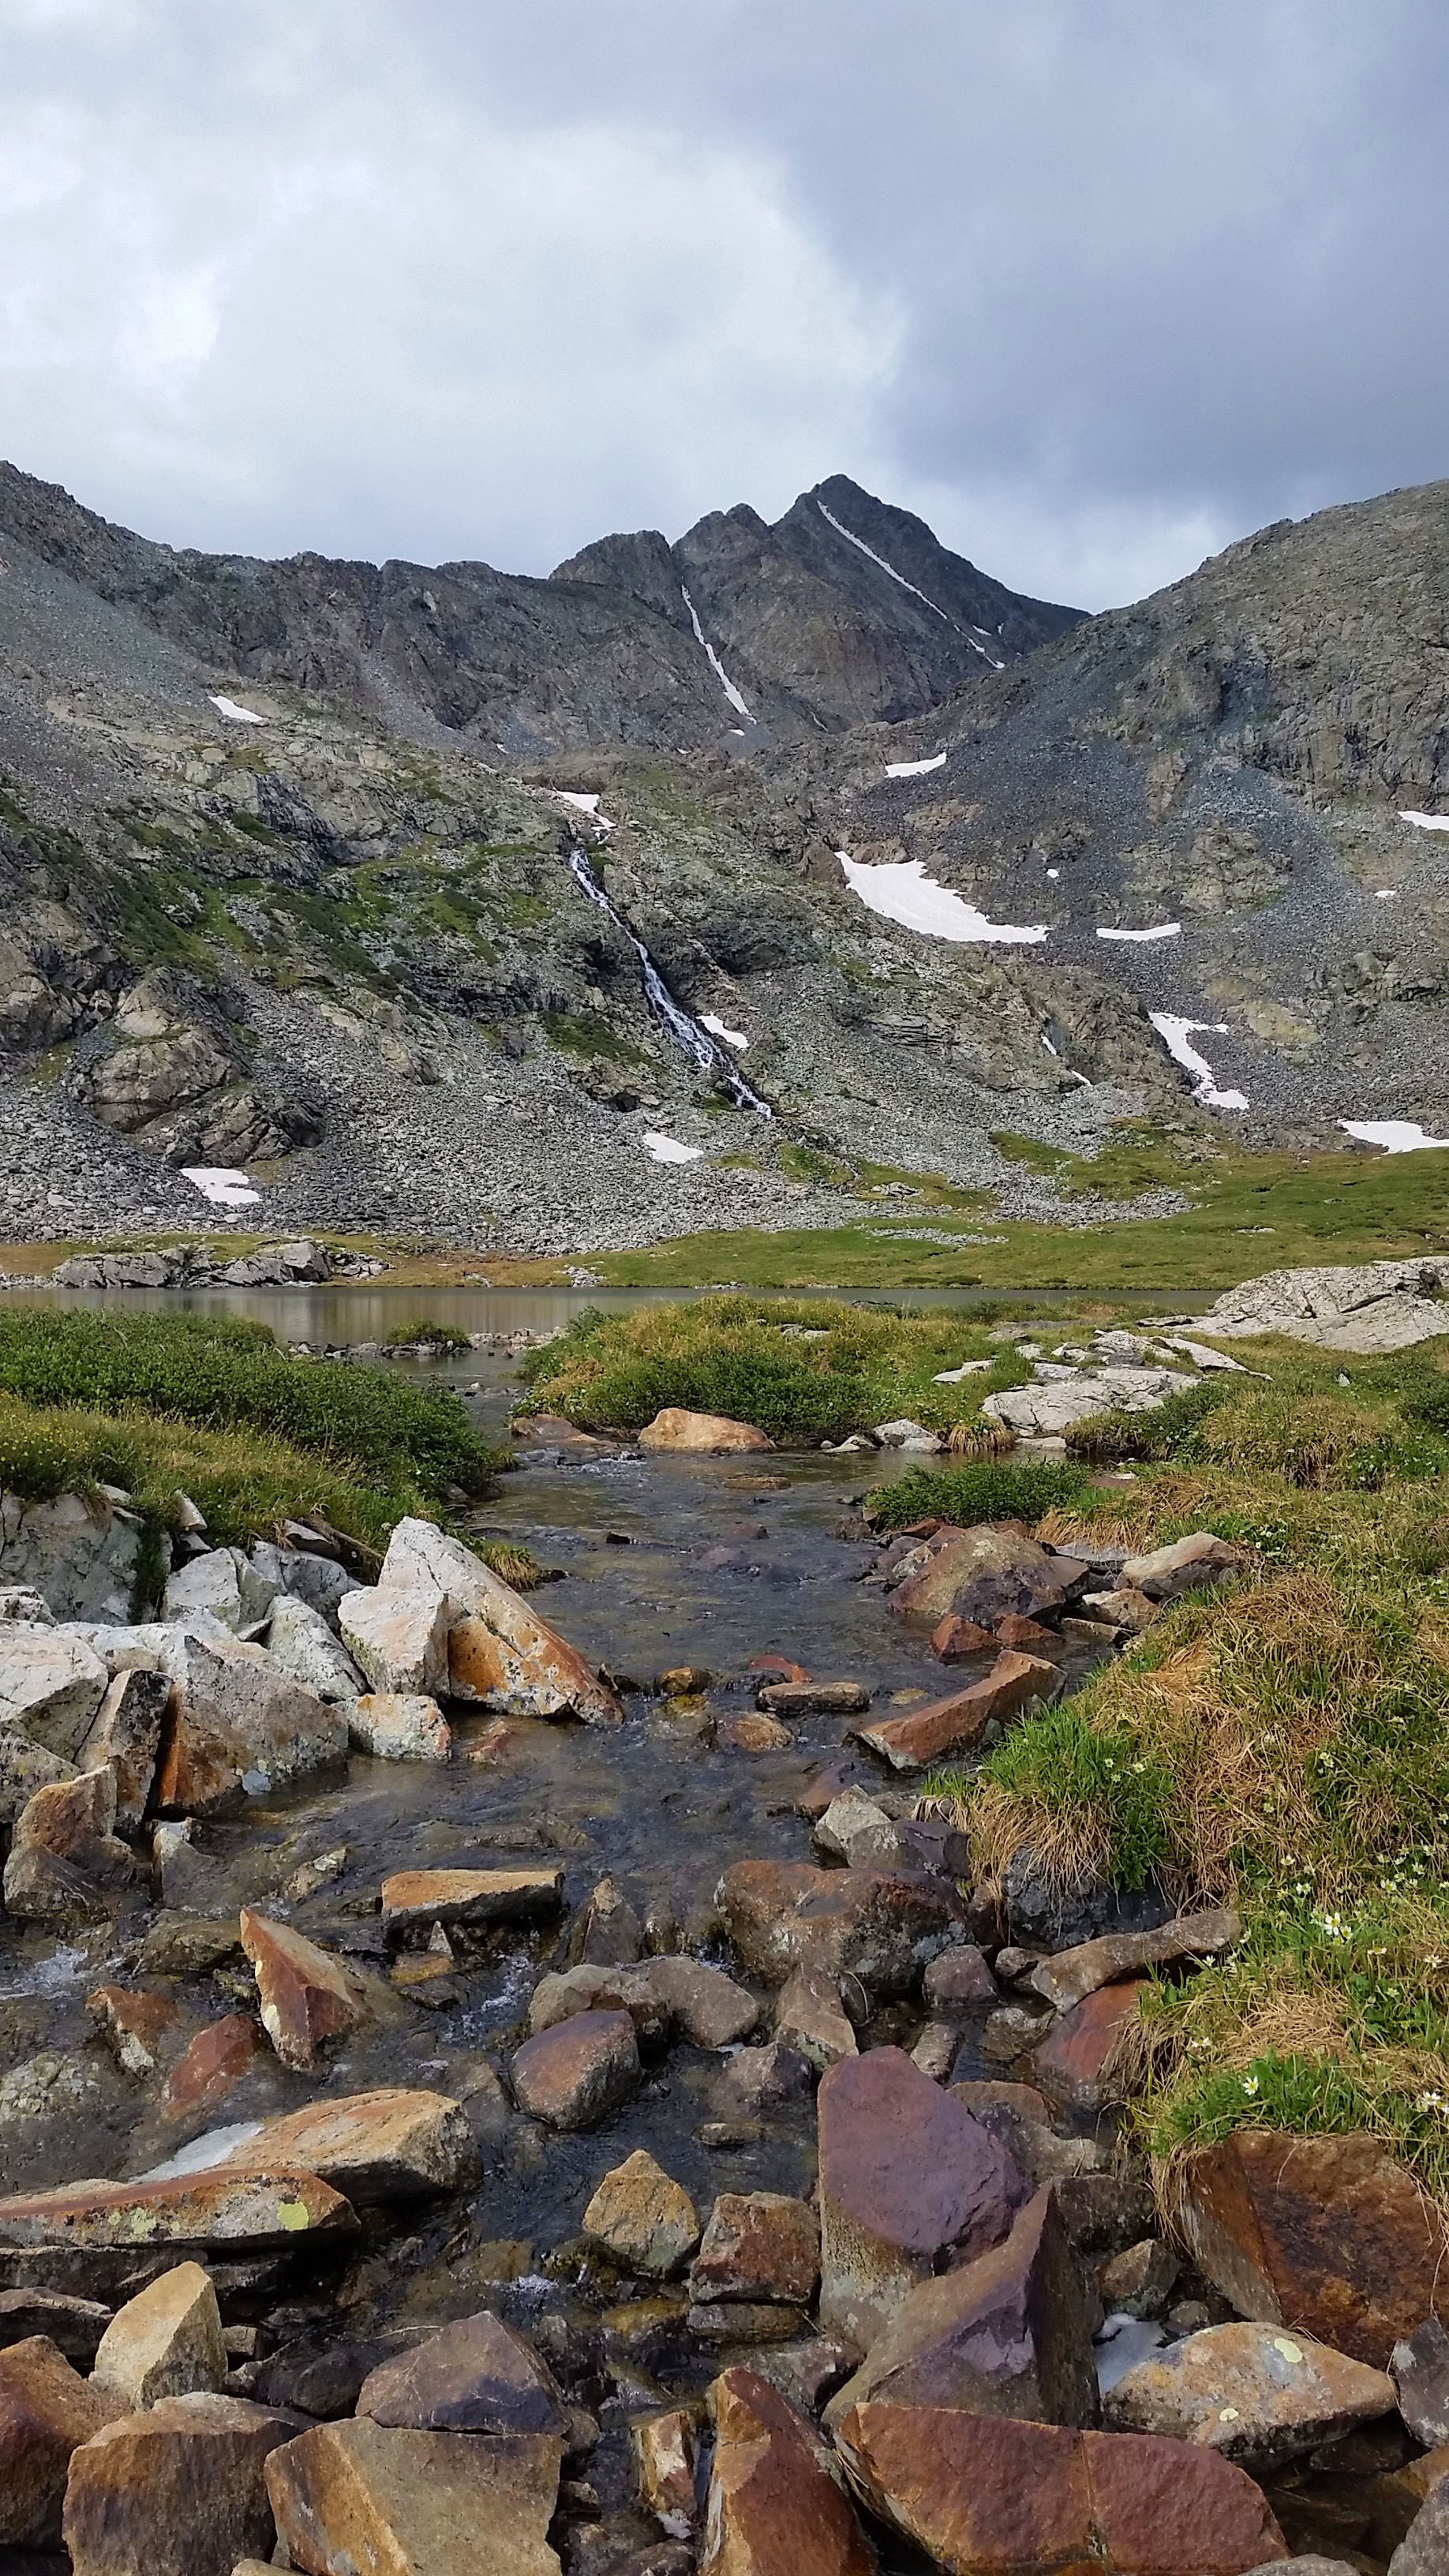
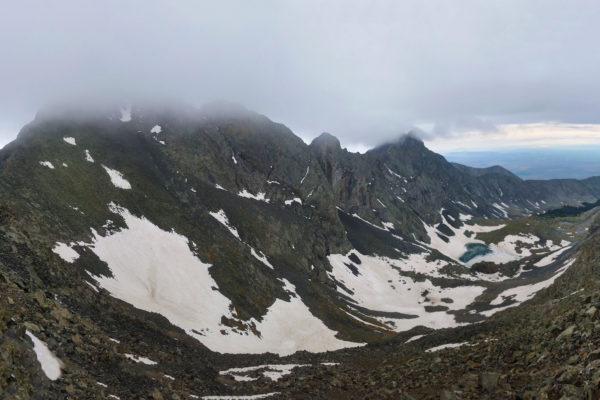
After the waterfall was the summit plateau, which housed another small glacier lake and the final trail to the col/saddle between Ellingwood Point and Blanca Peak. The only thing that stood between me and the ridgeline was a large frozen snow field. No ice axe, great! I crossed the snow carefully and made it safely to the rocks on the other side. Pushing up from here, after some searching I found the trail. Switchback central! The sun was just lighting up the sky enough to see that I was hiking into a thick cloud clinging to the top of the peaks. The rocks were wet and slick, every step was critical. Up and up I went until finally reaching the col/saddle where a large cairn stood. Left to Ellingwood, or right to Blanca? Ellingwood was a Class 3 traverse I was anxious to see, so left it was!
Large cairn at the Ridge, at the split to Ellingwood and Blanca
I followed the cairns across the ridgeline towards the first peak of the day. The looming cloud prevented me from seeing out past more than 10 feet in front of me. Scrambling up, down, and traversing I continued to route find. I skirted rock faces looking down into the cloud not knowing if it were a 10 foot drop for 100. No matter, just don’t fall! After half an hour I finally made it to the home stretch. Out of breath and tired from the ascent, I carefully pulled myself to peak! I stood up giving it a quick 360, nothing but whiteout conditions! Then on my way back down to the ridge for a brief second the clouds gave way and opened up, so I snapped pictures as quick as I could before they closed back in around me. It was a short celebration, and fearing the weather could turn on me, I scrambled back down across the traverse to the base of Blanca.
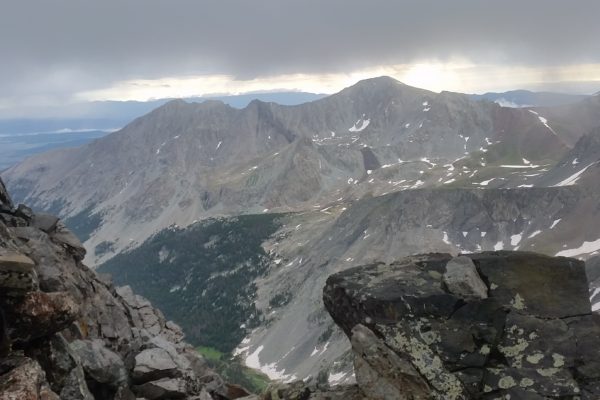
Views to the West from just below Ellingwood Point (click to enlarge)Views to the East from just below the Ellingwood Point (click to enlarge)
I made it back to the large cairn and started pushing up Blanca. Blanca was a decent Class 2 with a few scrambles here and there, but much less threatening than Ellingwood Point. I climbed through the clouds again upwards towards the peak, and in the distance I heard voices. It was Doug and crew once again, going for their summit bid of the day! I caught up with them and pushed to the peak together. His kids were doing surprisingly well under the low oxygen, wet, whiteout conditions. Finally we reached peak, every step was well worth it! I snapped a few pictures for them and headed back down the way I came.
Looking back down the chute to the valley below (click to enlarge)Climbing down the waterfall just above the small lake I camped next to (click to enlarge)Views of Lake Como as I headed down (click to enlarge)
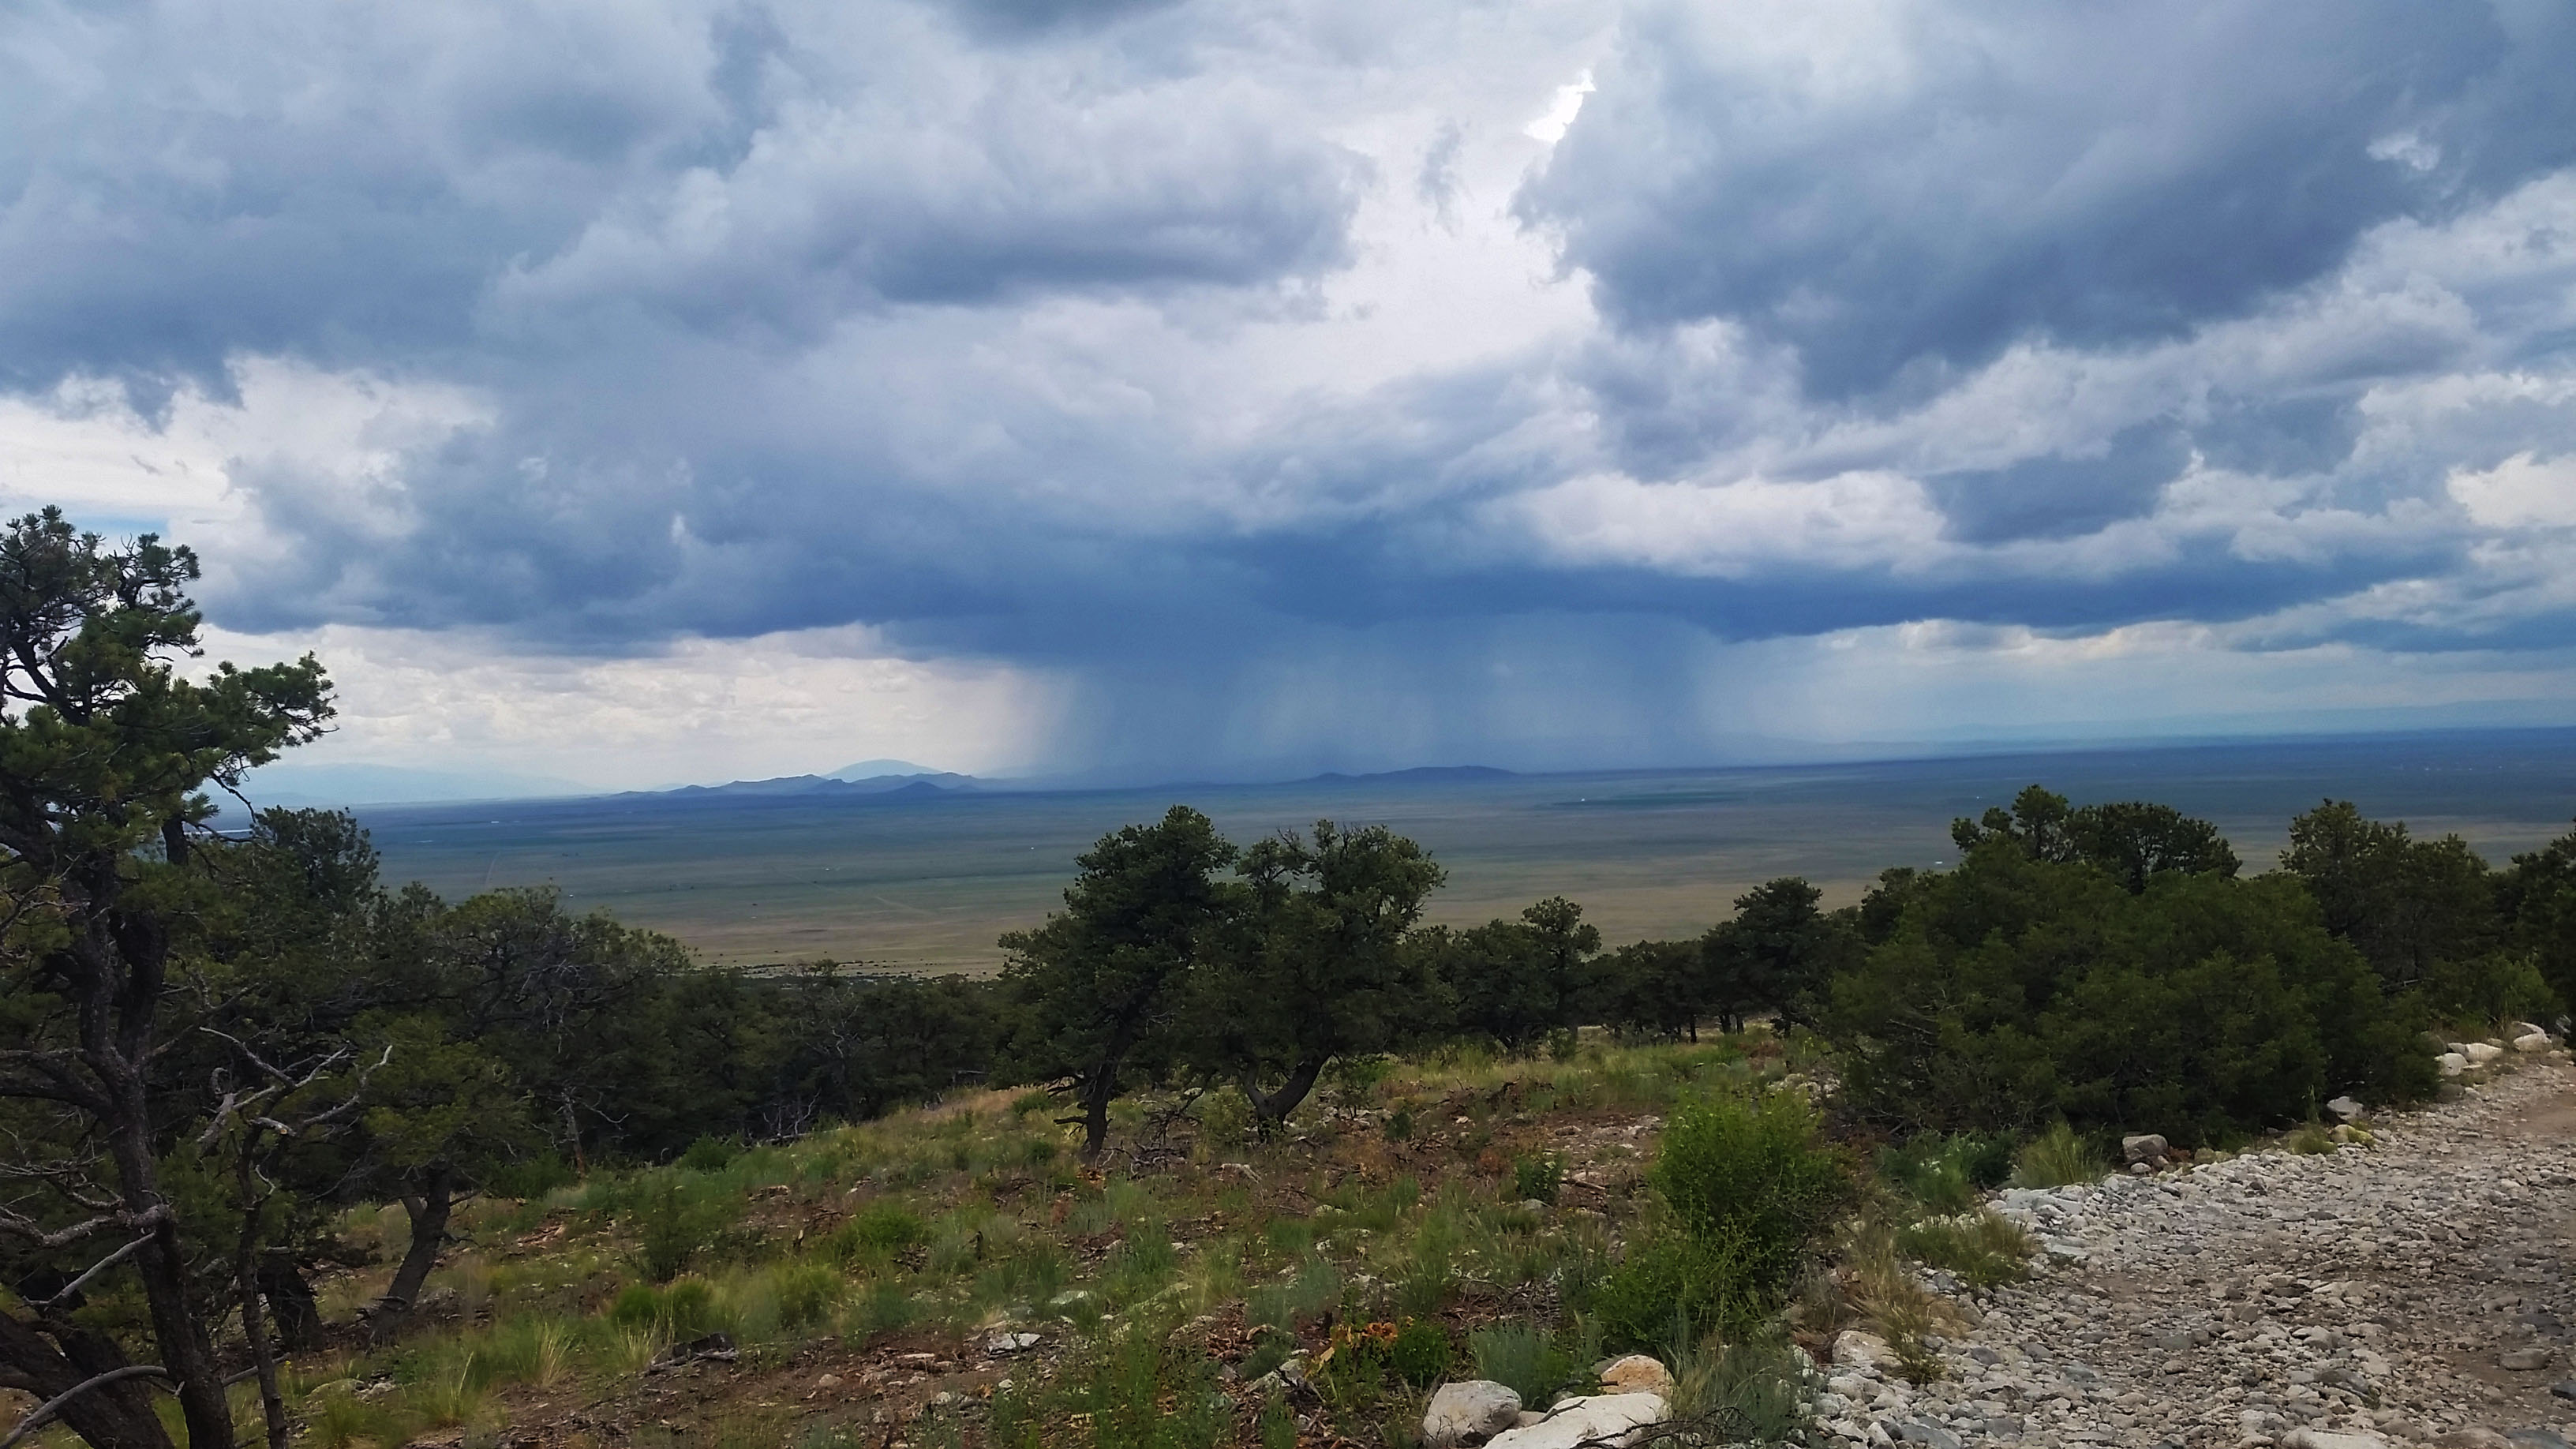
On the way down I finally dropped out of the clouds and saw bluebird skies over the valley below, giving me some hope for the return hike. I reached camp, broke it down, packed it up, and with trekking poles in hand headed back down the mountain. I was surprised at the number of people pushing up the mountain into the clouds so late in the afternoon. I wished them luck and dropped back down into the warm of the valley below. As I hiked west I watched this wall of clouds just dumping rain across the fields below. It was time to move! I picked up the pace and barely made it to the car before we were covered in a downpour! What another awesome adventure! Tired, smelly, and grinning ear to ear I rested in the backseat headed for the Dunes with another story to tell. It’s a beautiful country we live in, get outside and see it sometime!
Pushing up to the valley where the Lake Como resides
getting closer!
Apparently Bears dont mess around here
Brief view of the valley below form the ridge
Smaller Pool above Lake Como
Glacier Lakes from the ridge above
Into the trees!
Skirting Como
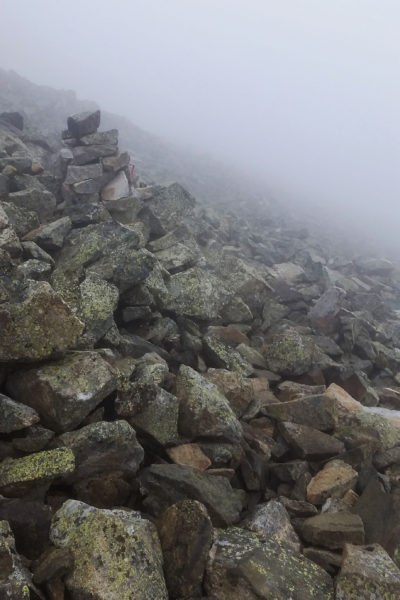
The mist and Fog above on the ridge, a cairn guides my way
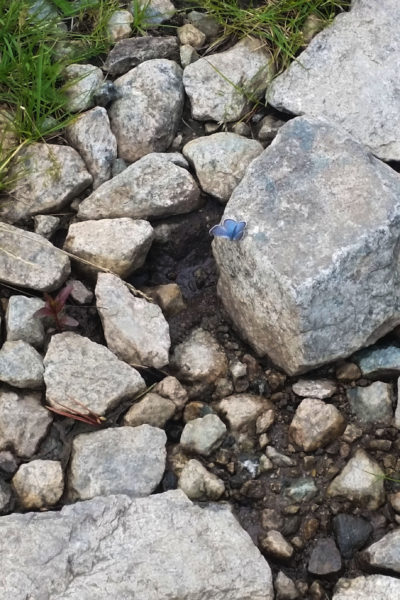
Beautiful Blue Butterfly (never seen one of these before)
Weather: Hi 70s, Low in the lower 50s, Cloud cover, Fog, Sparse Rain, Partially Sunny, Slightly windy
Water: 6 liters (2 days)
Food: 4 protien bars, 2 Clif Bars, 2 Granola bars, 2 via starbucks instant coffee, 1 Mountain House, instant mashed potatoes, 1 bag black forest gummies, 1 bag of trailmix, 1 Twix bar, Bag of salt and vinegar chips, 2 plums
Time: 2 Days (Hiking time – 5 hours, Day 1; 12 hours, Day 2)
Distance: 6 miles day 1, 12 miles day 2.
Accumulated Gain: 7,000 feet
GEAR:
58 liter exos osprey backpack
MULE Camelback
Big Anges Copper Spur UL2 tent
Flash REI sleeping pad
Cosmic Down Kelty Sleeping Bag (rated to 20 deg F)
Jet Boil – Sol
Black Diamond trekking poles
Sawyer Squeeze Filter
CLOTHING:
Smart wool 195 long sleeve shirt
Arc’teryx hoody
Patagonia Rain Jacket
Smart Wool Beanie
Smart Wool Gloves
Patagonia Pants
Merrell Mid Moab Hiking Boots
Darn Tough wool medium weight socks
Threadless hoody
Seeking Outdoor Adventure
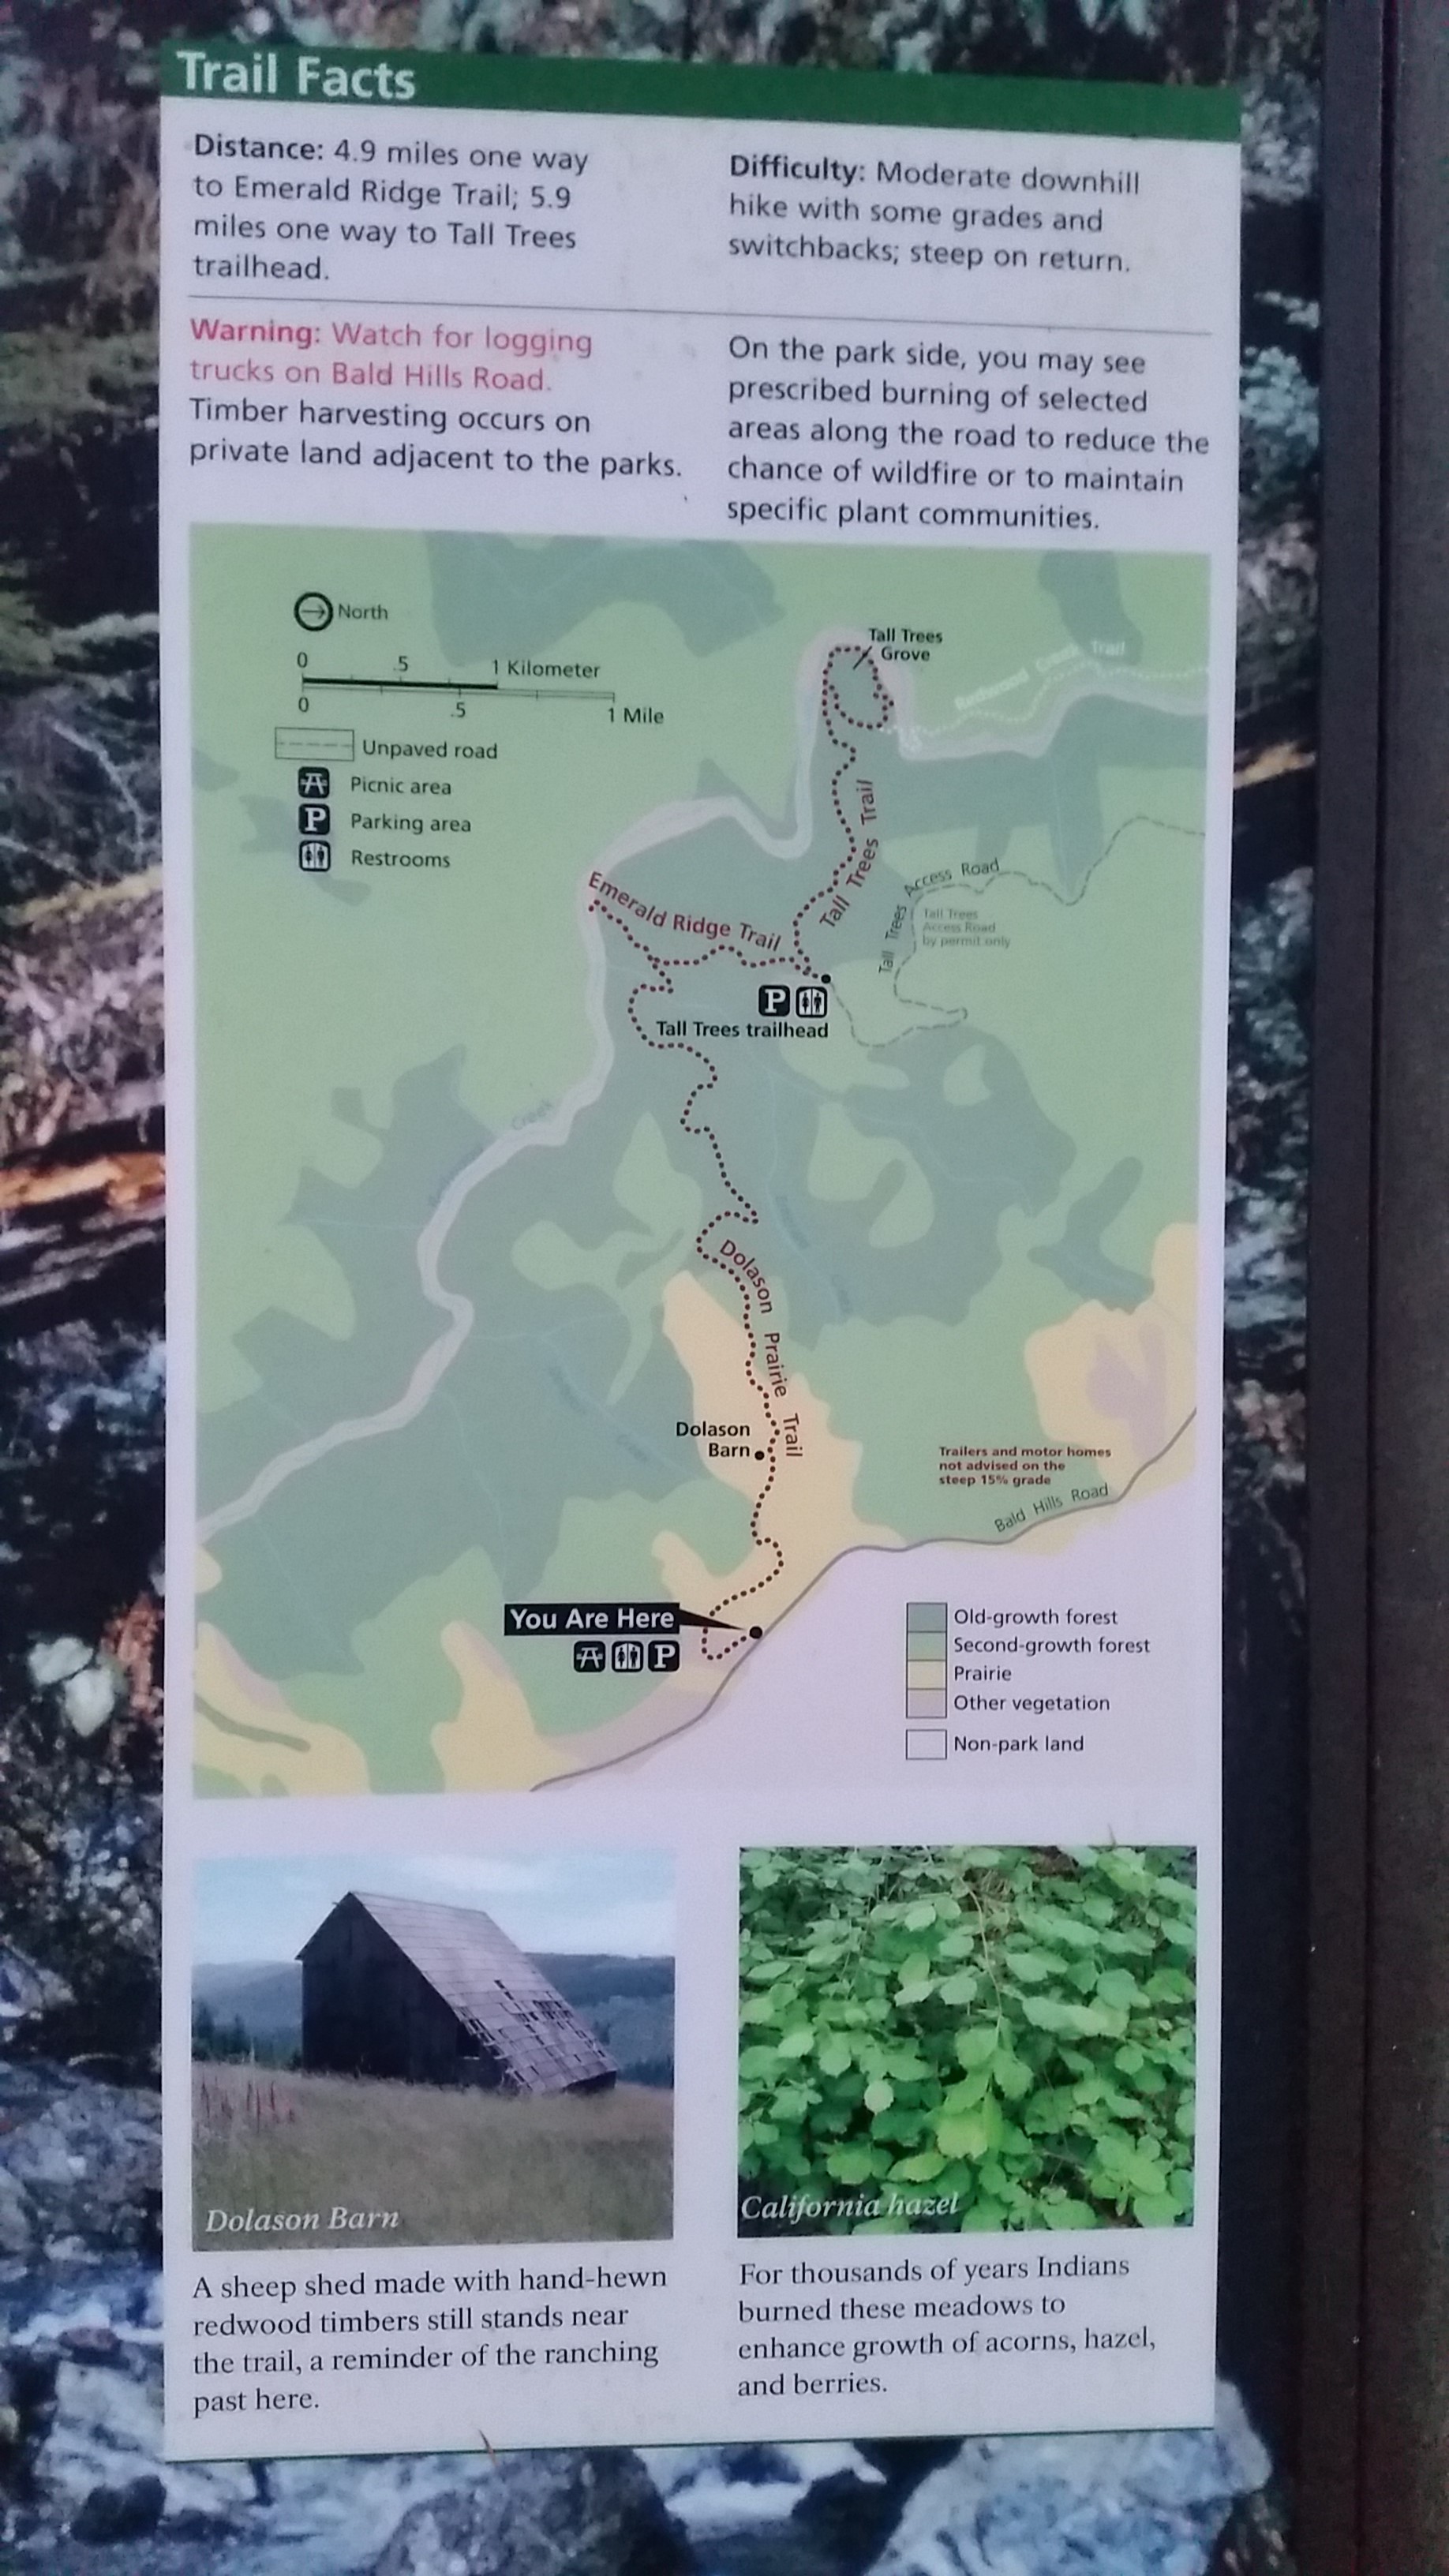
Tall Trees Map
Find an Adventure
There are TONS of resources out there. Books, websites, word of mouth. These are just a few Go To sites I use to find hike, climbs, and all around adventure.
Do your research on your hike! ALWAYS bring a paper map, do not EVER solely rely on a GPS track to get you there. Alright, now that the “spiel” is out of the way . . . here is how you create some killer custom GPS tracks for yourself that you cannot already download online (and just straight up don’t want to pay for).
Put your GPS tracks to work. You should technically use an actual GPS devise for your tracks. Garmin’s are super solid, accurate, waterproof, and wont break when you drop them. If you don’t have $300 to drop on a GPS, and you are just hiking around town, there are a few good phone Apps will serve the same purpose. The following Apps will allow you to pre-download maps and overlay both GPS tracks and your current GPS location (you don’t need a cell signal, just a clear view to the sky for GPS):
Go prepared! Places like slot canyons or river crossings could quickly swell, or turn into flash flood areas, leaving you stranded or worse. As a part of prepping for your trek, choosing the appropriate gear for weather is critical so you aren’t caught with your pants down.
I like to use a few different sources to cross reference. Here are some great sites I use regularly to check for weather: