
Step 7: Build Bed/Bed Storage.
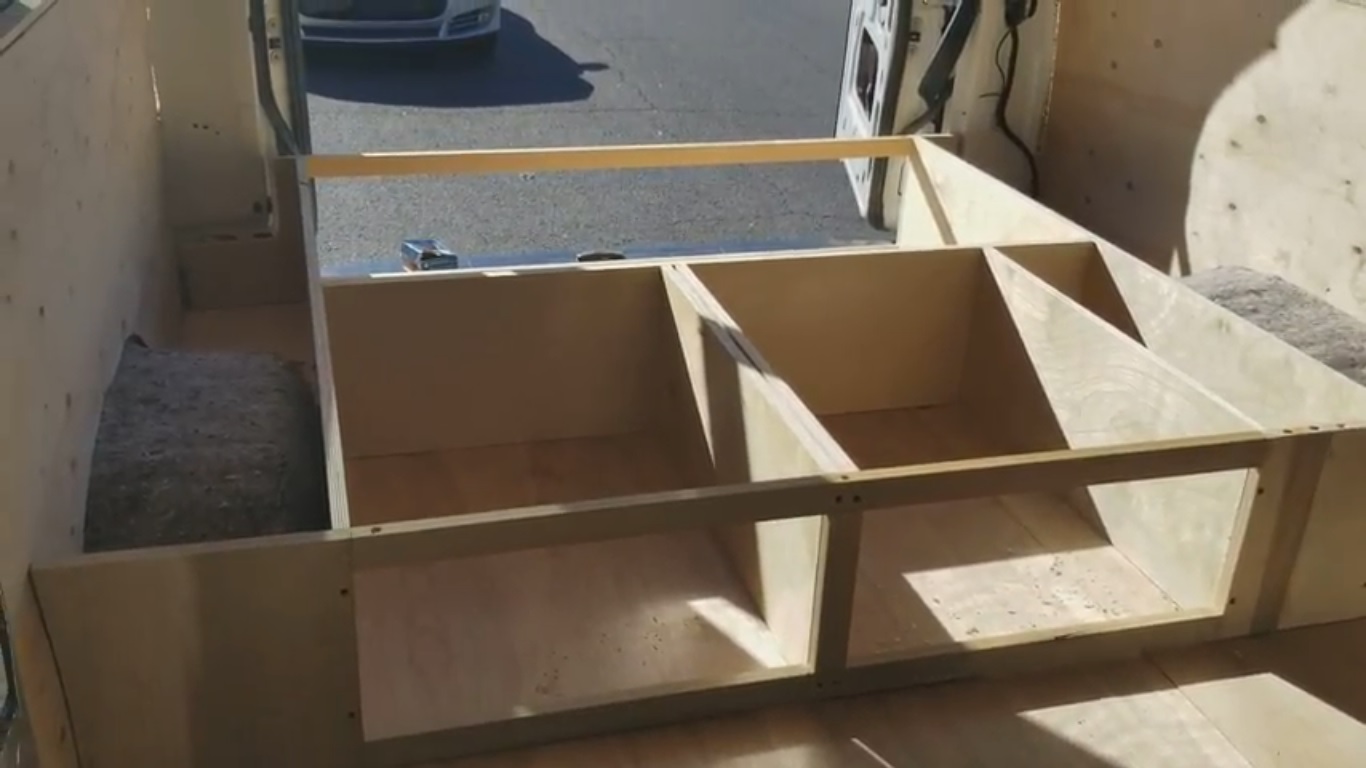
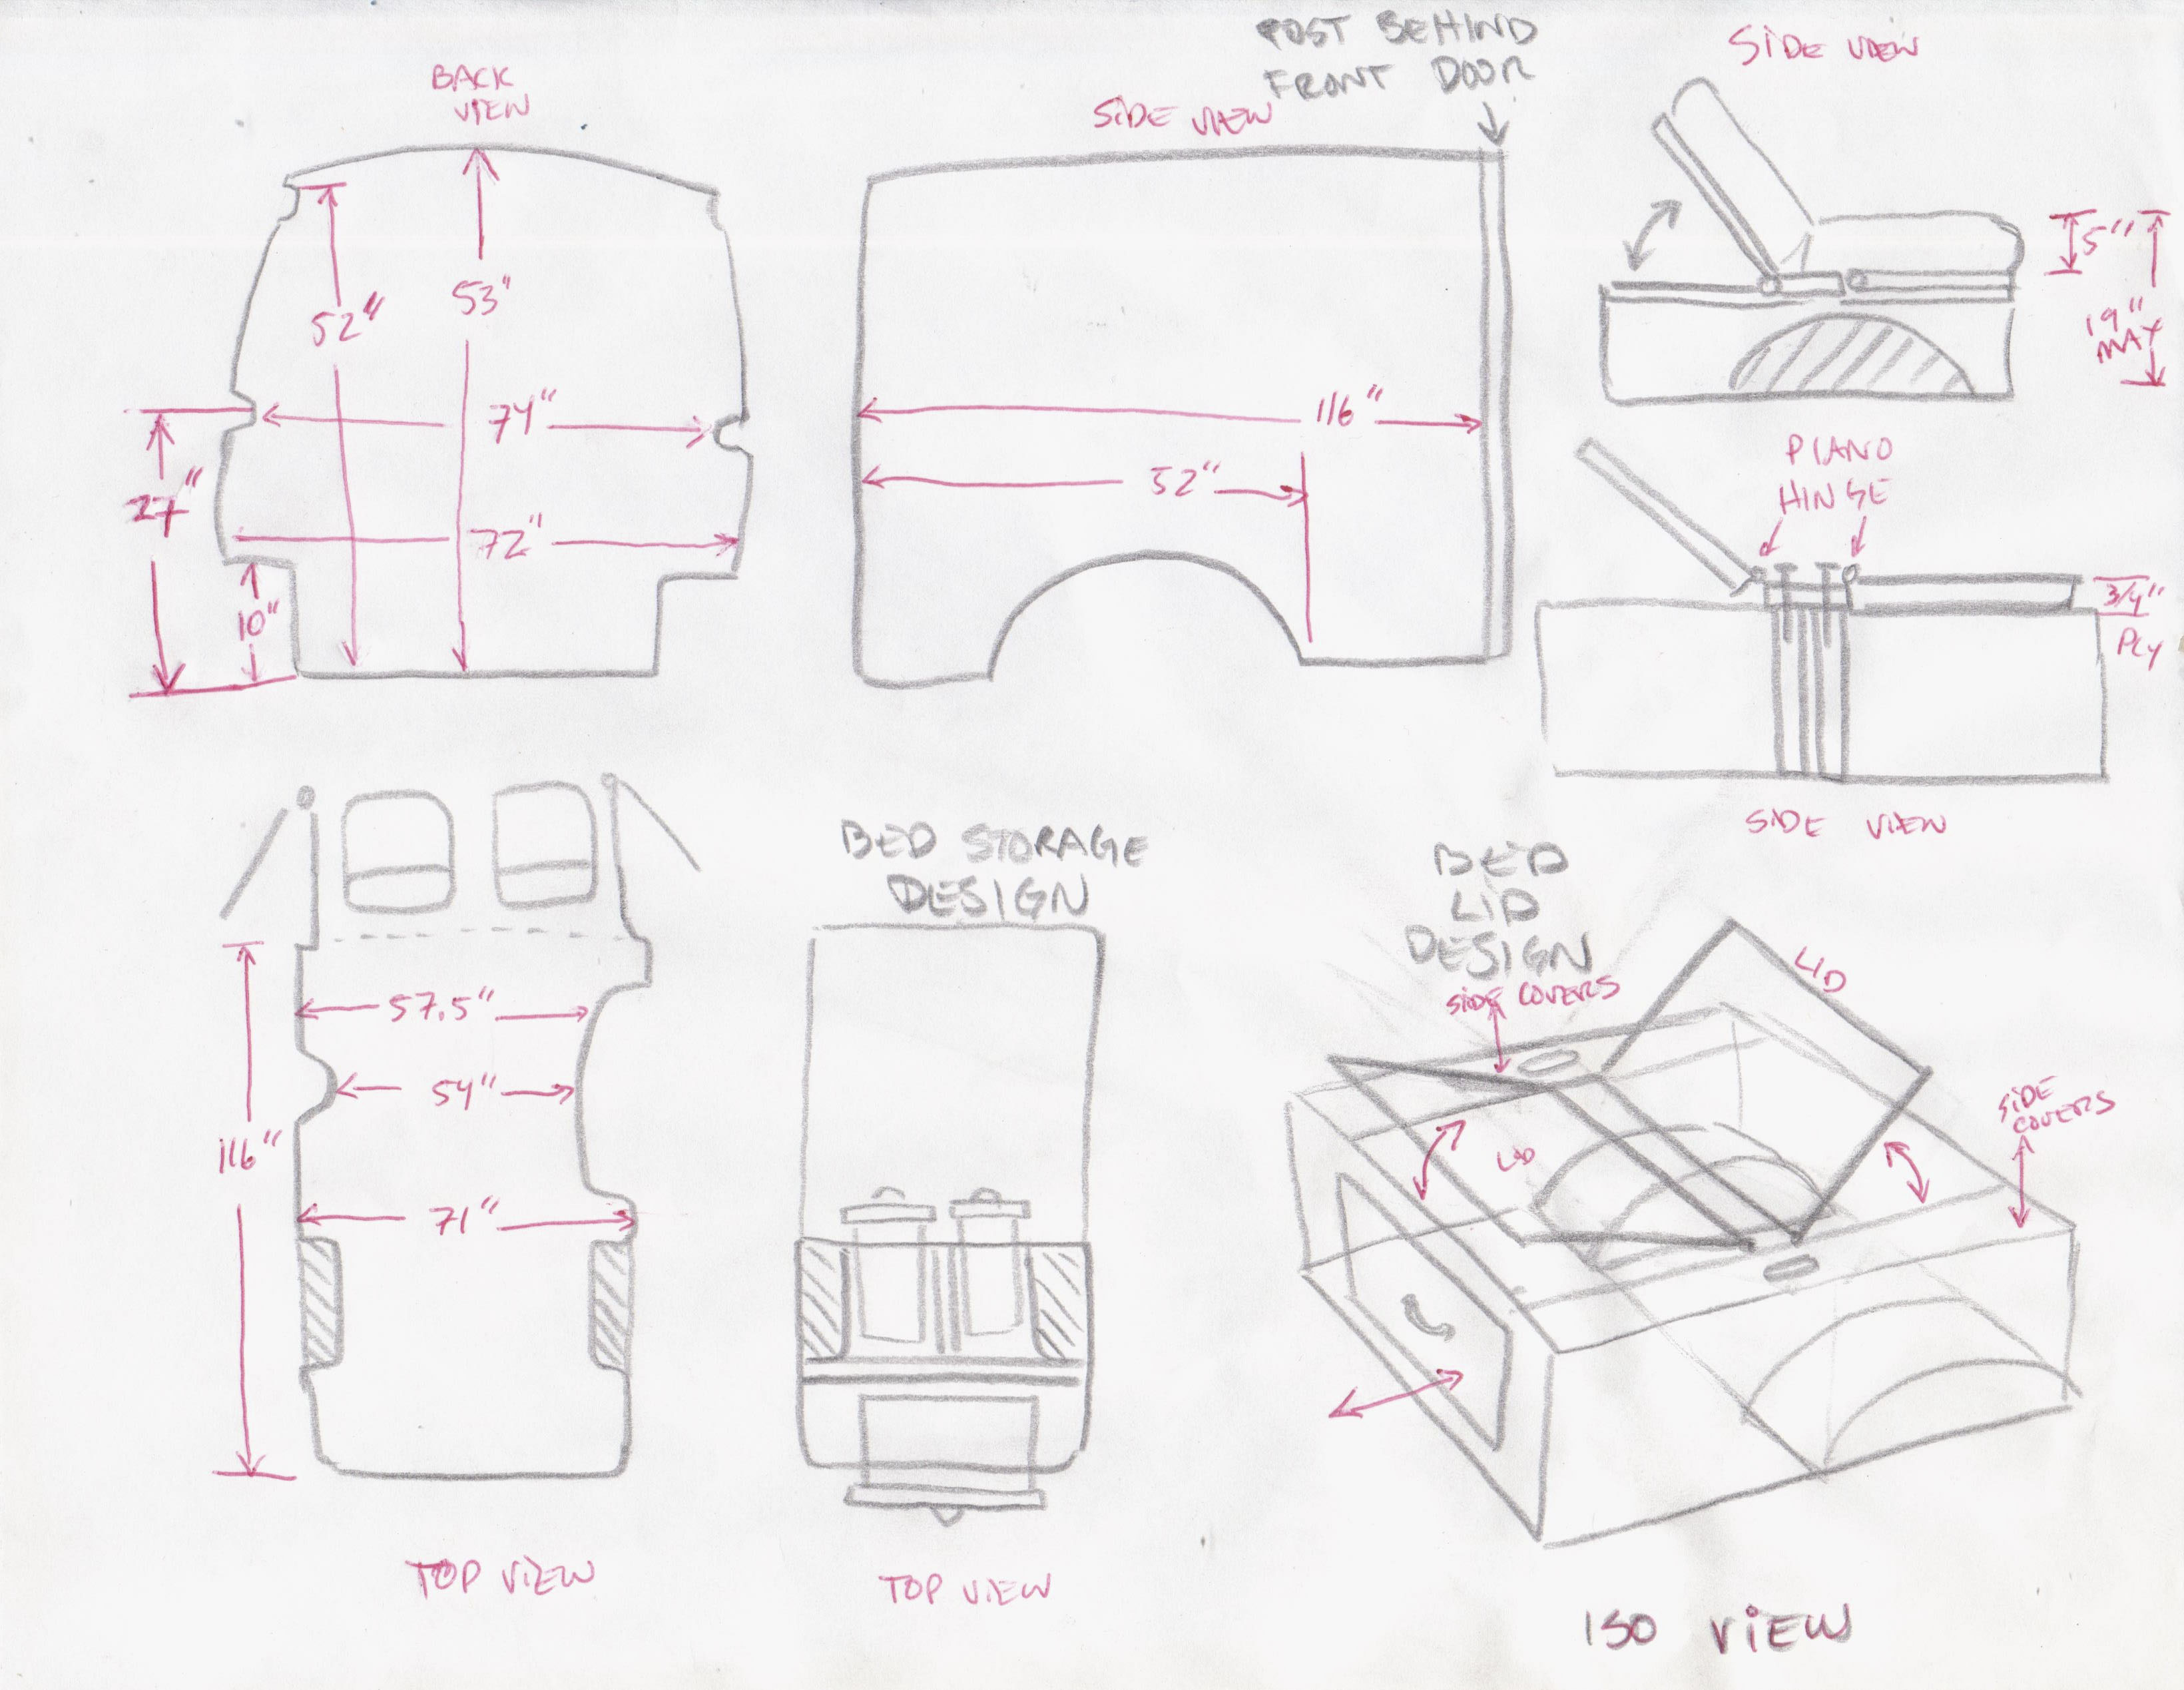
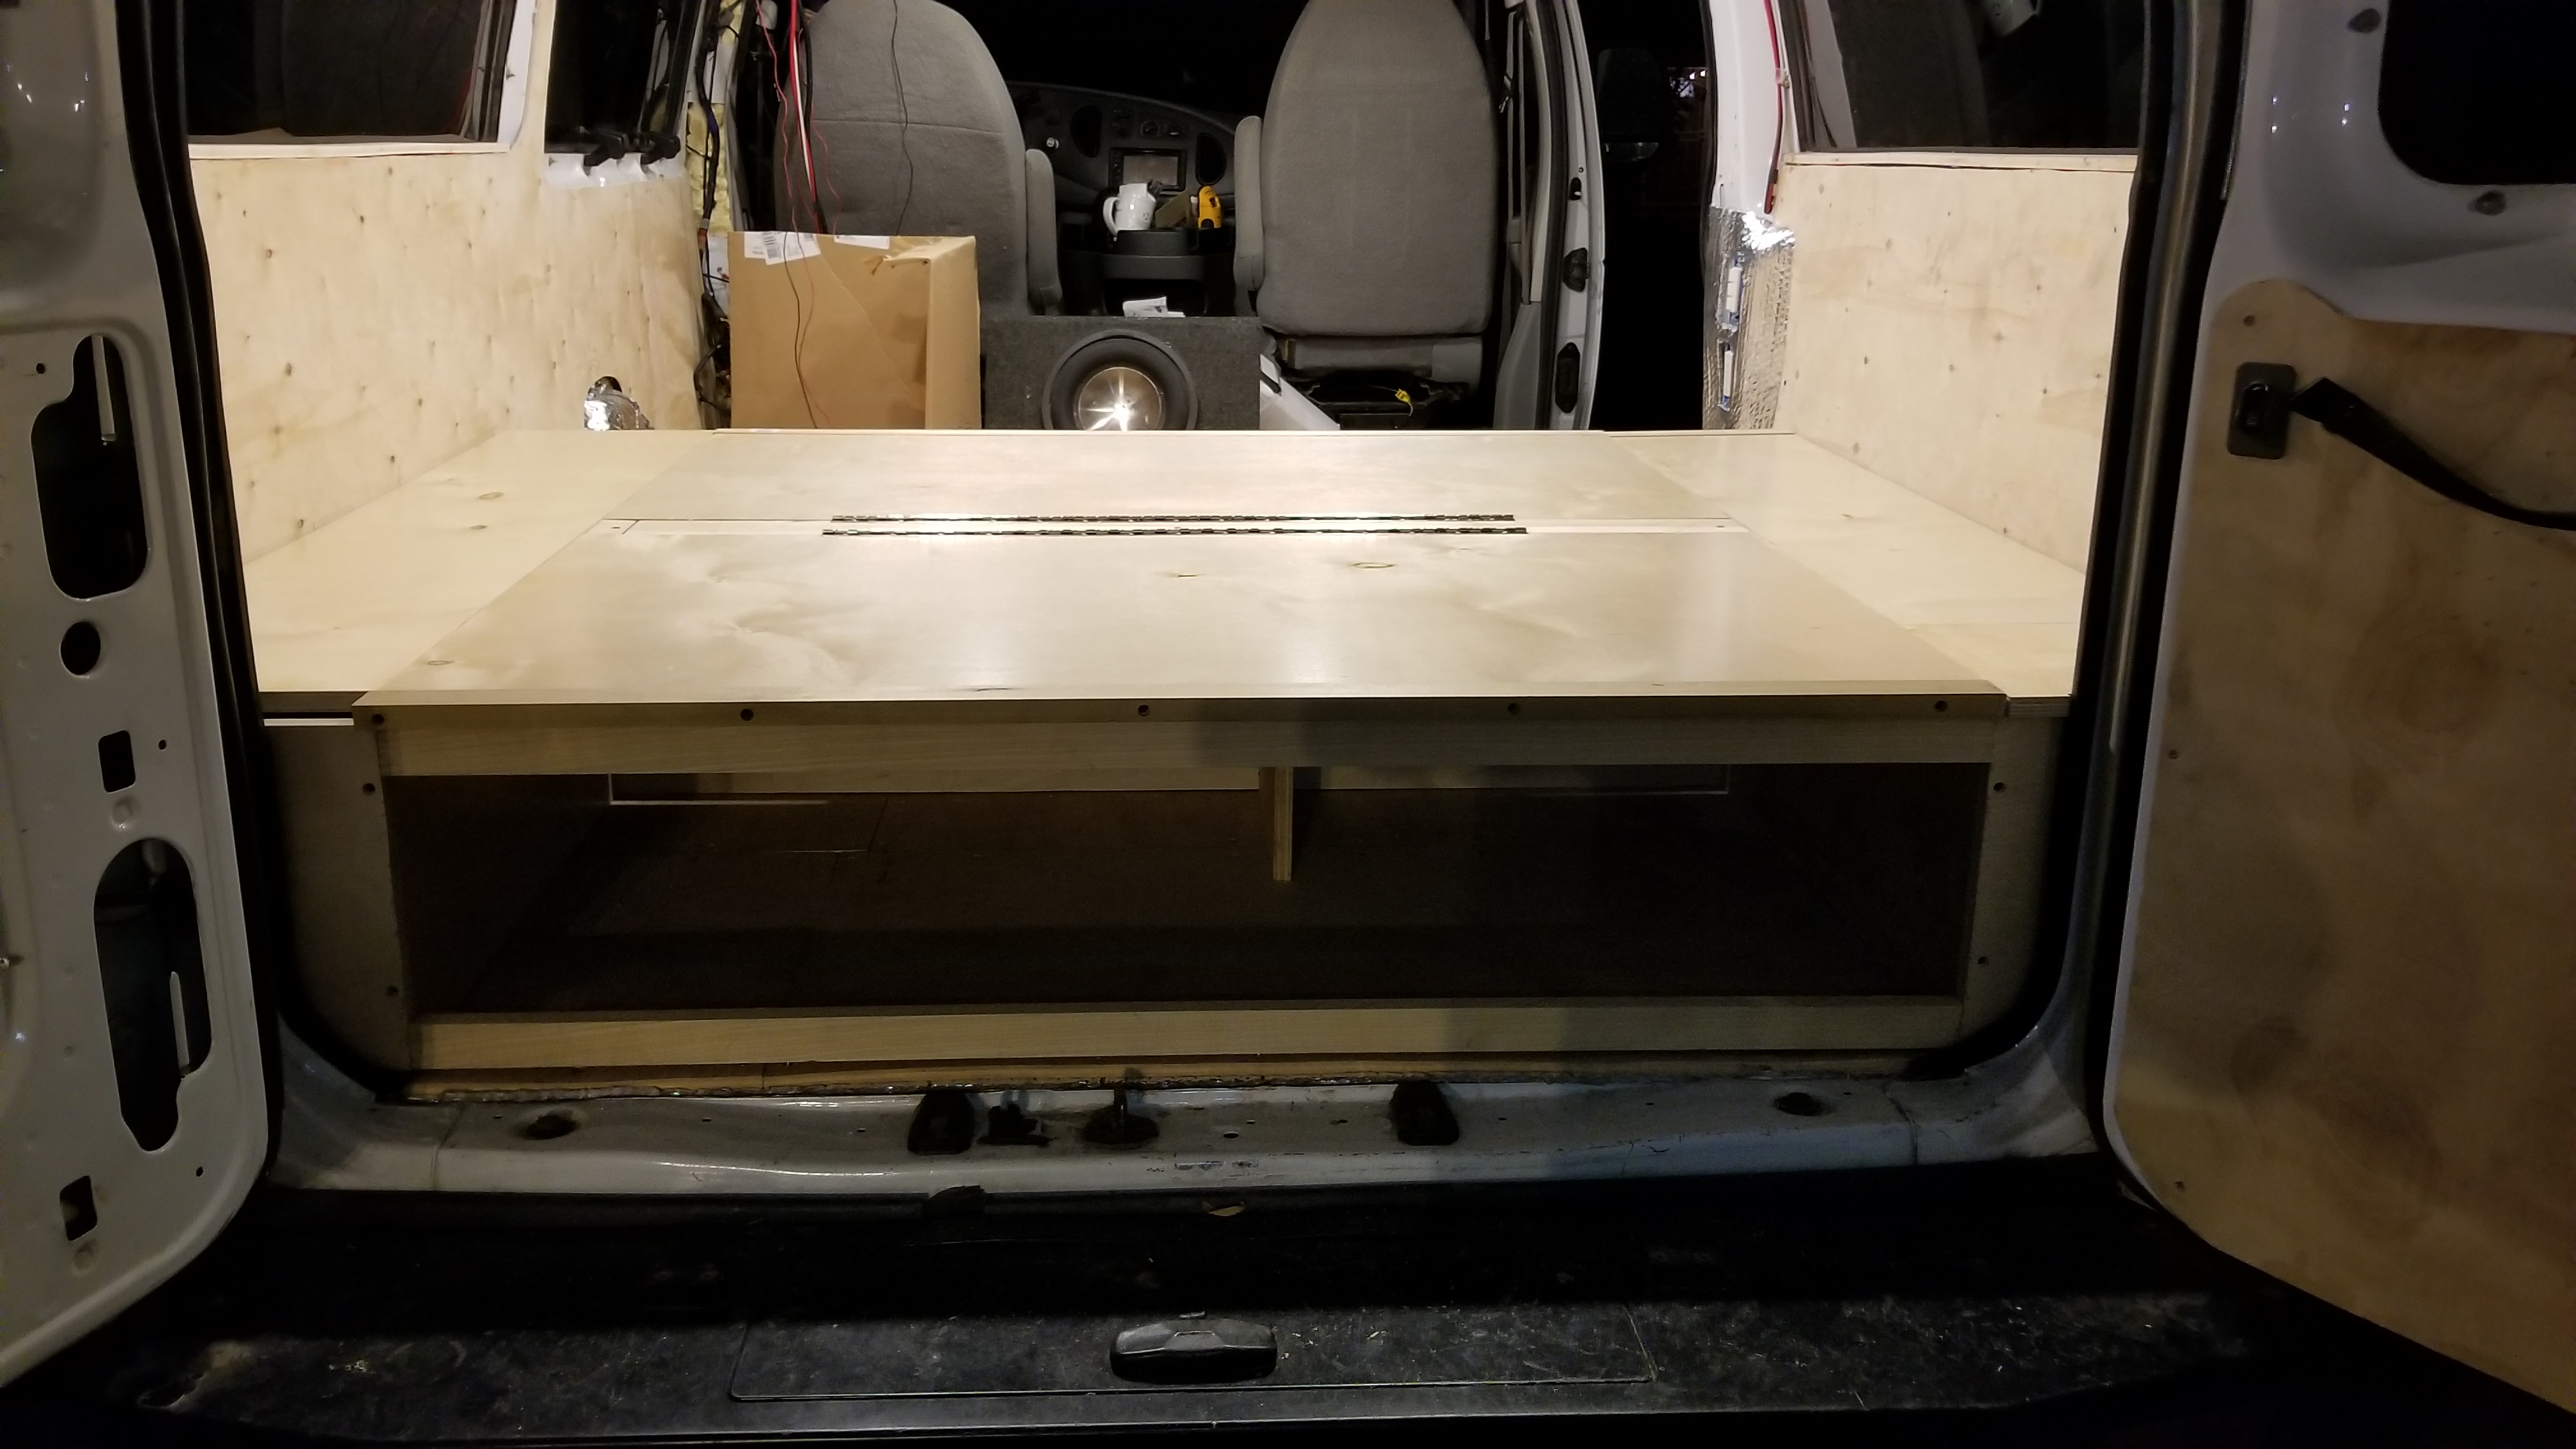
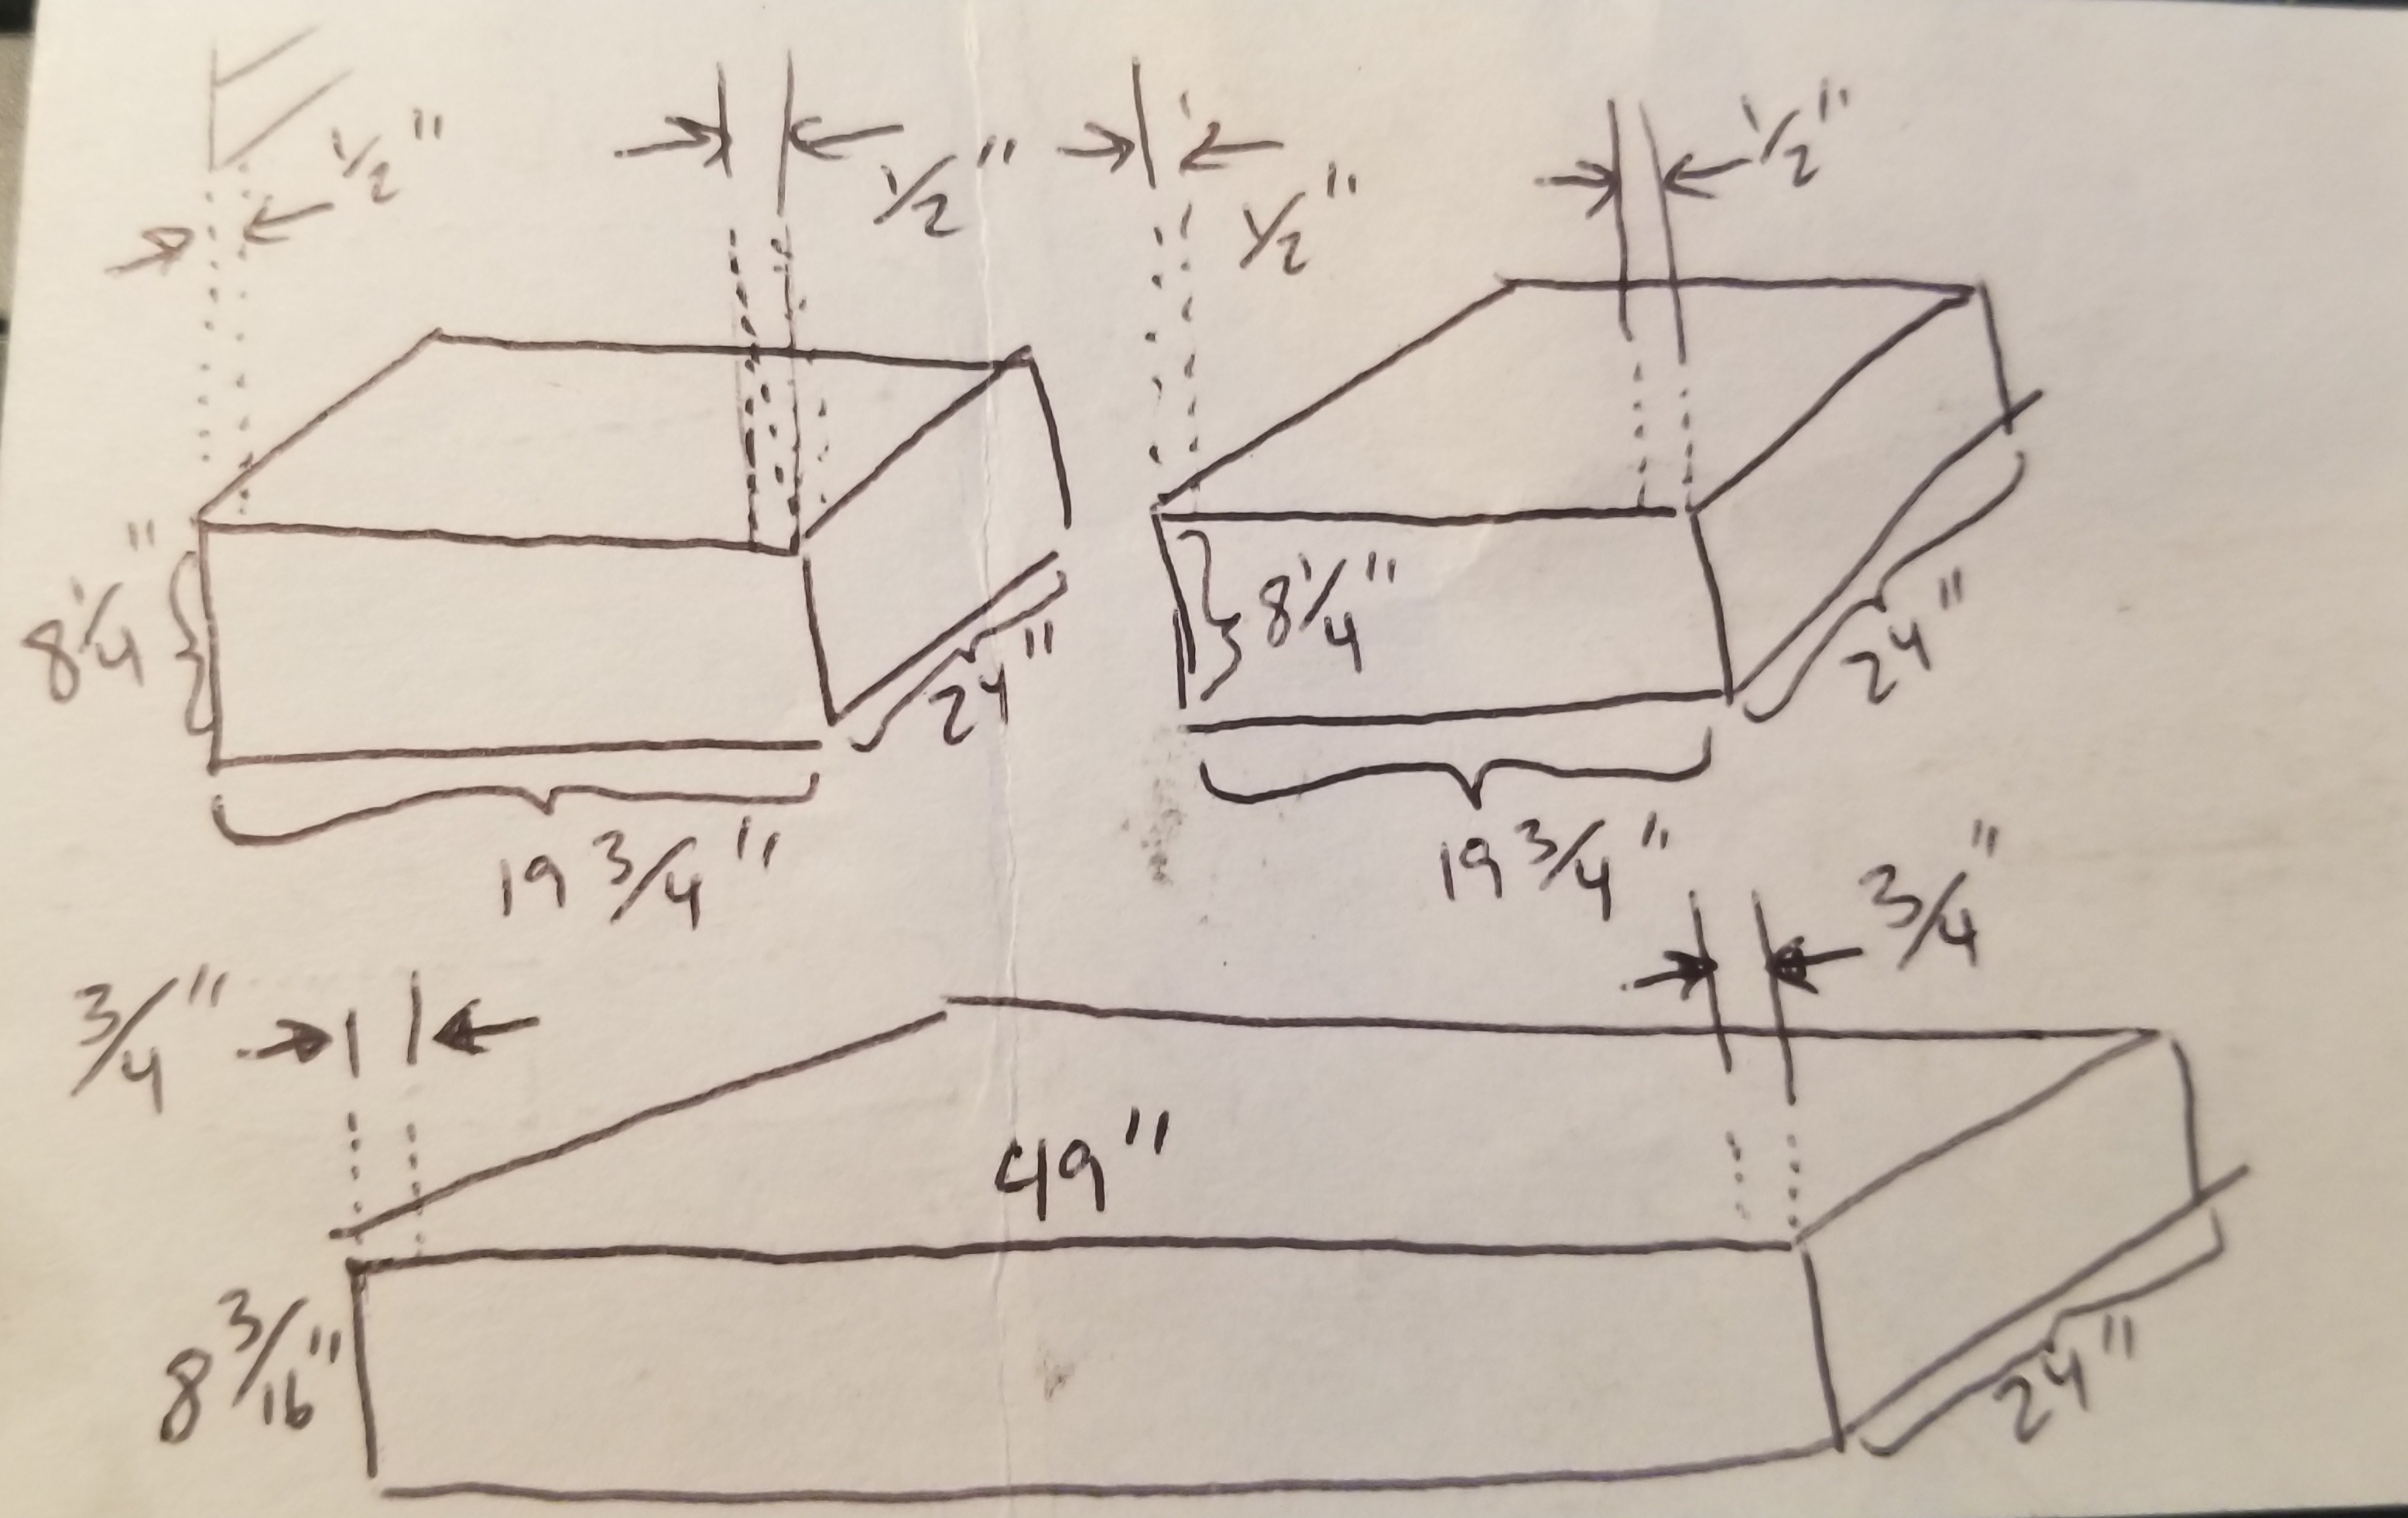
Remember how I said nothing is flat inside the body of a Ford E350 van? This is when it really matters! You want to build a bedframe that is flat; however, you are building on a curved surface. I first built the basic ‘H’ shape of my bed then shaved the bottom down until it sat flat on the floor. Once that step was done I could start building the rest of the bed/storage on this flat base. I chose to have a side-to-side bed (I am 5’7”) that was low enough to the floor that I could still sit up in it and use as a couch (remember to account for your mattress thickness). I also wanted it wide enough to sleep two people. These parameters drove my dimensions of the bed.
Tools/Materials used:
- Table Saw – Ridgid 15amp Portable 10″ Saw
- Sheet Sander – Makita 1.7 amp Sander
- Sand Paper – Grit: 100, 150, 220
- Dewalt Drill 20V Cordless
- Dewalt Drill Bits
- Drill bit with CounterSink (This thing was a huge time saver)
- Screws – Black square head wood screws 2″
- Measuring Tape
- Drafting Compass – Compass (Marking – saved the guesswork)
- Basic Tool Set
- JigSaw – Makita corded JigSaw
- JigSaw Blades – 3 Pack – I used a few different blades, found that the fine tooth took longer but made smoother cuts.
- Birch Plywood – 3/4 in X 4 ft X 8 ft plywood
- Birch Hardwood – 0.75IN X 2.5IN-R/L
- Qty: 12 ft
- Poplar hardwood – 0.75IN X 1.5IN-R/L
- Qty: 6 ft
- Piano Hinges – 1-1/16″ x 30″ Continuous Hinge
- Qty: 2
- Shocks – 100 Lb Single Shocks
- Qty: 2
- Shock Mounts – Ball socket mounts
- Qty: 2 sets of these 2: Flat Plate , Bent Plate
- Bed Lid Locks – HoodPins (These hold your bed lid w the shocks down)
- Qty: 2
- Front Small Drawer Sliders – 24″ Full Extension Soft Close Set
- Qty: 2
- Big Drawer Sliders – 200 Lb Capacity – 24″ Full Extension Sliders Set
- Qty: 1
Procedure:
- Take measurements of your van, and cut your ‘H’ shape to the height of your bed (with cover and mattress taken into account of course).
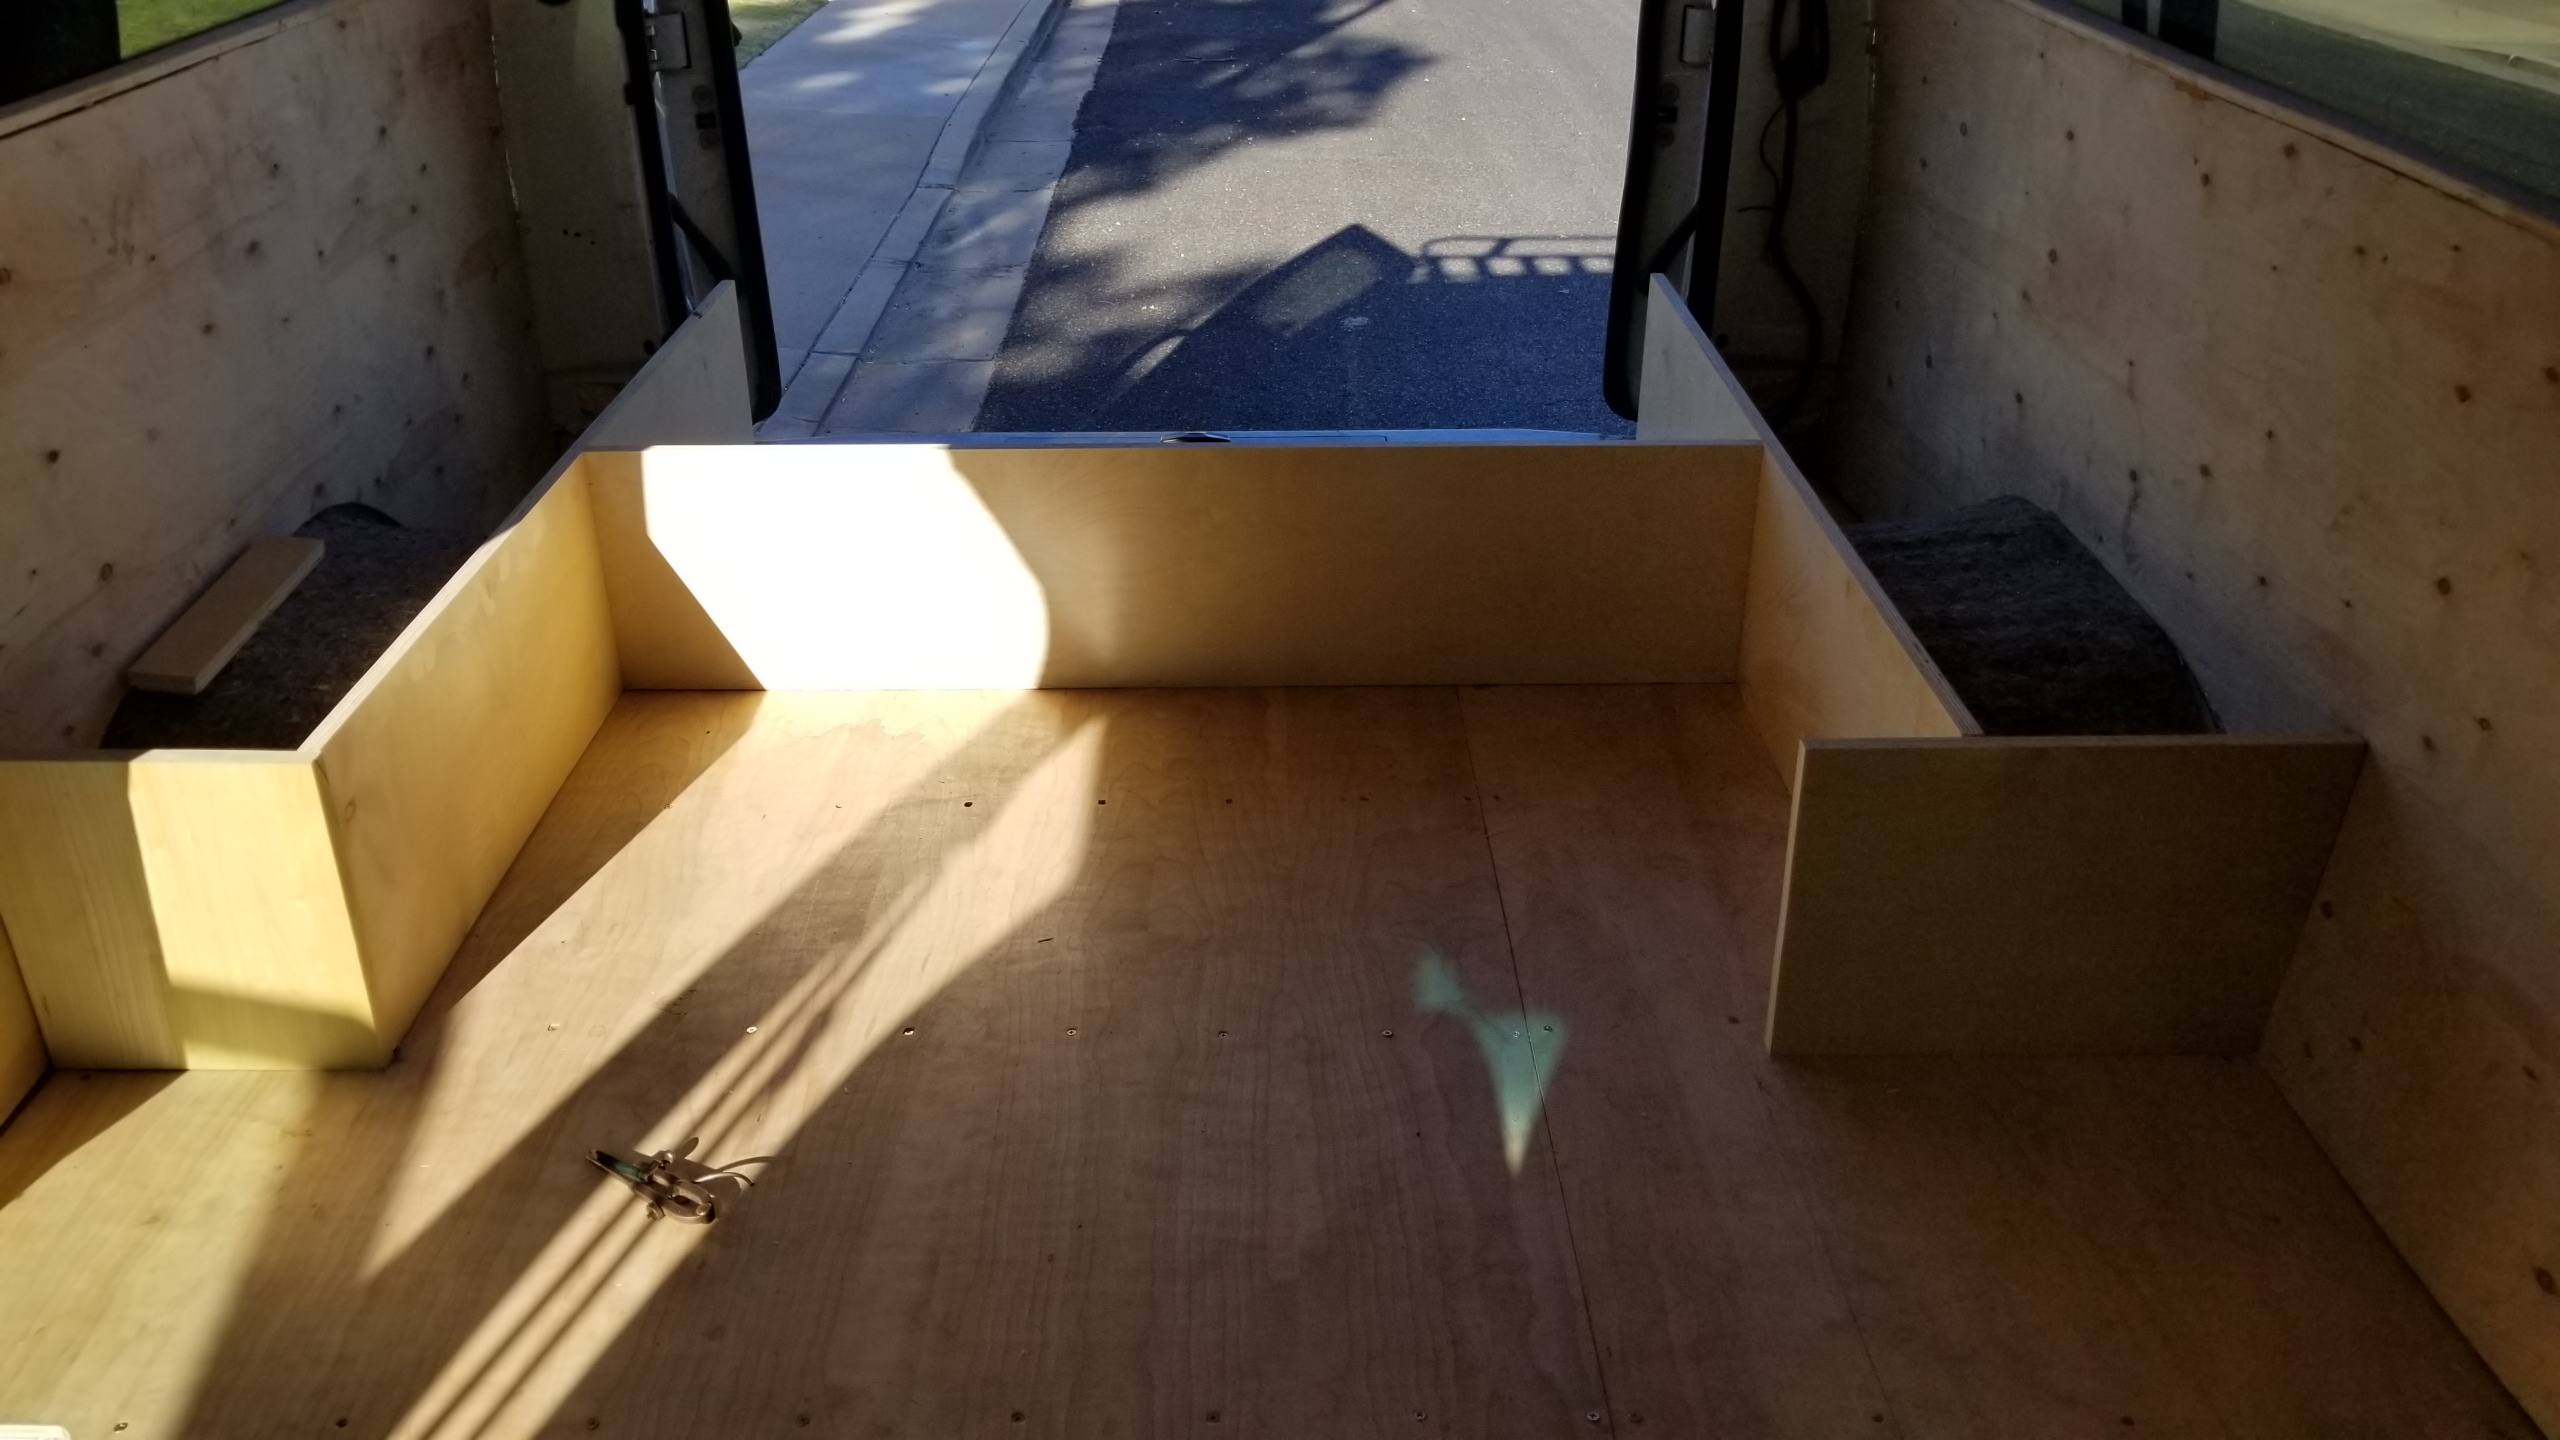
- Drill bore holes and countersinks for your screws. Screw it together (make sure it is square! 90 degree corners) and place in the back of the van. Your van isn’t flat, just come to terms with it. Once in place you’ll want to shave away the wood in the middle of your ‘H’ shape until it sits flat.
- Video progress: https://youtu.be/Q_pk2nhP_Ms
- Video of Basic ‘H’ Shape Complete: https://youtu.be/z9XKVYsz4RQ
- Once flat, cut your face boards out of hardwood (I chose hardwood as it can be sanded down and painted for a finished look). Cut your runners to create openings for your drawers. Ensure everything is square and sitting flush in your van.
- Video: https://youtu.be/RN8z5Dc3QJQ
- Once your frame is complete, screw mounting blocks into the floor and then screw your frame to the mounting blocks. I used wood as it was readily available. I am sure you could use metal brackets. At any rate make sure it’s good and secure so your bed doesn’t go flying across your van when you stop!
- Now it’s time for the top of your bed! I opted to have lids that opened like a chest and swiveled on piano hinges. This gave me access to the storage below without opening the drawers in the front/back but also gave me the ability to make the bed into a couch with the aid of two air shocks (rated at 200 lbs each). I cut a central strip for mounting the two lids and screwed it to the center piece of the ‘H’ shape. Then I cut both lids, laid them down flat, attaching them with piano hinges to the central strut.
- Video: https://youtu.be/iyKcVvZL-8g
-
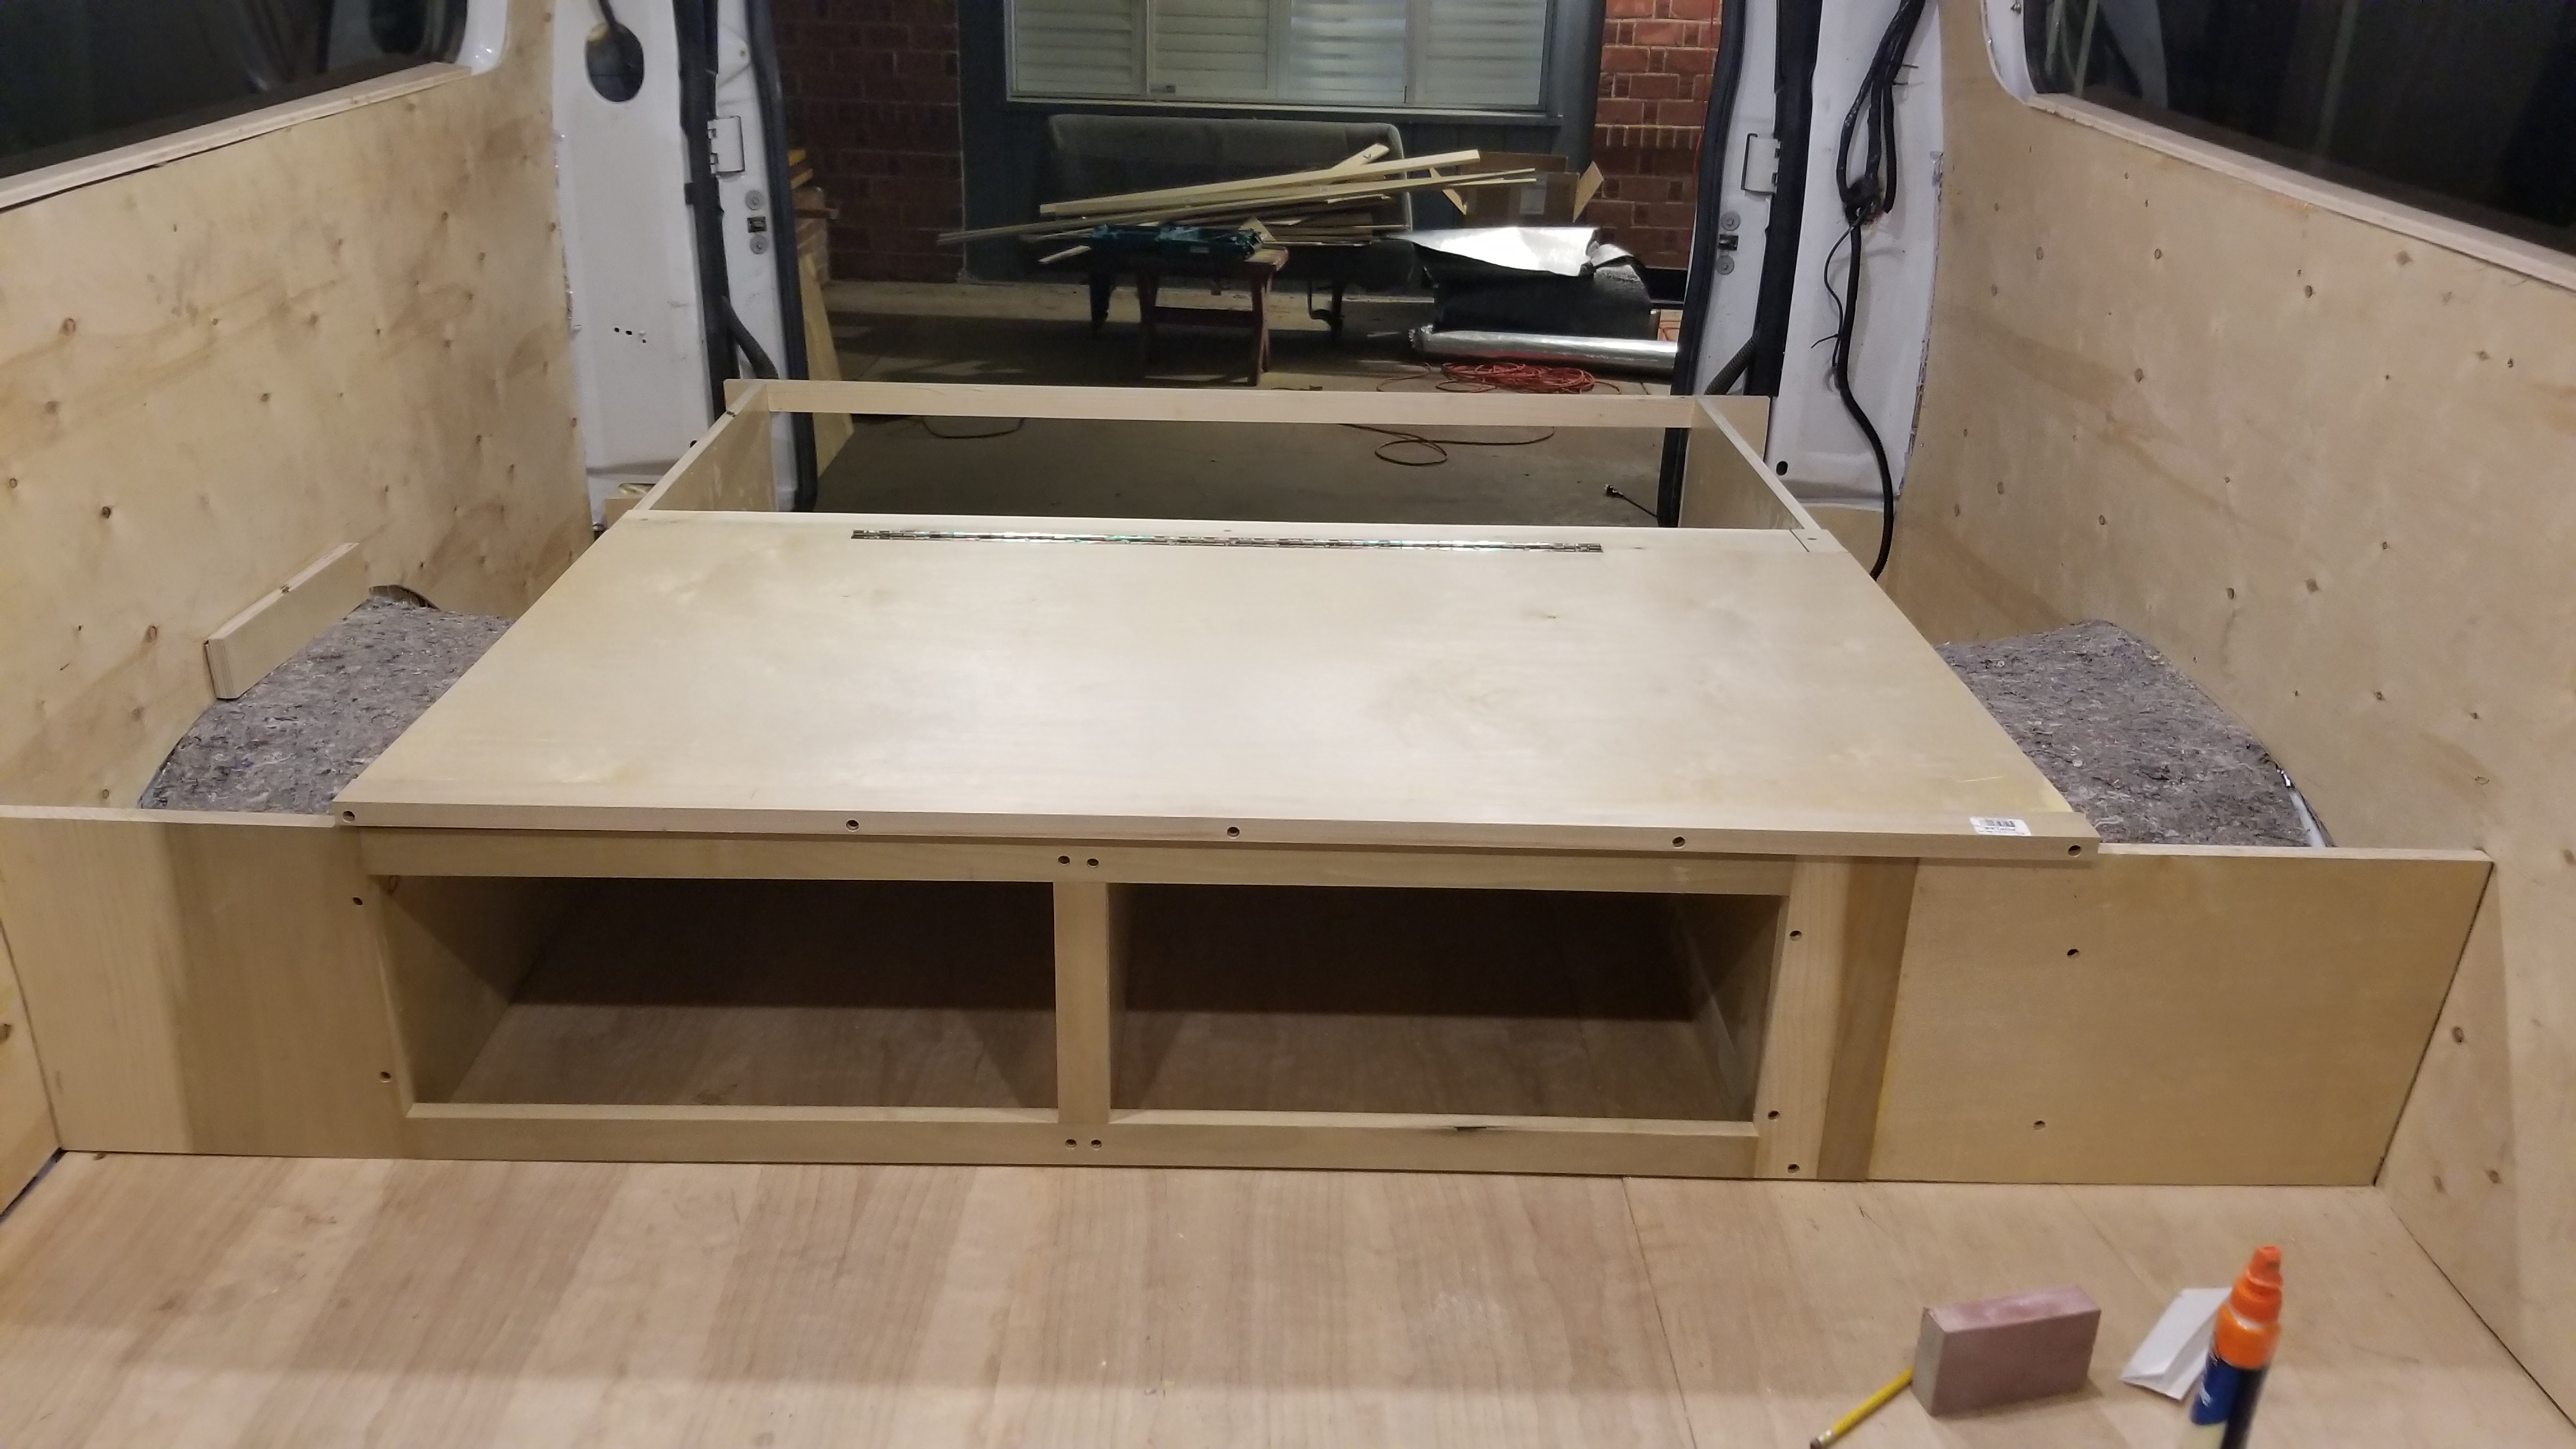
Front view! Front lid is on. 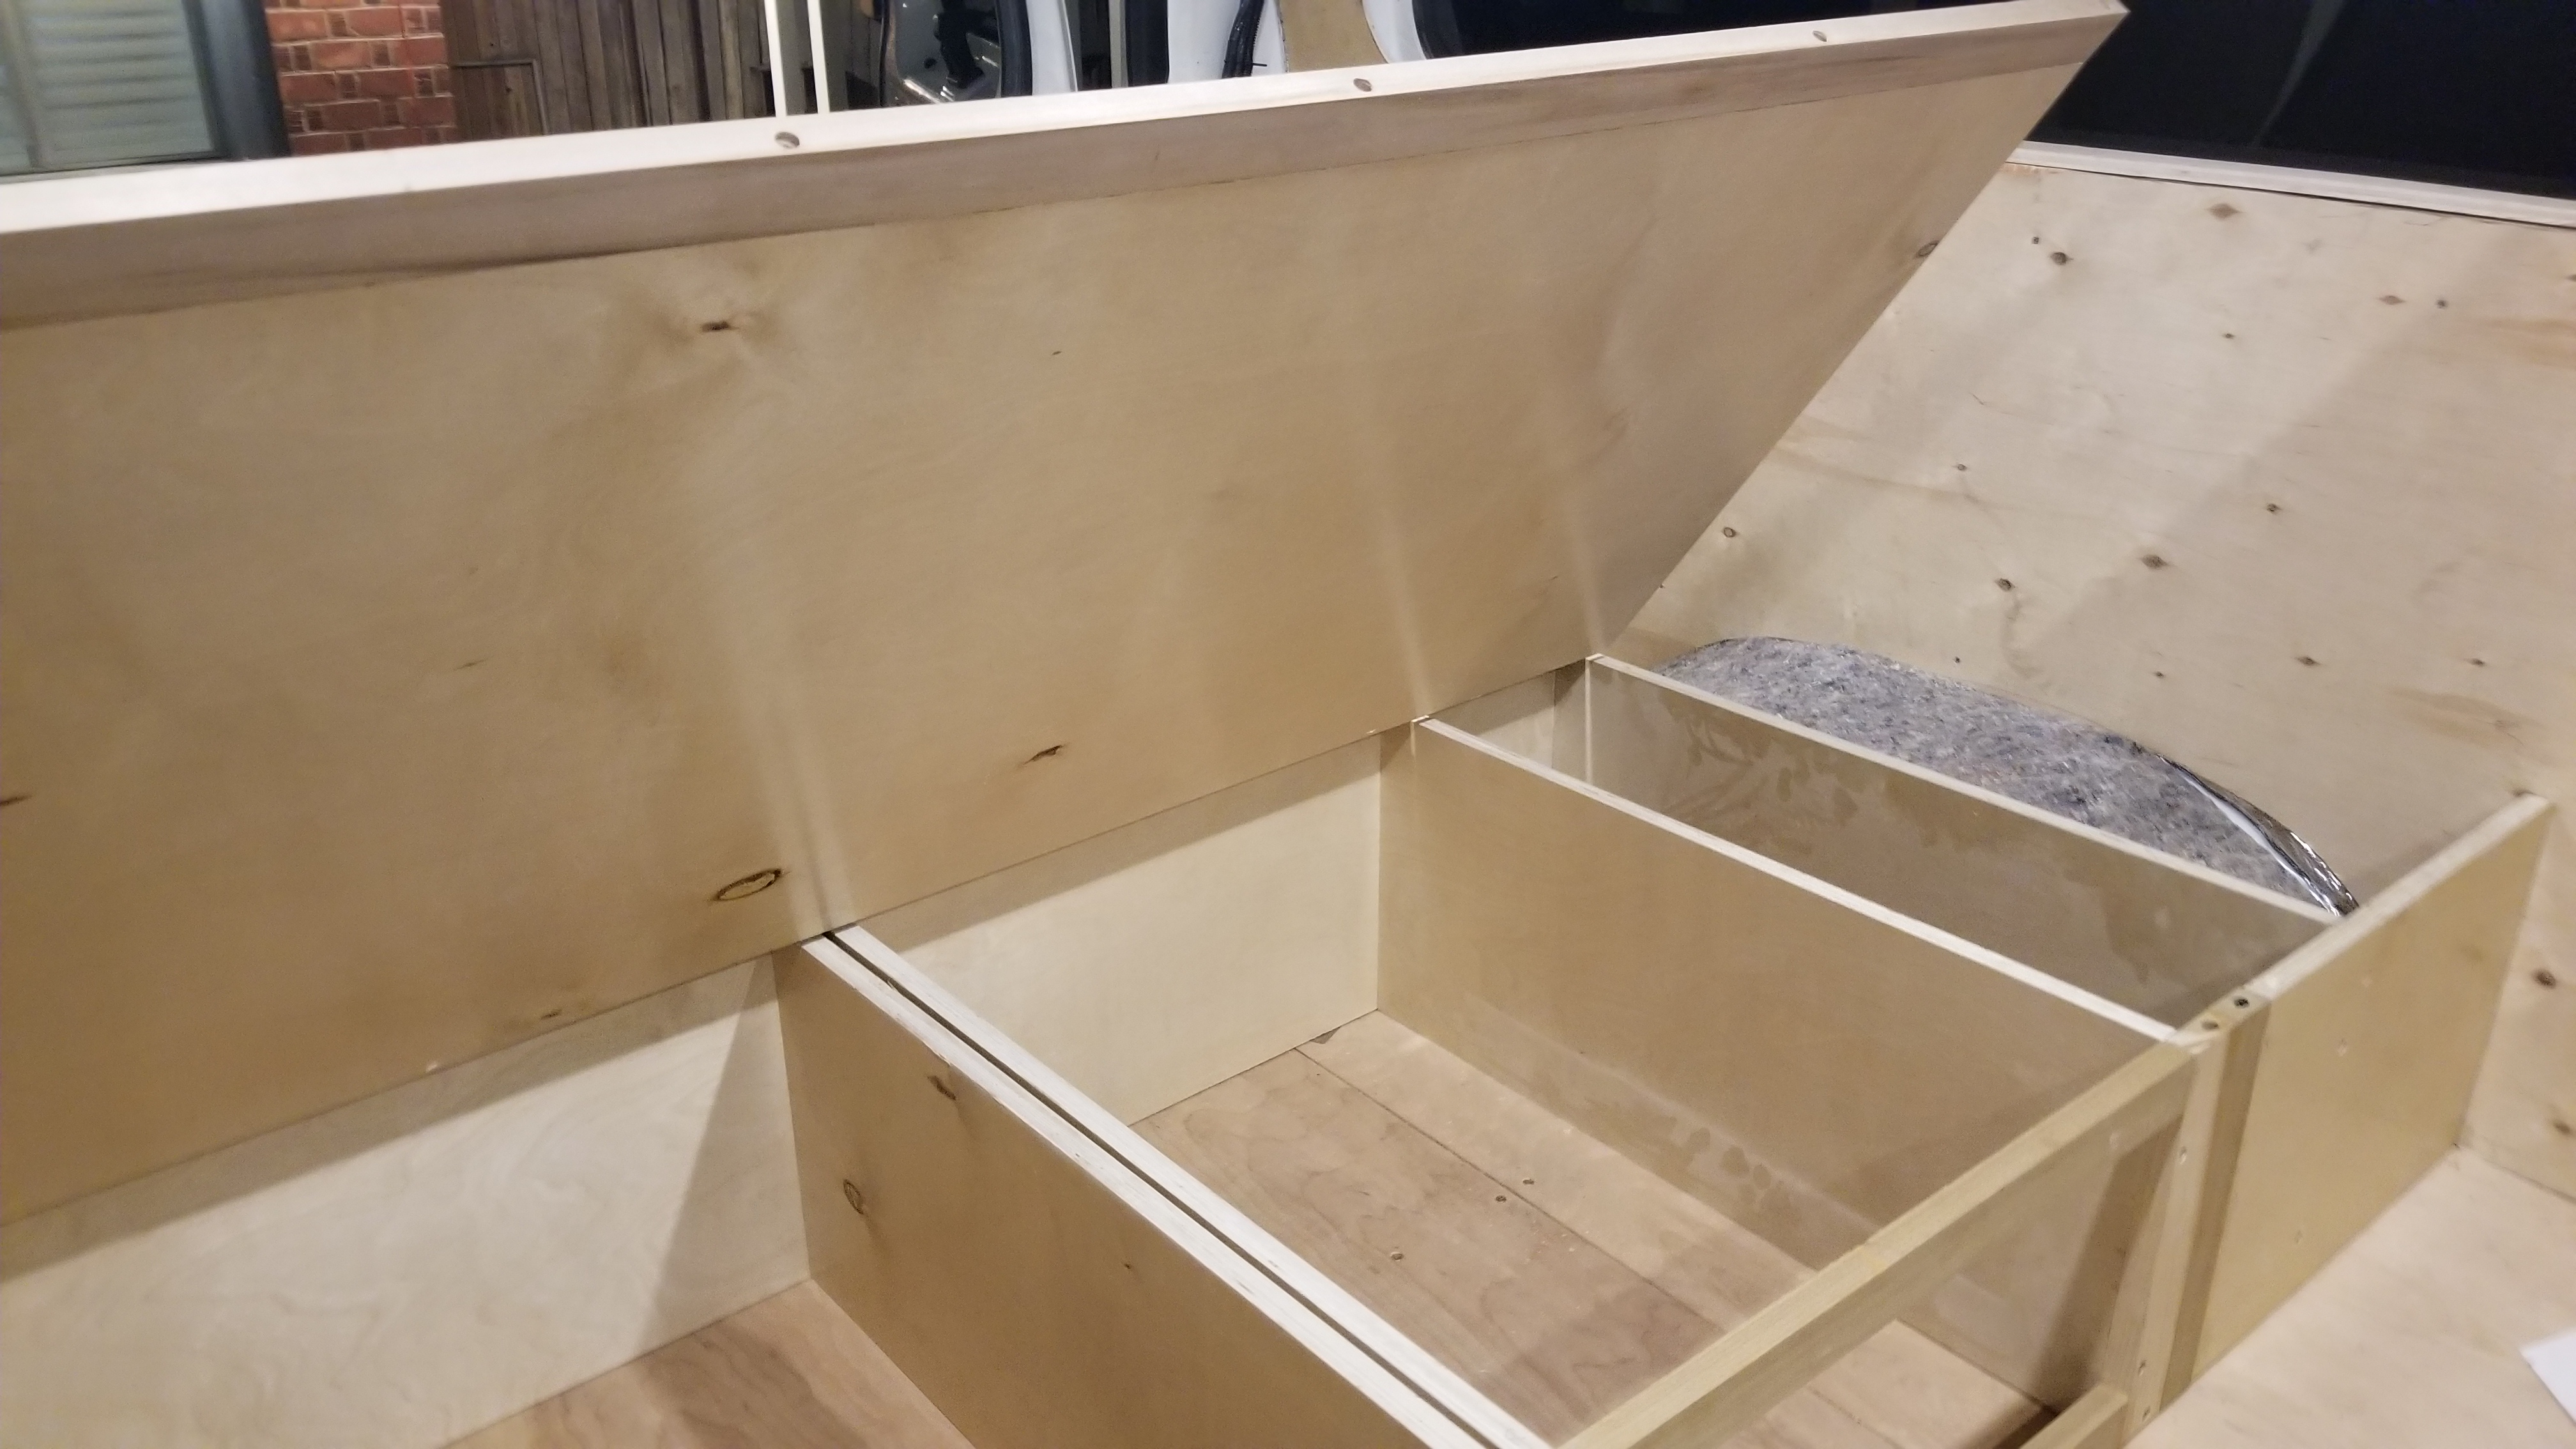
Looking into the little cubby holes 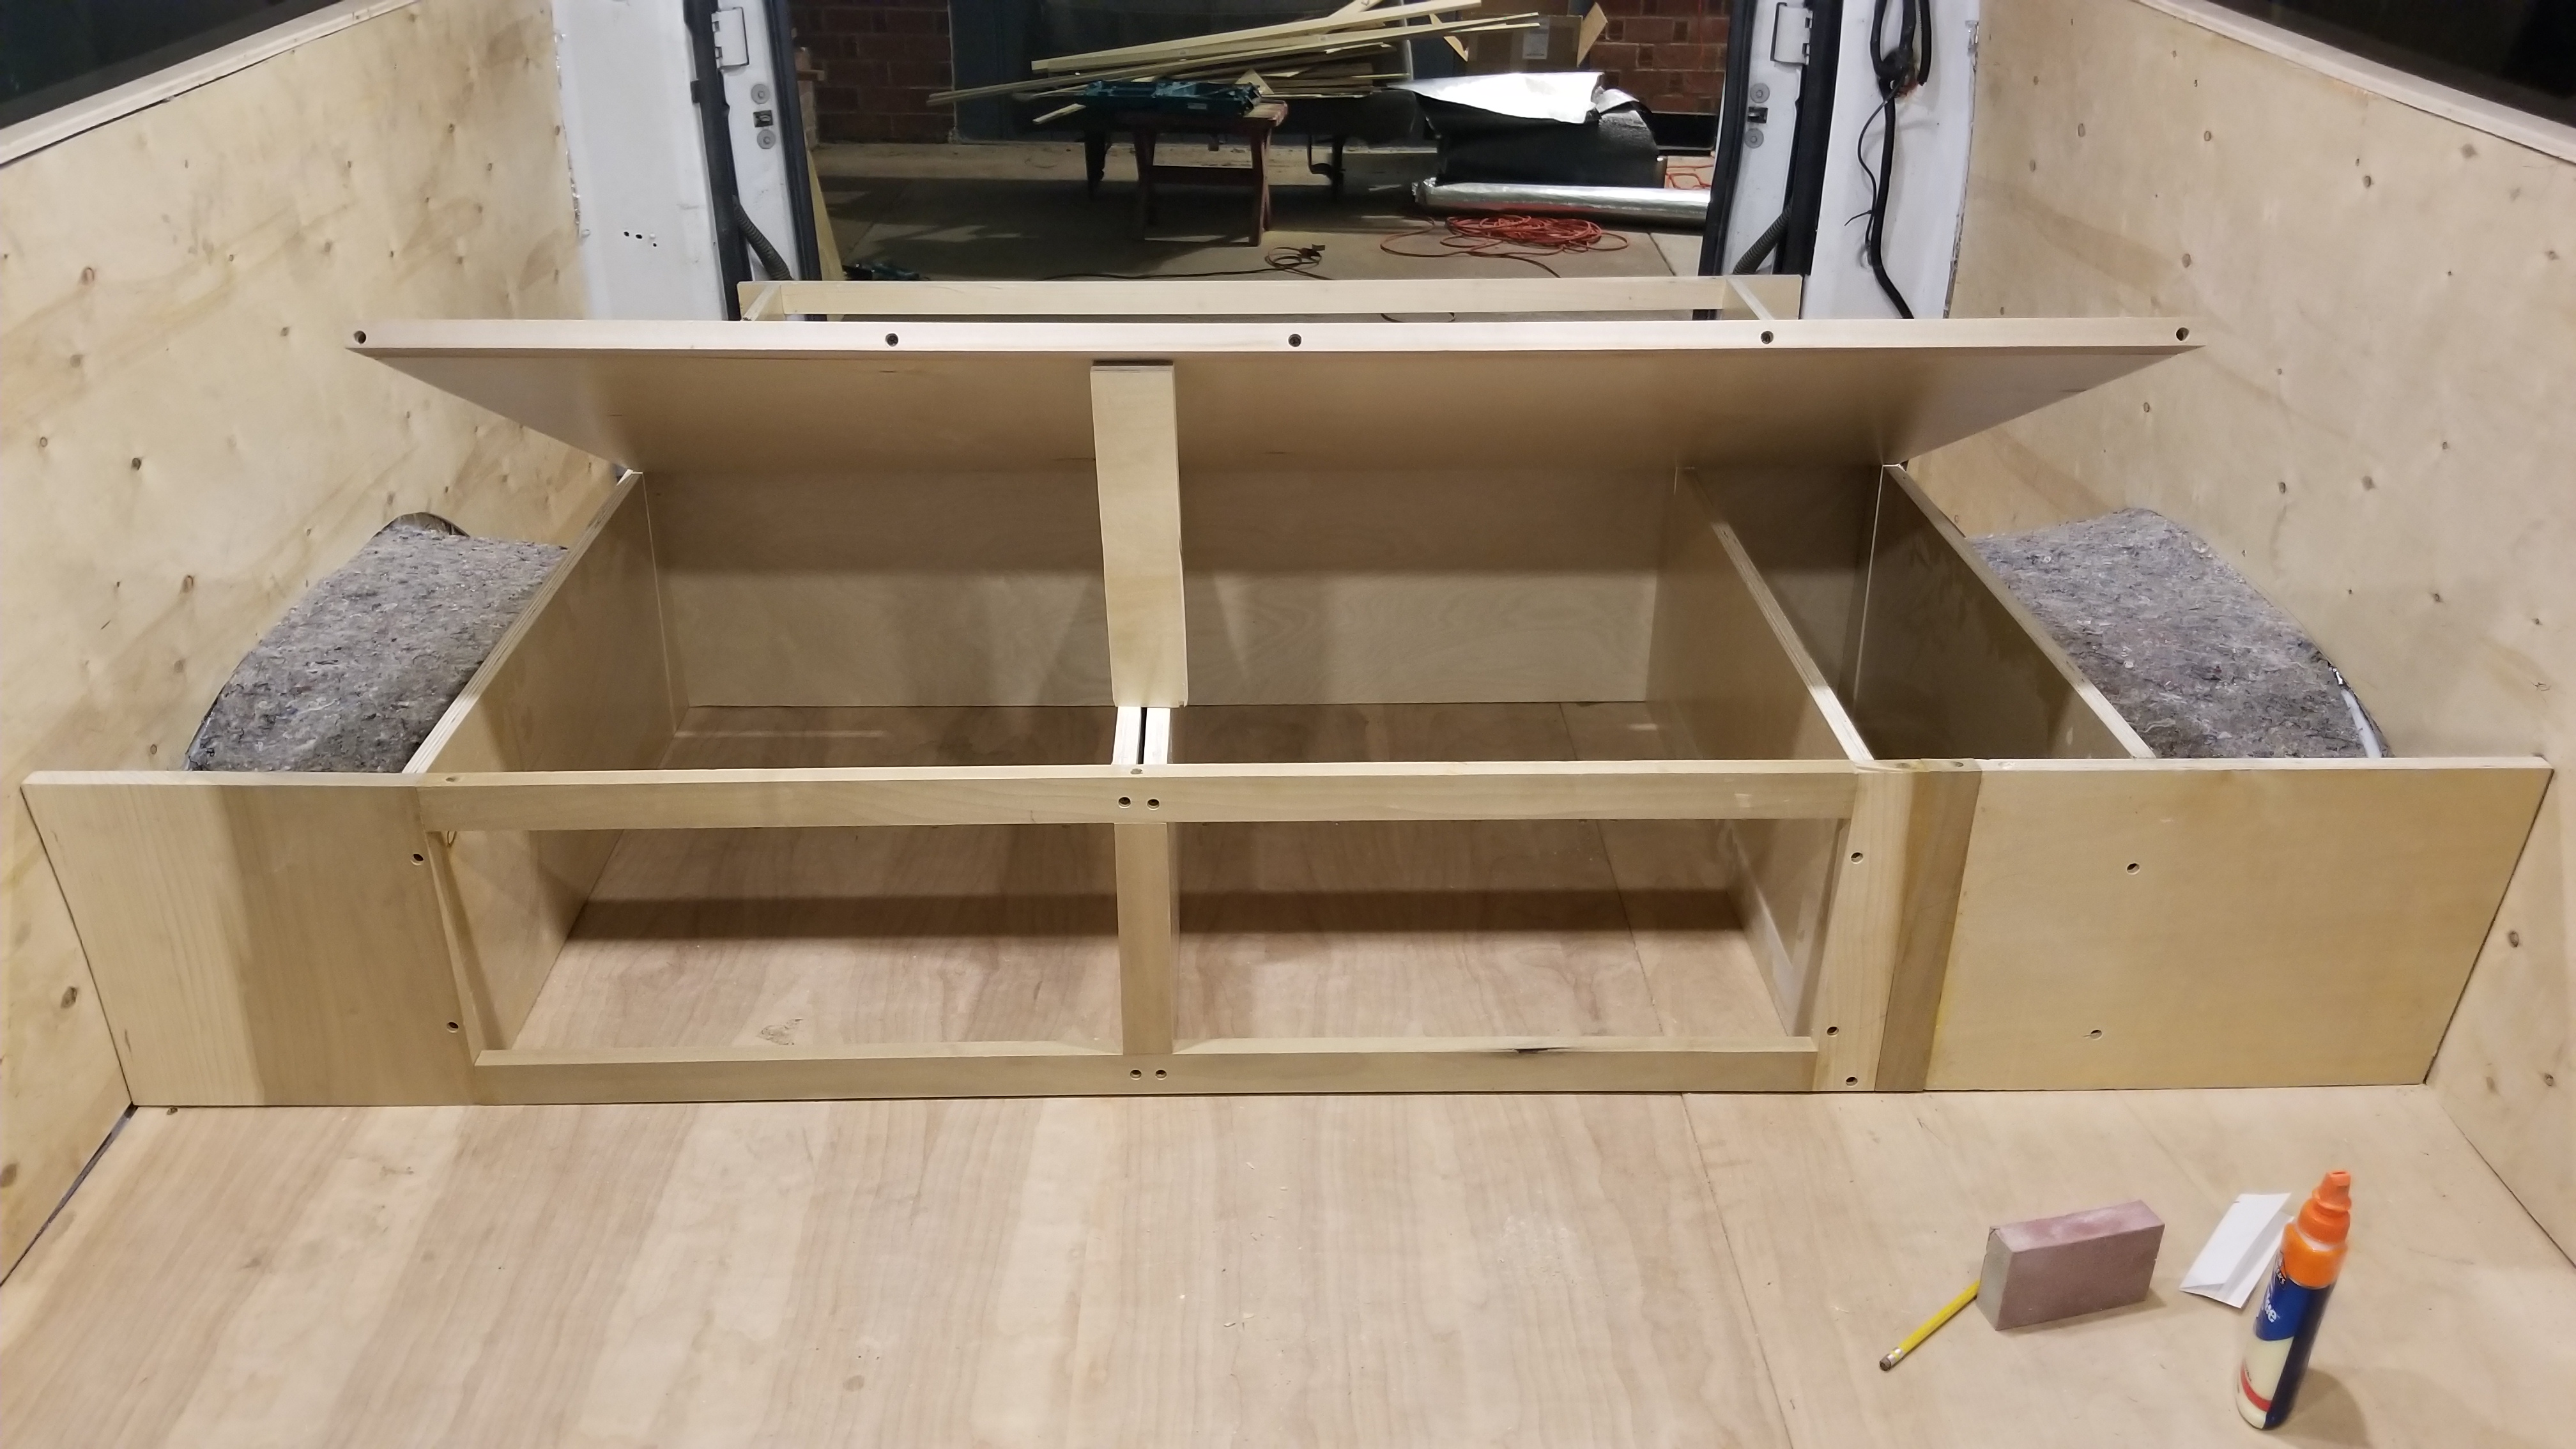
Lid will lift for top access to cubbies and drawers
- I then cut the side covers for the areas that would not be covered by the lids. The side storage I cut to size using the lids and van walls to keep them in place (no actual attachment, just laid on top). I cut a hole in the top to manually pull for access. I split the difference of the legs of the ‘H’ between the side covers and the two hinging lids to ensure they both had surfaces to rest on when closed. I cut small blocks and screwed them to the wall as a support stopper for these side covers.
- Video: https://youtu.be/C9iHKHNxx90
- I ended up cutting a flat strip of hardwood for the edge of all the lids and screwed it into place from the ends. I did this to keep a clean finish once sanded and painted.
- I then installed the air shocks for the back lid and two hood latches. This took some adjusting, but once in position they worked great! You can accomplish this “couch mode” by rigging up a couple of pieces of wood for struts to hold the back lid up. Warning: The shocks will put some decent forces on your bed frame, make sure it’s sturdy or it will rip your lids from their hinges or shift your frame making the perfect lids you cut no longer fit correctly. I went back and beefed my frame up for this reason.
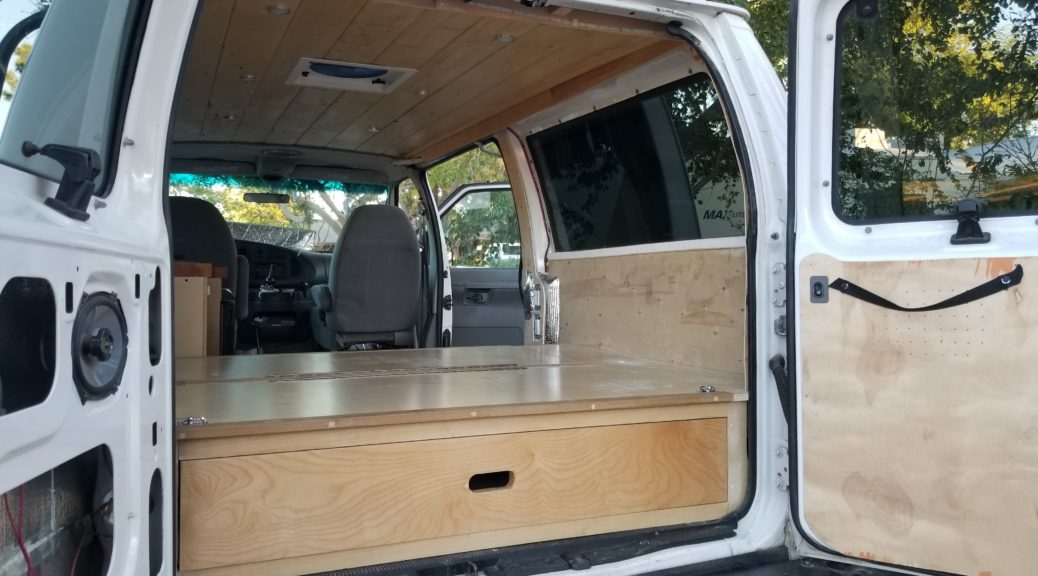
- Install your drawers – I bought my drawers custom made, I provided the dimensions of the holes I had designed for my three drawers and gave the dimensions of the sliders I purchased and picked them up when they were done! I really didn’t want to play around with trying to make perfectly square drawers so I outsourced this to my friend Sam’s dad (thanks Peter Gallen!). Once I had the drawers I installed them with sliders that I purchased from Home Depot (the sliders come with installation instructions). Once installed I (Peter actually) cut facer covers for all three drawers and screwed them in from the back to give the closed drawer a flush look (don’t need to be snagging everything on the edges of drawers).
-
Measure your drawer hole, then subtract the size of the sliders from the side to get your drawer size. - Video: https://youtu.be/ZNaGEtvXih4
 Be a bum and get someone professional to build you some stellar drawers (Thanks Peter Gallen!)
-
- Stain your drawer facer boards and install your handles. I installed sleek handles on the front (facing the living space) that wouldn’t snag. I simply cut an elongated hole in the large back drawer in the back that I could just grab by hand (no handle needed).
- Cut your futon that you bought from IKEA down to fit your bed frame. I removed the foam blocks from inside the futon and cut 6” off the height and 3” off the side to side to fit. I took my futon cover to an awning company to be boxed up to fit the cut-down size of the foam pieces.
- Video 1: https://youtu.be/I3UjRC07Eow
- Video 2: https://youtu.be/NF60CThpC6o
- Video 3 – Installed (taken later in the build): https://youtu.be/NAindaPd9WA
-
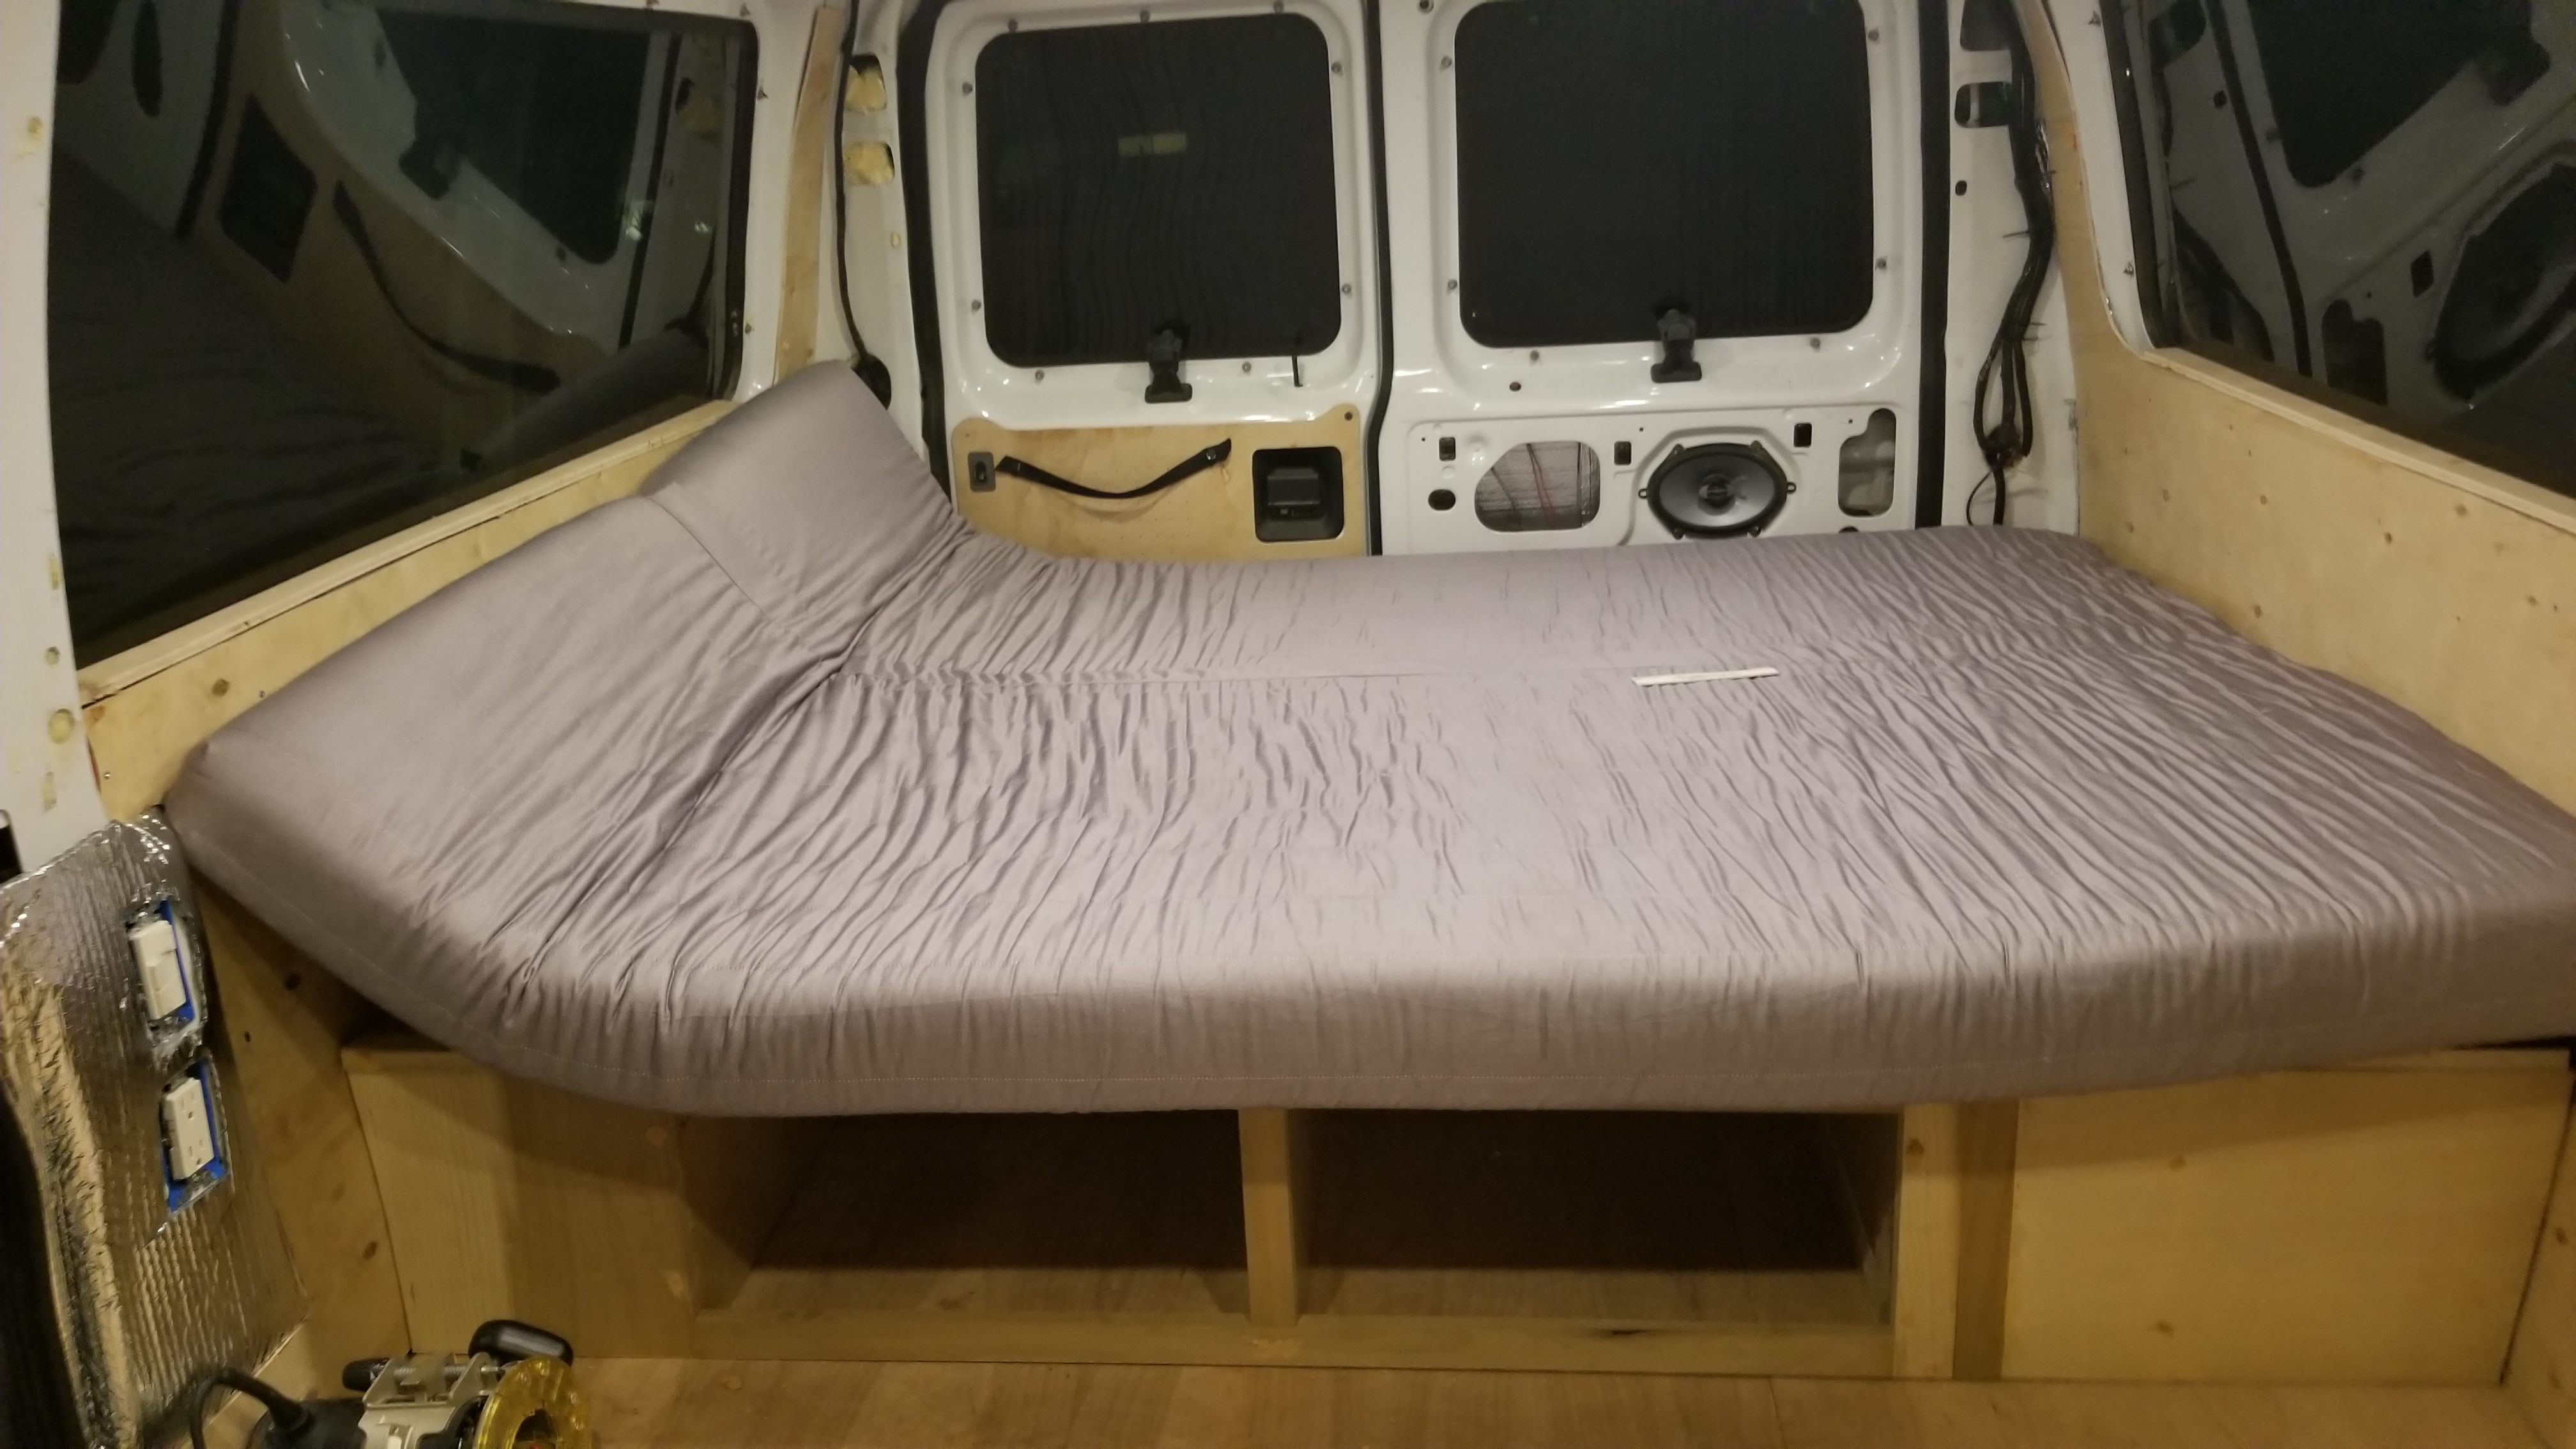
IKEA baby! -
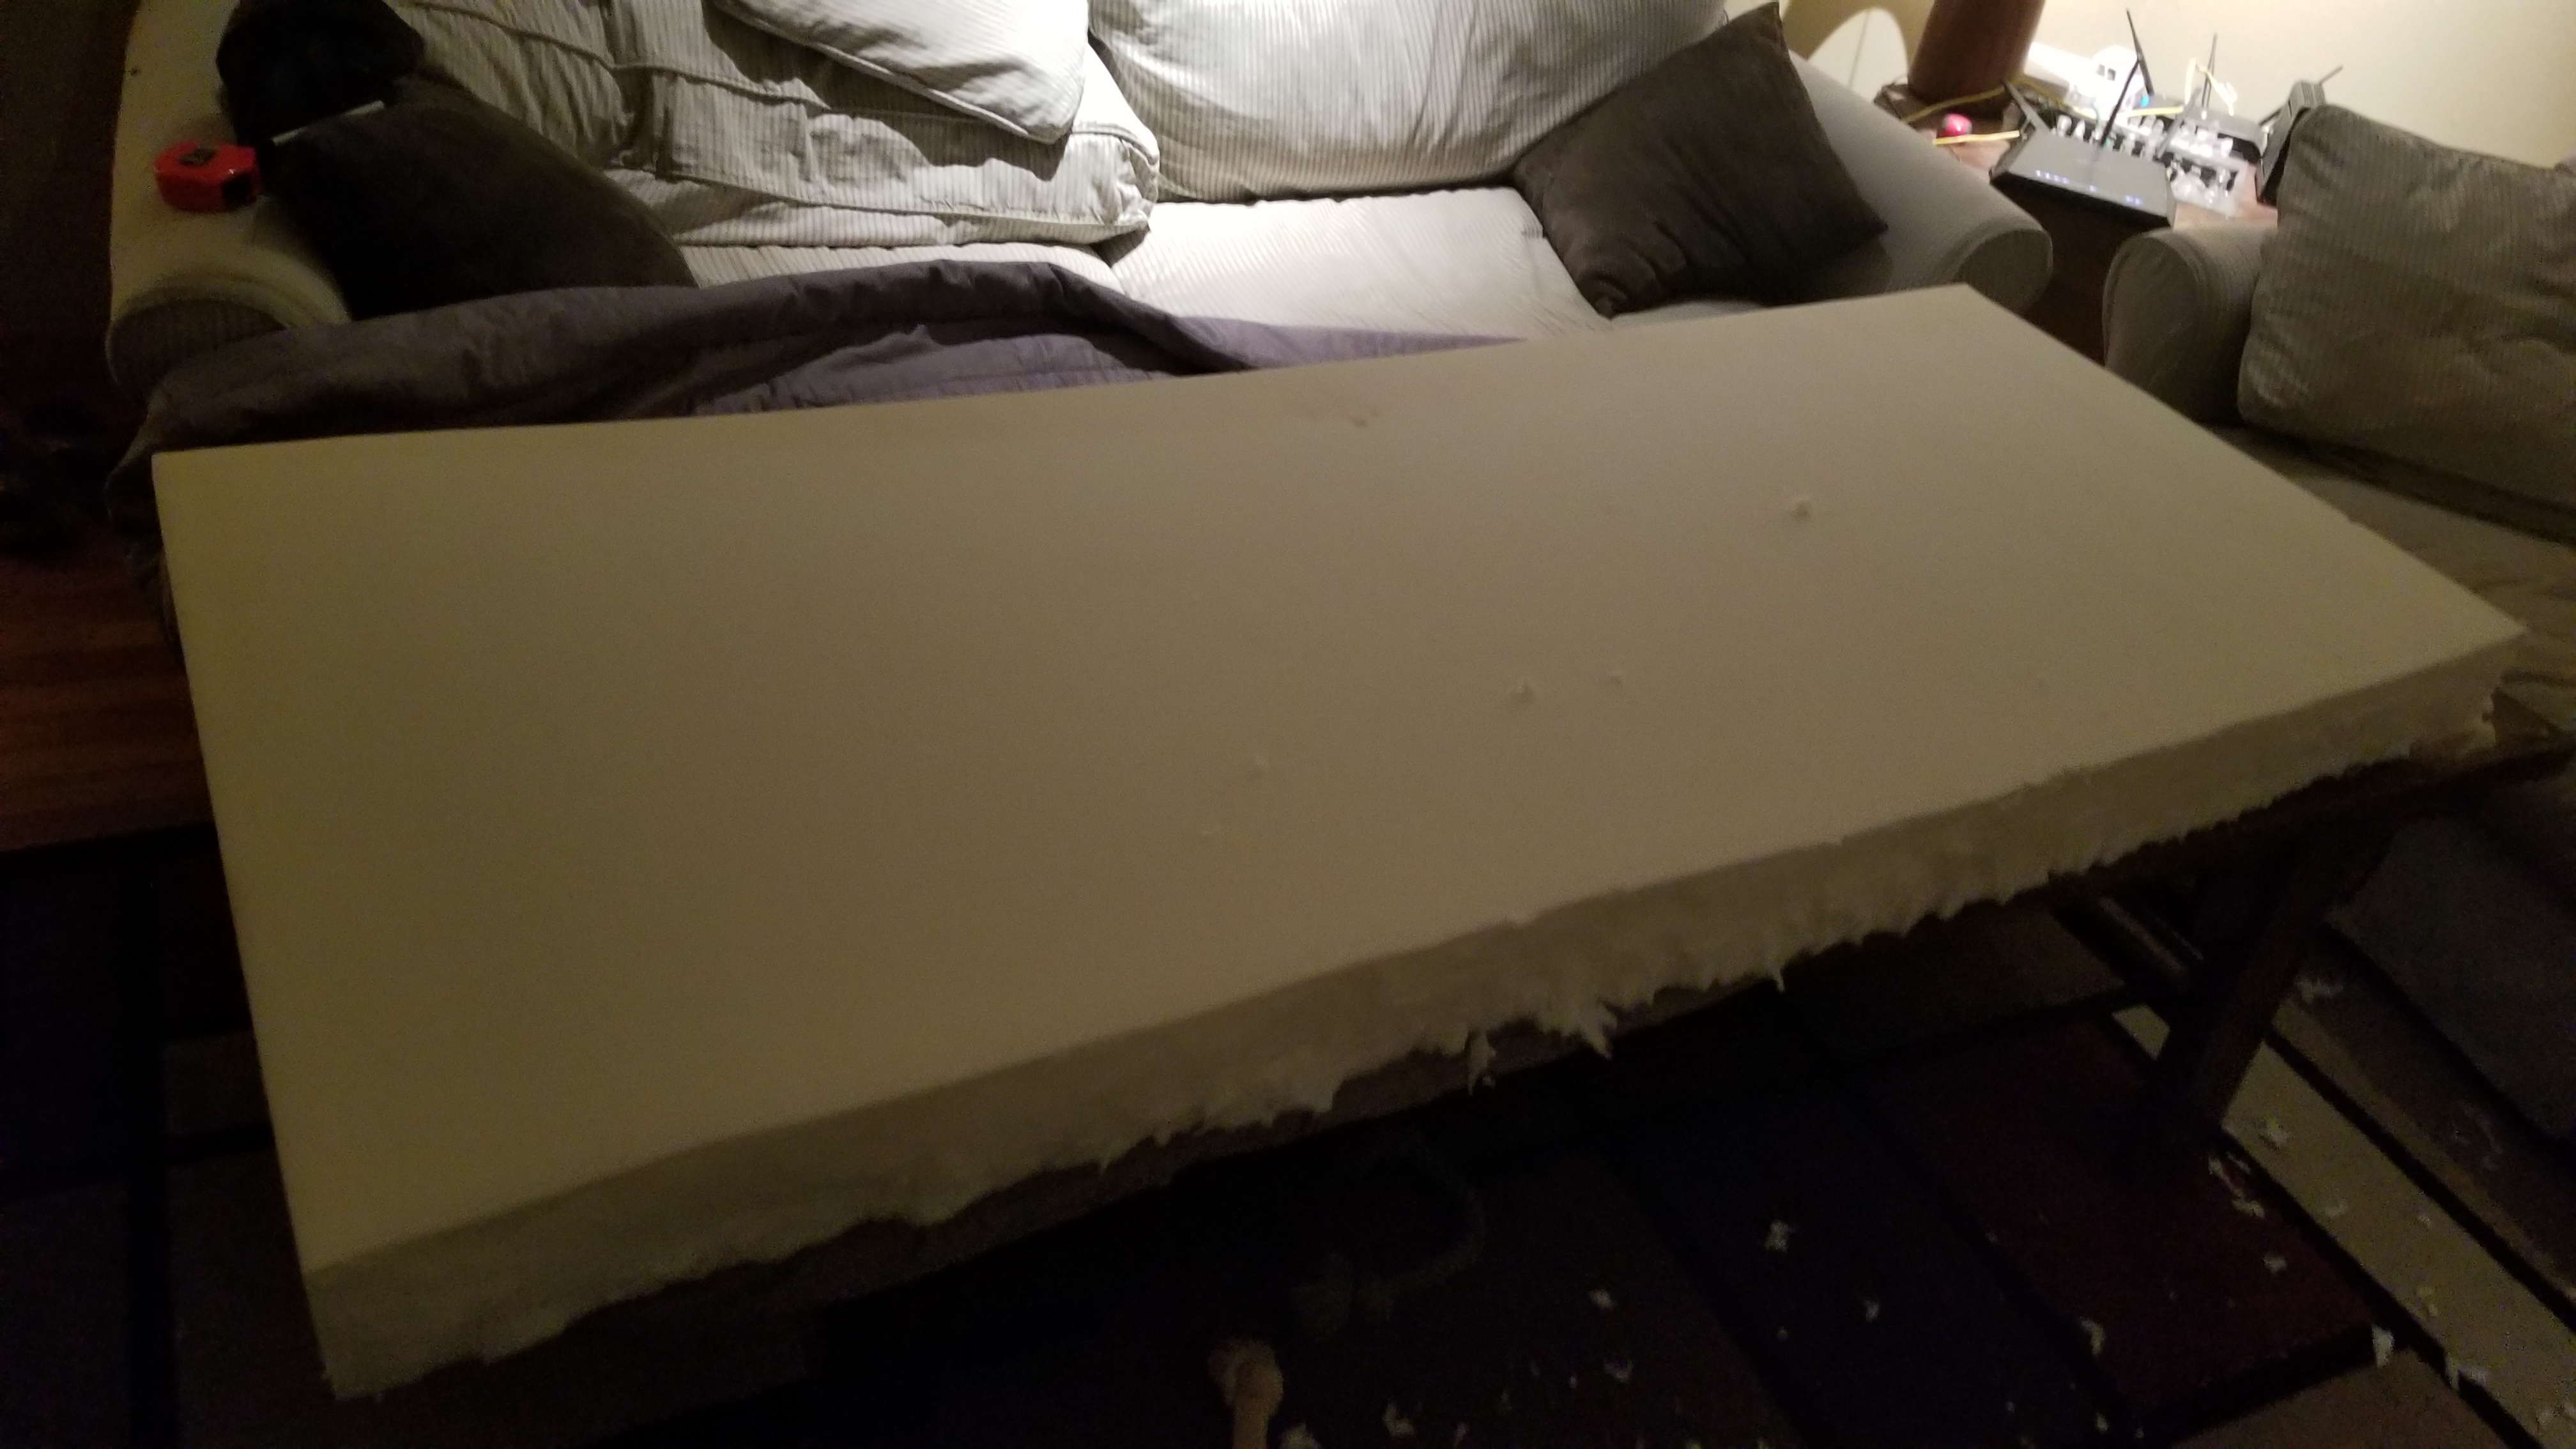
Cut that cushion down! -

Cut down and sewed up, fits snug in couch mode!
- Now that you’ve pulled your hair out getting this thing into place, screwed down, and operational, just have a break and drink a beer . . . this may be the most important step for your sanity!