
Step 5: Insulate
Now that you have a clean base, let’s start insulating this guy! My E-350 was a passenger van and not a cargo van, so that means the interior sheet metal walls are designed and contoured to receive the plastic molding (that you removed in Step 3). This means there are large gaps between the outer sheet-metal of the van body, and the inner wall sheet-metal. Due to this I decided to use spray foam for these gaps as it is hard to use anything else in these gaps (no accessibility).
Tools / Materials used:
- Dewalt Foldable Knife
- Hammer
- Basic Tool Set
- Insulation from wheel well covers removed in the Strip Step (the ones you kept!)
- Spray foam – I used this to fill in the in the wall cavities and the sheet metal frame support C beams.
- Hard Foam Board – I used this in the ceiling between the braces which made a nice rectangle.
- Qty: 5 x 1/2in 4ftX8ft polystyrene
- Reflectix – This insulation is like bubble wrap encased in an aluminum sheet and contours easily to sweeping curves. I used it for the insides of the walls and floor beneath any wood covering. Later I will use this to make my window covers as well.
- Sub-Floor Barrier – For the floor I put a sub-carpet barrier layer against the van’s sheet metal floor.
- Qty: 1 x 100 sq. ft. 25 ft. x 4 ft. x .093 in. Premium 3-in-1 Underlayment
- Adhesive – I used this to hold all Reflectix and Foam Boards into place.
Procedure:
- Start by spray foaming inside the walls and braces. Caution! Apply the spray foam in stages. The foam needs to cure and if you spray a ton in at once it will not cure in the middle. The foam is very sticky and will ruin your clothes. If you get it on yourself (or your hair), wash it off immediately! Note: The two cavities in the rear corners of your van where the wiring harness for your brake lights should be partially left clear so you can still maintain the wiring/lights.

- Ceiling insulation – Install the hard foam into the roof (I used 3M spray-on adhesive to hold it in place). I cut the hard foam to fit between the braces, making enough room for the wiring sheath that you installed in the Lay the Wiring Step. I used 3M adhesive spray to hold it in place.
- Subfloor barrier installation (You can use this as a floor template to cut your wood before you glue it down!)- You want to remove any bolts that are left over from securing seats, seatbelts, or any other components you removed when you stripped the van out. Make sure the floor is clear of anything before installing the subfloor barrier. Once my flooring was ready (and I wasn’t tramping in and out of the van left and right) I cut the subflooring barrier for the floor, and installed it using 3M adhesive spray.

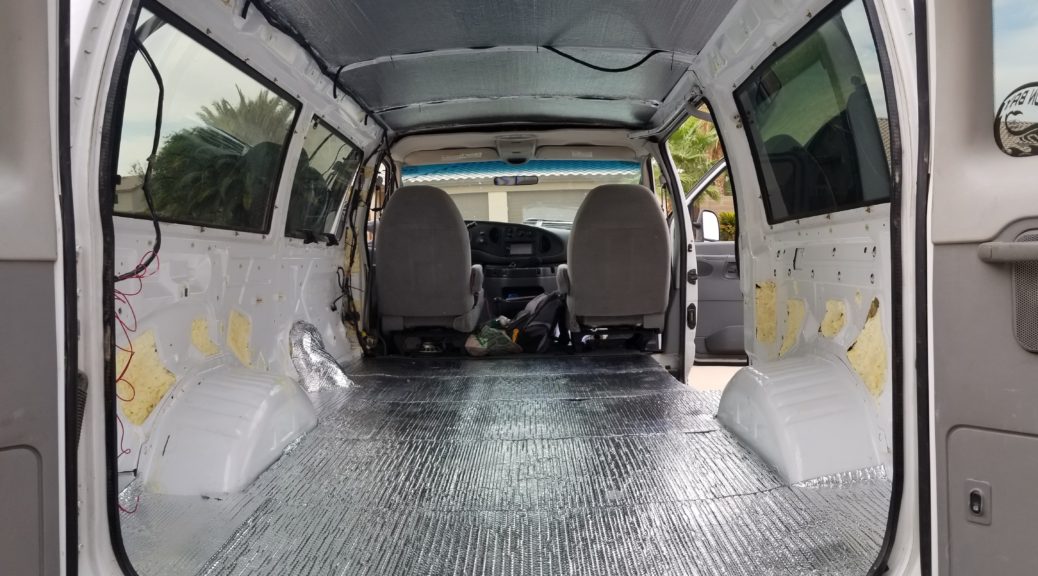
- Subfloor reflexive insulation – Cut the reflexive for the floor, installed on top of the subflooring barrier, hold in place using 3M adhesive spray.

- Install the reflexive on the walls (custom cut) using 3M adhesive spray. I would later cover these areas with wood.
- NOTE: My particular passenger van had a metal tab/lip that protruded out which would obstruct the wood walls from going down to the floor. I took a large hammer and beat this tab/lip flat so I had a good surface to work with. Then I placed reflexive over this. Video: https://youtu.be/NPkwn7DhH-M
- Take the insulation attached to the bottom of the carpet you removed in the Strip Step made for the wheel wells and reinstall it over the wheel wells. I tore this off the bottom of the carpet, sprayed 3M adhesive and stuck them back on.

Videos:
- Insulation in-progress: https://youtu.be/Ut6s8mWgDJk
- Insulation ceiling/floor inner walls complete (I put the reflexive on the walls later): https://youtu.be/9uBA8hVofto
- Wall insulation: Progress video getting ready for the walls and other features: https://youtu.be/iJNOi77CJE4