
Step 10: Wire it up.
It’s time for the part that most people are afraid of, electricity! By this point all the ends of the wires for your appliances and lights should be hanging around the designated fuse box area. I will do this Section in three parts: 1) Basic Electrical Theory, 2) Basic Circuits, and 3) Putting Theory to Work (the install).
Click for Basic Electrical Theory DetailsBasic Electrical Theory
Electrical Analogy: I want you to imagine that your batteries are buckets which can be filled with water. The water in this metaphor is current (or flow of electrical energy that appliances require to operate). Once your buckets are empty, you are out of electrical energy and cannot run any electronic appliances until you fill them up again. The buckets are just an easy way to understand that batteries can store electrical charge at a limited capacity dependent on what kind or battery you purchase.

Batteries (buckets) – Choosing your batteries is a great starting point for designing your electrical system. You need to try and imagine you are in your van and all charging is off (no sunlight, no engine or generator running) and think about what all appliances you will use and how long you will use them. Every appliance (water pump, Fantastic fan, LEDs, plugin appliances) has a power rating. For example LEDs require a 12 Volt source and a power rating of 12 Watts. Don’t let words like Watt scare you, this is very very simple math and here are the three equations:
- Eq1: V = I*R; where V=Volts, I=Current (measured in amps), R=Resistance
- Eq2: P=V*I; where V=Volts, I=Current (measured in amps), P=Power (Measured in Watts).
- Eq3: Pin = Pout; where Pin in power input, and Pout is Power output.
So if an appliance gives you a Voltage and Power rating, you can easily figure out how much current the appliance requires by rearranging Eq2. I=P/V. So in our example, the LEDs require a 12 Volt source and a power rating of 12 Watts. Thus the current I = 12 Watts/12 Volts = 1 amp. So the LEDs require 1amp at maximum output (they may pull less current if you have them on a dimmer).
What you need to do is add up the current all your appliances will use, and how long you plan to run them (in hours). So let’s pretend you plan on leaving your lights on 24-7. The 12 Volt LEDs will use up 1amp for the duration of 24 hours. You would require at least: Amp*Hours = 1amp*24 Hours = 24 amp hours.
Deep cycle batteries (buckets) are rated in AH (Amp Hours). So your 12 Volt battery will be rated somewhere in the neighborhood of 200 Amp-Hours which means that in a perfect world the batteries could deliver 200 amps over 1 hour, or 20 amps for 10 hours, or 2 amps for 100 hours, ect. Warning! Make sure to get Deep Cycle batteries, these are designed to be charged and discharged many times, they are different from starting batteries.
Sum up all the appliance currents and the hours you intend on using them to “size” your batteries.
- Puck LEDs: 1amps * 3 hours = 3 Amp Hours
- LED Strip: 5amps * 0.5 hours = 2.5 Amp Hours
- Water Pump: 2.7amps * 0.5 hours = 1.35 Amp Hours
- Fridge: 2.7amps * 8 hours = 21.6 Amp Hours
- Fantastic Fan: 1.5 amps * 1 hours = 1.5 Amp Hour
- Phone Charger: 1.67 amps * 4 hours = 6.68 Amp Hour
Sum up all appliance Amp Hours = 36.63 Amp Hours.
To be conservative I wanted to oversize my batteries a bit so I multiplied by 4 for to get 144 Amp Hours (I realized to get this I’d have to have 2 batteries so to go overkill I got 2 batteries with 225 Amp Hour Capacity). This conservative approach would account for other unforeseen power uses like a friend showing up with a hairdryer wanting to borrow my inverter outlet. Or at a dirtbag party, having 12 climbers wanting to all plug their phones in at once! Plus you have to remember that batteries aren’t 100% efficient and as they drain they will have a harder time delivering the current your appliances require.
The battery’s capacity will change the dimensions of the battery body (taller, longer, ect.) so keep that in mind when choosing your battery because you will have to find a place to store it!
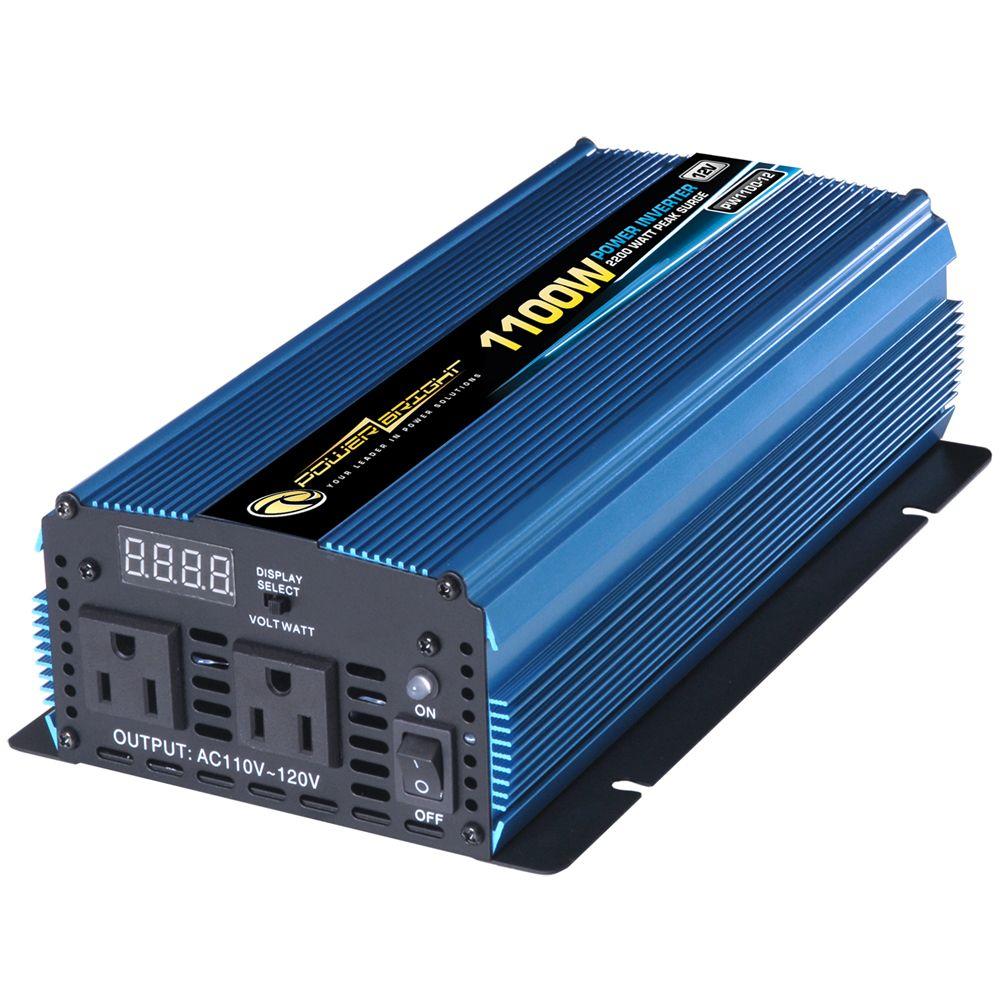
Inverters: So you want to use that hair dryer from your house in your van eh? Your batteries deliver 12 Volts DC (direct current) and if you look at your hair dryer plug, it requires 125V AC (alternating current) at 15 Amps (full power). AC and DC are not equal! You must have an inverter to accomplish this. I won’t get into the nuts and bolts of how it works (there are two large coils inside the box which use induction and magnets to transfer the power from DC to AC) but all you really need to understand is that the Power IN ~ Power OUT.
So you already have power from Eq2 I gave you earlier. No matter if it’s AC or DC, power equation is the same (with a little loss for efficiency of course). Your inverter is taking input DC power from your batteries and outputting AC power to your hair dryer.
Eq3: Pin = Pout, and Eq 2: P = IV
V(AC) * I = V(DC) * I
Example: Hair Dryer
(125 Volts AC)*(15Amps) = (12 Volts DC)*(DC Current)
Solve for DC required current = DC Current = (125V*15amp)/(12V) = 156 amps.
So it will require 156 DC amps to run your hair dryer. Use this example to calculate how many amp hours you will need for drying your hair for ½ hour. That will be 75 Amp Hours. Throw that into your battery sizing calculation.
Let’s see if you understand everything we have covered with the next example. Let’s pretend you have a fully charged 12V system with batteries that can output 200 Amp-Hours of current. You have your inverter wired up, you aren’t charging your batteries, and no other electronics are turned on. You start to dry your hair at full blast and then something distracts you, you get out of the van to check out whatever wild animal is lurking around and forget all about the hair dryer. How long will your hair dryer run before your batteries (buckets) run out of juice?
Hair dryer uses 156 DC amps. Time = (Amp Hour battery rating)/ Current used = 200AH/156 = 1.28 hours. So if you aren’t back in around 1 hour and 15 minutes, your batteries will be totally dead and you’ll have to charge them.
Sizing your inverter: Sum up the Wattage for all the plug-in AC appliances you plan on using AT THE SAME TIME. If you only plan on using one appliance at a time, just use the one Wattage rating and size from there.
Example: Hair dryer (125V @ 15amps = 1875 Watts). You will need at least a 2000 Watt inverter.
The surge capacity of your inverter is usually twice what the inverter is rated at. So a 2000 Watt inverter will have 4000 surge capacity (which means how much power before the thing starts melting). If you plan on running both a hair dryer and an induction stove at the same time, just add them up and pick something rated a little bigger Wattage.
Charging: Let’s move on to filling your buckets (charging your batteries). There are a few ways to charge your batteries: solar, van alternator, gas generator. I chose solar because I wanted to keep my charging system and batteries for my appliances totally separate from the van’s wiring system. Choose your poison.
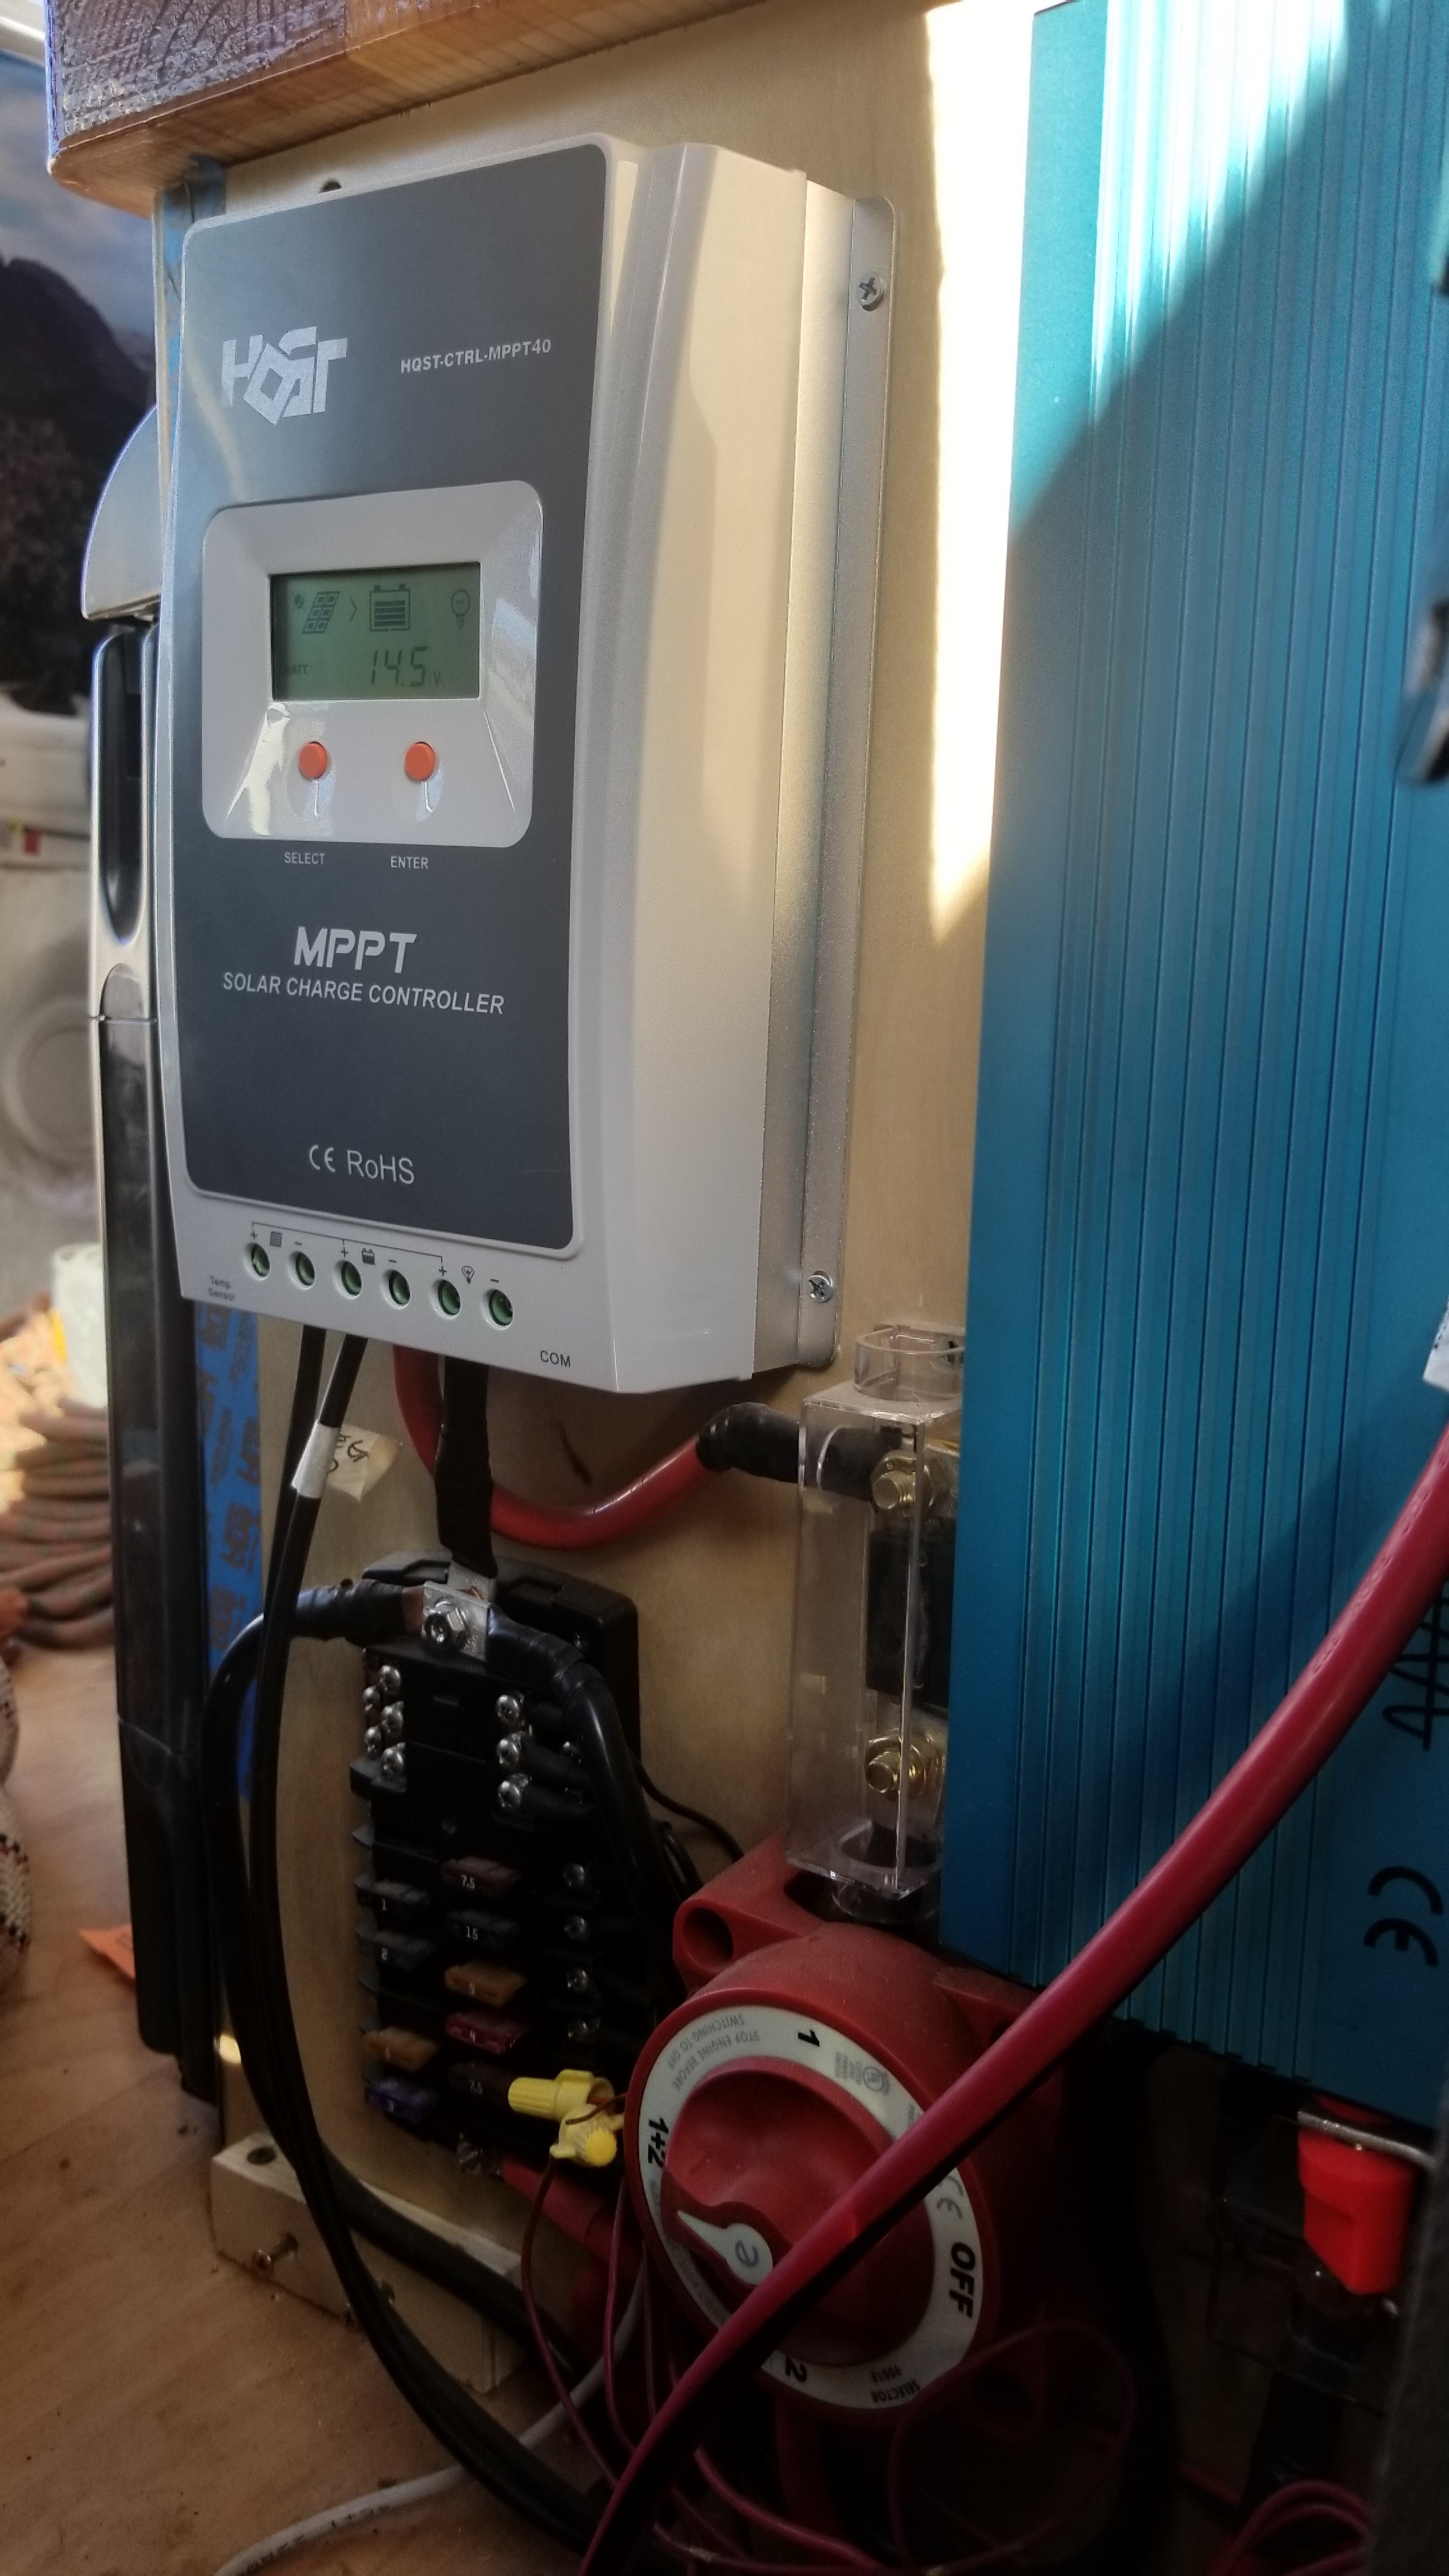
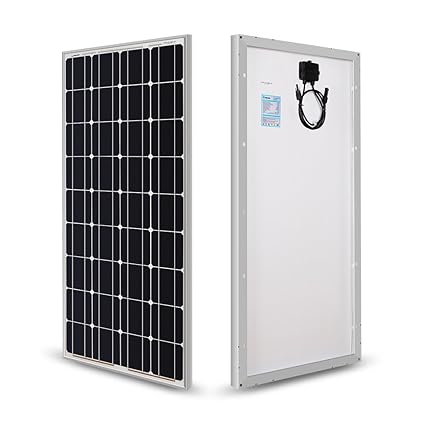
Sizing your solar system: There are typically (depending on where you live, weather (clouds), time of year, ect) 12 hours of sunlight in a day. That means you can only collect power during that timeframe. The Power (Watts) will be collected in the solar panels and converted to 12 Volts with a charge controller which will in turn fill your batteries. The charge controller does a ton of work for you, it converts the voltage and current from the panels for you, it stops charging the batteries when full, and alerts you when your batteries are almost empty. Your panels will run at different voltage and currents depending on how you wire them up, I will let Renogy take over that discussion.
The solar panels are generally rated in Watts. This is the power that they can collect over the surface area of their face. Remember from equation 2 (Eq2) that Power = I*V and equation 3 (Eq3) Pin = Pout. Lets calculate the current you could acquire over a 12 hour (daytime) period with a single 100 Watt panel.
Pin (from solar panels) = Pout (Charging your DC system) = V (DC volts) * I (current)
I (current) = Pin / V(DC) = 100 Watts /12 Volts = 8.33 Amps.
So over 12 hours you can accumulate: 8.33 Amps * 12 Hours = 100 Amp Hours of juice
You can see the problem here that if you have a 200 Amp Hour Battery system, in perfect full light for 12 hours that you would only full it half way (by collecting only 100 Amp Hours of electrical capacity). Thus you can install a second 100W Solar Panel. So now you have 200 Watts inputting from solar, and you’ll get twice the current to charge your batteries (in a perfect world when the sun is always shining and you aren’t running appliances during the day, ect ect).
With this information you should be able to size your solar system and choose your battery size as well as your appliances.
Click for Basic Circuits Details
Basic Circuits:
You have a power source (battery) and wire connecting an appliance (fridge) which requires a certain current to function.
If you throw a switch into this system you can turn the component on/off by breaking/completing the circuit.
Now to protect your components in this system you will need a fuse (resistor) that will burn up above a specified current. If for some reason your fridge which requires 2.7 amps max suddenly receives 20 amps, it would fry the components inside. If you have a 10 cent fuse installed that can only handle 5 amps, the fuse would bust, thus protecting your 600$ fridge from harm.
This is the very basic circuit theory you will use for just about everything in your system. Power source, switch, component, fuse.

Fuse sizing: Each appliance should specify the size of fuse you should put in line to protect the component. You can find this information in the components manual. If it does not specify the fuse required, then use the following rule of thumb.
Fuse =(Max appliance current * 1.5) round up.
Inverter Fuse = (inverter surge power/10)*1.2
Wire sizing: Each appliance should have a manual that specifies the size of the wire required. If there is no callout, use an online wire gage calculator to select the correct size of wire (https://www.wirebarn.com/Wire-Calculator-_ep_41.html). I ran 18 AWG wire from the majority (but not all) of my components.
I also used a wire loom to run as many wires as possible for organization.

Putting the Electrical Theory to Work: Wiring up your van.
Now that you have the appliance, wire size, fuse size, and a basic understanding of simple circuits, let’s start putting theory to work! If you followed the wire running Step 3 then all of your wires should be located in one central place you have allocated for the fuse box area (this includes all your wires for appliances and the two extension cable plug-ends meant for the inverter.
Your fuse box will be power central. I decided to mount my batteries below the body of the van onto the frame itself. This will save me a ton of room inside the van for storage. I placed the batteries as close to my fuse box area as possible. Once this was complete you can start mounting your components to the side of the cabinet and start wiring things together.
Tools/Materials used:
- Dewalt Drill 20V Cordless
- Dewalt Drill Bits
- Screws – Black square head wood screws 2″
- Screws – #6 x 1/2″ Philips Screws
- Screws – #6 x 1″ Philips Screws
- Basic Tool Set
- Soldering Iron kit
- Wire Stripper
- Wire Ties – Used for organization
- Qty: 100 x 4 in Cable Ties
- Power Extension Cord – Used for wiring outlets
- 18/16 gage wire
- 4 Gage Inverter Wiring Kit – I used the large 4gage wires for all my battery connections
- Copper Lugs – 4 gage copper connectors and shrink tubing
- Copper Ring Terminals – Assorted for wires to fuse box screws
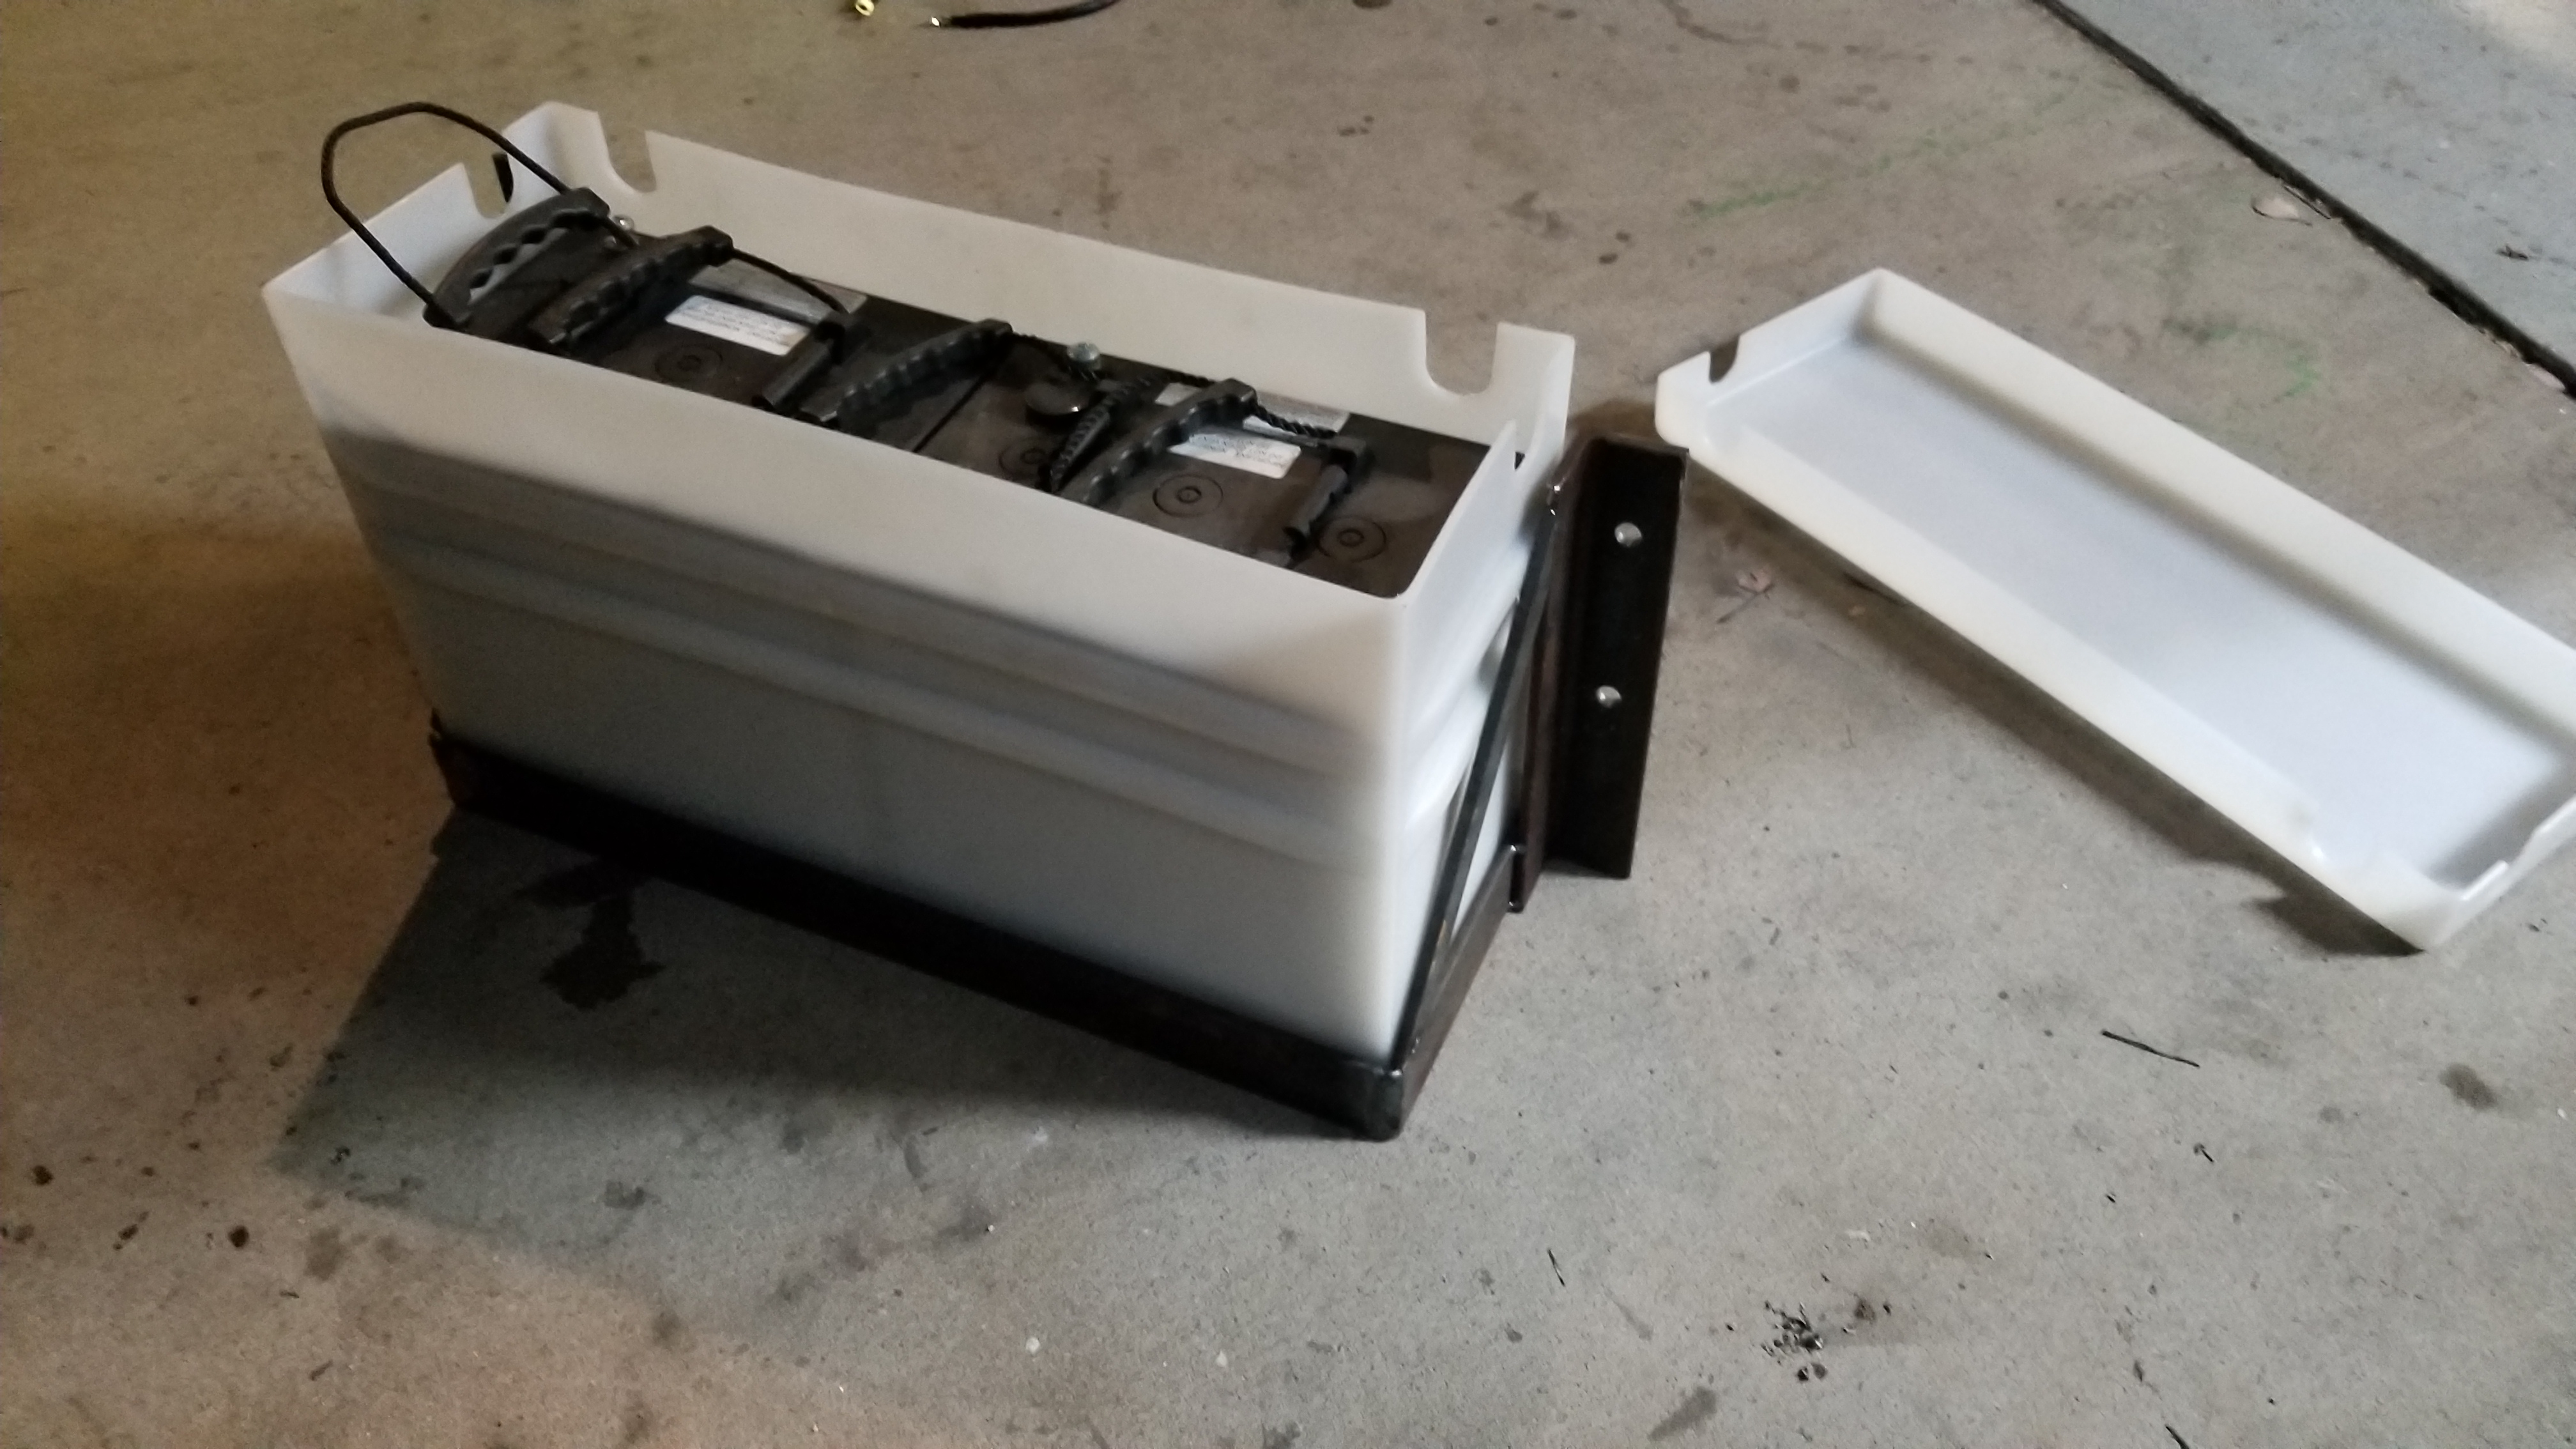
- Deep Cycle Batteries – LifeLine AGM 6V 220 Amp*Hr Batteries
- Qty: 2
- Polyurethane Battery Box – Fits two 6V batts side by side
- Solar Panels + Charge Controller (Renogy kit) – 40amp MPPT Charge Controller + Two 100 Watt Solar Panels
- Fuses
- Fuse Box – Blue Sea Fuse Box with Pos + Neg Posts
- Power Selector Switch – Blue Sea Marine Switch
- Wire Grommets – Assorted pack (Use the right size for the hole you drill in your van. Use a grommet for any hole through sheet metal that you plan on having a wire run through)
Procedure
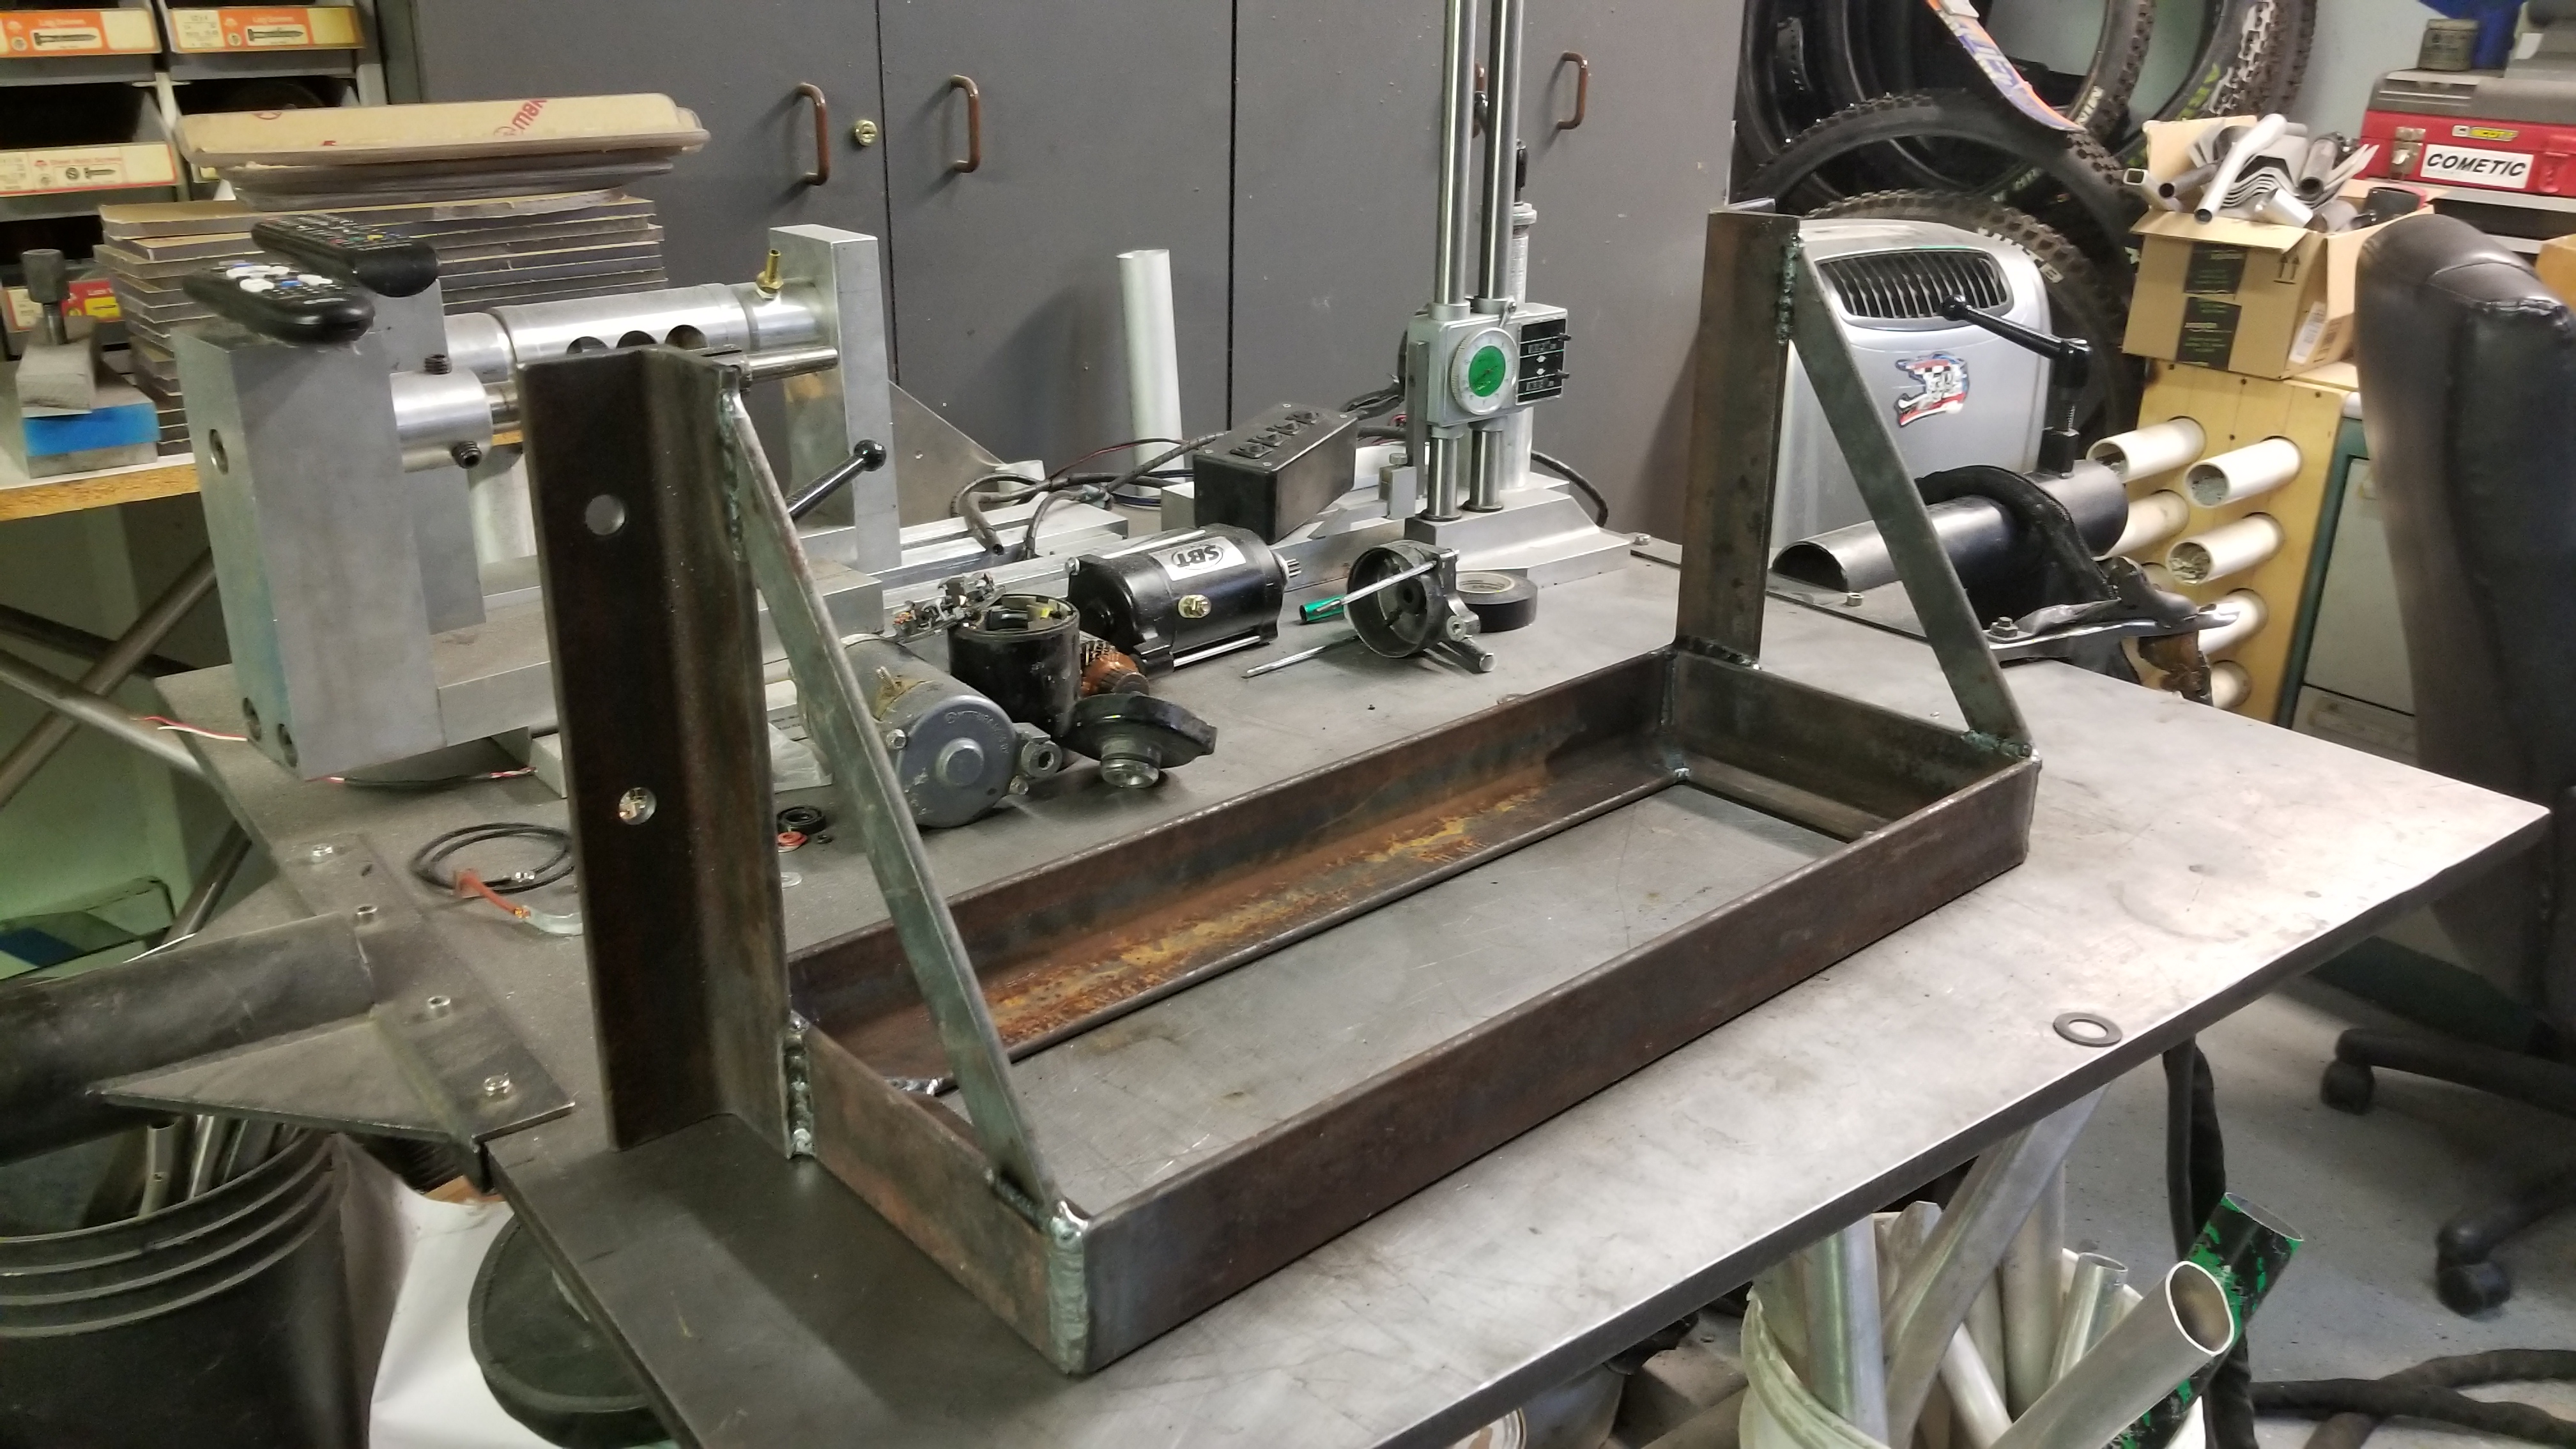
- Build a battery box to house your deep cycle batteries (thanks Adam!).
- Grab your plastic battery holder for dimensions and start cutting angle iron to make a frame around it.
- Drill 4 holes that will be used to mount the metal battery frame to the van’s frame.
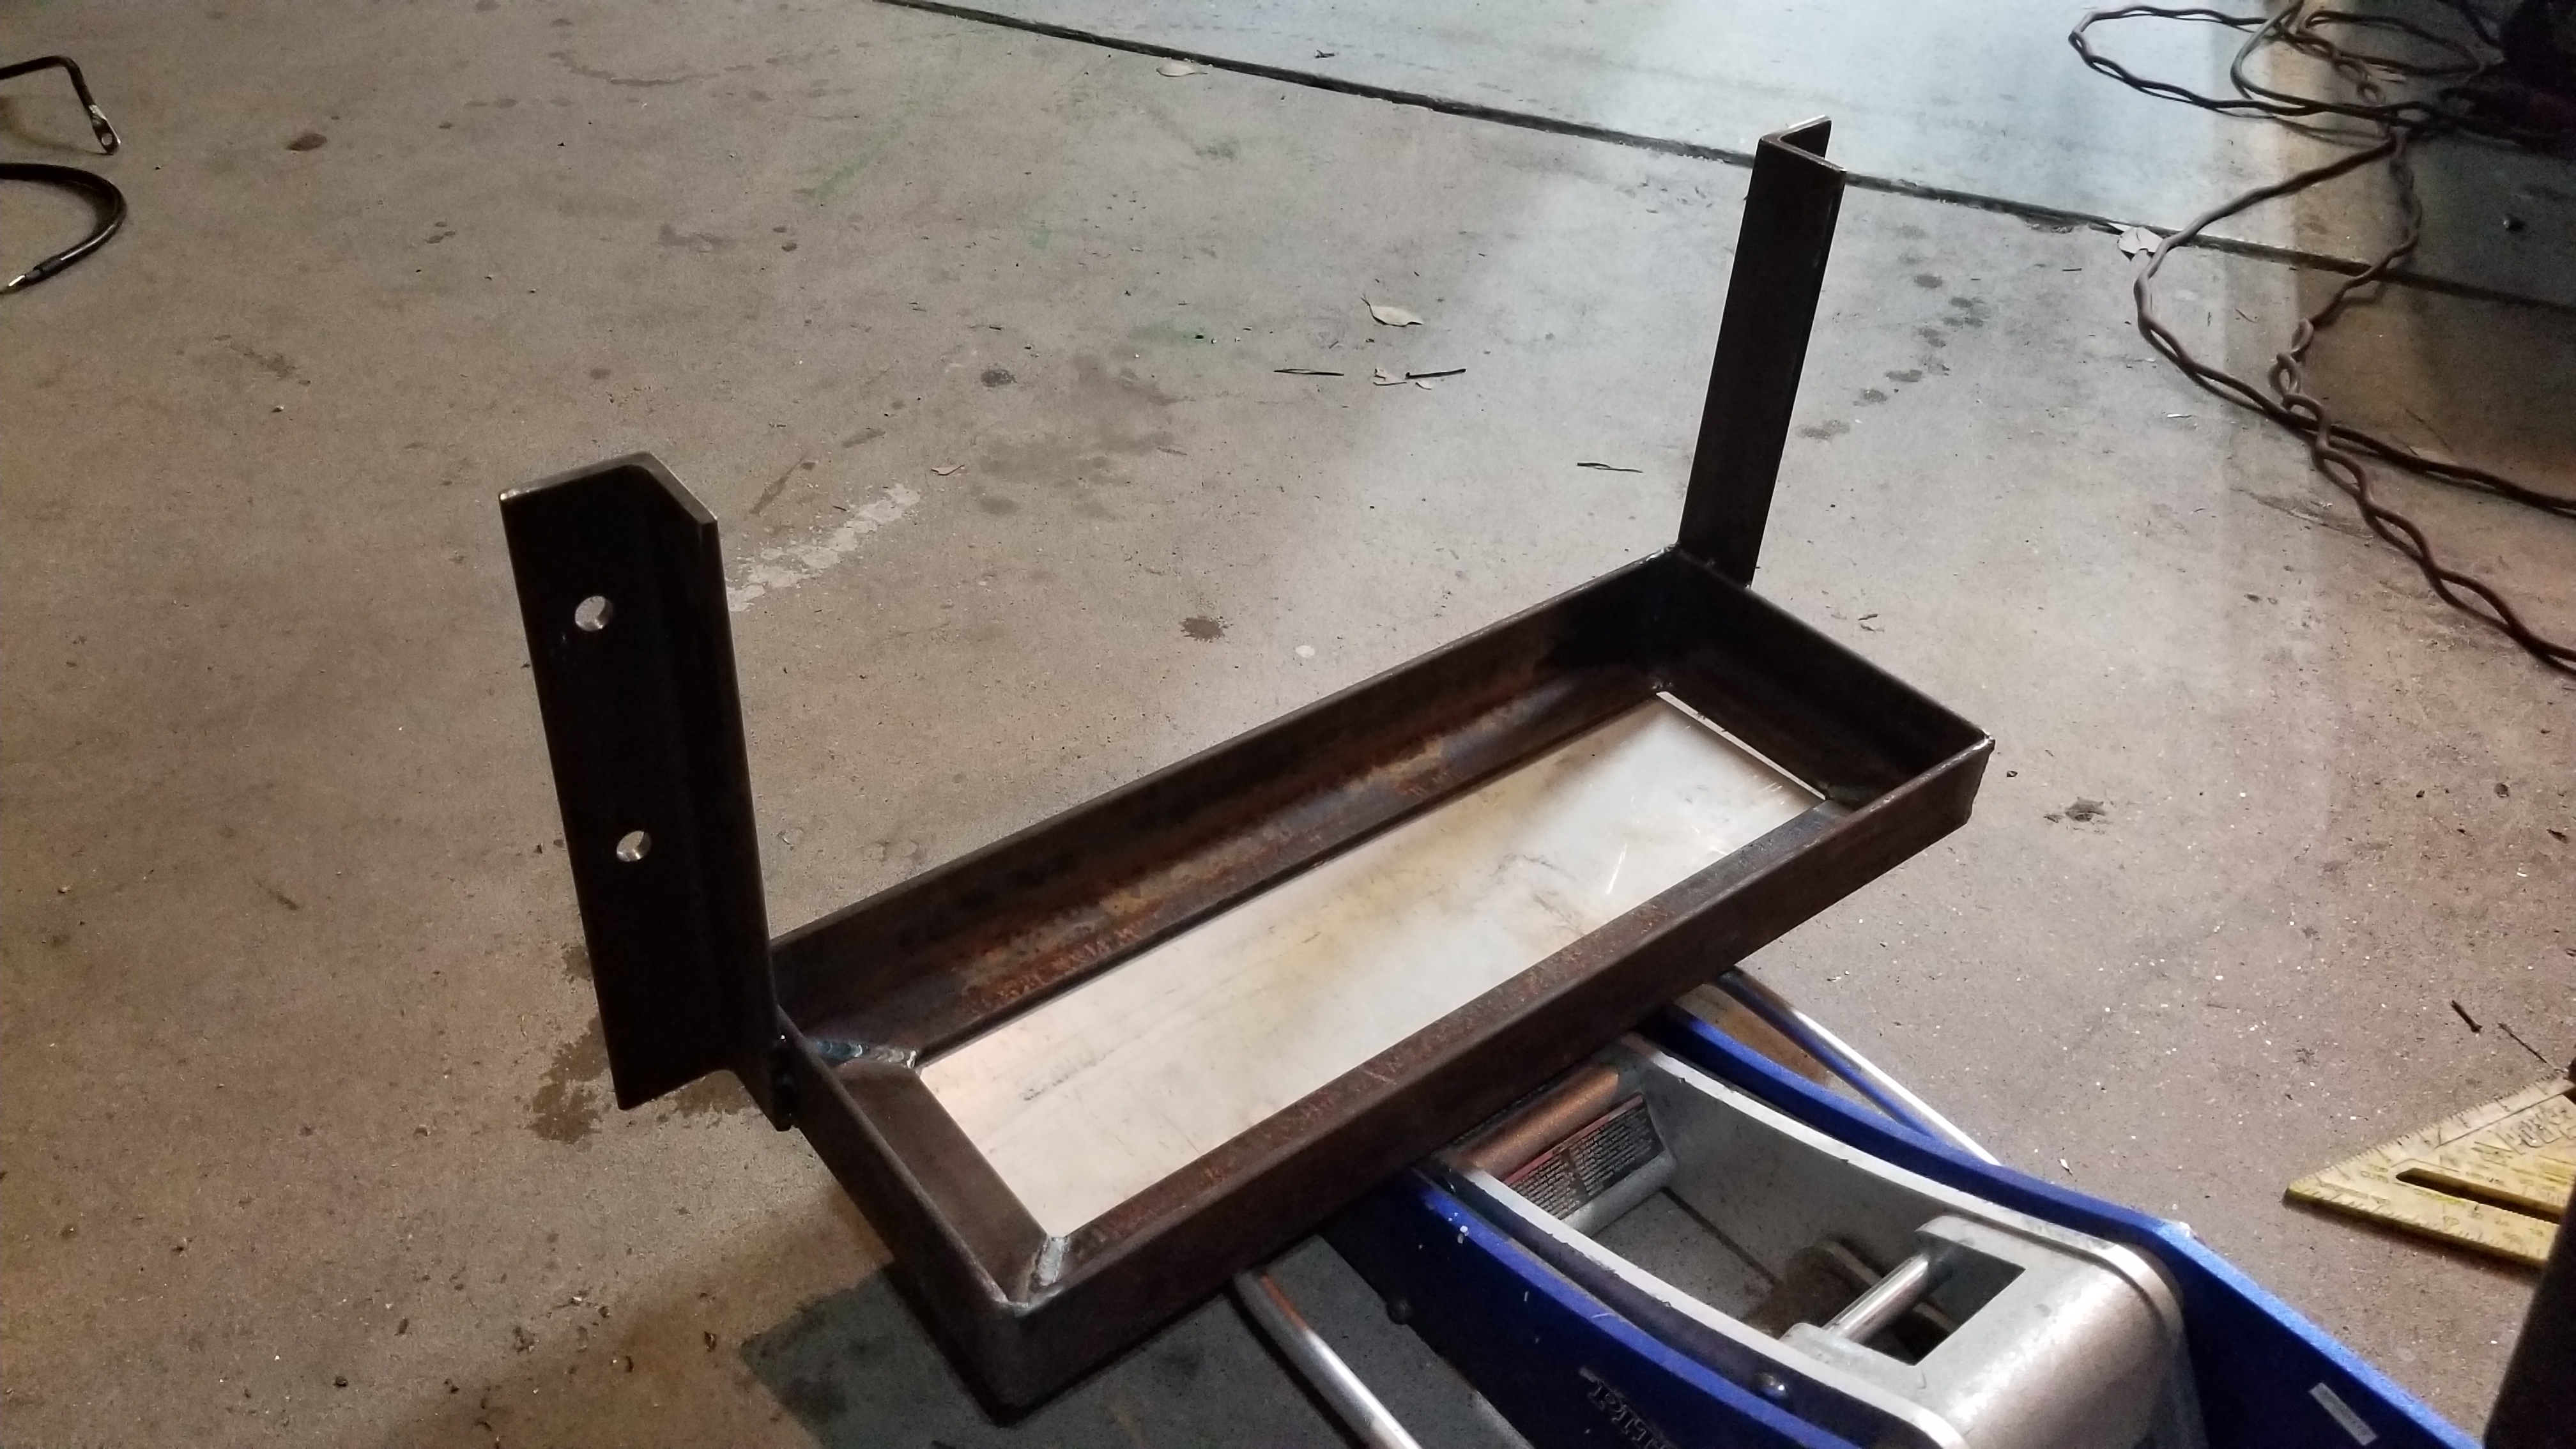
- Weld the frame together and make sure your plastic battery holder fits snug inside without being pinched.
- Lift the battery frame up next to your van’s frame with the bolts and nut plates screwed onto the end.
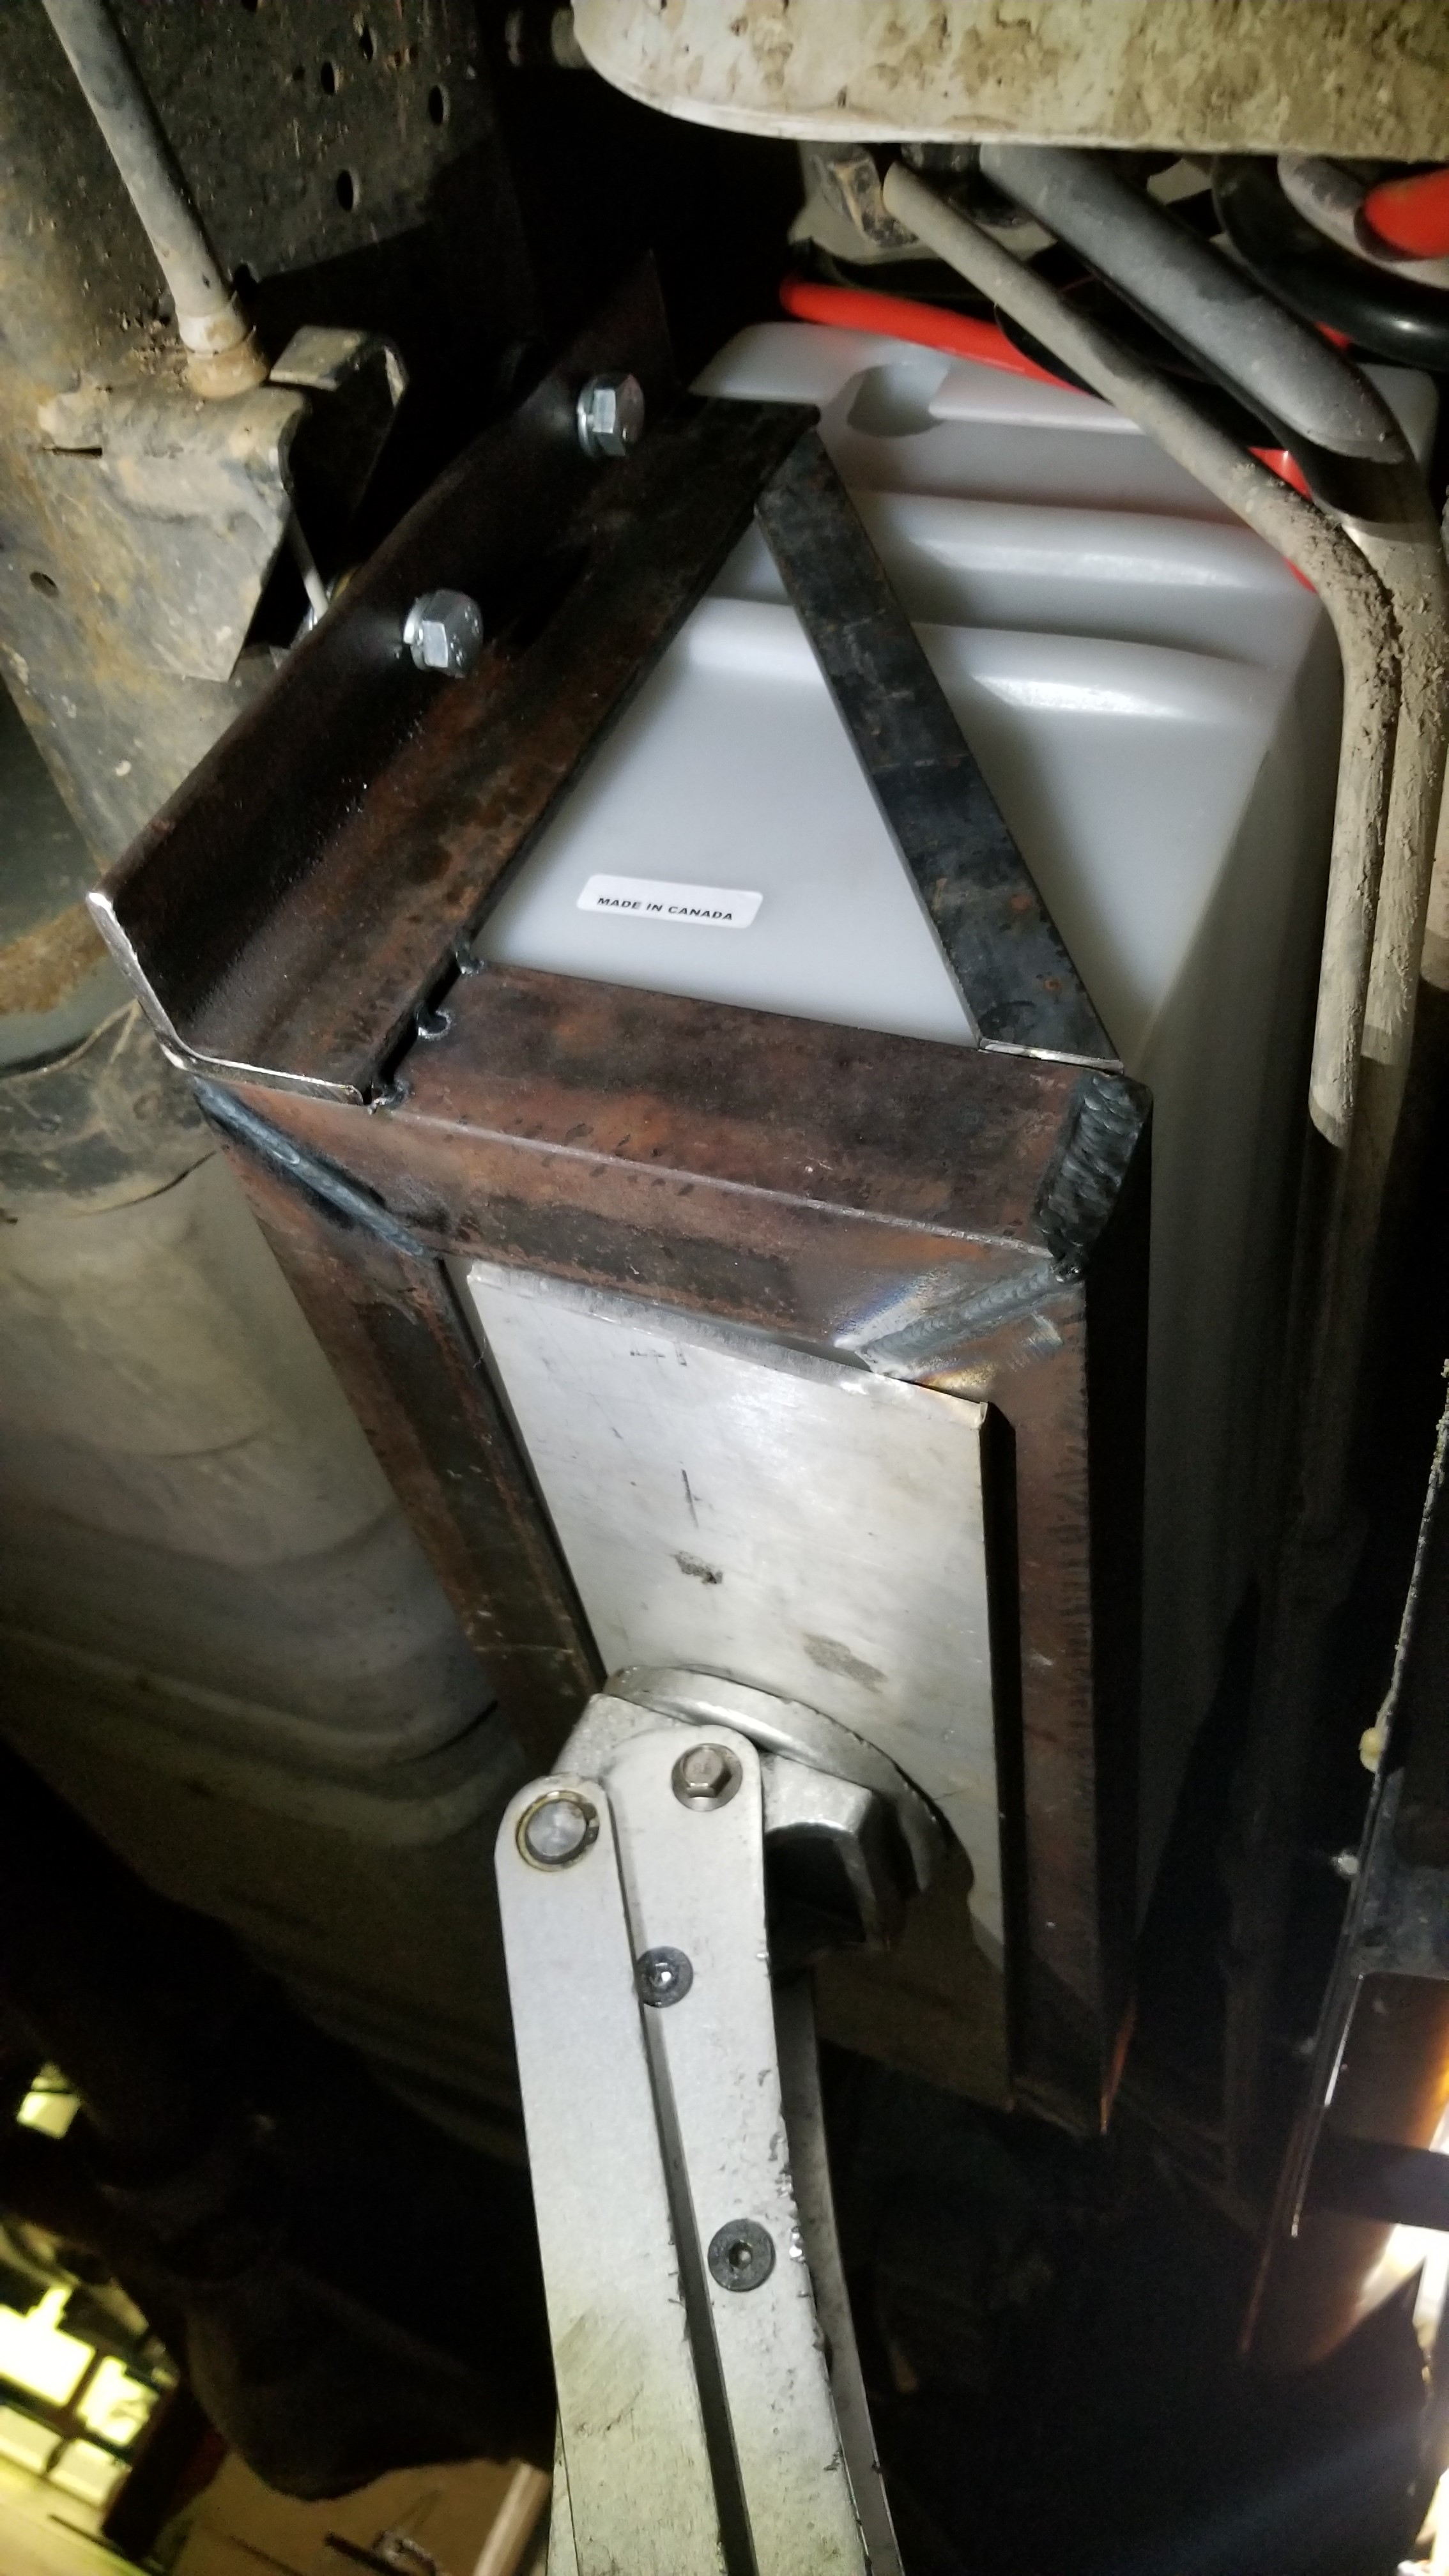
- Tack weld the nut plates to the frame, remove the bolts, lower the battery frame down, fully weld the nut plates to the frame. Video: https://youtu.be/UR8SUxsoaoc

Bottom view, getting ready to tack the nut plates into place. 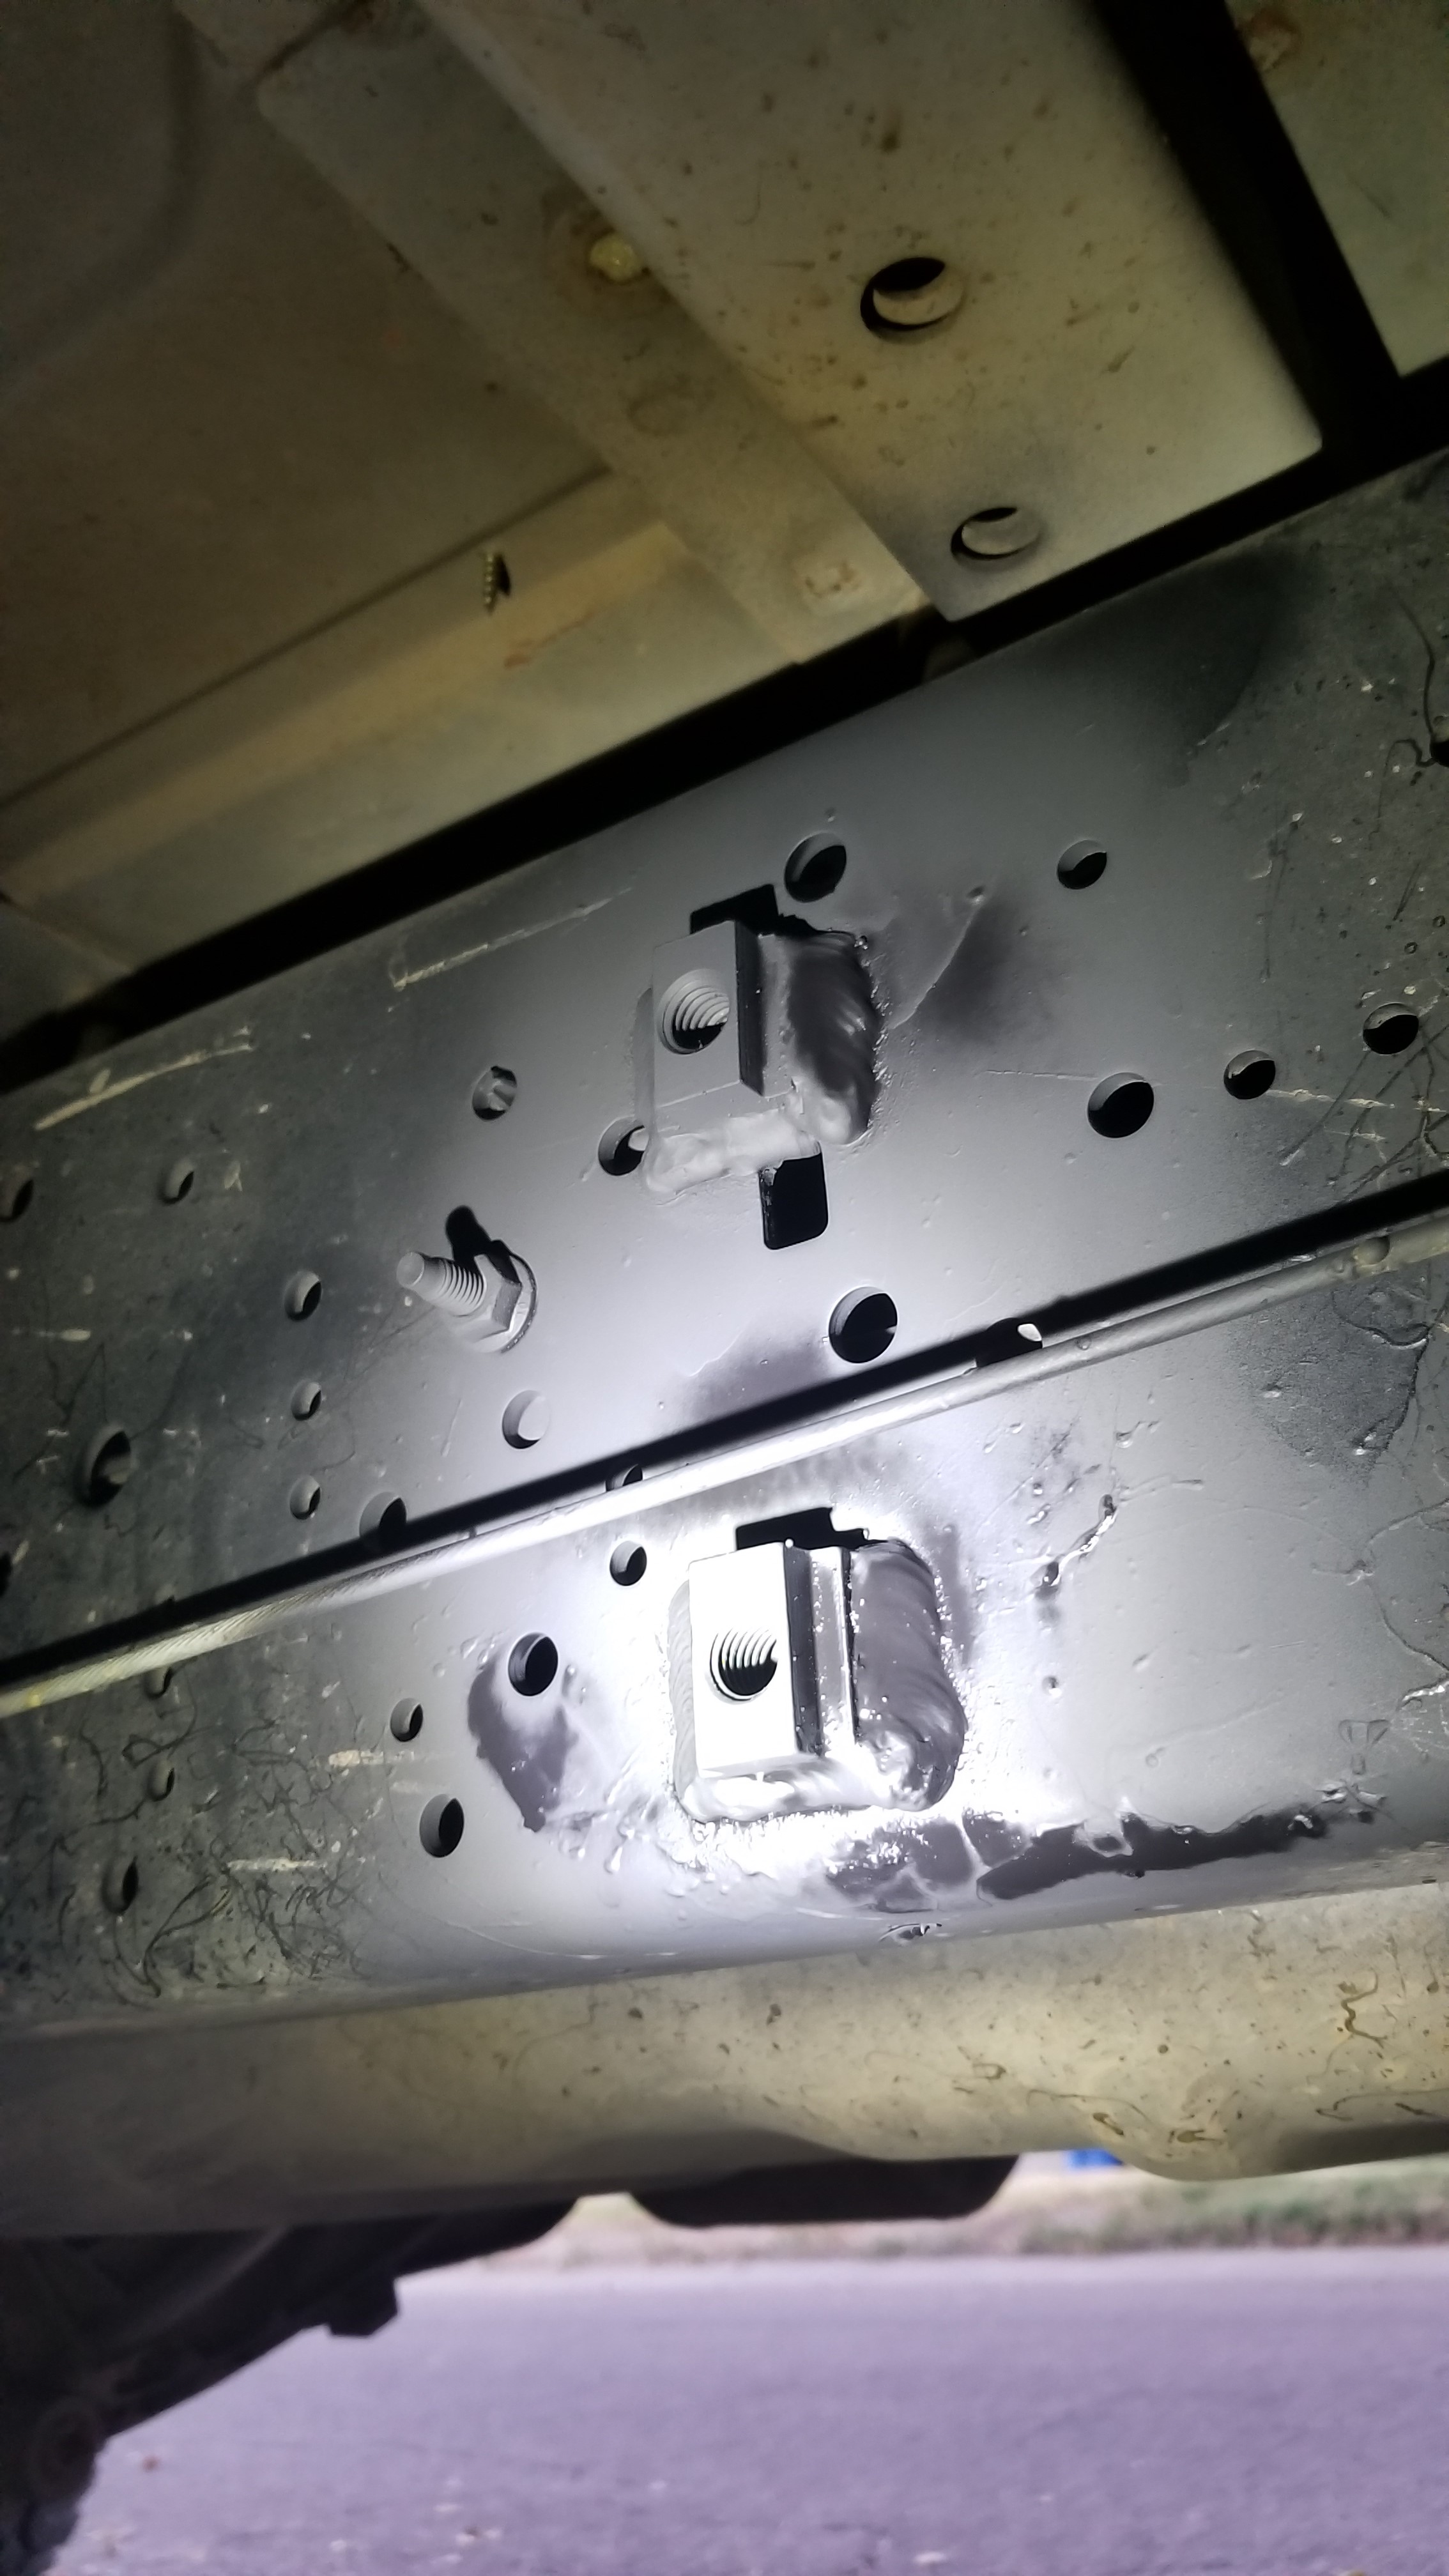
Nut plates welded on and sprayed with anti-rust spray paint. - Make four spacers to go behind the frame so it will clear the emergency cable that runs next to the frame.

- Spray paint the Nut Plates, Plastic Battery Box, and Battery Frame with anti-rust spray paint.
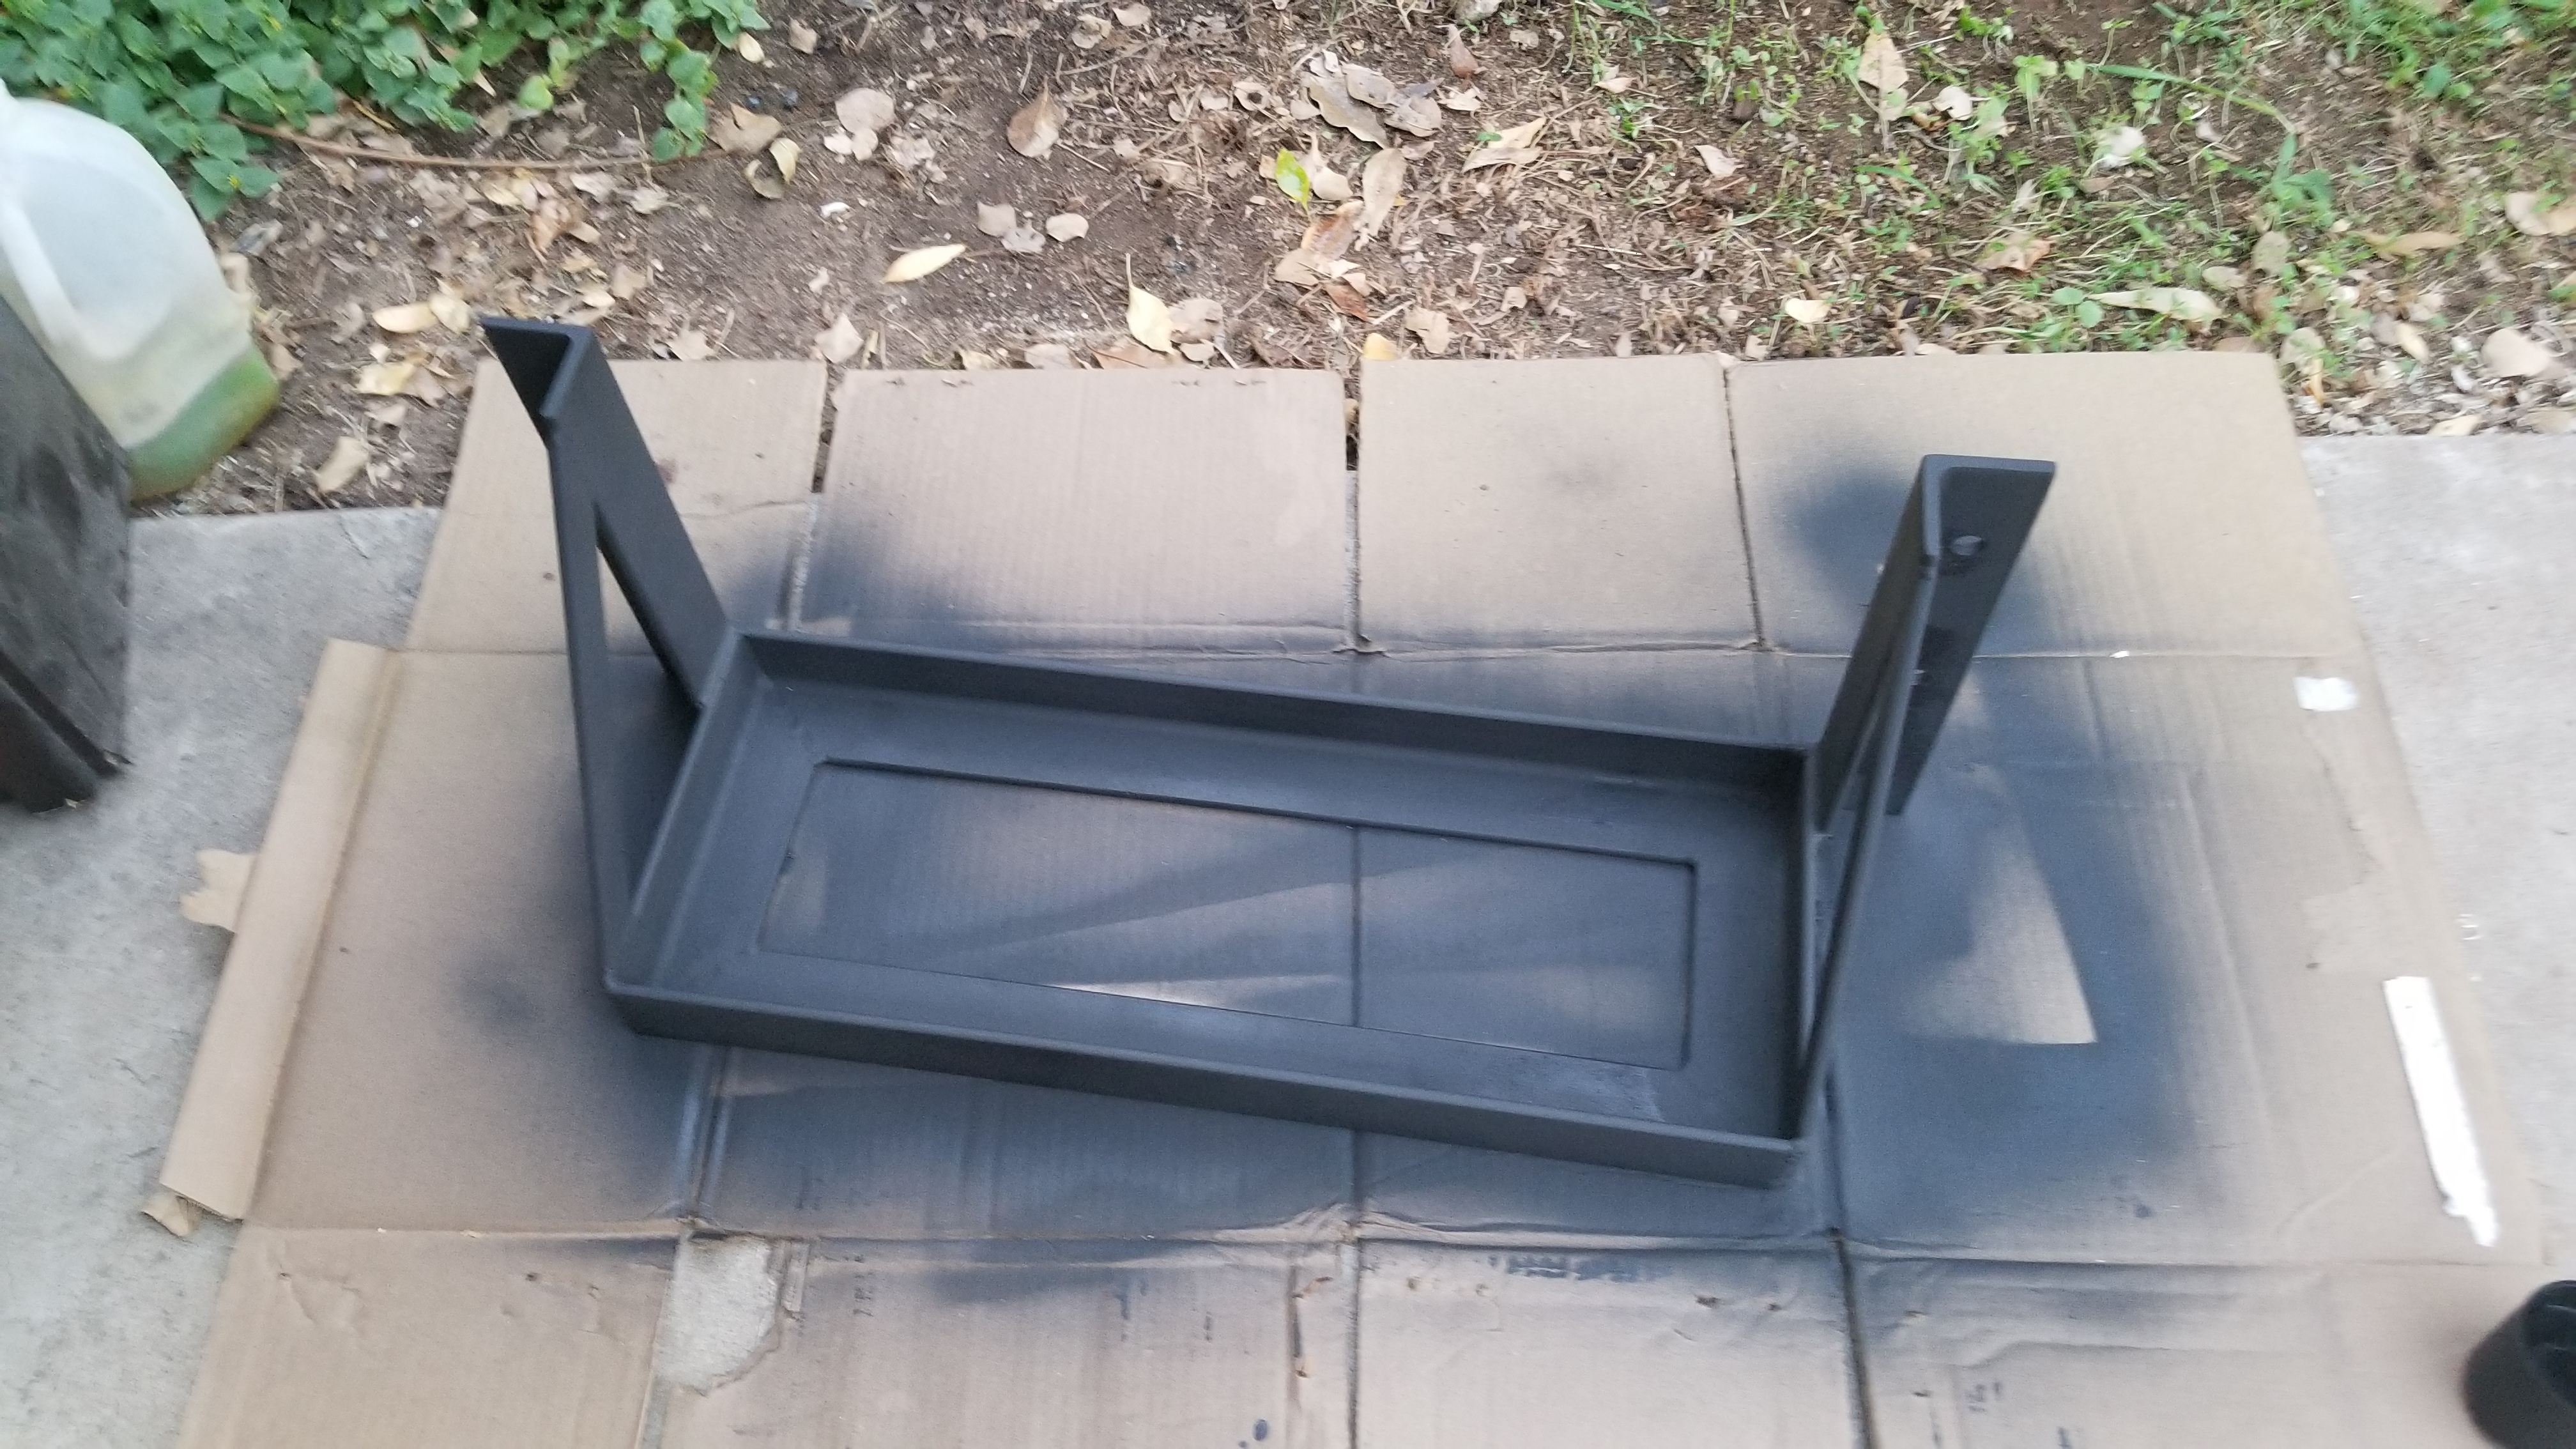
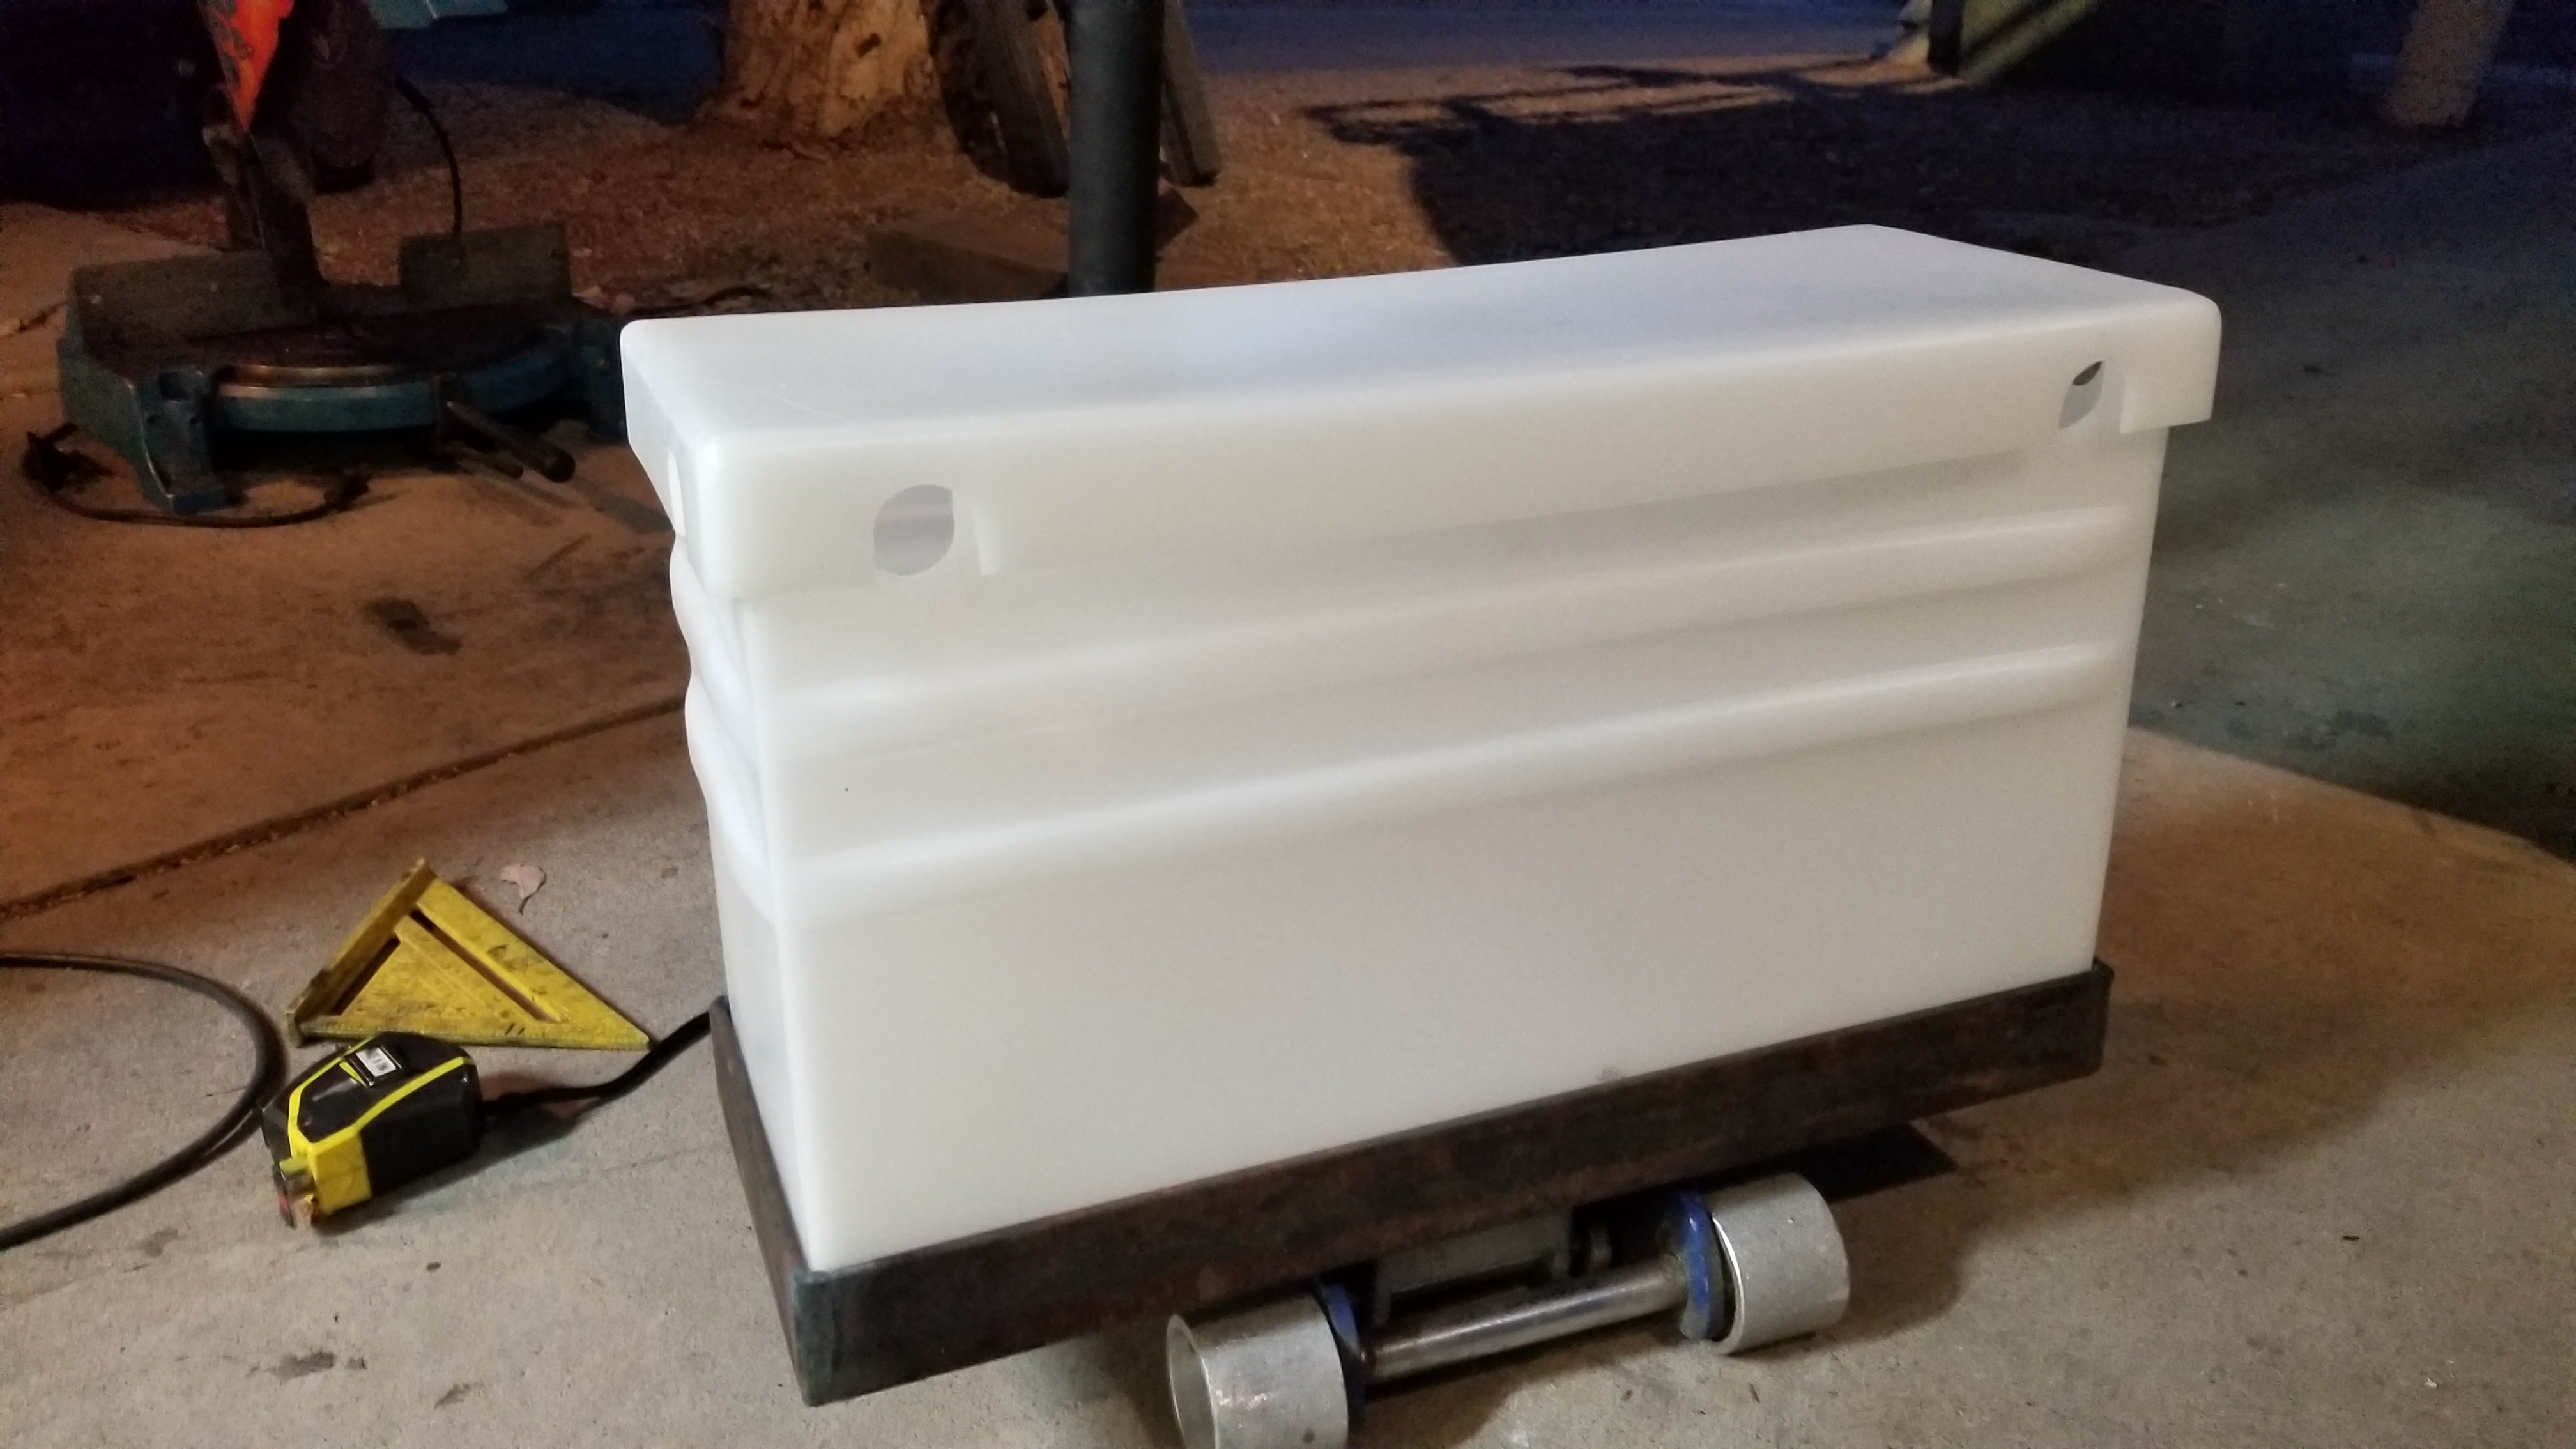
Battery Frame, all painted up! 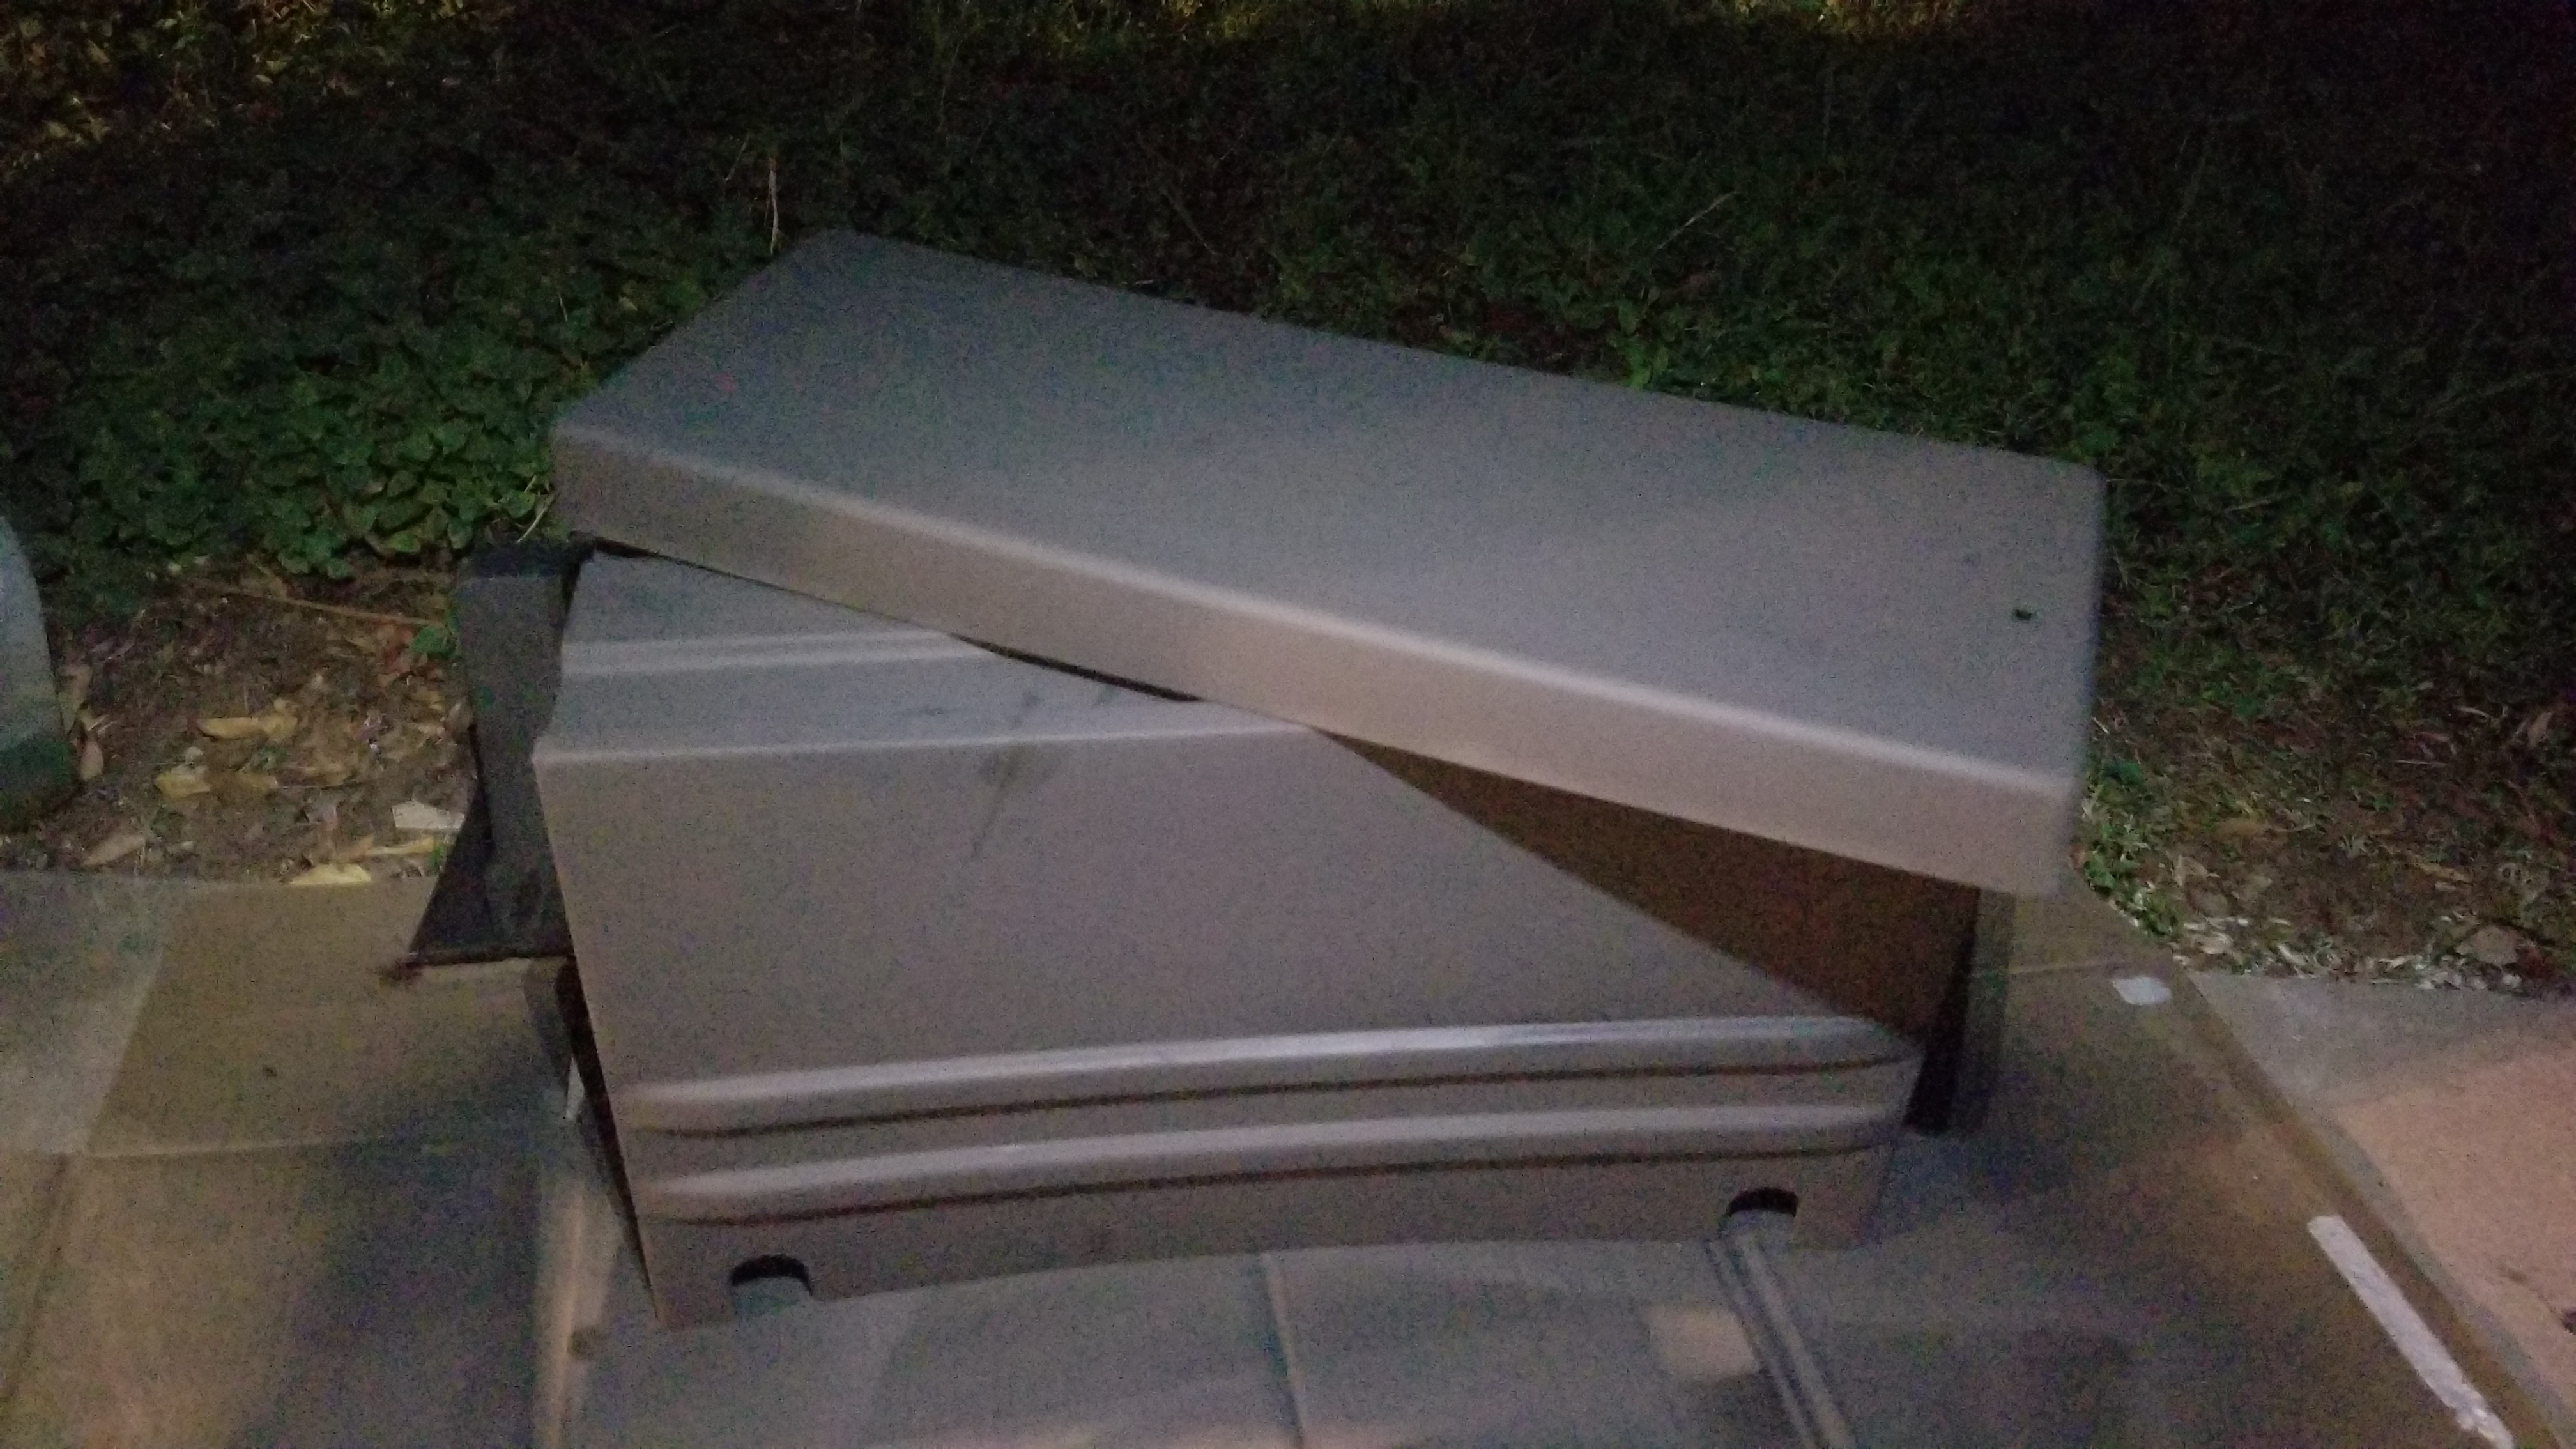
Battery box, painted, ready to roll! - Install the batteries into the box, wire them in series (I have two 6V batteries, wire in parallel if you have 12V batteries), put the lid on, lift it into place and bolt the battery frame to the van’s frame.
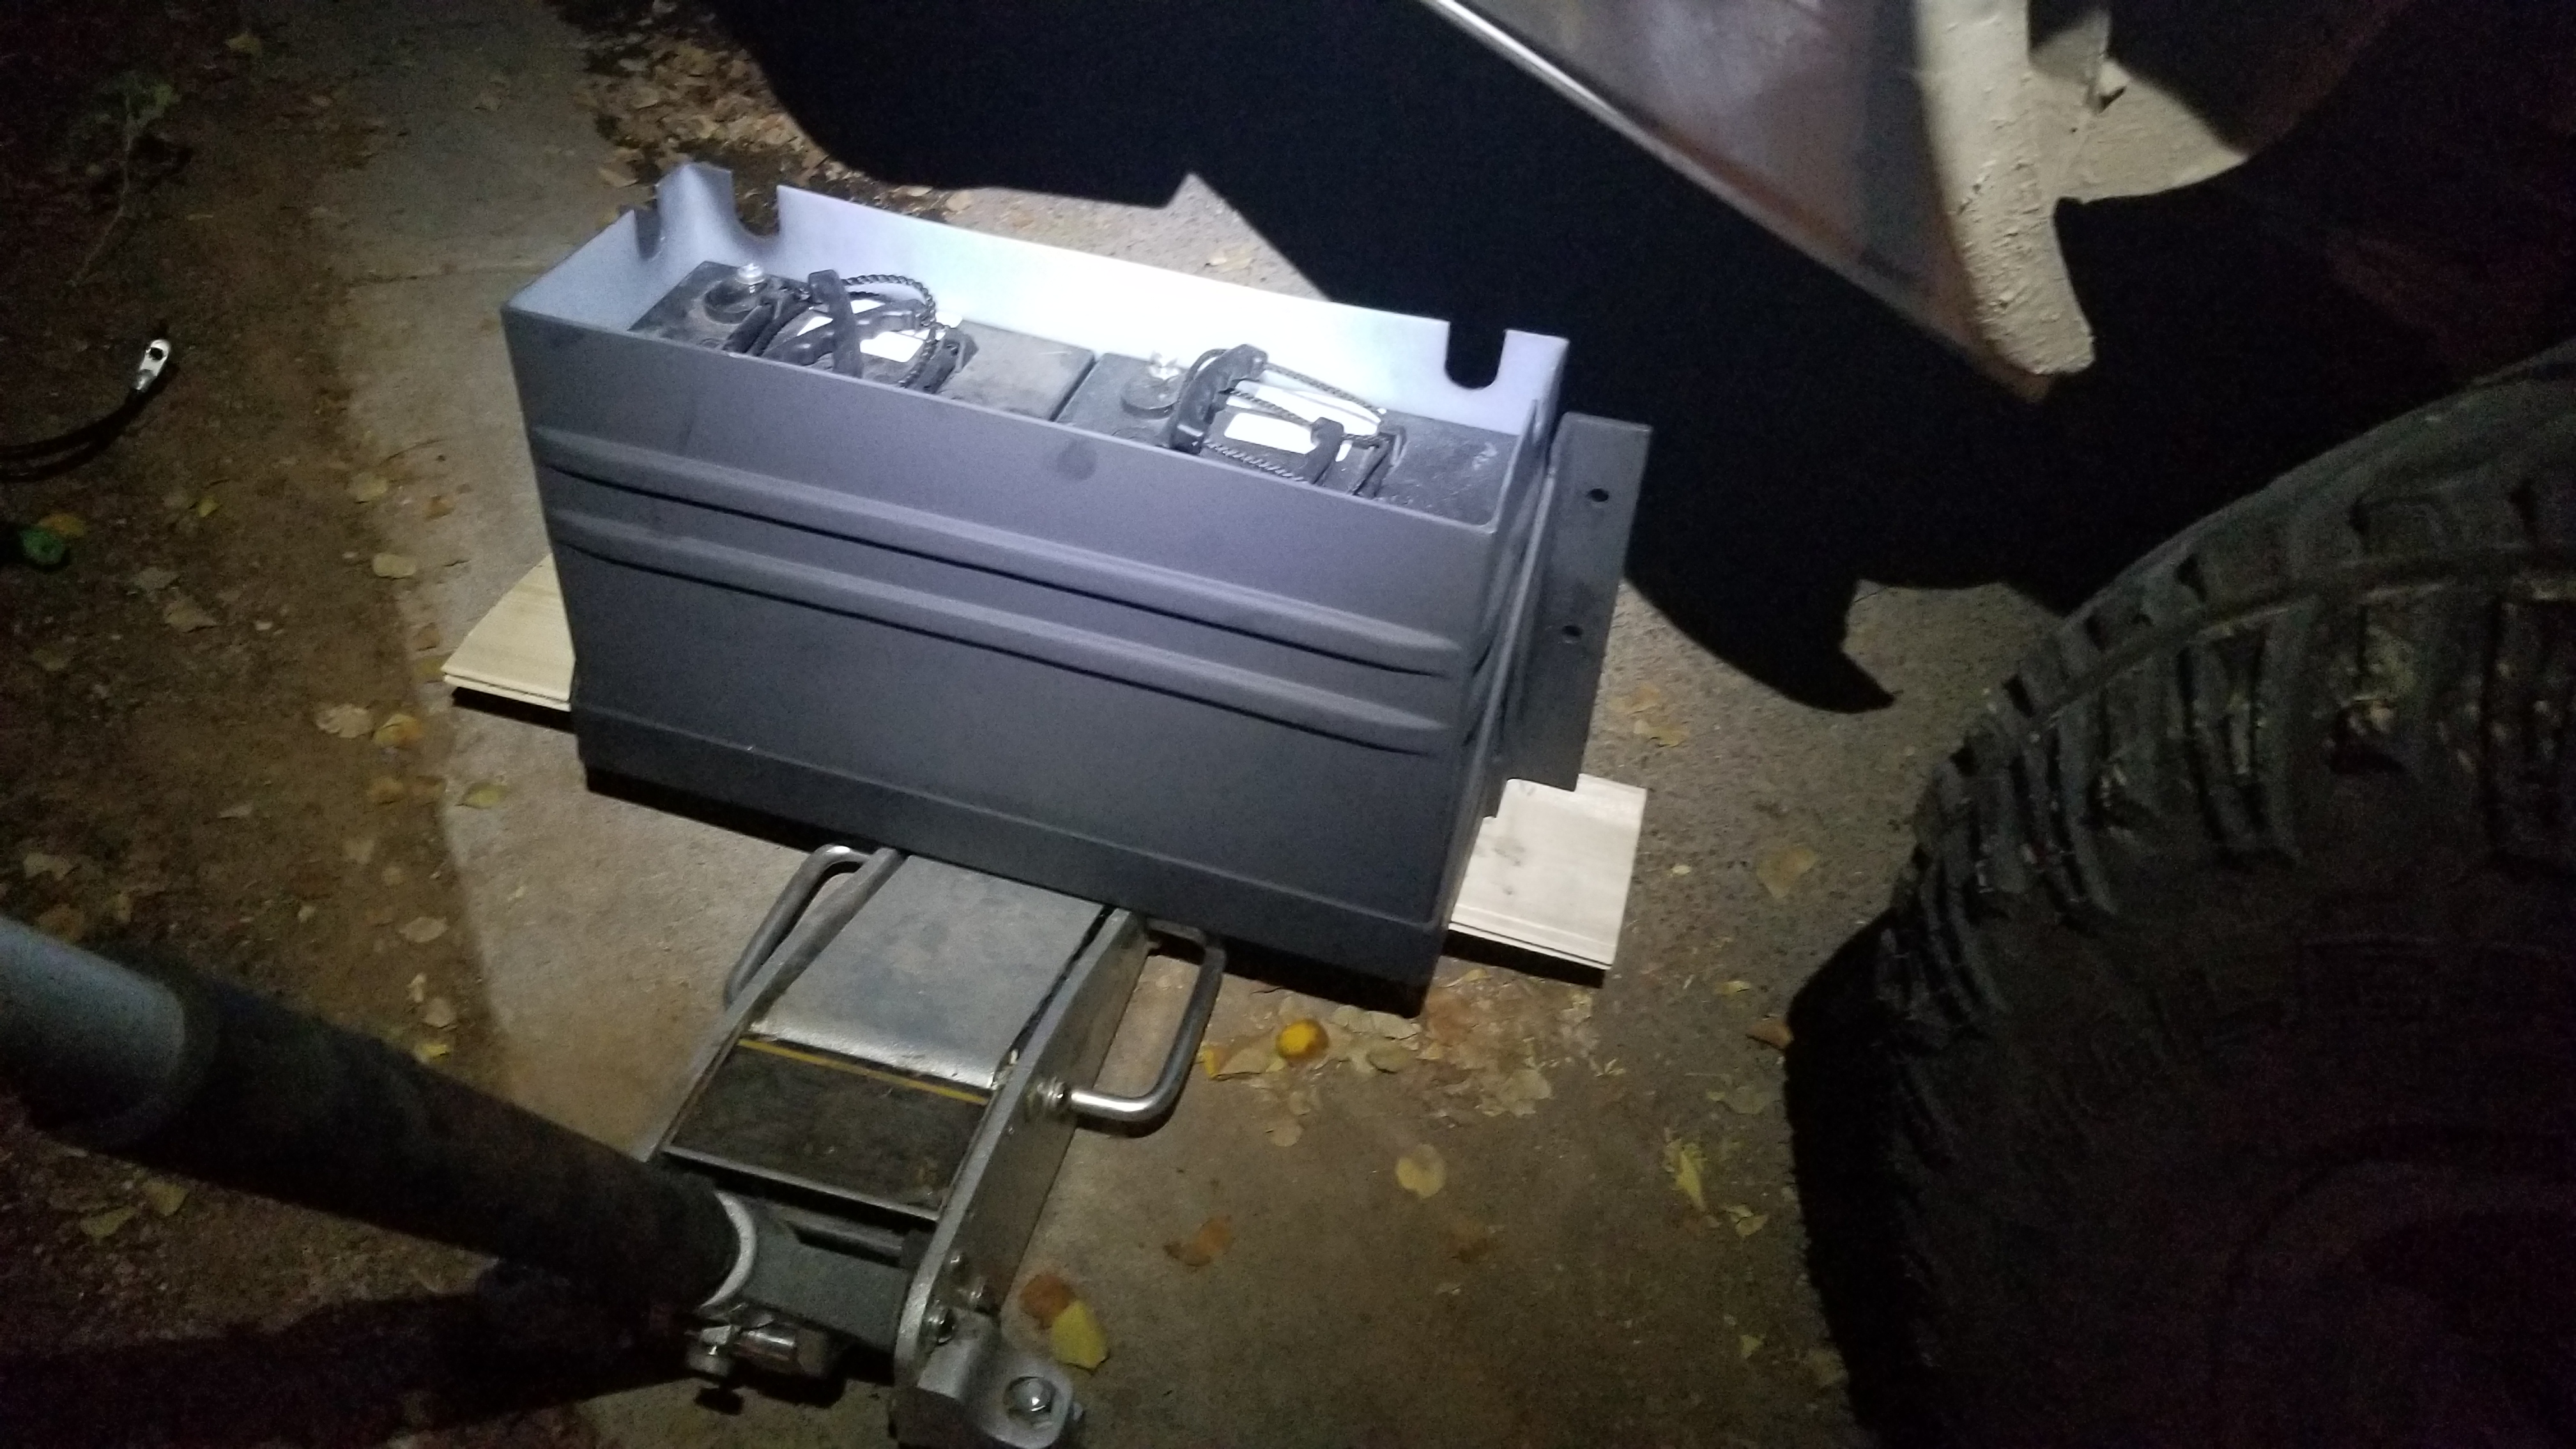
Batteries in, ready to be wired up! 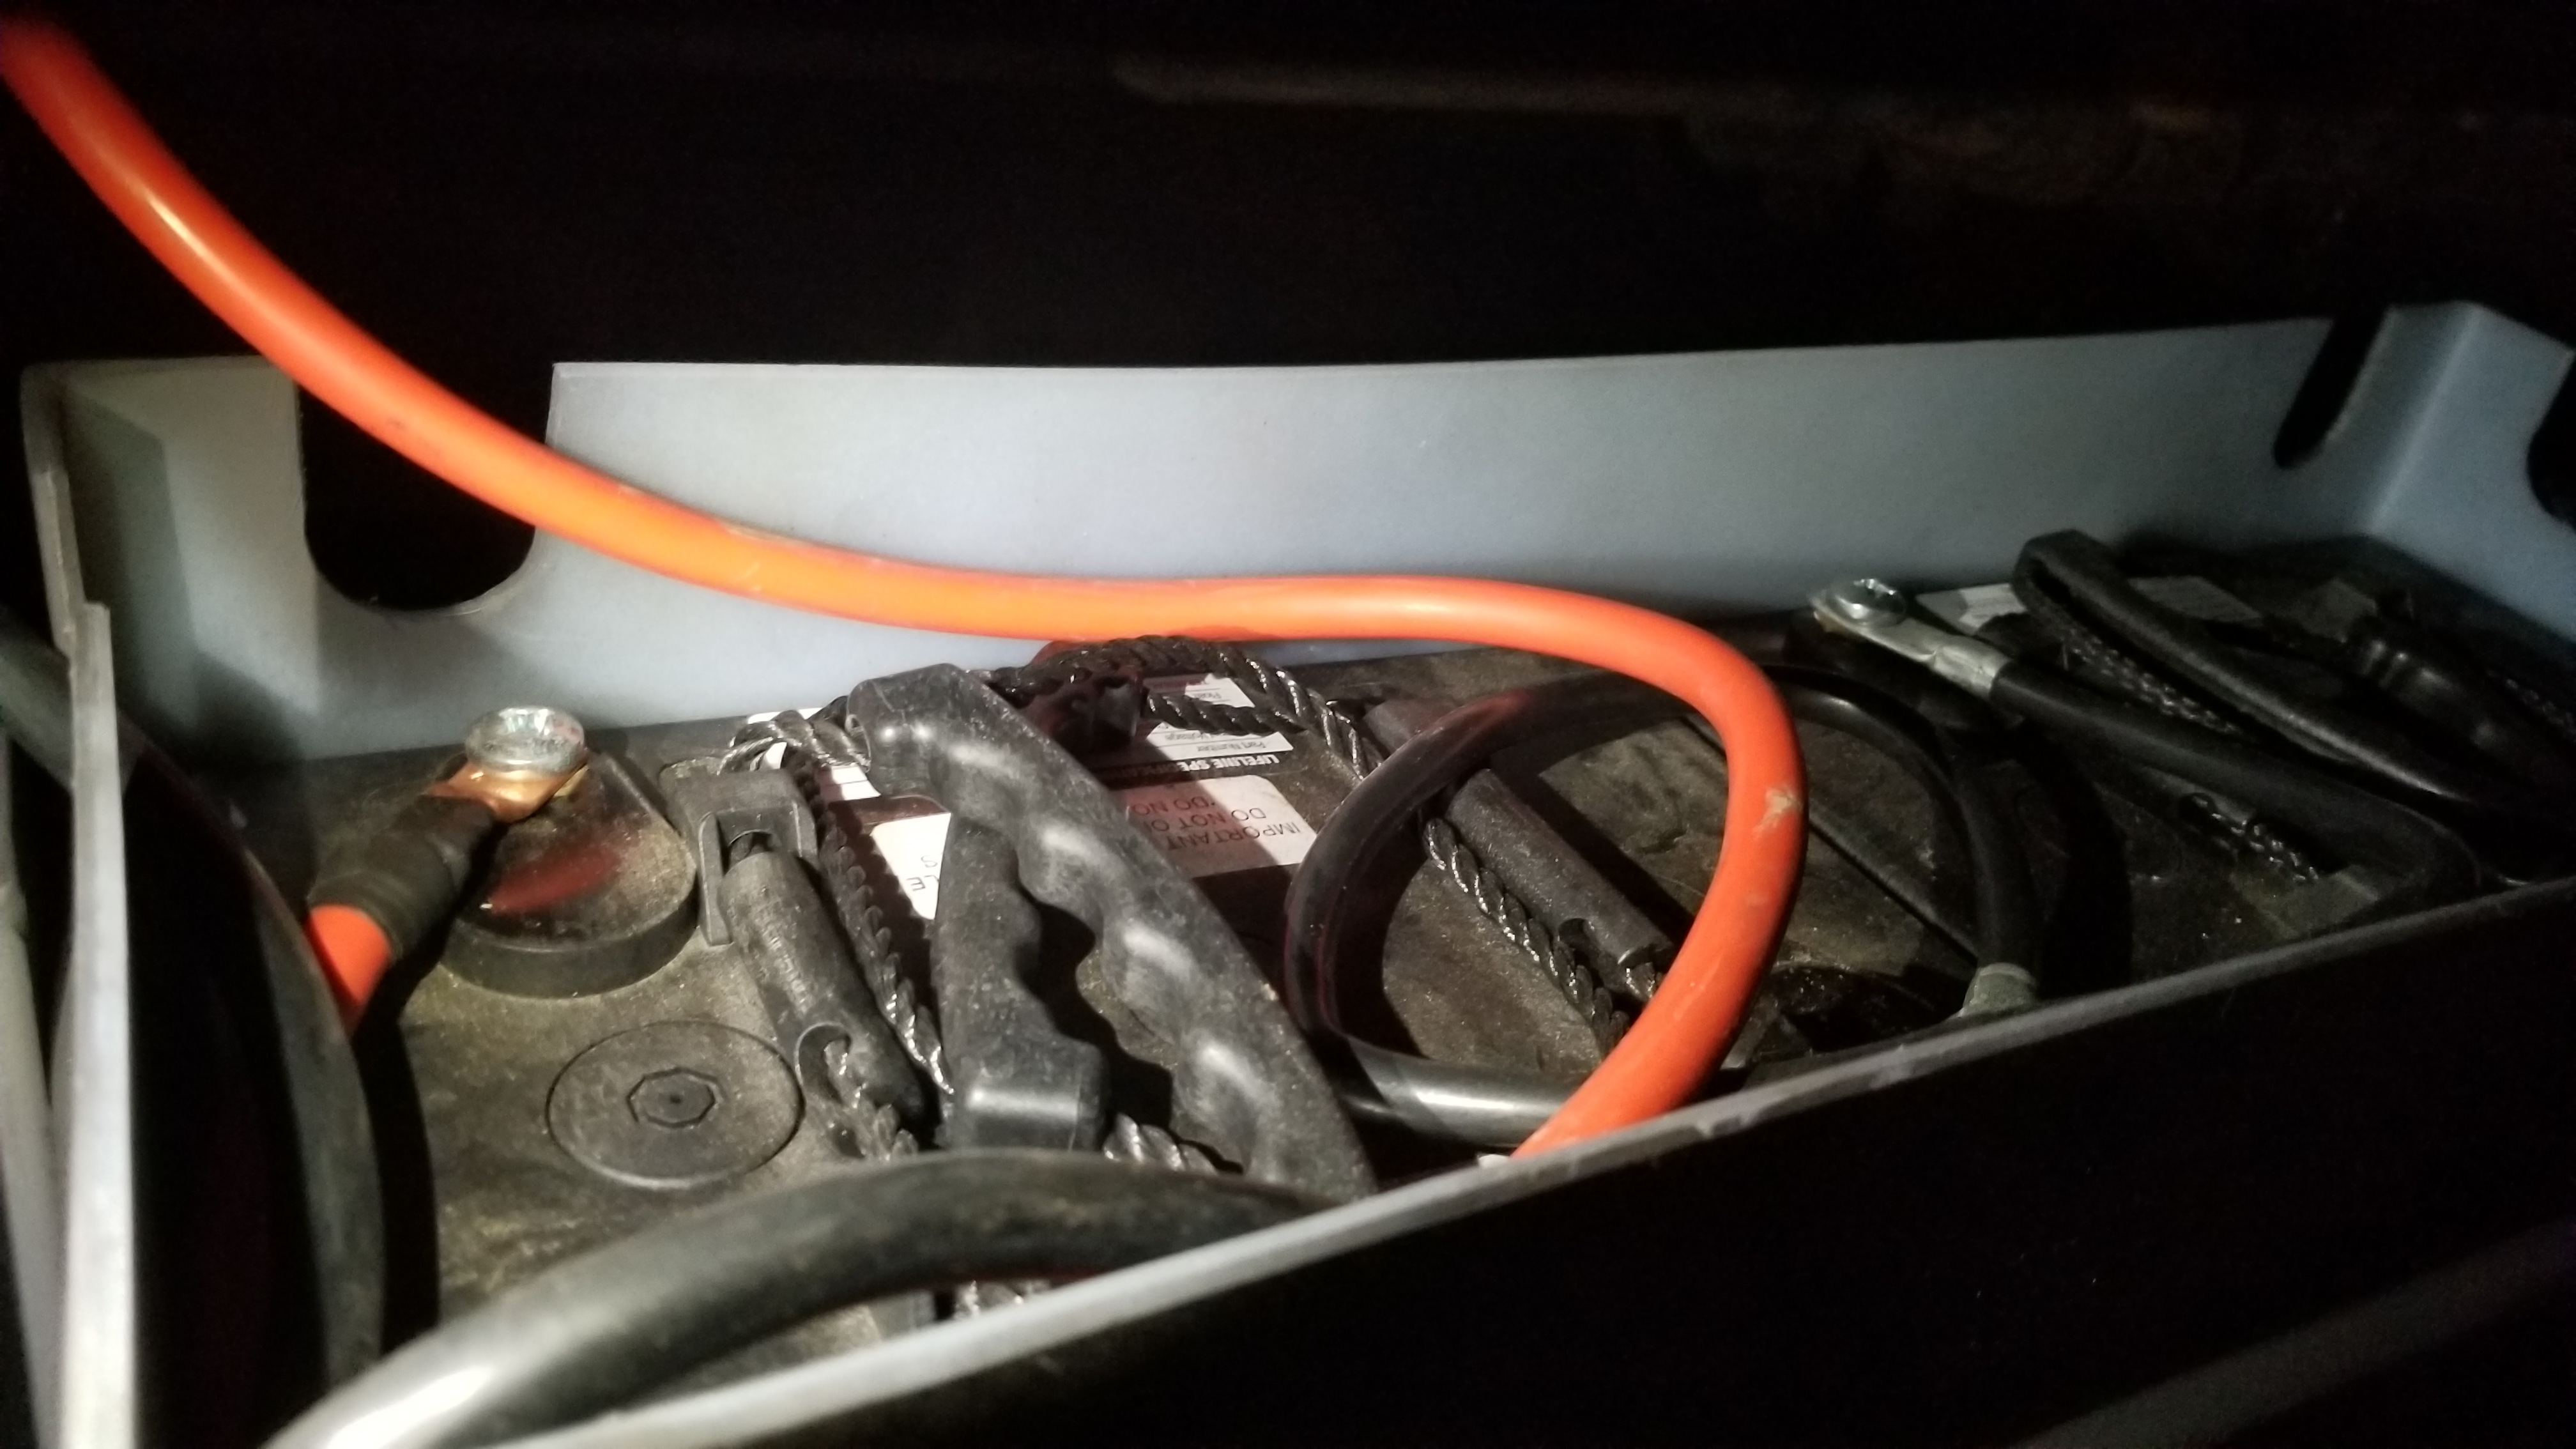
I wired my batteries in Series as they are two 6V and I want a 12V system. - Important! Make sure to have hot (red – positive) and ground (black – negative) wires that are long enough to reach the frame (ground) and the fuse box inside your van while the battery frame is lowered to the ground (makes for easy maintenance and removal)
- Attach the ground wire from your battery to the van’s frame.
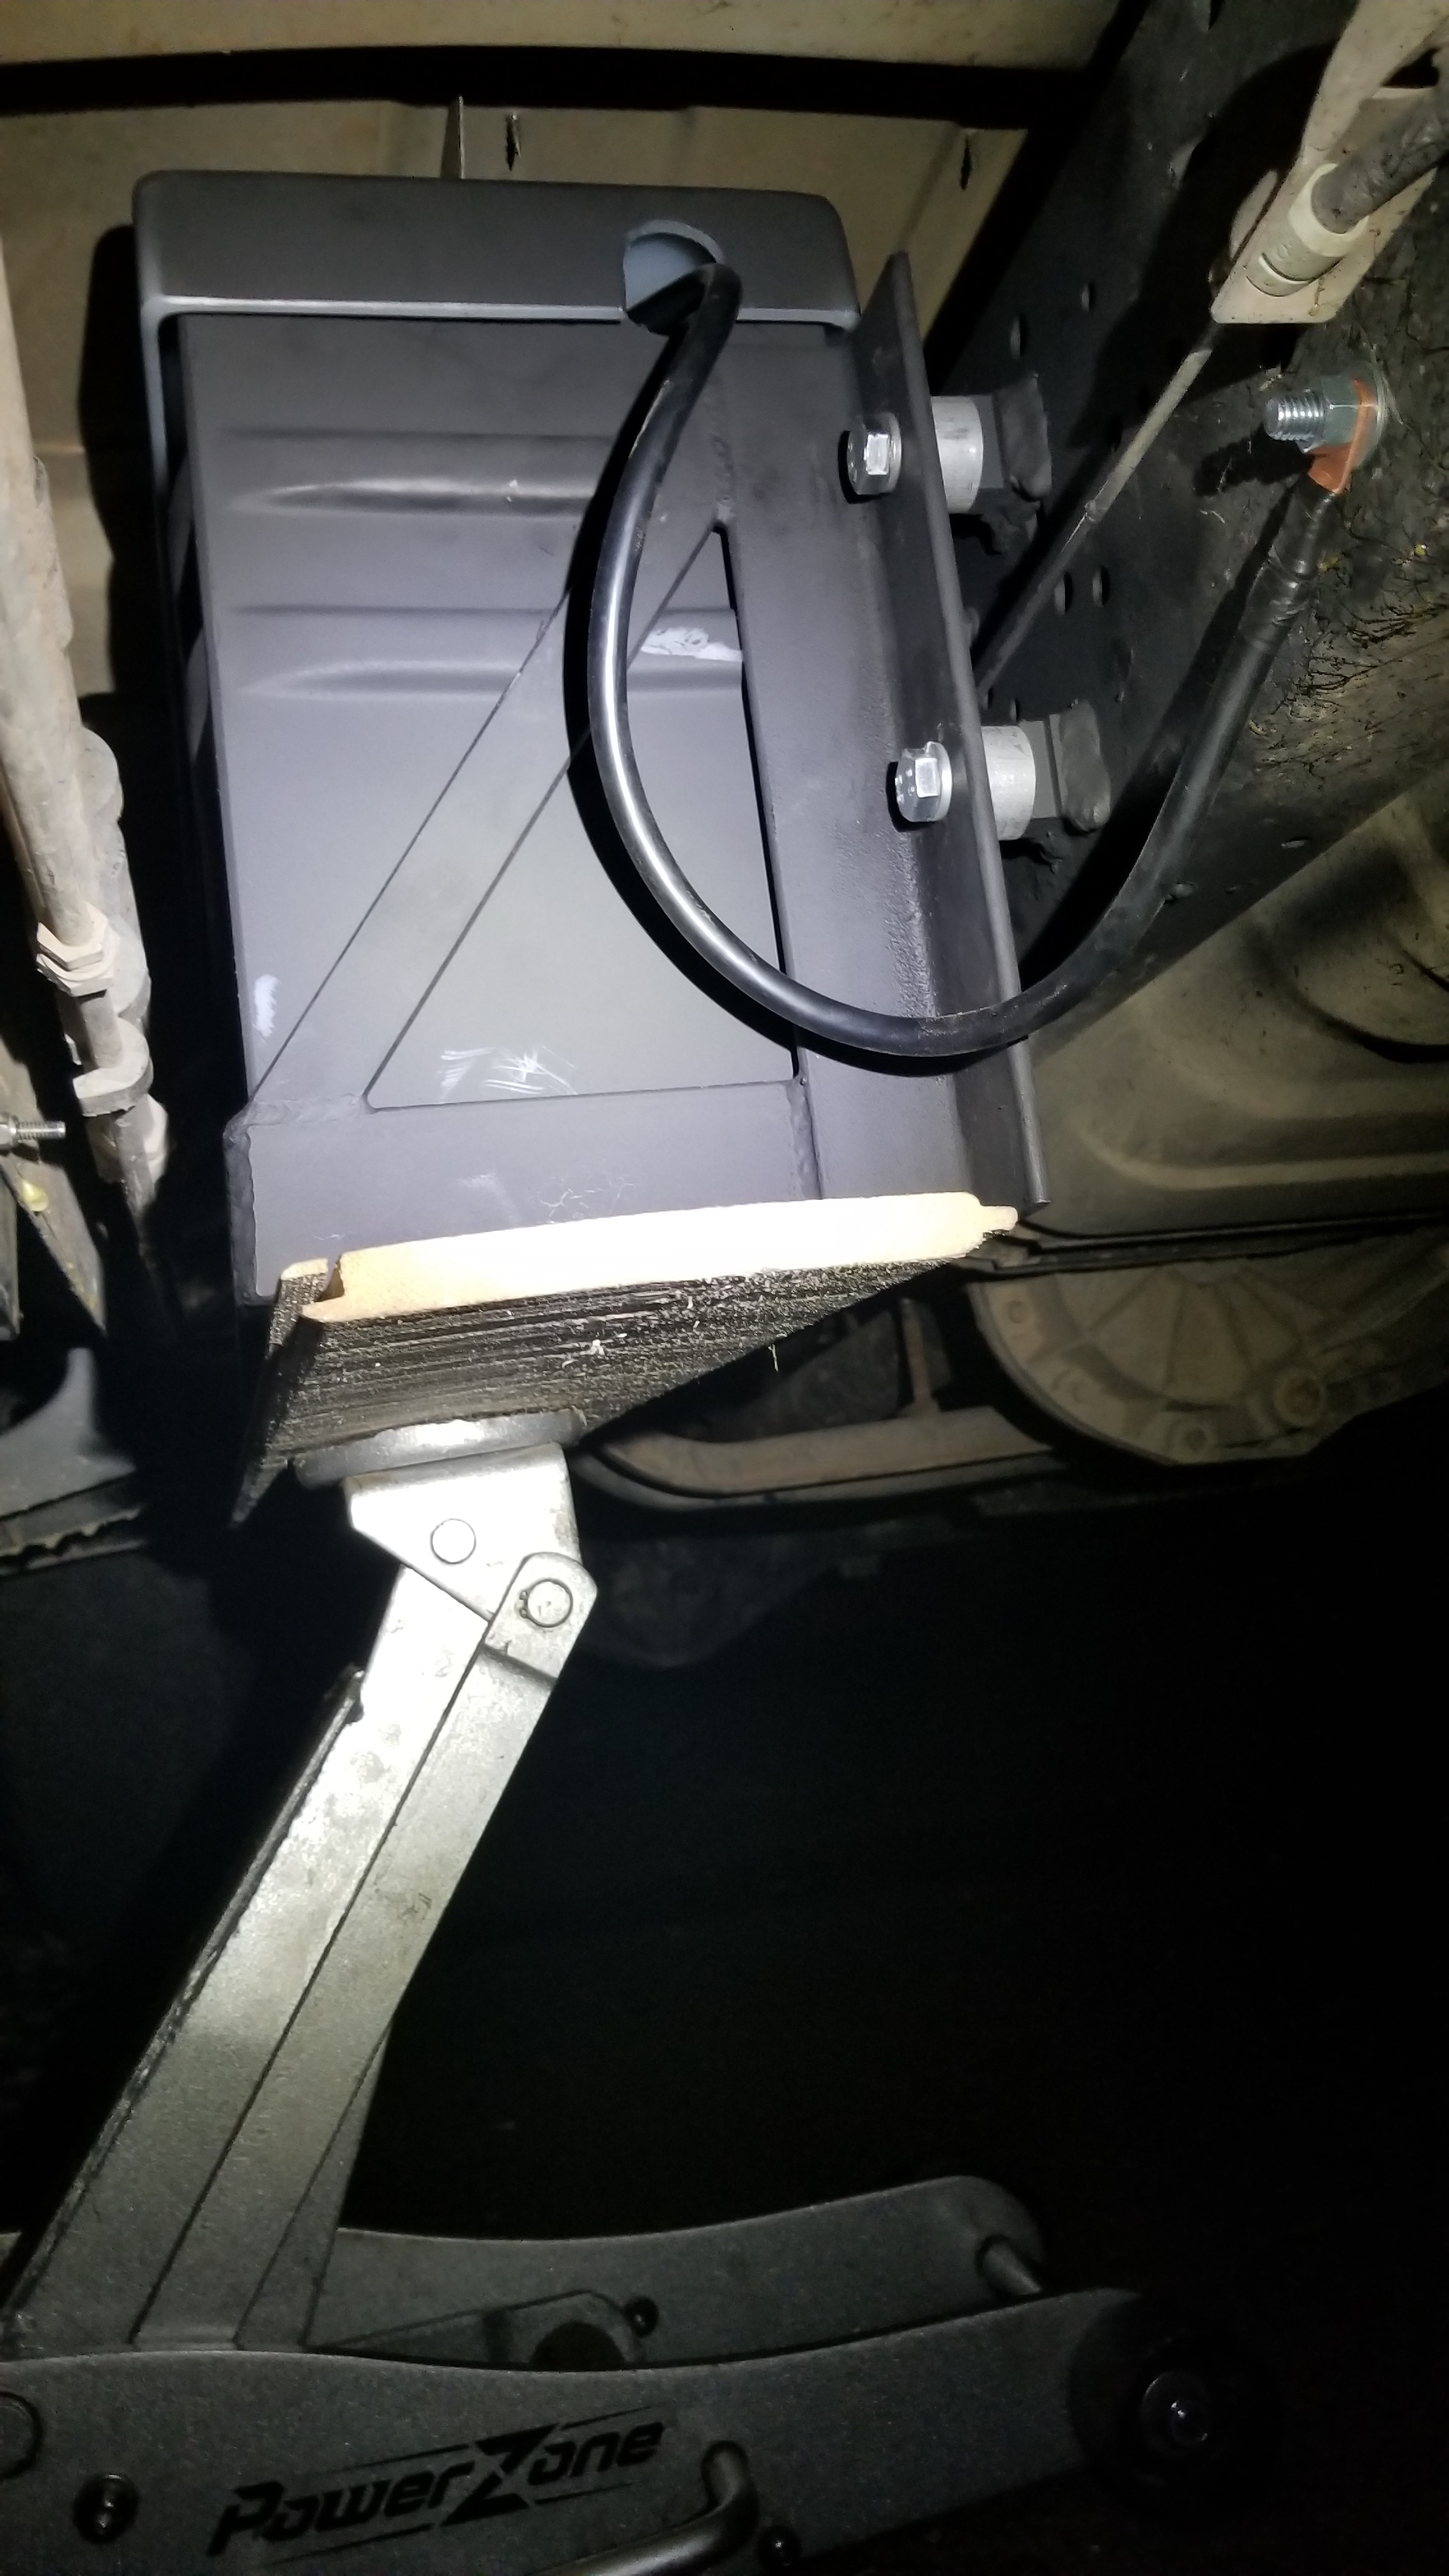
Battery Box in place, bolted up, and ground wire bolted to Van’s frame.
- Grab your plastic battery holder for dimensions and start cutting angle iron to make a frame around it.
- Drill a hole through the floor of your van just next to the fuse box area and the batteries mounted below the van on the frame. I found a precut hole with an oval stopper in it. I removed the stopper and drilled an identical hole through the wood floor of my van.
- Once the hole is drilled, insulate the edges of the hole with a rubber grommet to protect your battery wires.
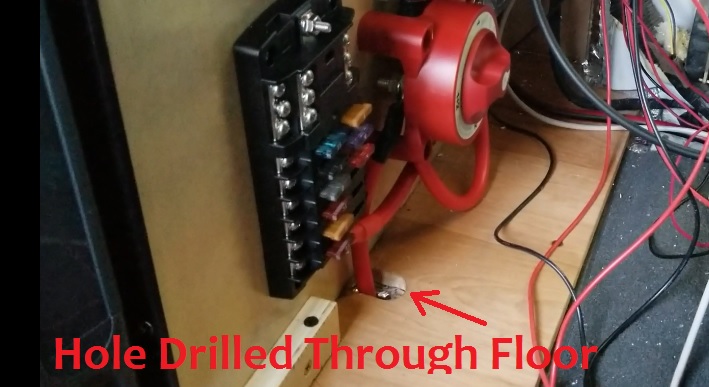
This picture only shows positive coming through the floor, a negative ground wire will soon follow
- Once the hole is drilled, insulate the edges of the hole with a rubber grommet to protect your battery wires.
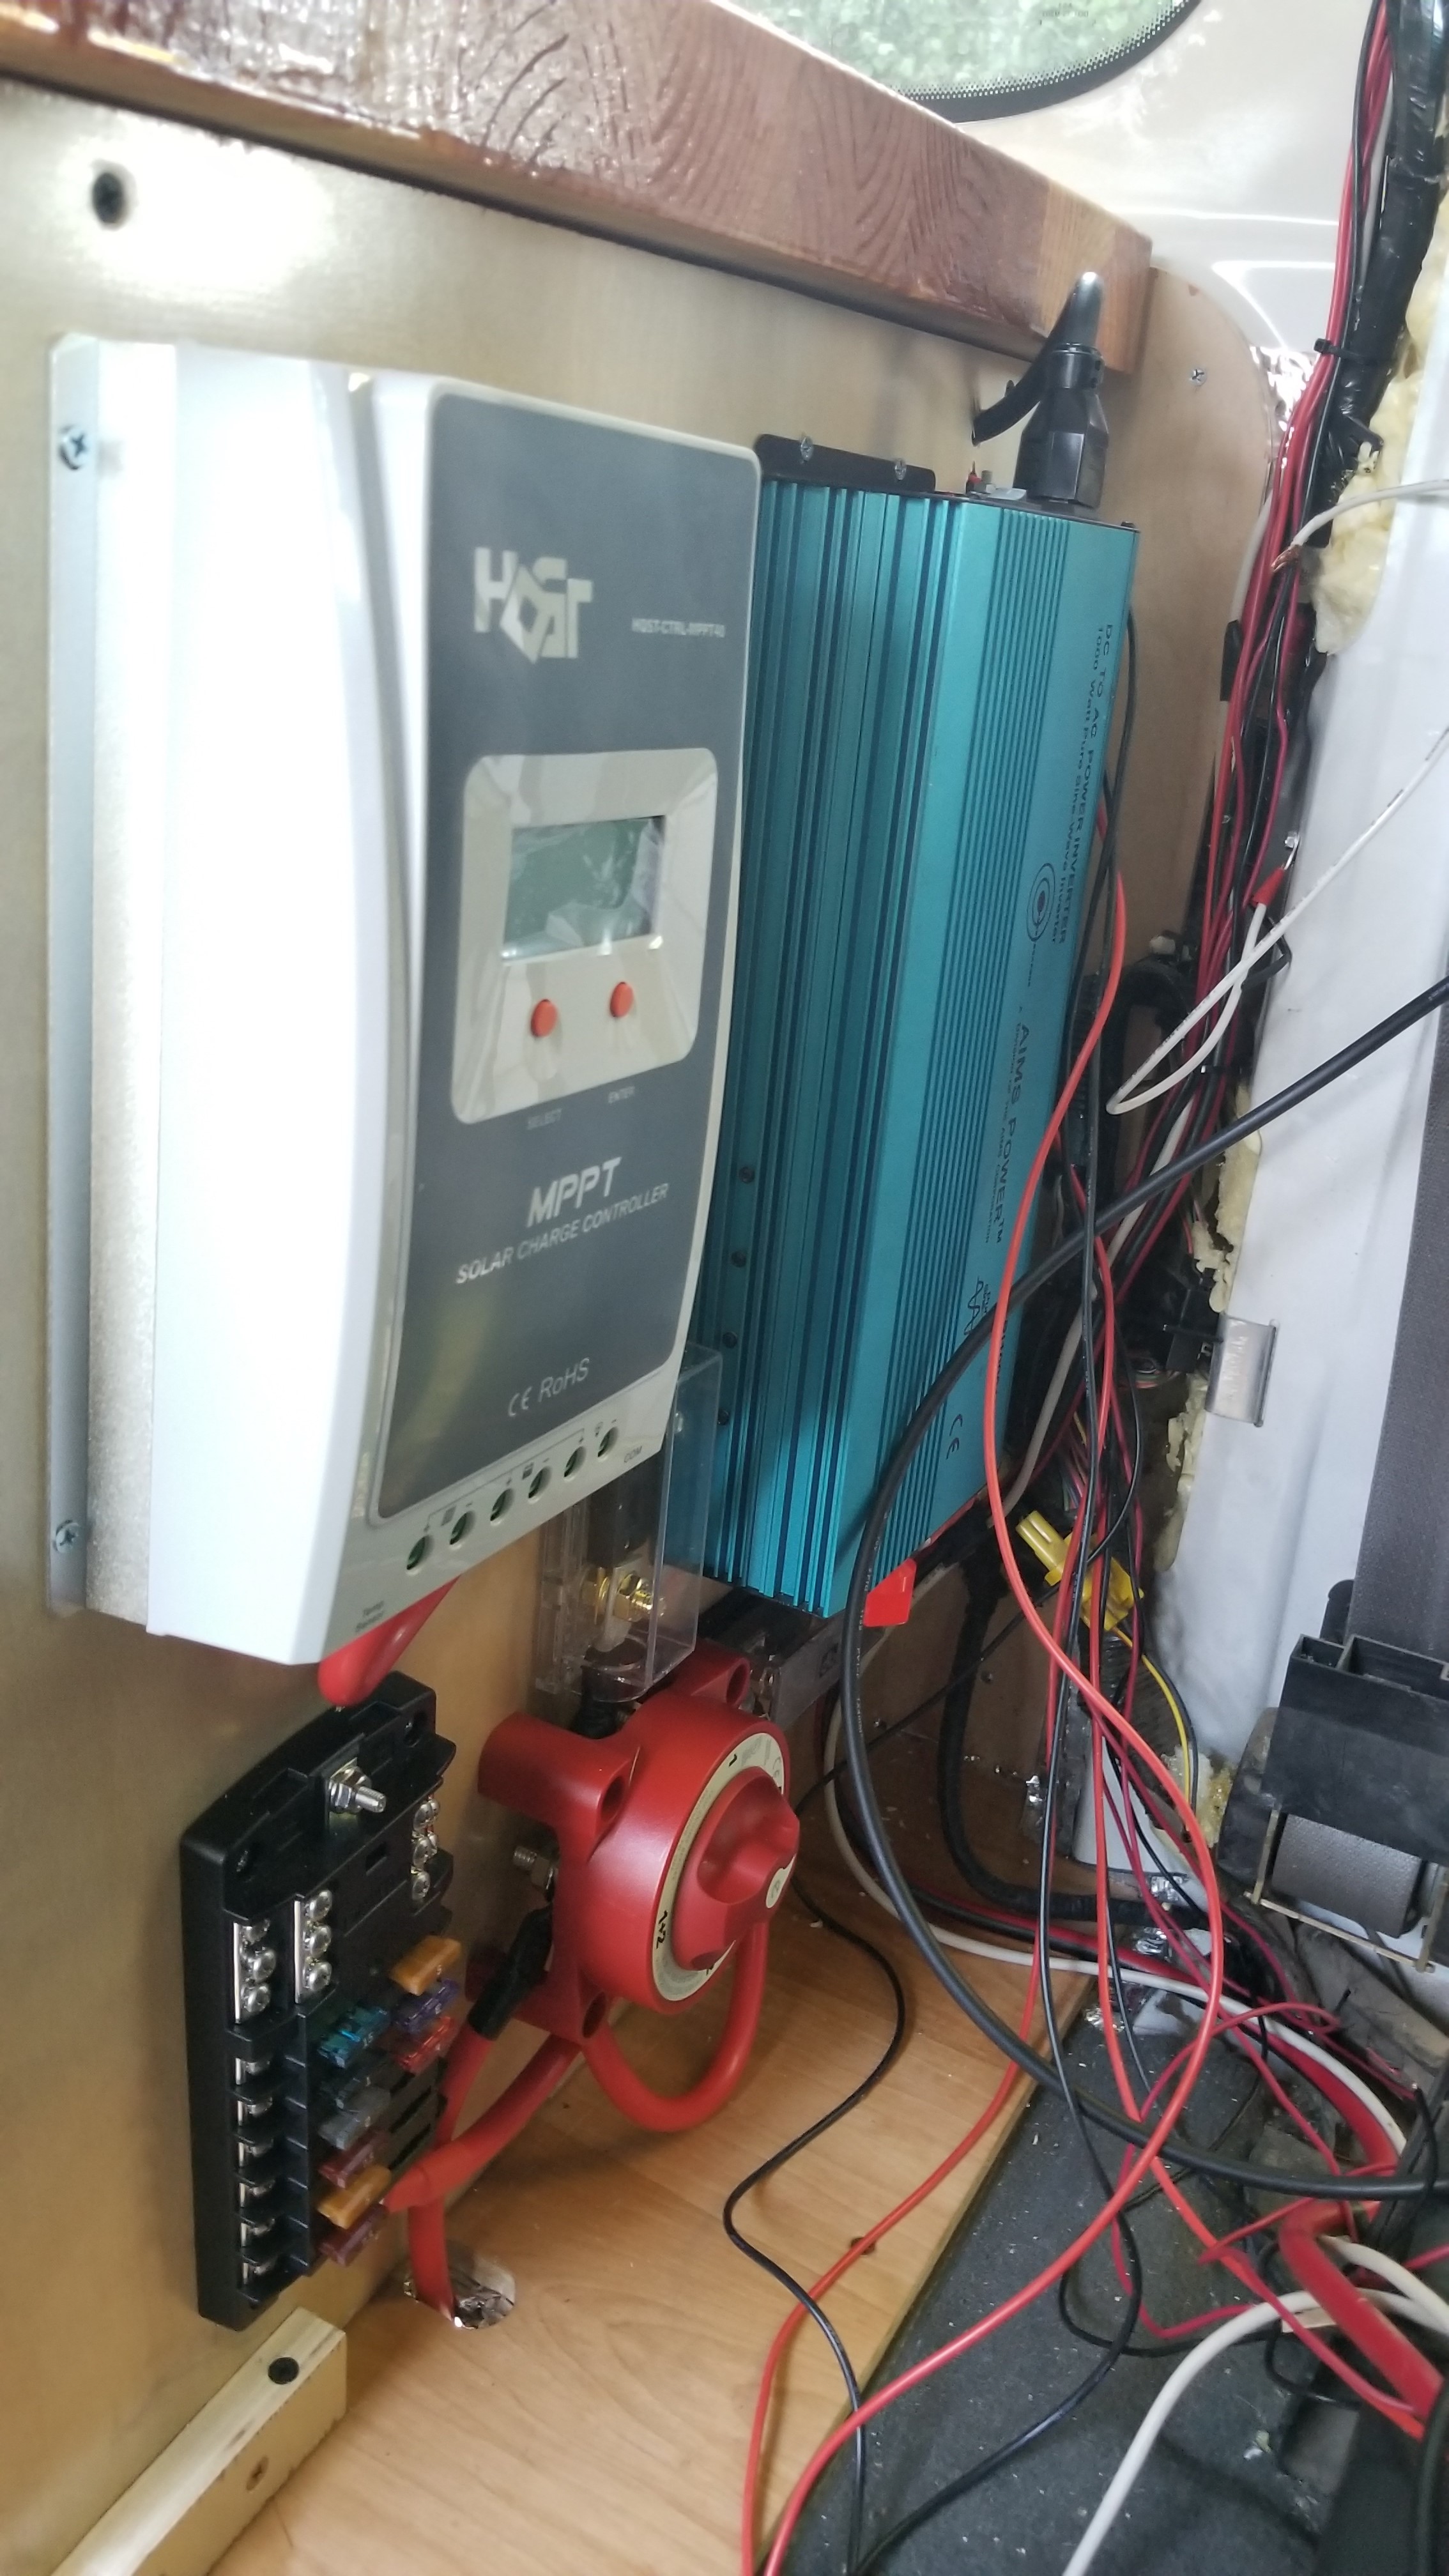
- Mount your fuse box, BlueSea power switch, charge controller, inverter, and two single large fuse holders (one for the inverter, the second for the charge controller).
- You’ll want to strategically place these so you can run large gage wire between the power and ground terminals.
- You’ll want to strategically place these so you can run large gage wire between the power and ground terminals.
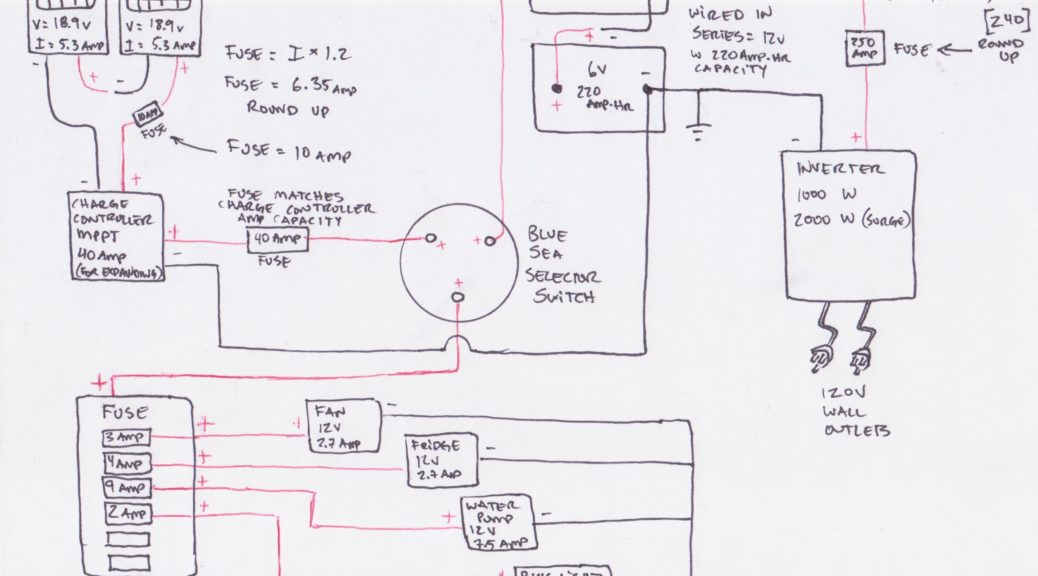
- Once you’ve mounted these, start running your wires. I wired my system in a way that I could isolate the batteries from the fuse box and the charge controller if I so chose. I opted to run my fuse box straight to my batteries instead of to my charge controller. If I would have wired it to my charge controller I could have monitored the current used by all my appliances (perhaps I’ll do this in the future, but just wanted to keep it simple for now). I used the following wiring diagram I drew to wire up my system (this doesn’t show the switches I put in for the lights, and water pump – The fridge and fan have built in switches for on/off).
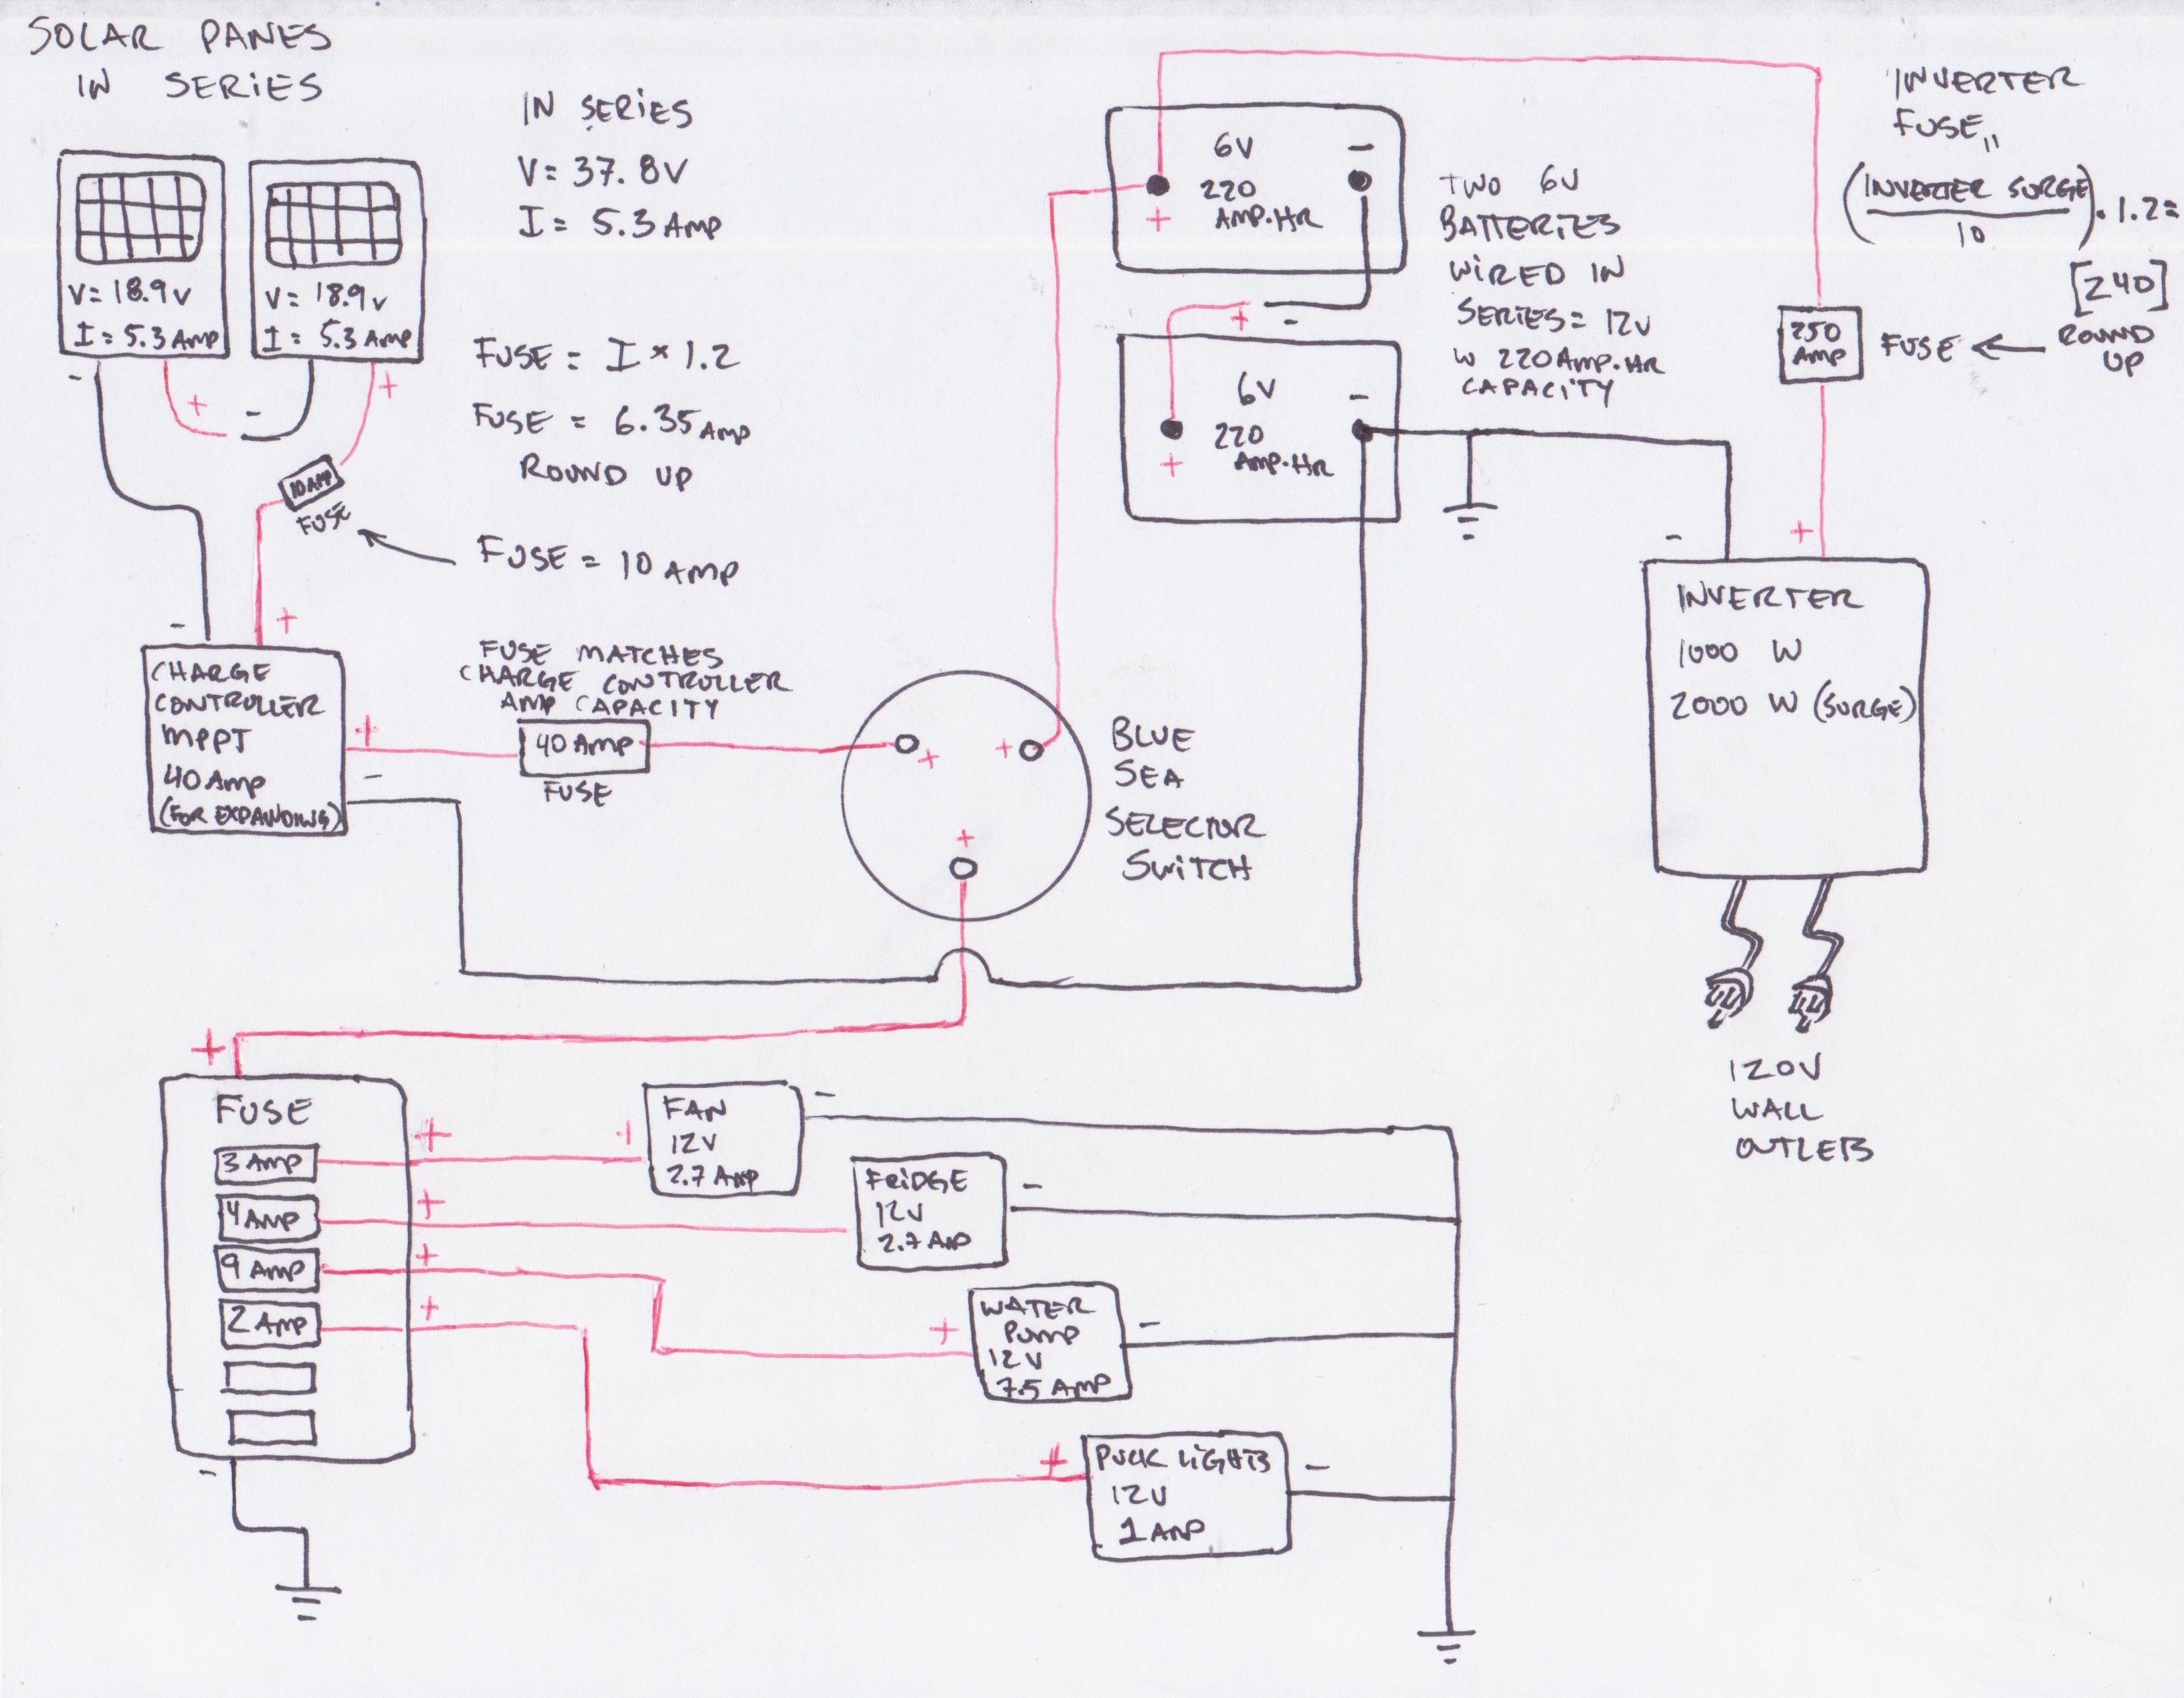
Wiring Diagram for my Van (Click to enlarge) - Run all your wires on the recommended gages to the fuse box. The recommended fuses and wire gages will be in each component manual.
- I utilized the wall switch I installed early on in the build for the ceiling puck lights, and will be used for the LED strip lights and eventually the cook area puck lights.
- Video: Shows generally whole wiring scheme – https://youtu.be/YqlrzXS5fnU
- Now that you are ready, run the hot (red-positive) wire from your batteries to the Blue Sea switch. Double check everything, cross your fingers, and turn the switch on! Congrats! You either have power easily flowing to your appropriate appliances, or you have a crap ton of problems you have to run down and correct.
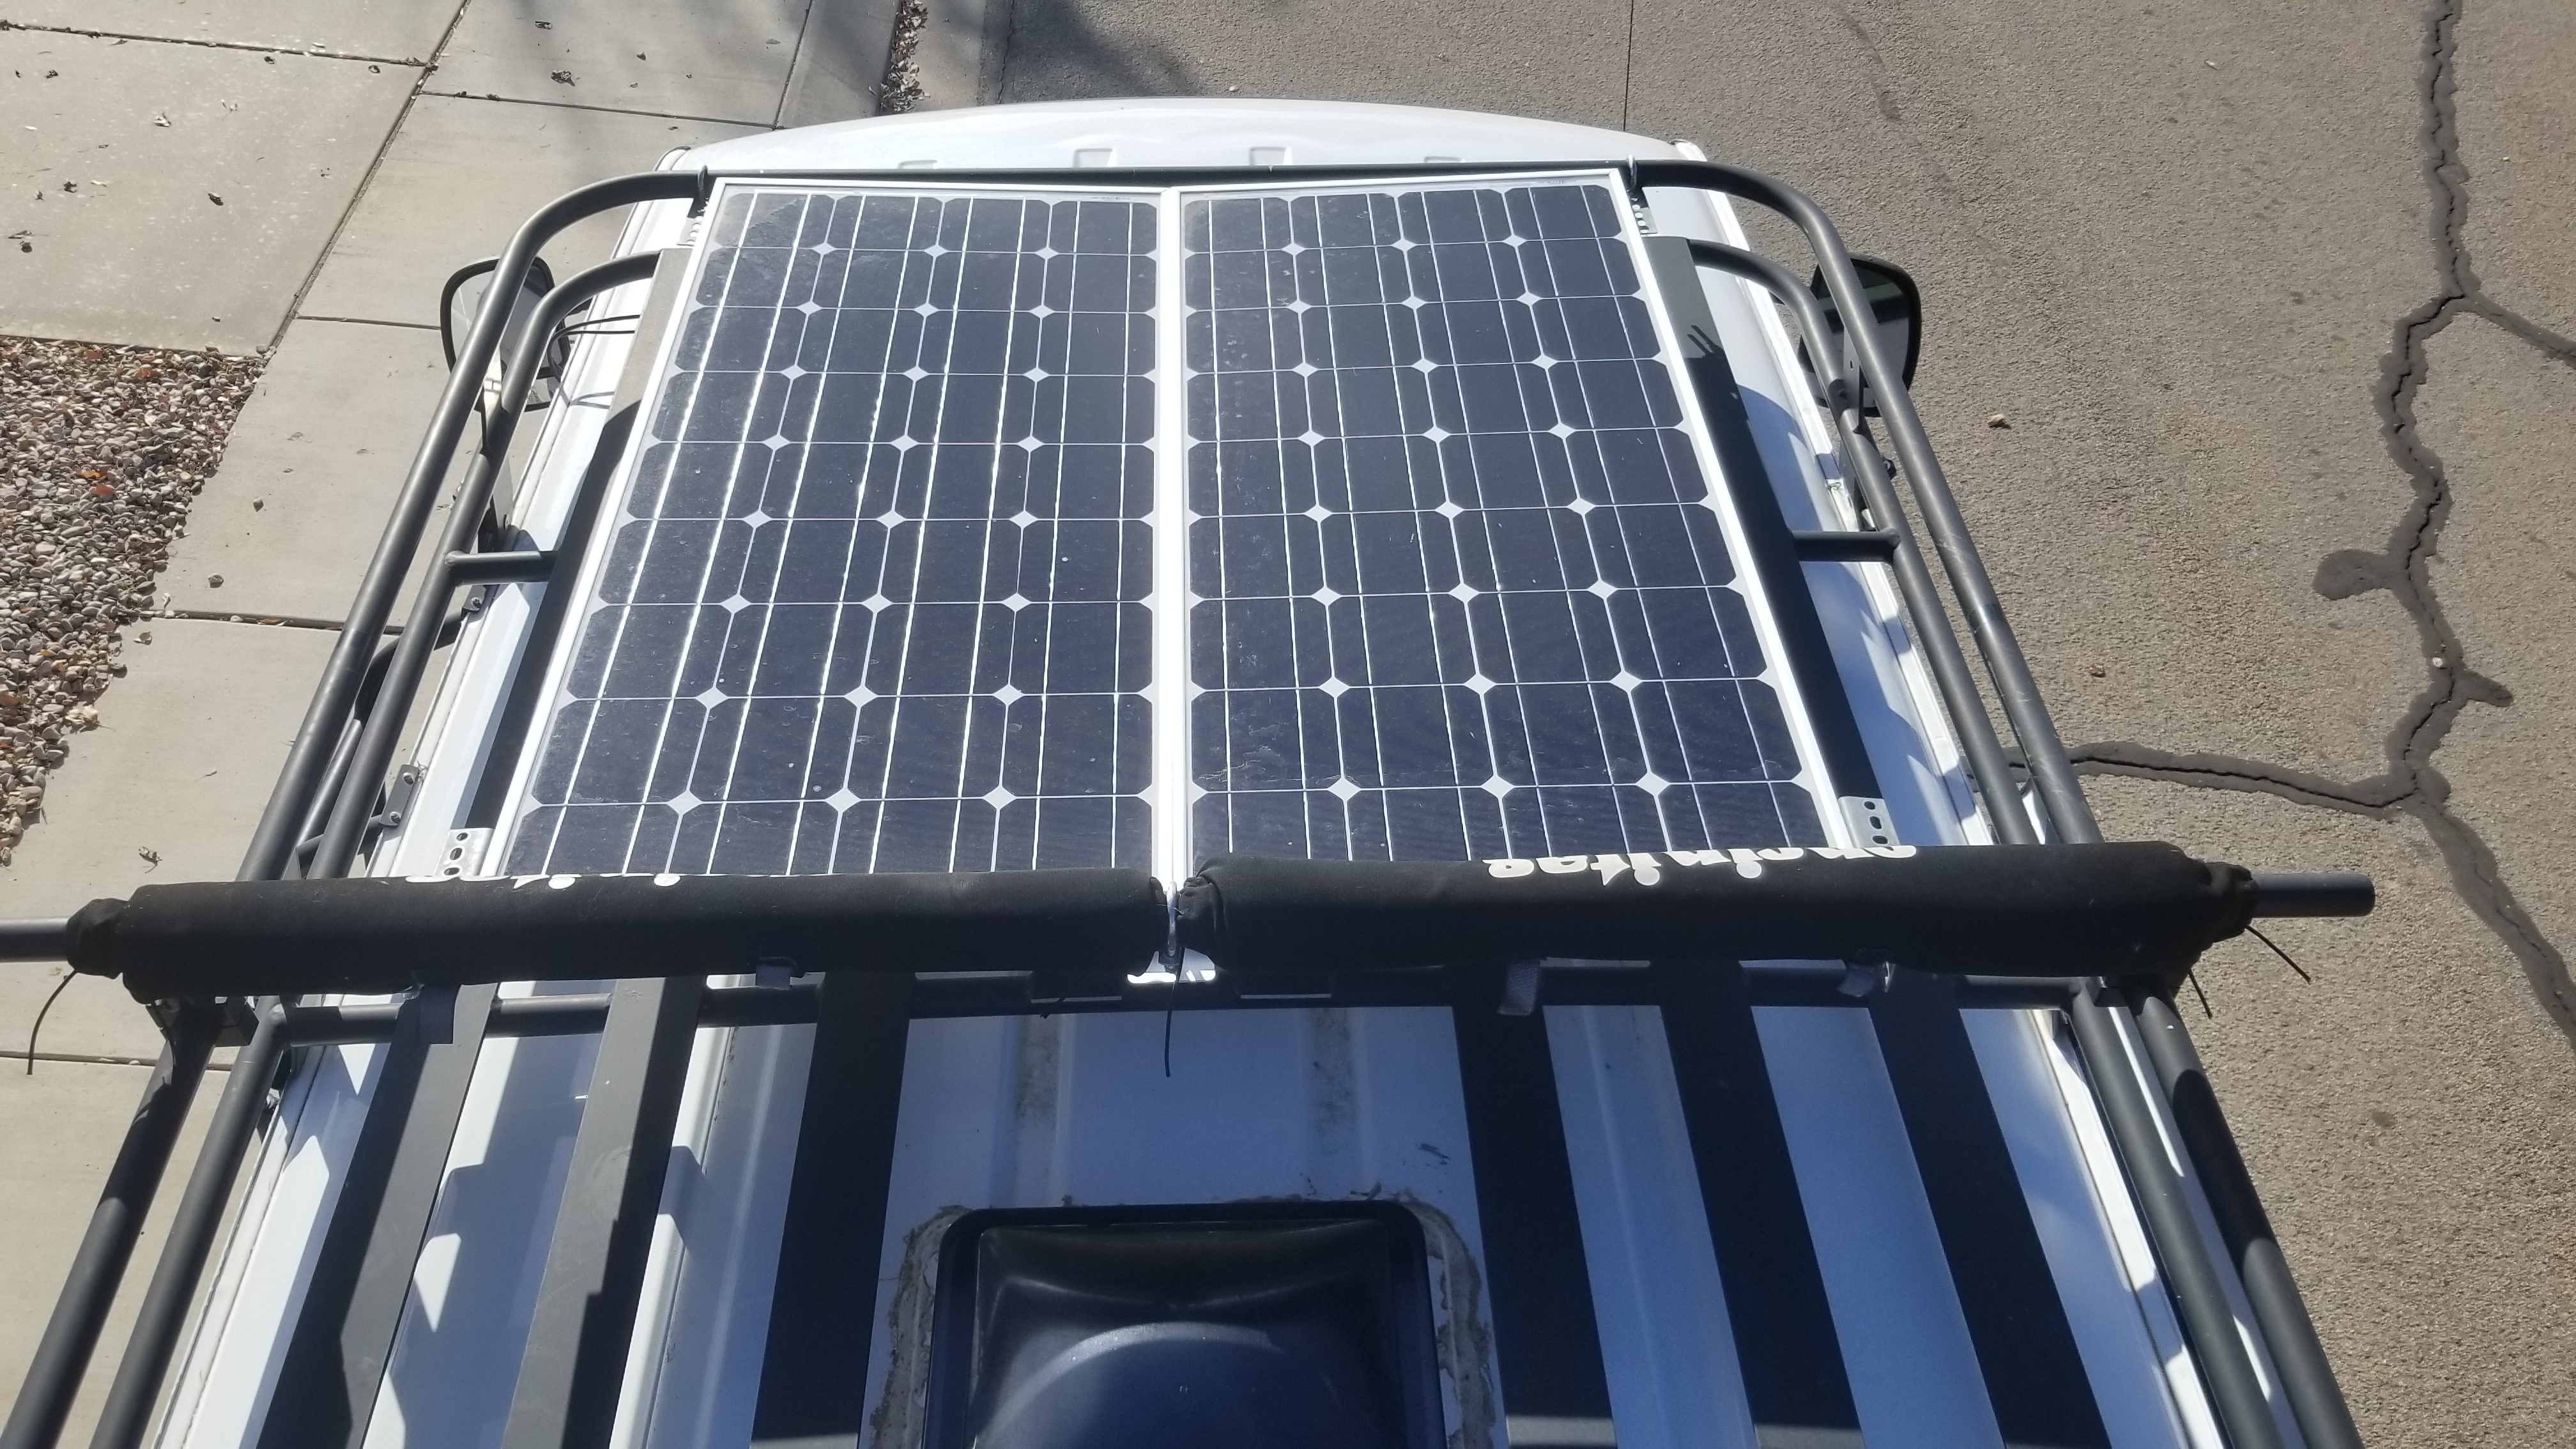
- Install your solar panels on your roof. Tons of options here, I created some brackets that would keep the panels in line with my roof rack which cut down on air resistance.
- Drill two holes into the side of your van BELOW the rainguard lip where your roof meets the side body of your van. Run your wires through the body of the van and connect them to your charge controller.
- Use rubber grommets to protect the wires from the sharp edges of the holes through your van body
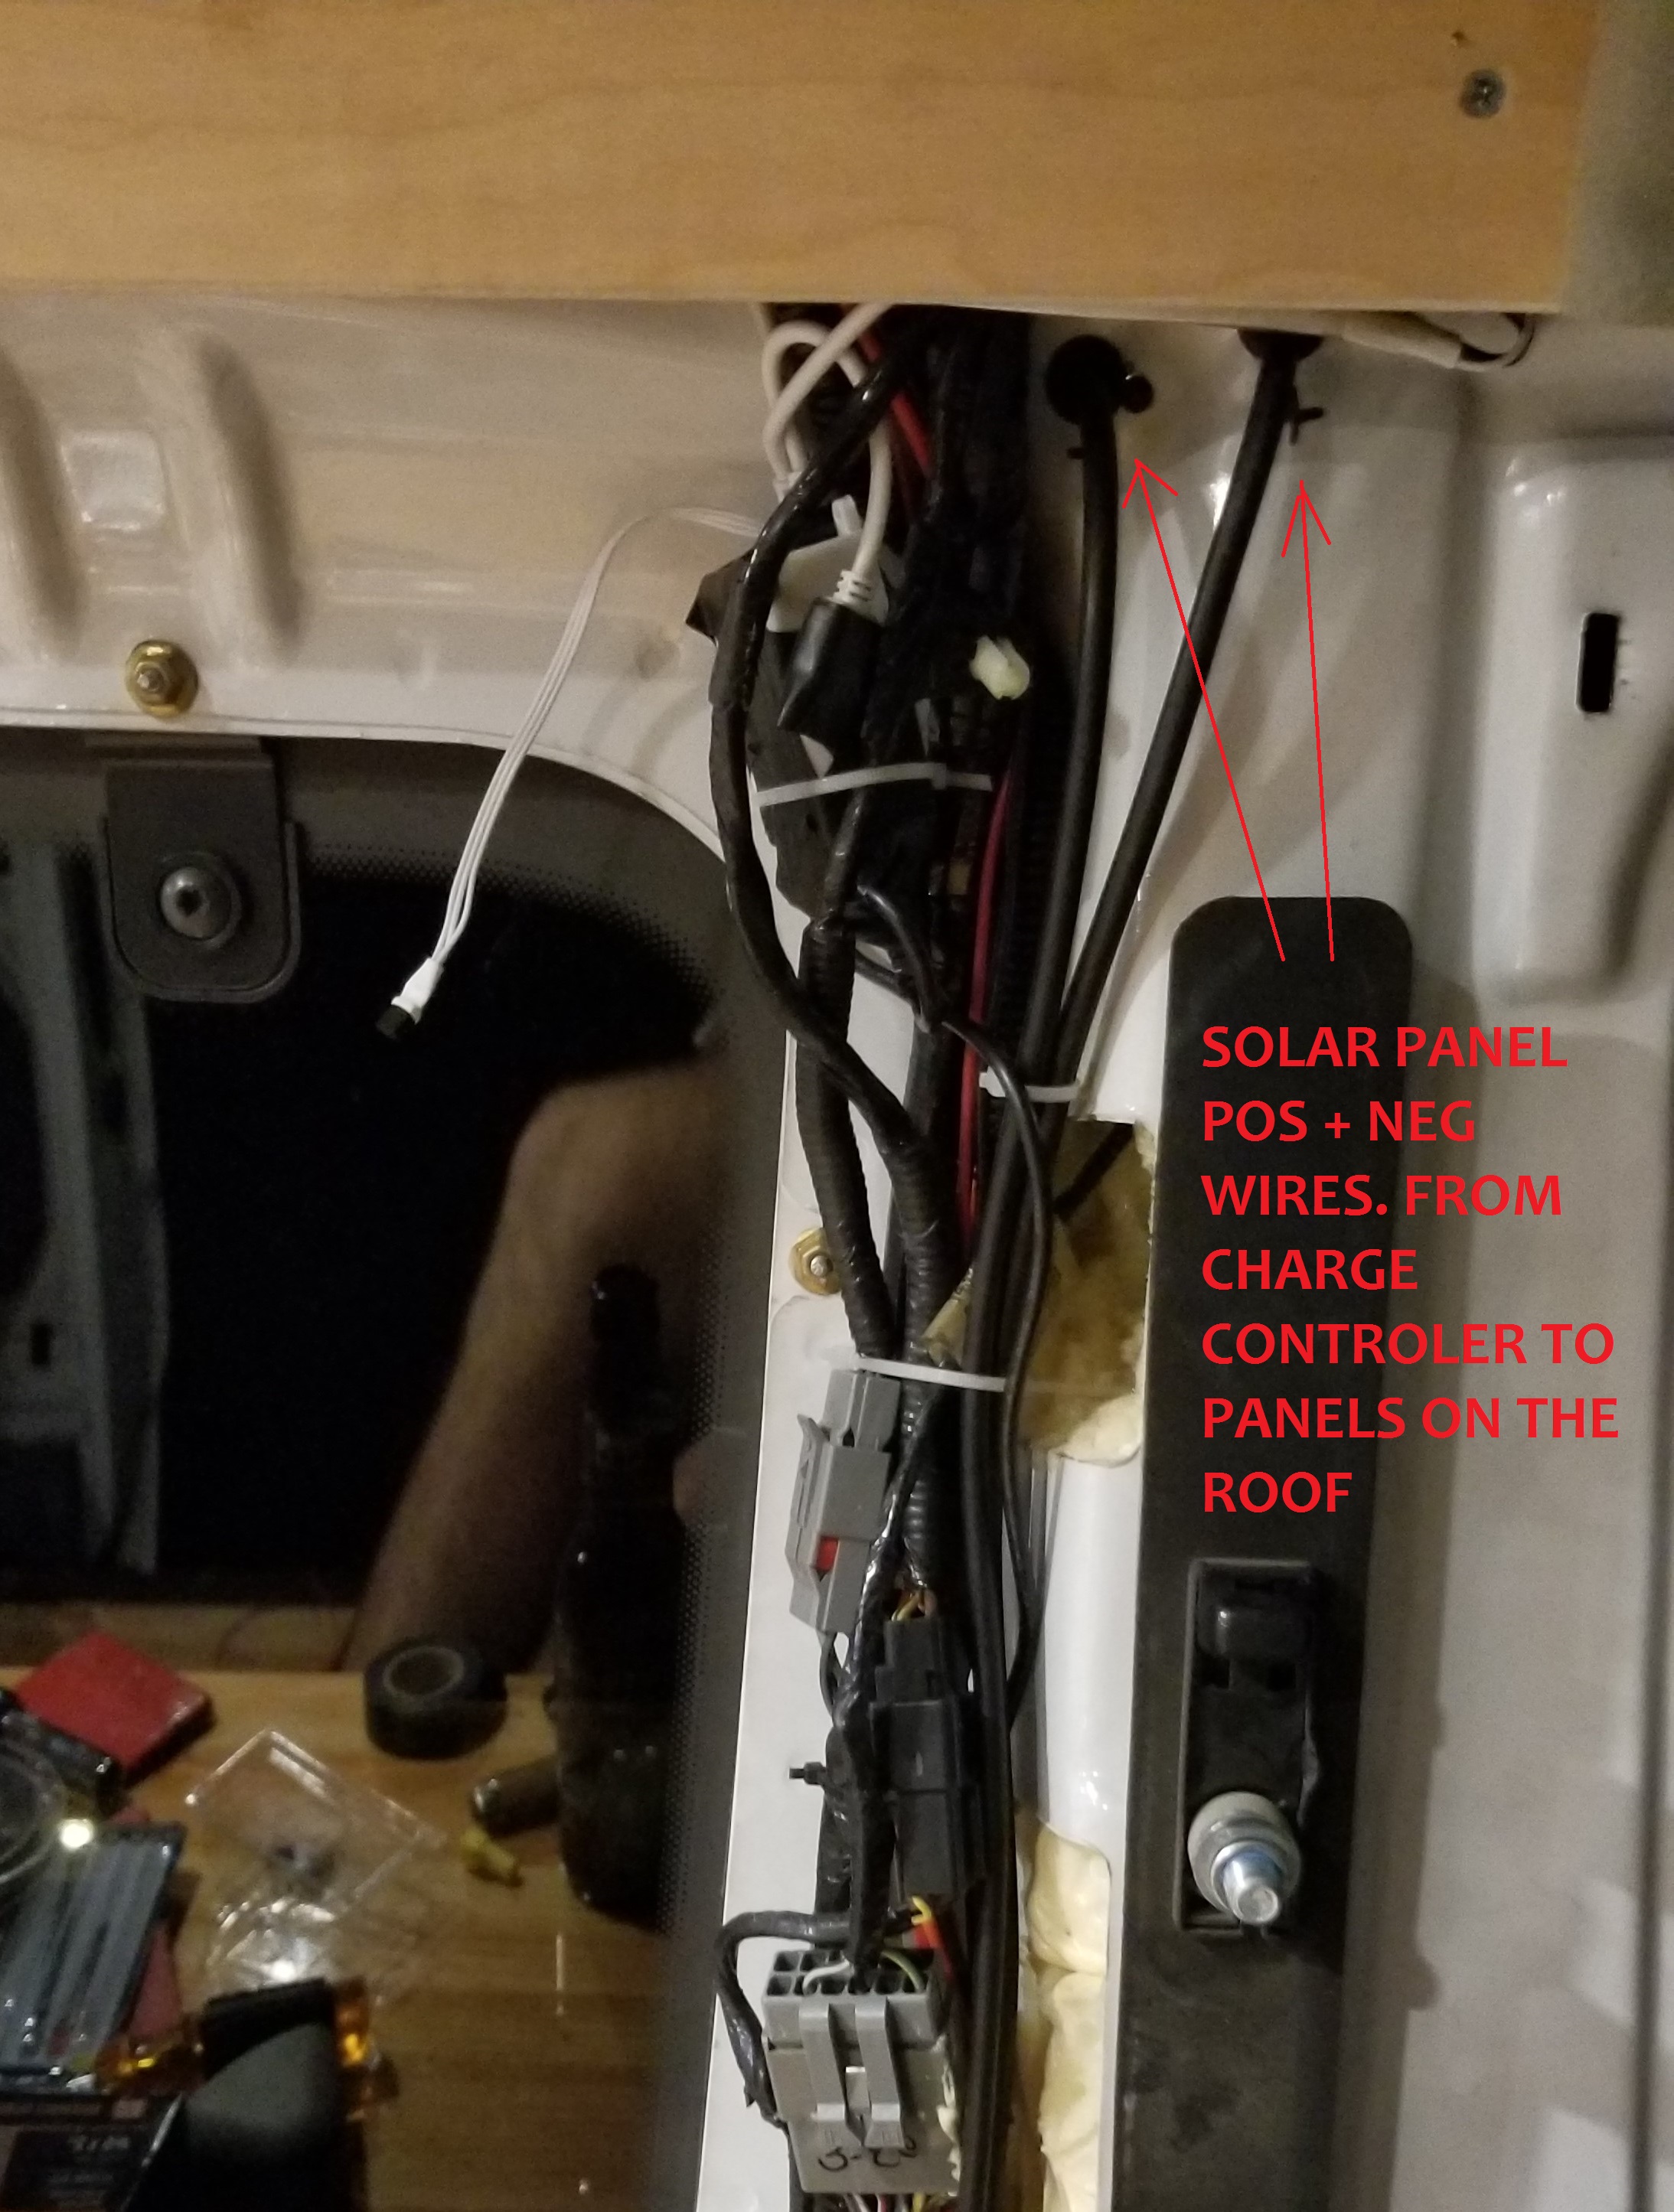
Holes for panel wires from inside 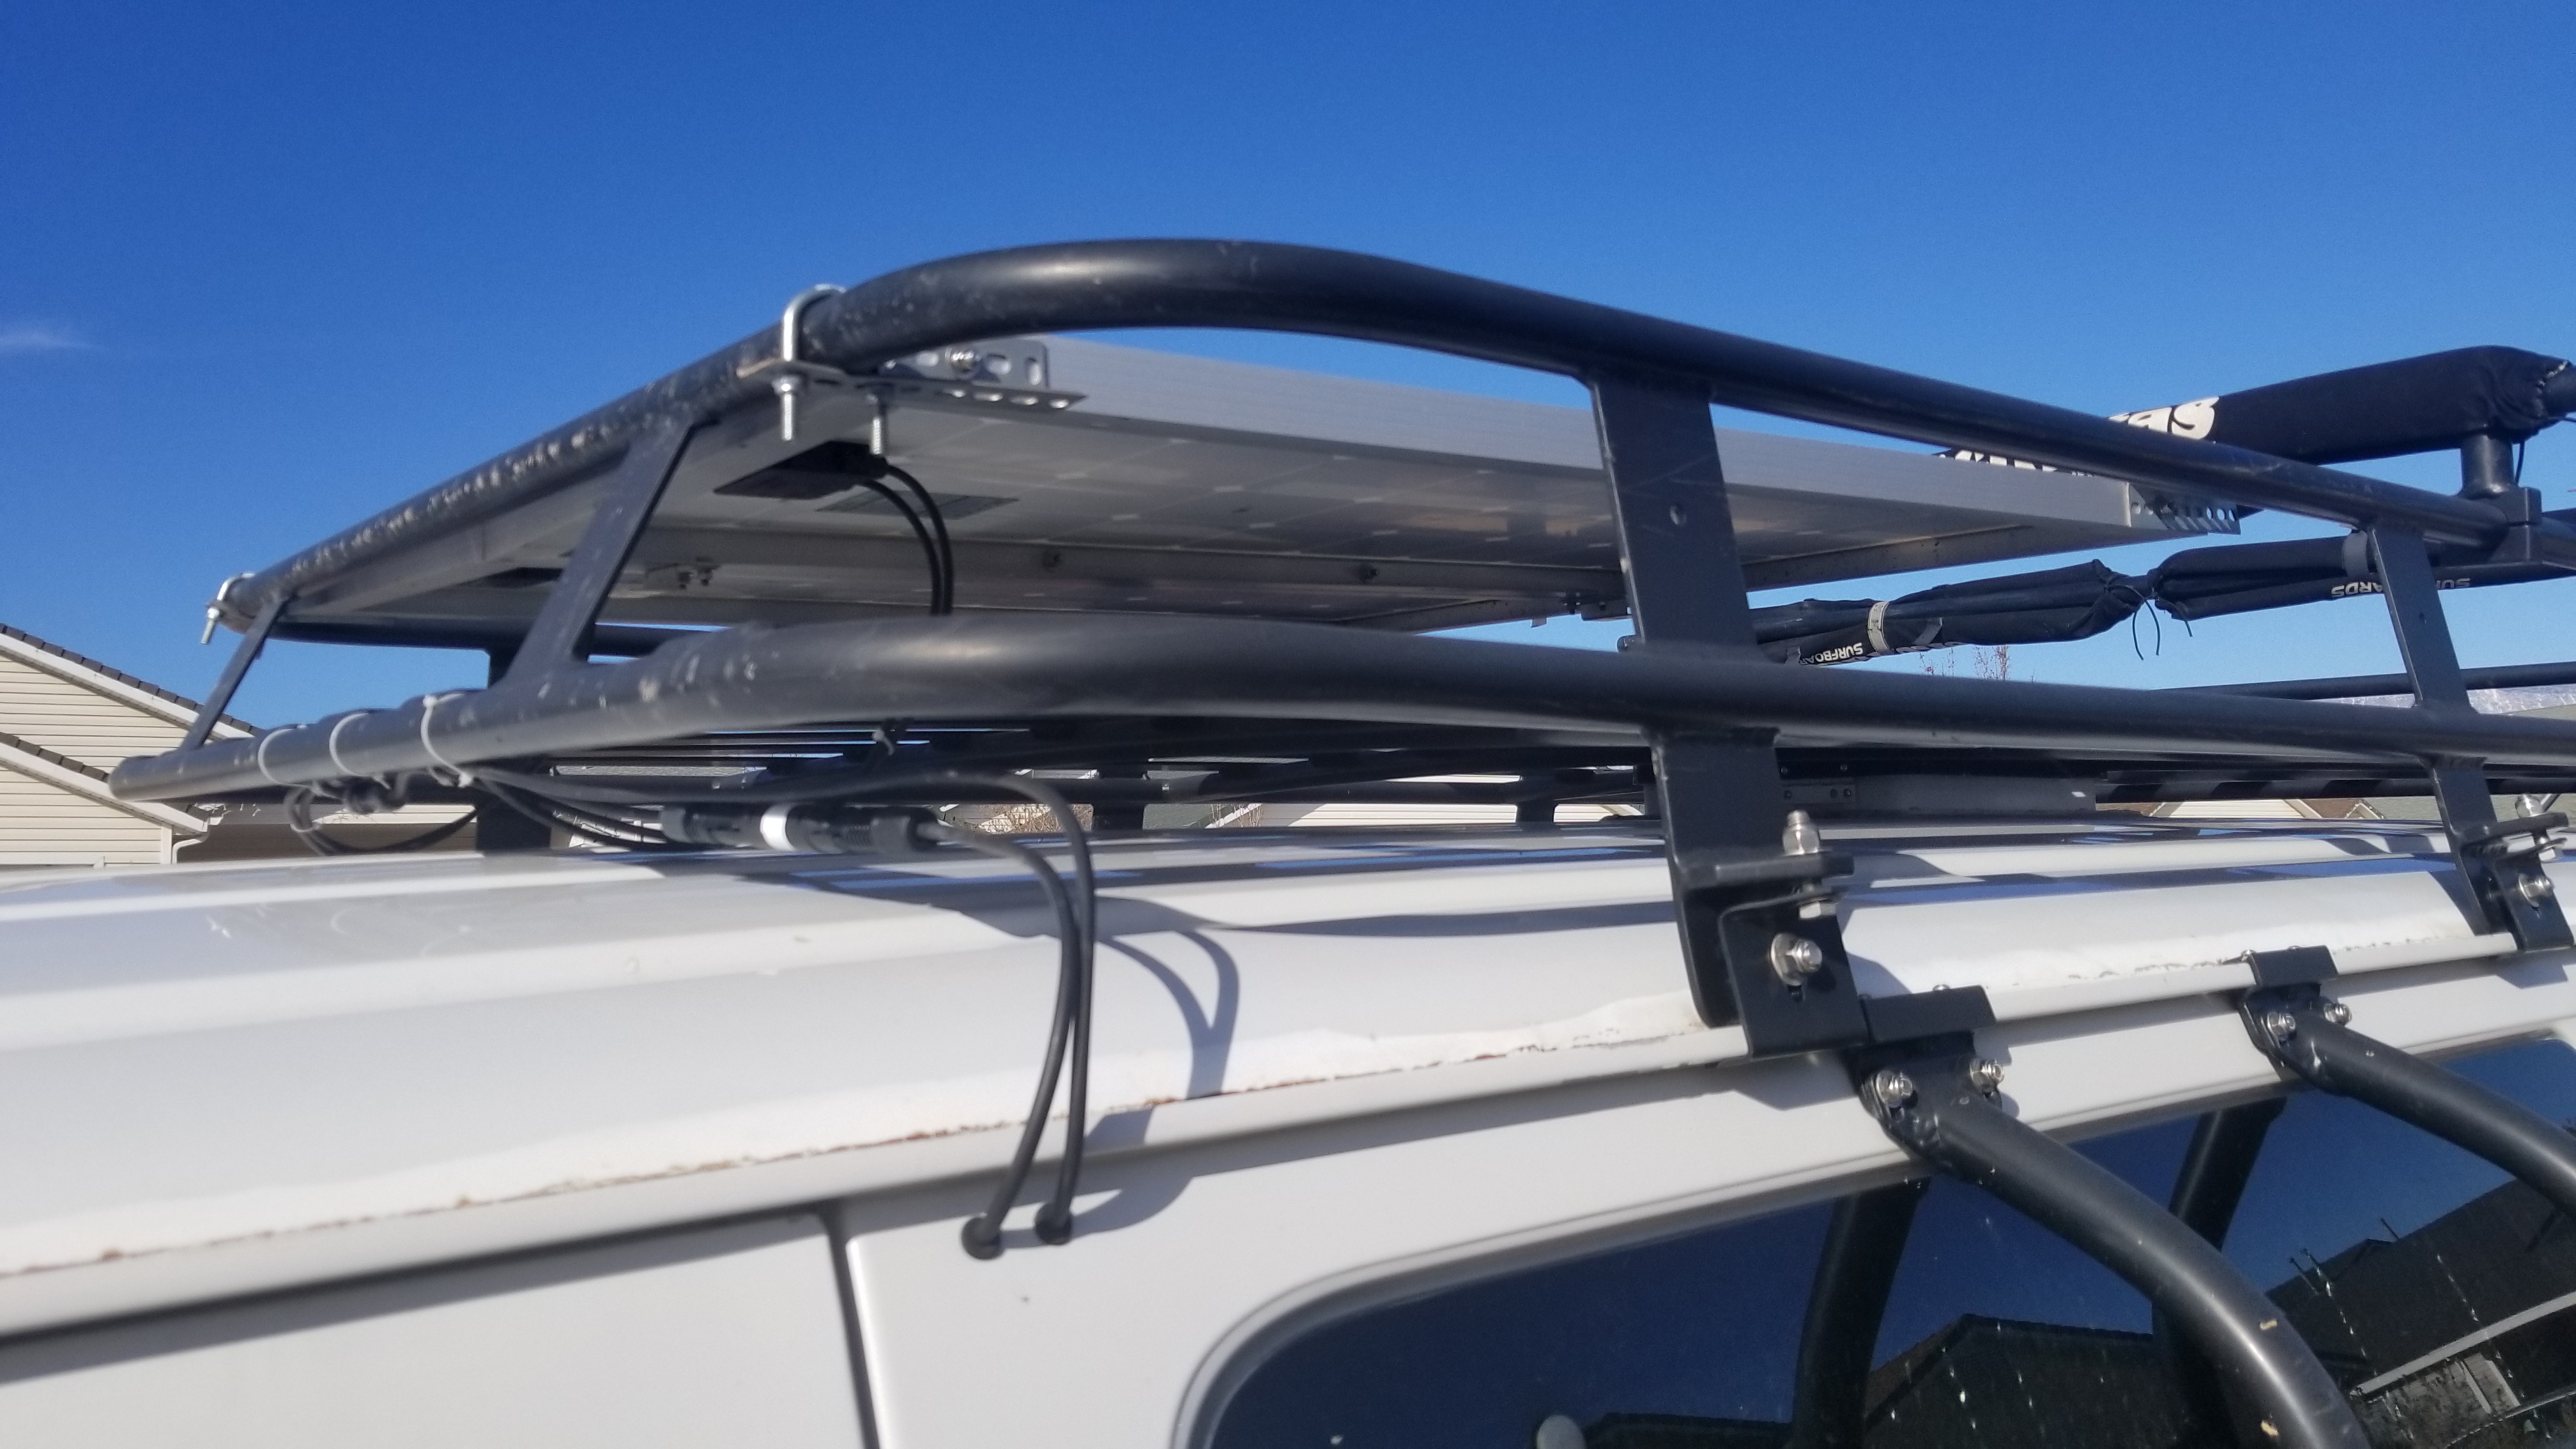
Wiring to panels, you can see my in line 10 amp fuse from renogy just below the roof rack
- Use rubber grommets to protect the wires from the sharp edges of the holes through your van body
- Now clean everything up, use ties and organize the mass bundles of wires to a tidy mess.