
As I continue seeking adventure, it seems as though my eyes continue to seek out routes that are more difficult, not just physically and mentally, but also vertically. As climbing continues to steepen, and the difficulty increase, so does the classification of the route. As posting continues I will be mixing in both hiking treks and climbing adventures so I wanted to define a few terms to ensure that my posts are understood . . . “The more you know”.

Before I jump into definitions I want to touch on a subject that no one likes to talk about: Death. Dying is an inevitable part of life, but its timing can be greatly influenced by the choices and decisions you make with risk management on any adventure. The death zone is considered to be climbing above 30 feet of exposure above the ground. Essentially if you fall, you die from the injuries sustained from such an accident. I will be focusing on deaths due to falls for each route classification as to help define the danger and risk taken in participating in each activity.
Table 1. Route Classifications by Difficulty
| Route Classifications | |
| Class 1 | Walking an established flat, easy trail, much like a sidewalk. |
| Class 2 | Hiking a steep incline or decline. |
| Class 3 | Scrambling a steep hillside, moderate exposure, and hands are used in climbing. |
| Class 4 | Scrambling up steeper yet, with hands, on exposed faces which the potential of falls that could cause serious or possibly fatal injury. Ropes and rock protection are sometimes used. |
| Class 5 | Free Climbing (Free from Aid): This technical climbing is accomplished using one’s hands and feet on the rock to ascend the route. It is free from any aid such as pulling on a rope or any other protection. Any fall from a Class 5 route would most likely be fatal without protective gear. Rope and rock protection are required. |
| Class 6 | Aid Climbing: This form of technical climbing is used when there is an absence of hand and foot holds for the climber to use to ascend a route. The climber must use aid from pitons, hangers, hooks, and an assortment of gear to ascend the route. Any fall from a Class 6 would most likely be fatal without protective gear. Rope and rock protection are required. |

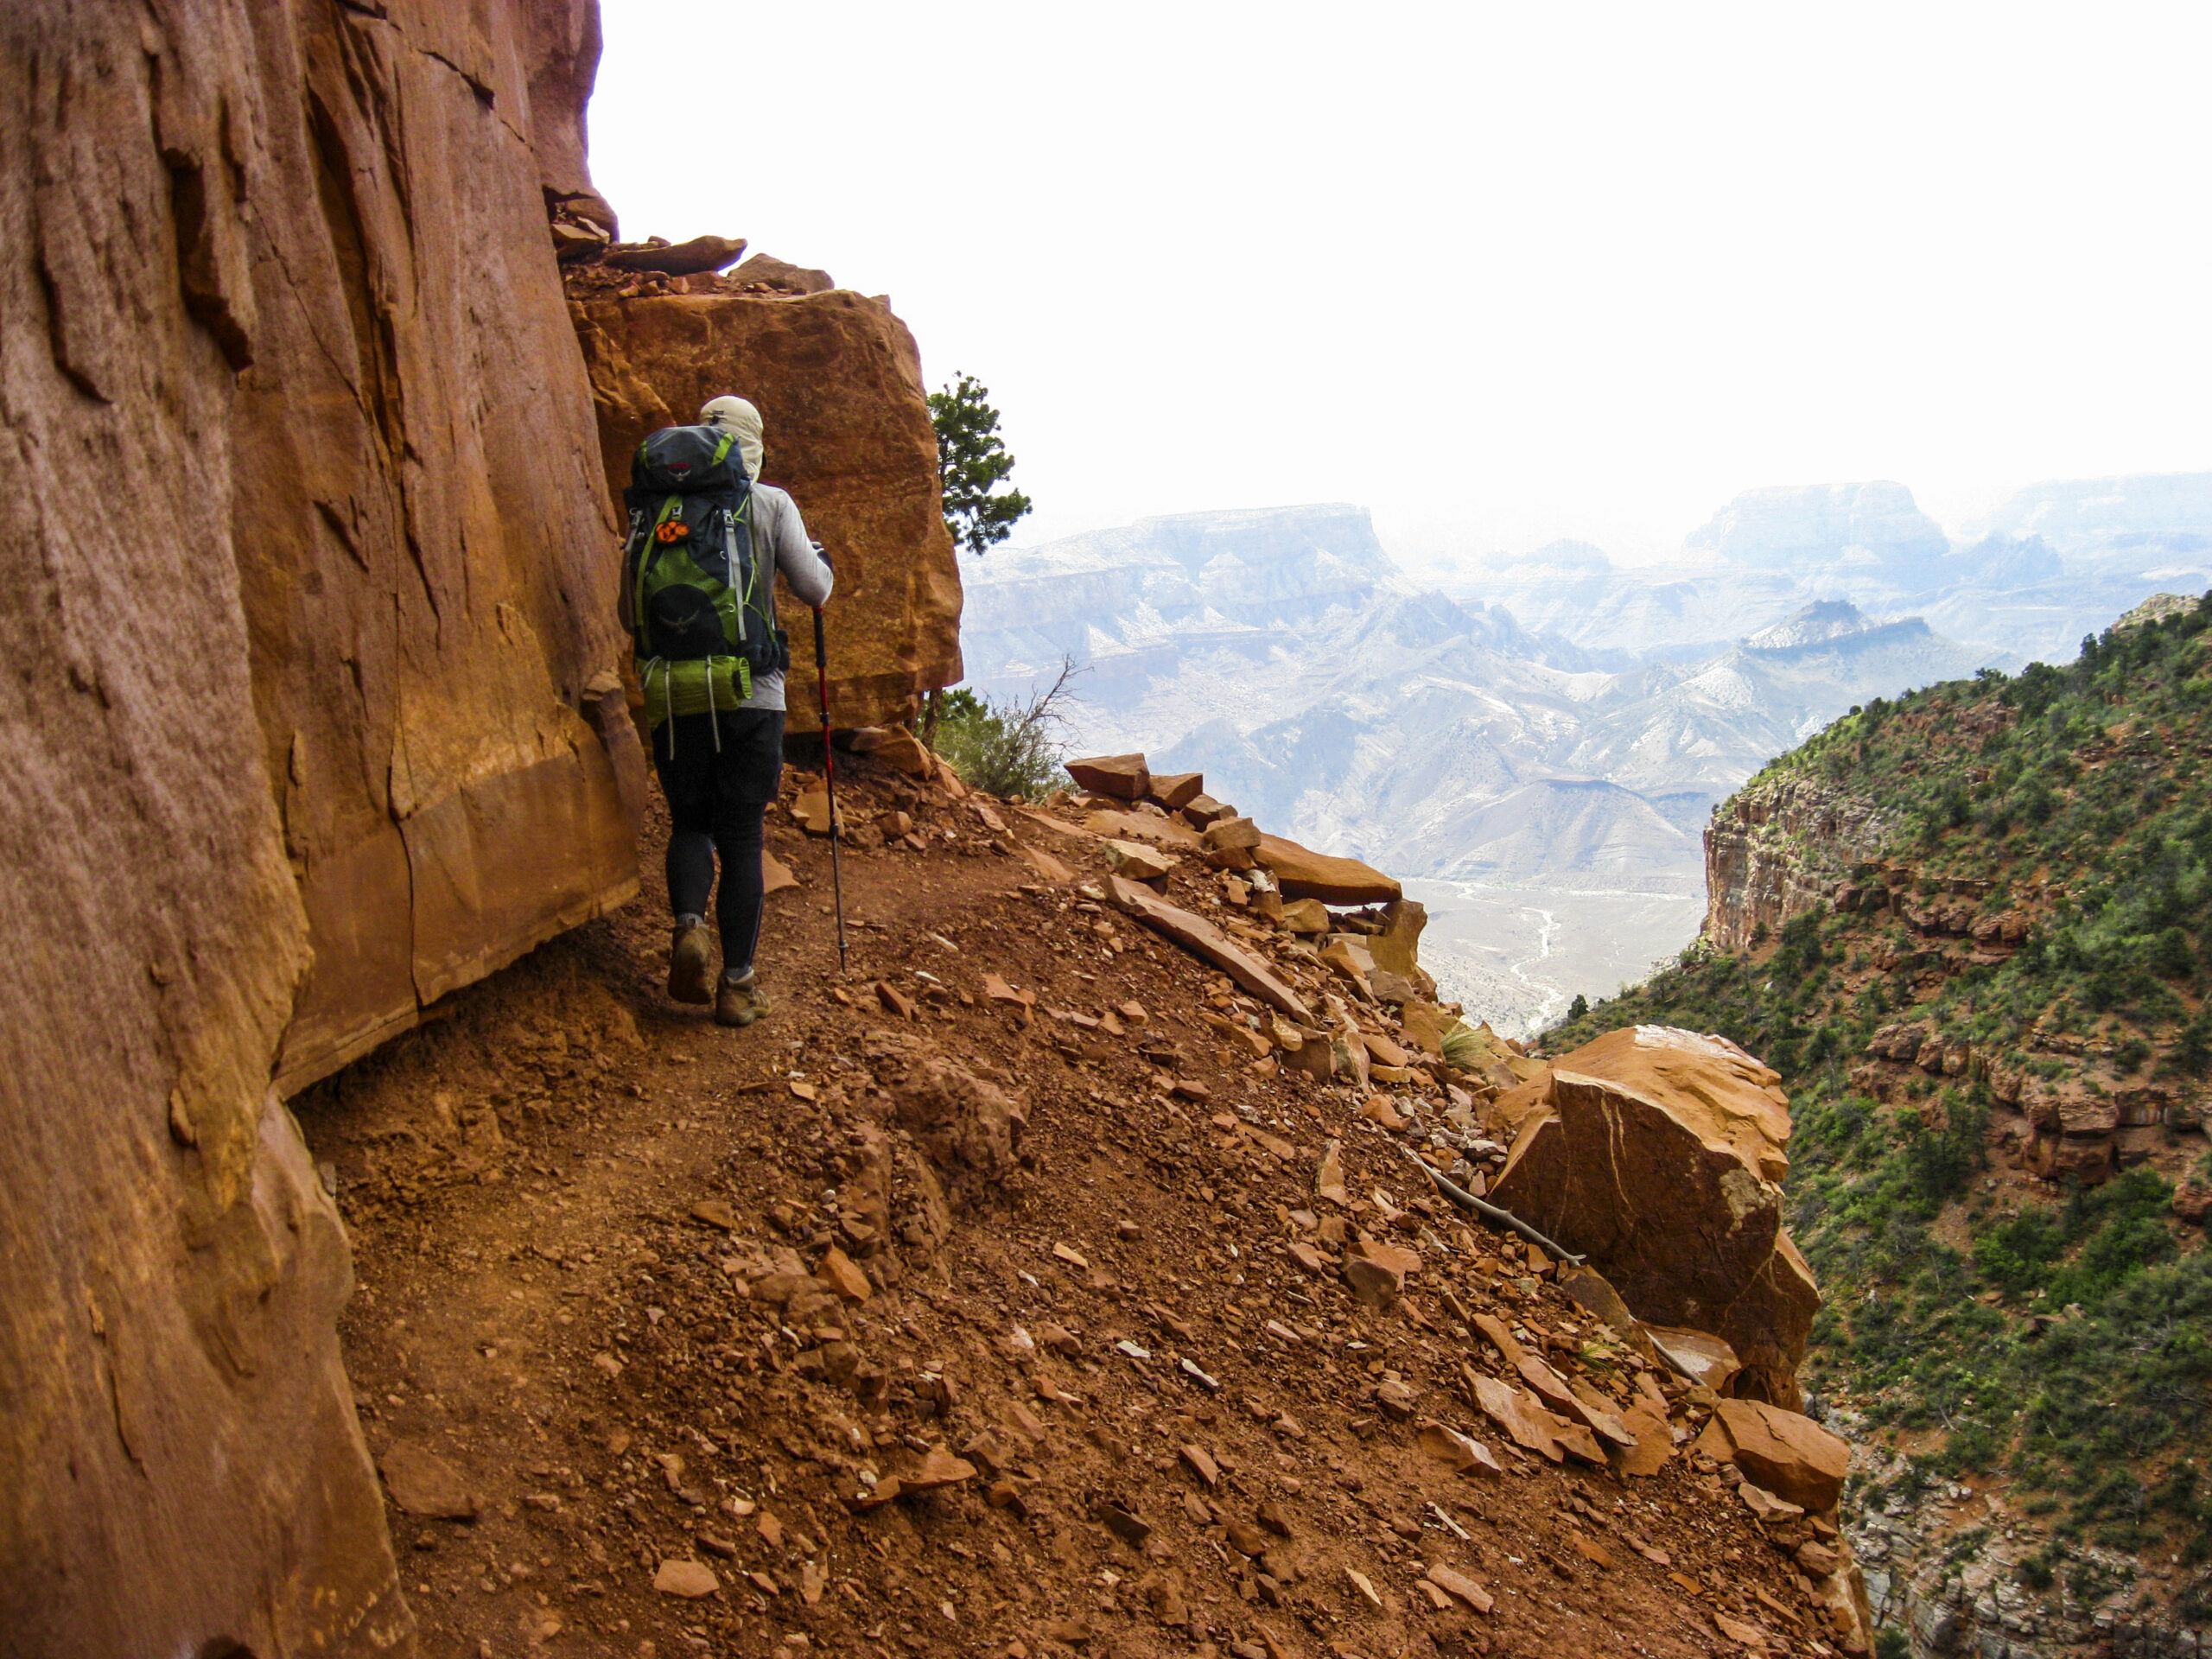
Class 1-3: Hiking & Easy Scrambling – Most people understand pretty easily Class 1-3 as they have walked, hiked, and scrambled to get to the top of a mountain. There is no gear required for this kind of terrain.
- Fall occurrence: Low, Death risk: Low, Gear Required: None.
- Annual Deaths: 5 deaths from falls, 35 total (NPS SAR Data)
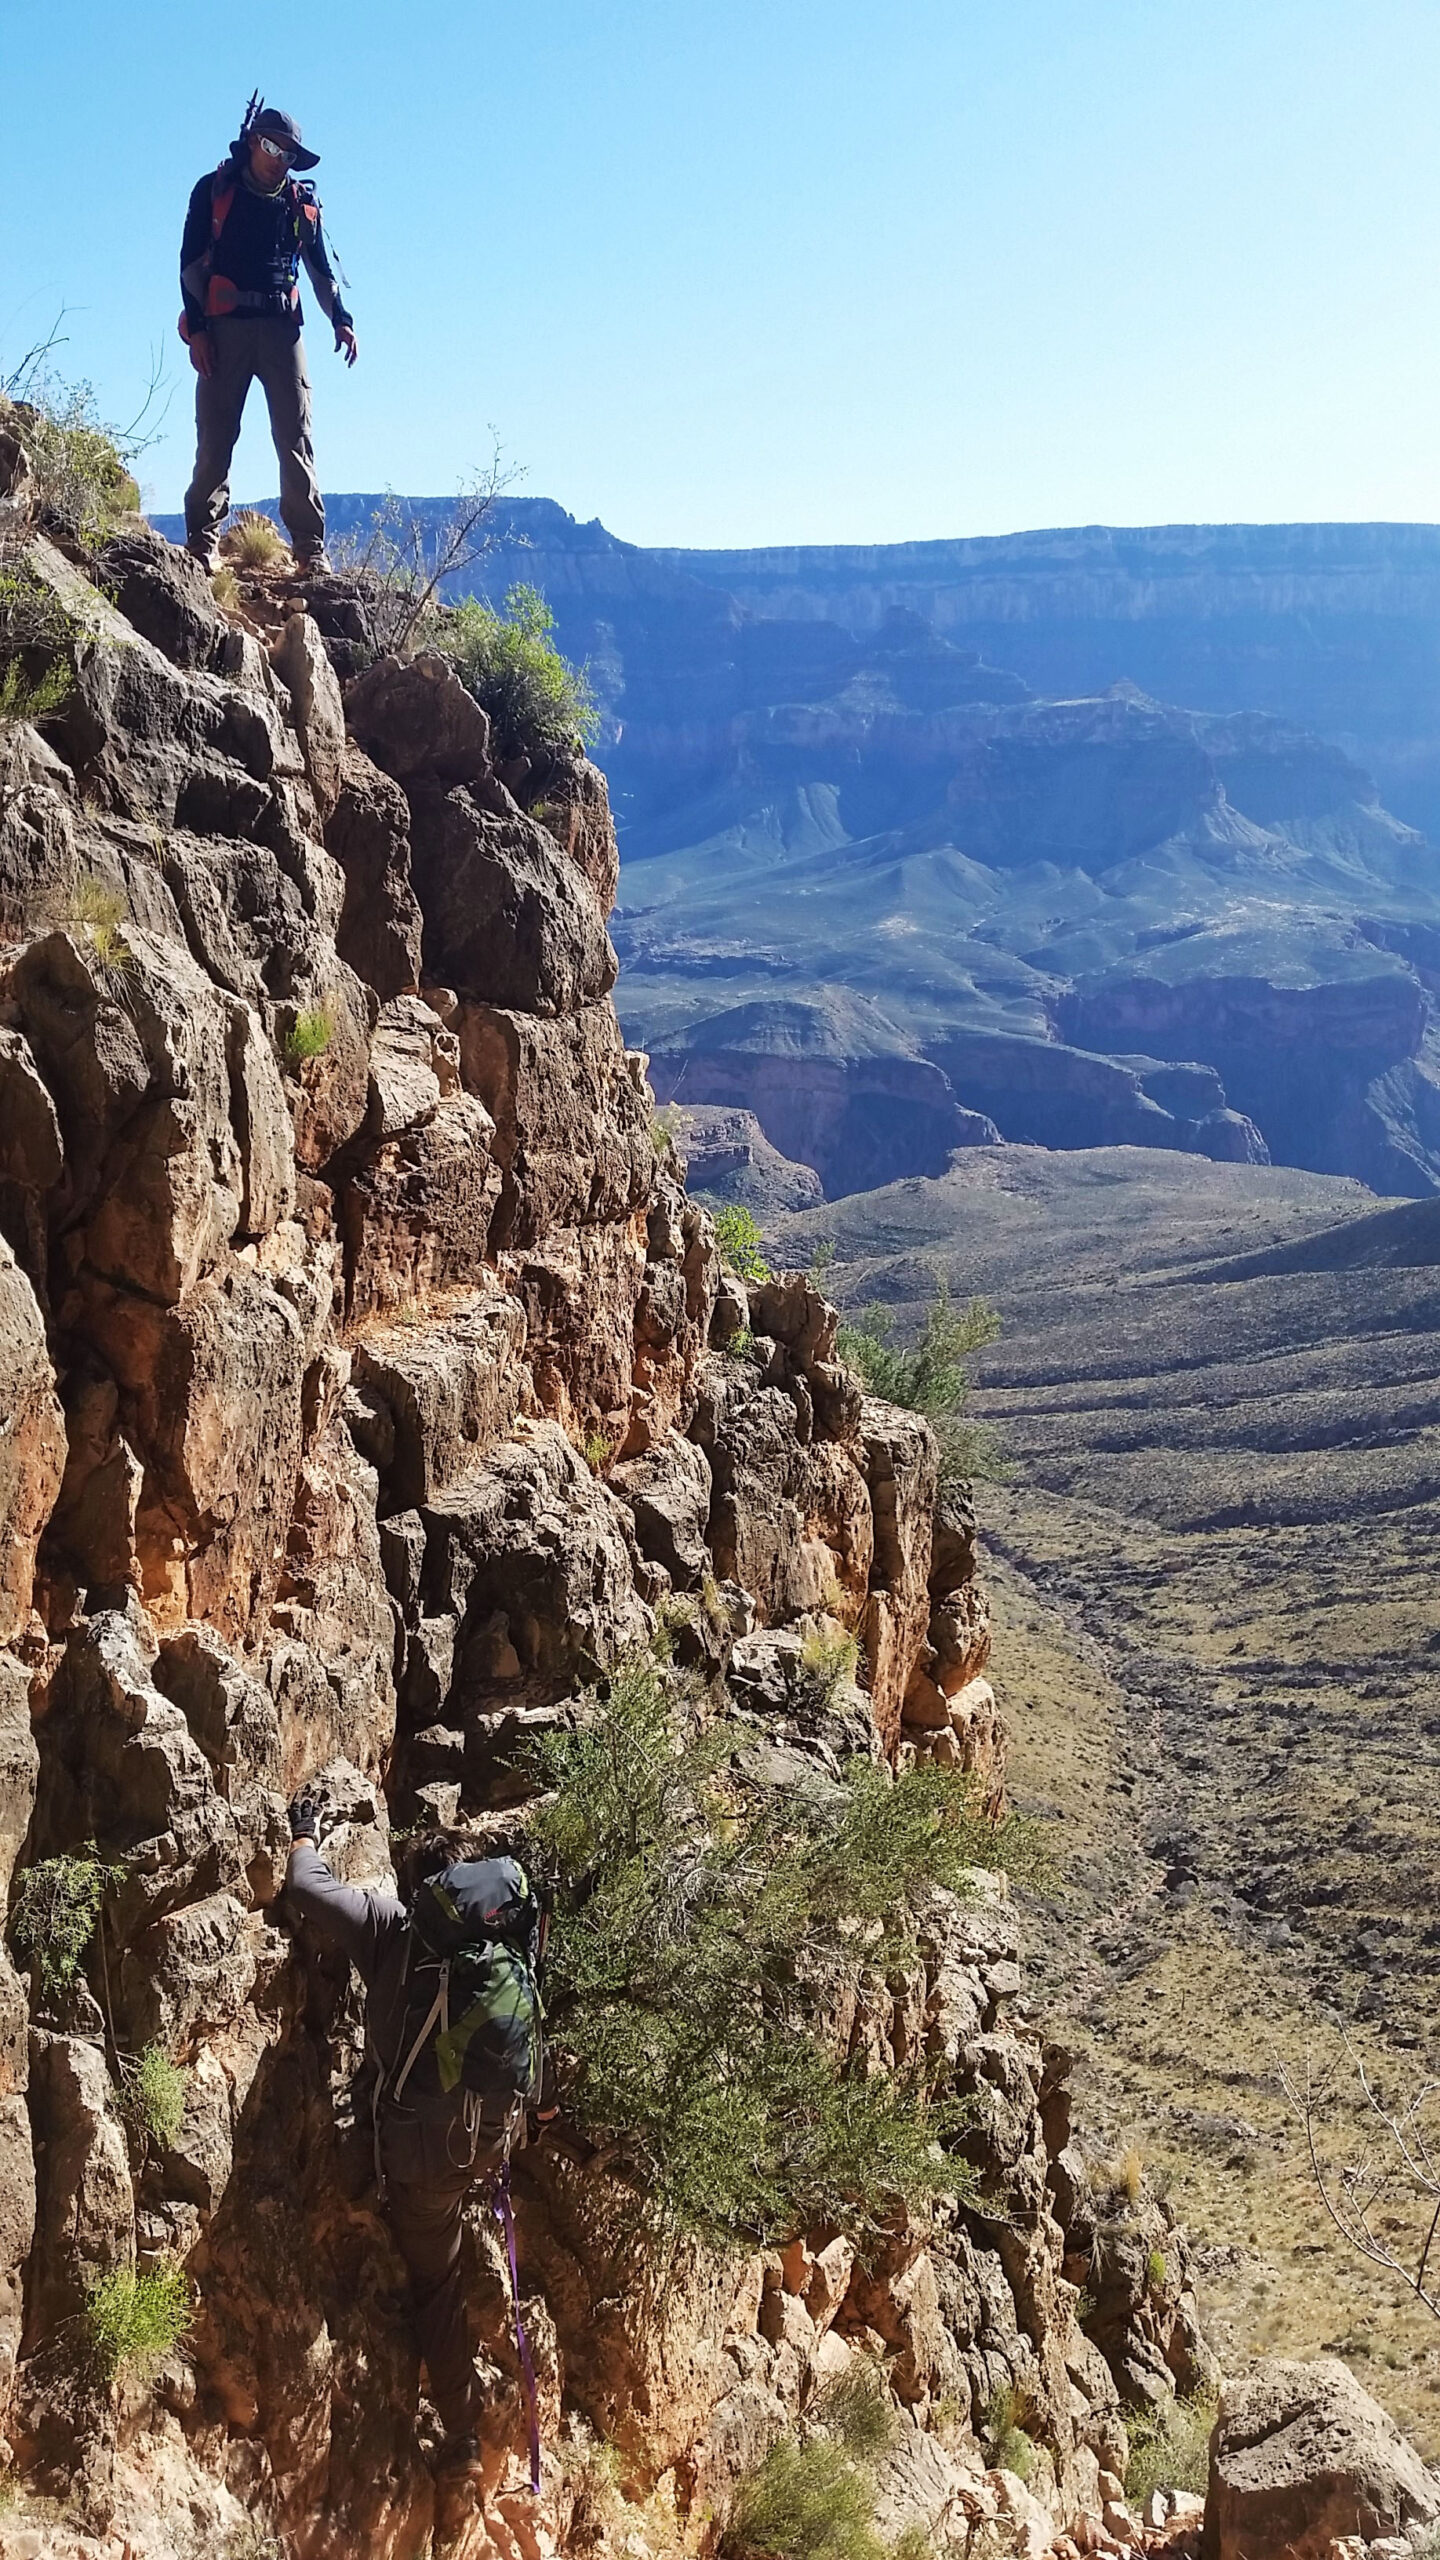
Class 4: The Most Deadly Class – Scrambling on fourth class can be very dangerous as the scrambling becomes more vertical and exposure to drop-offs becomes inevitable. The problem lies within knowing when to pull out a rope for technical climbing using fifth class techniques and when to go for it with no ropes. Setting up belay stations, using rock protection, and climbing using fifth class techniques is time consuming and sometimes not worth climbing just 10’ of rock. On the other hand, fourth class can be very exposed and a mistake on easy climbing may leave you falling to your death. Because the nature of fourth class is almost always subjective, it can be the most dangerous leaving the safety protection up to the climber’s discretion rather than a requirement.
- Fall occurrence: Med, Death risk: Med-High, Gear Required: None/Subjective.
- Annual Deaths: 10 (Rocky Mountain Rescue Group 1998-2011)
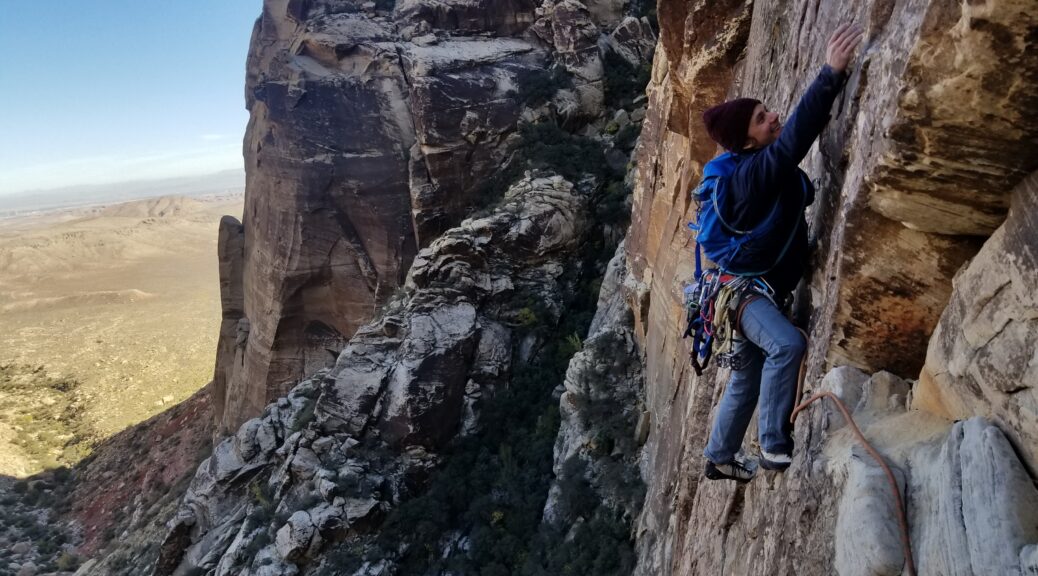
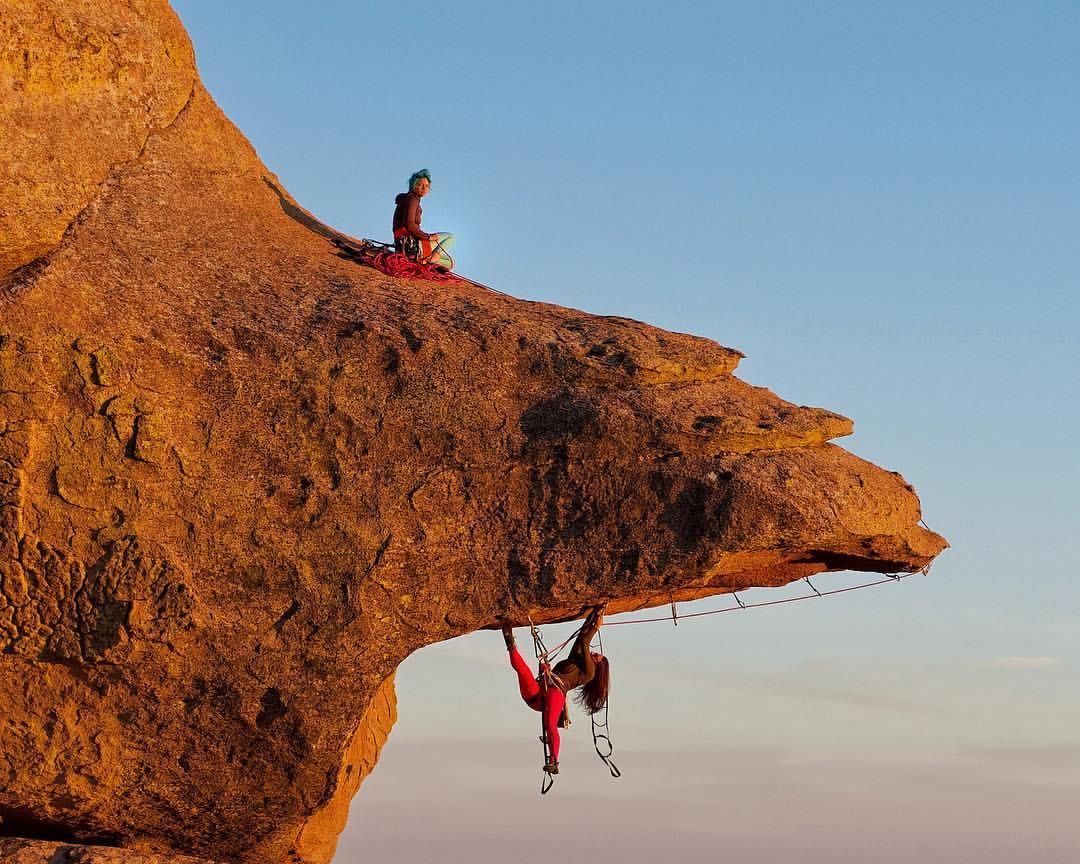
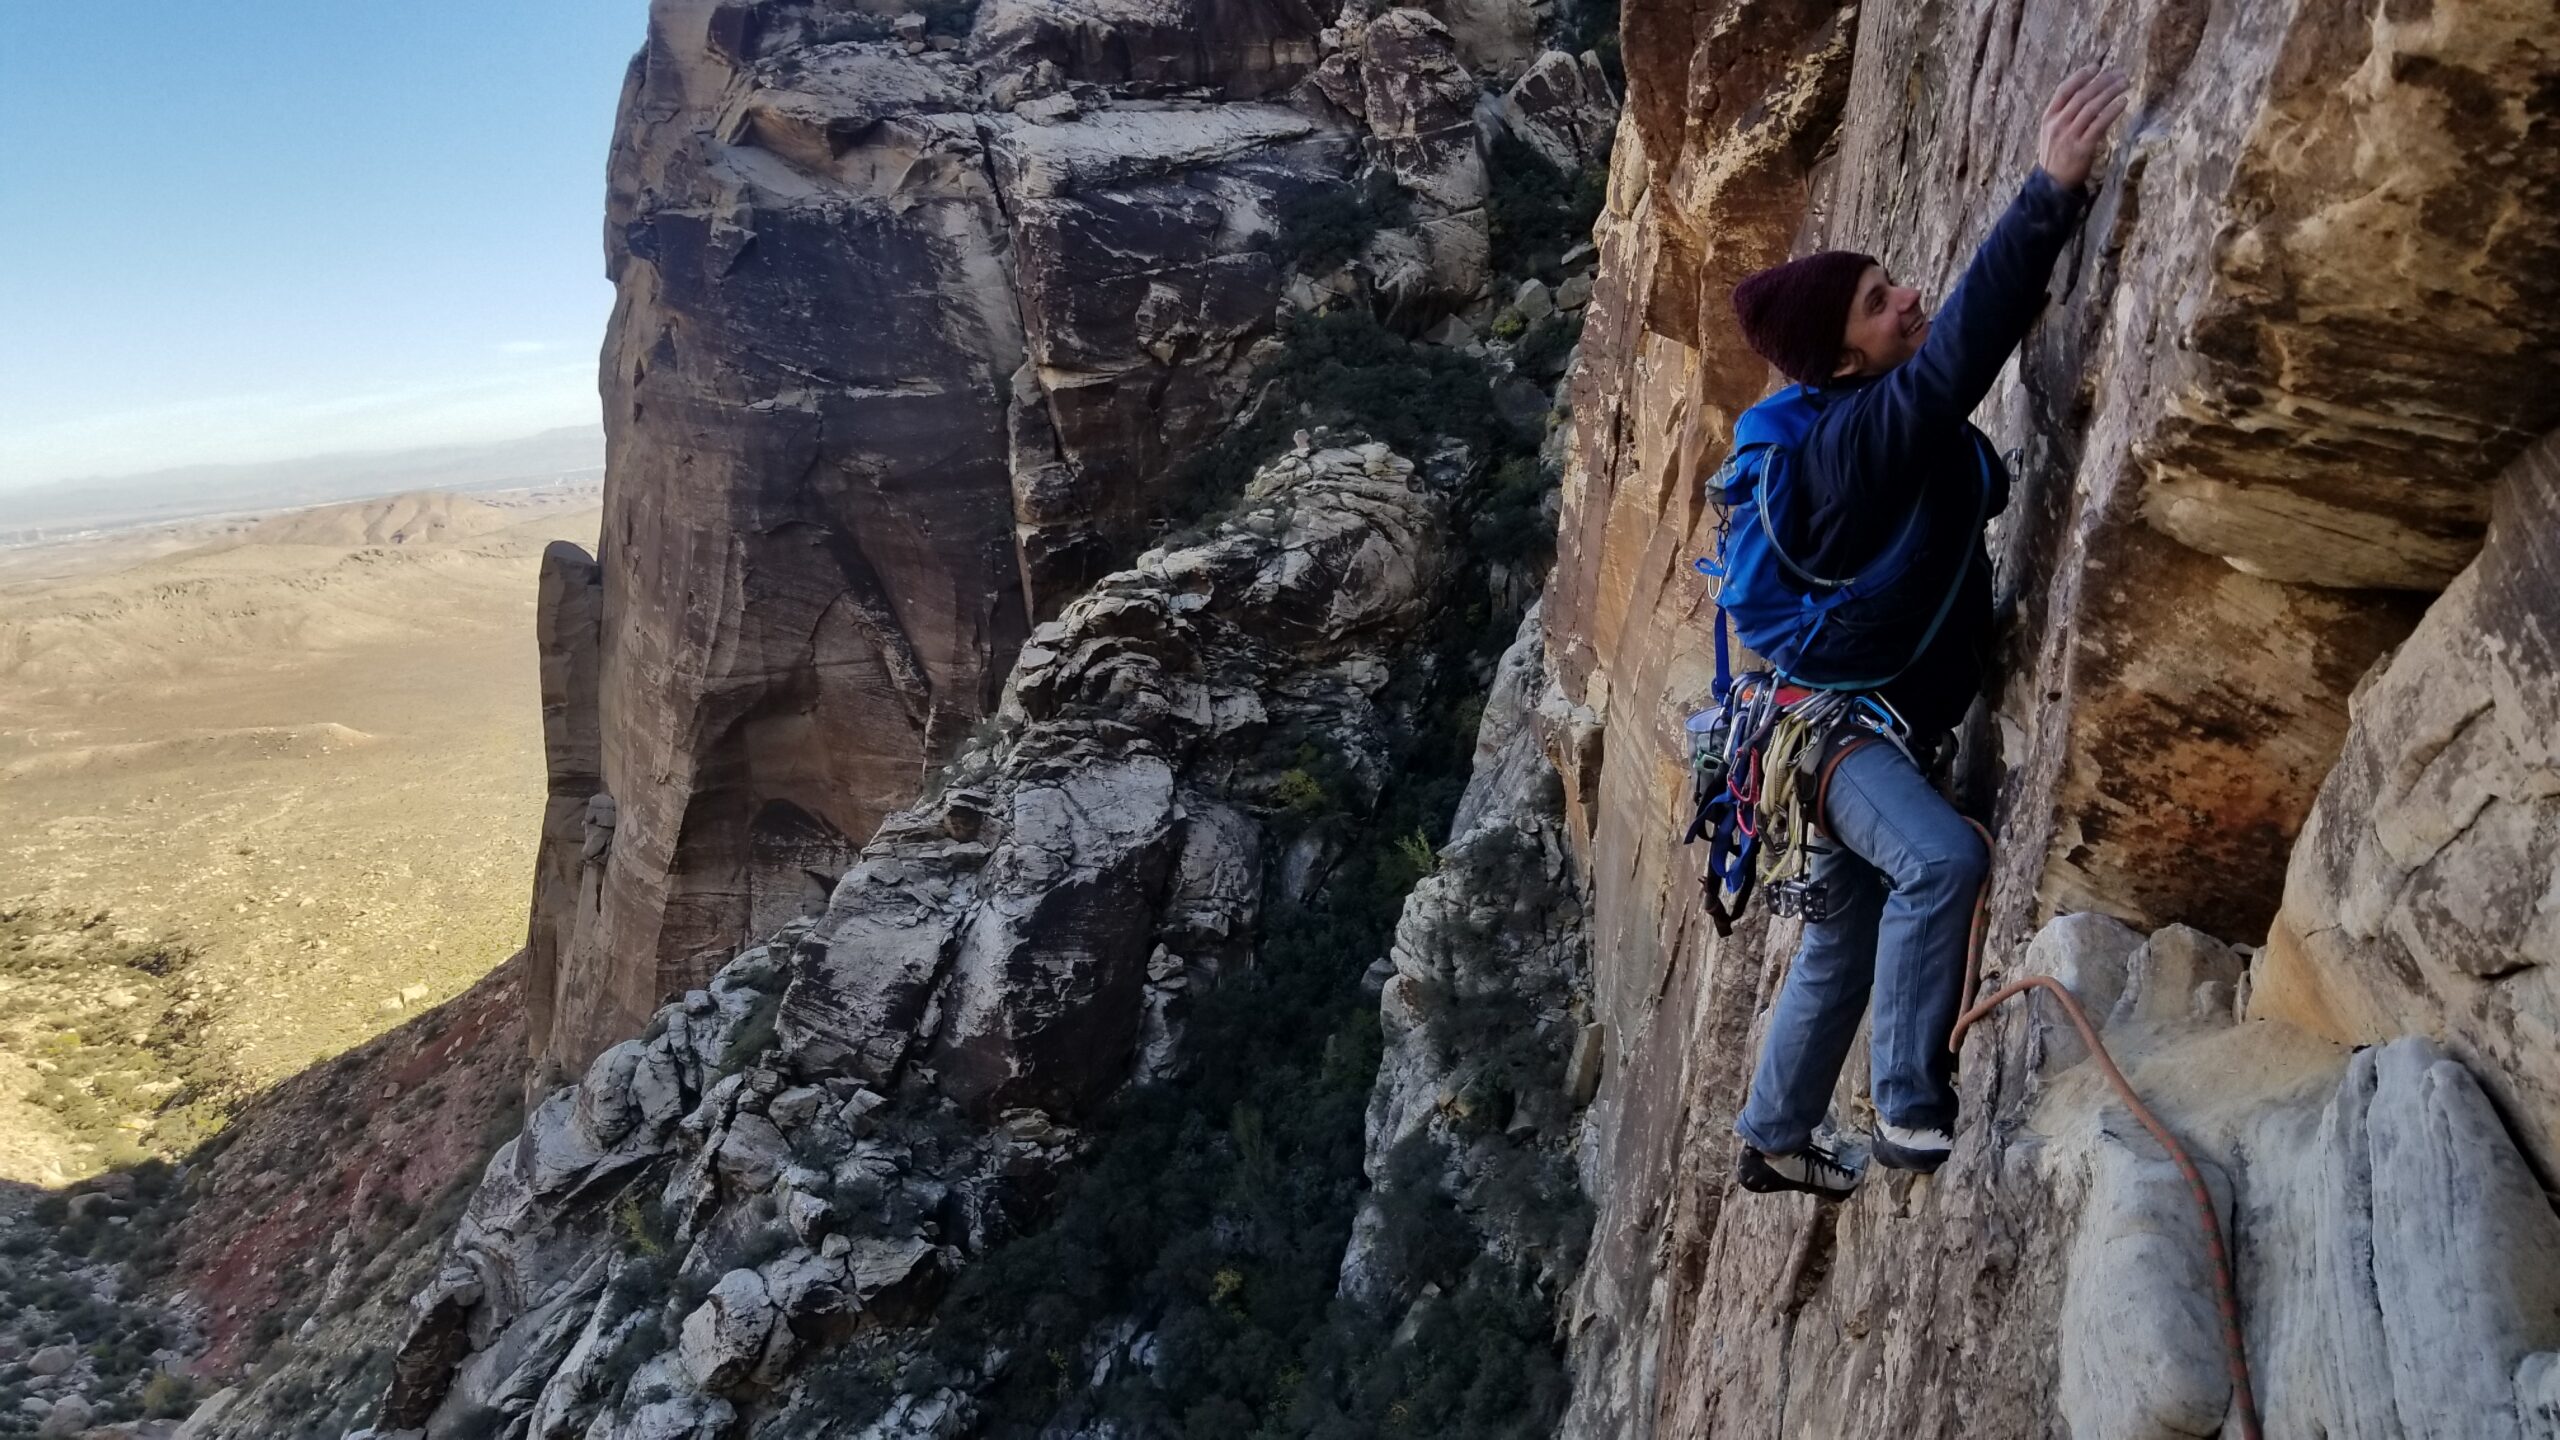
Class 5: Free Climbing (Free from Aid) – This technical climbing class involves using your own physical power (hands and feet) to ascend a route or rock face from bottom to top. Due to the fact that this form of climbing would certainly result in death in the event of a fall, certain specific gear is used to prevent injury. This form of climbing requires two climbers, a rope, helmet, harness, belay device, quick draws, and some sort of protection. Protection can be either pre-fixed bolts in the rock (Sport Climbing) or traditional gear that can be later removed once the climb is complete (Trad Climbing). The two climbers consist of a leader and a belayer (aka a follower in multi-pitch climbs), which are connected by a rope tied with a knot into harnesses which each climber wears. The belayer uses a belay device connected to their harness which clamps on the rope between the climbers which allows them to slacken (“give”) or tighten (“take”) in the amount of slack in the rope between the two climbers. The belay device also acts as an assistant or stopper in catching their leader in the event of a fall.
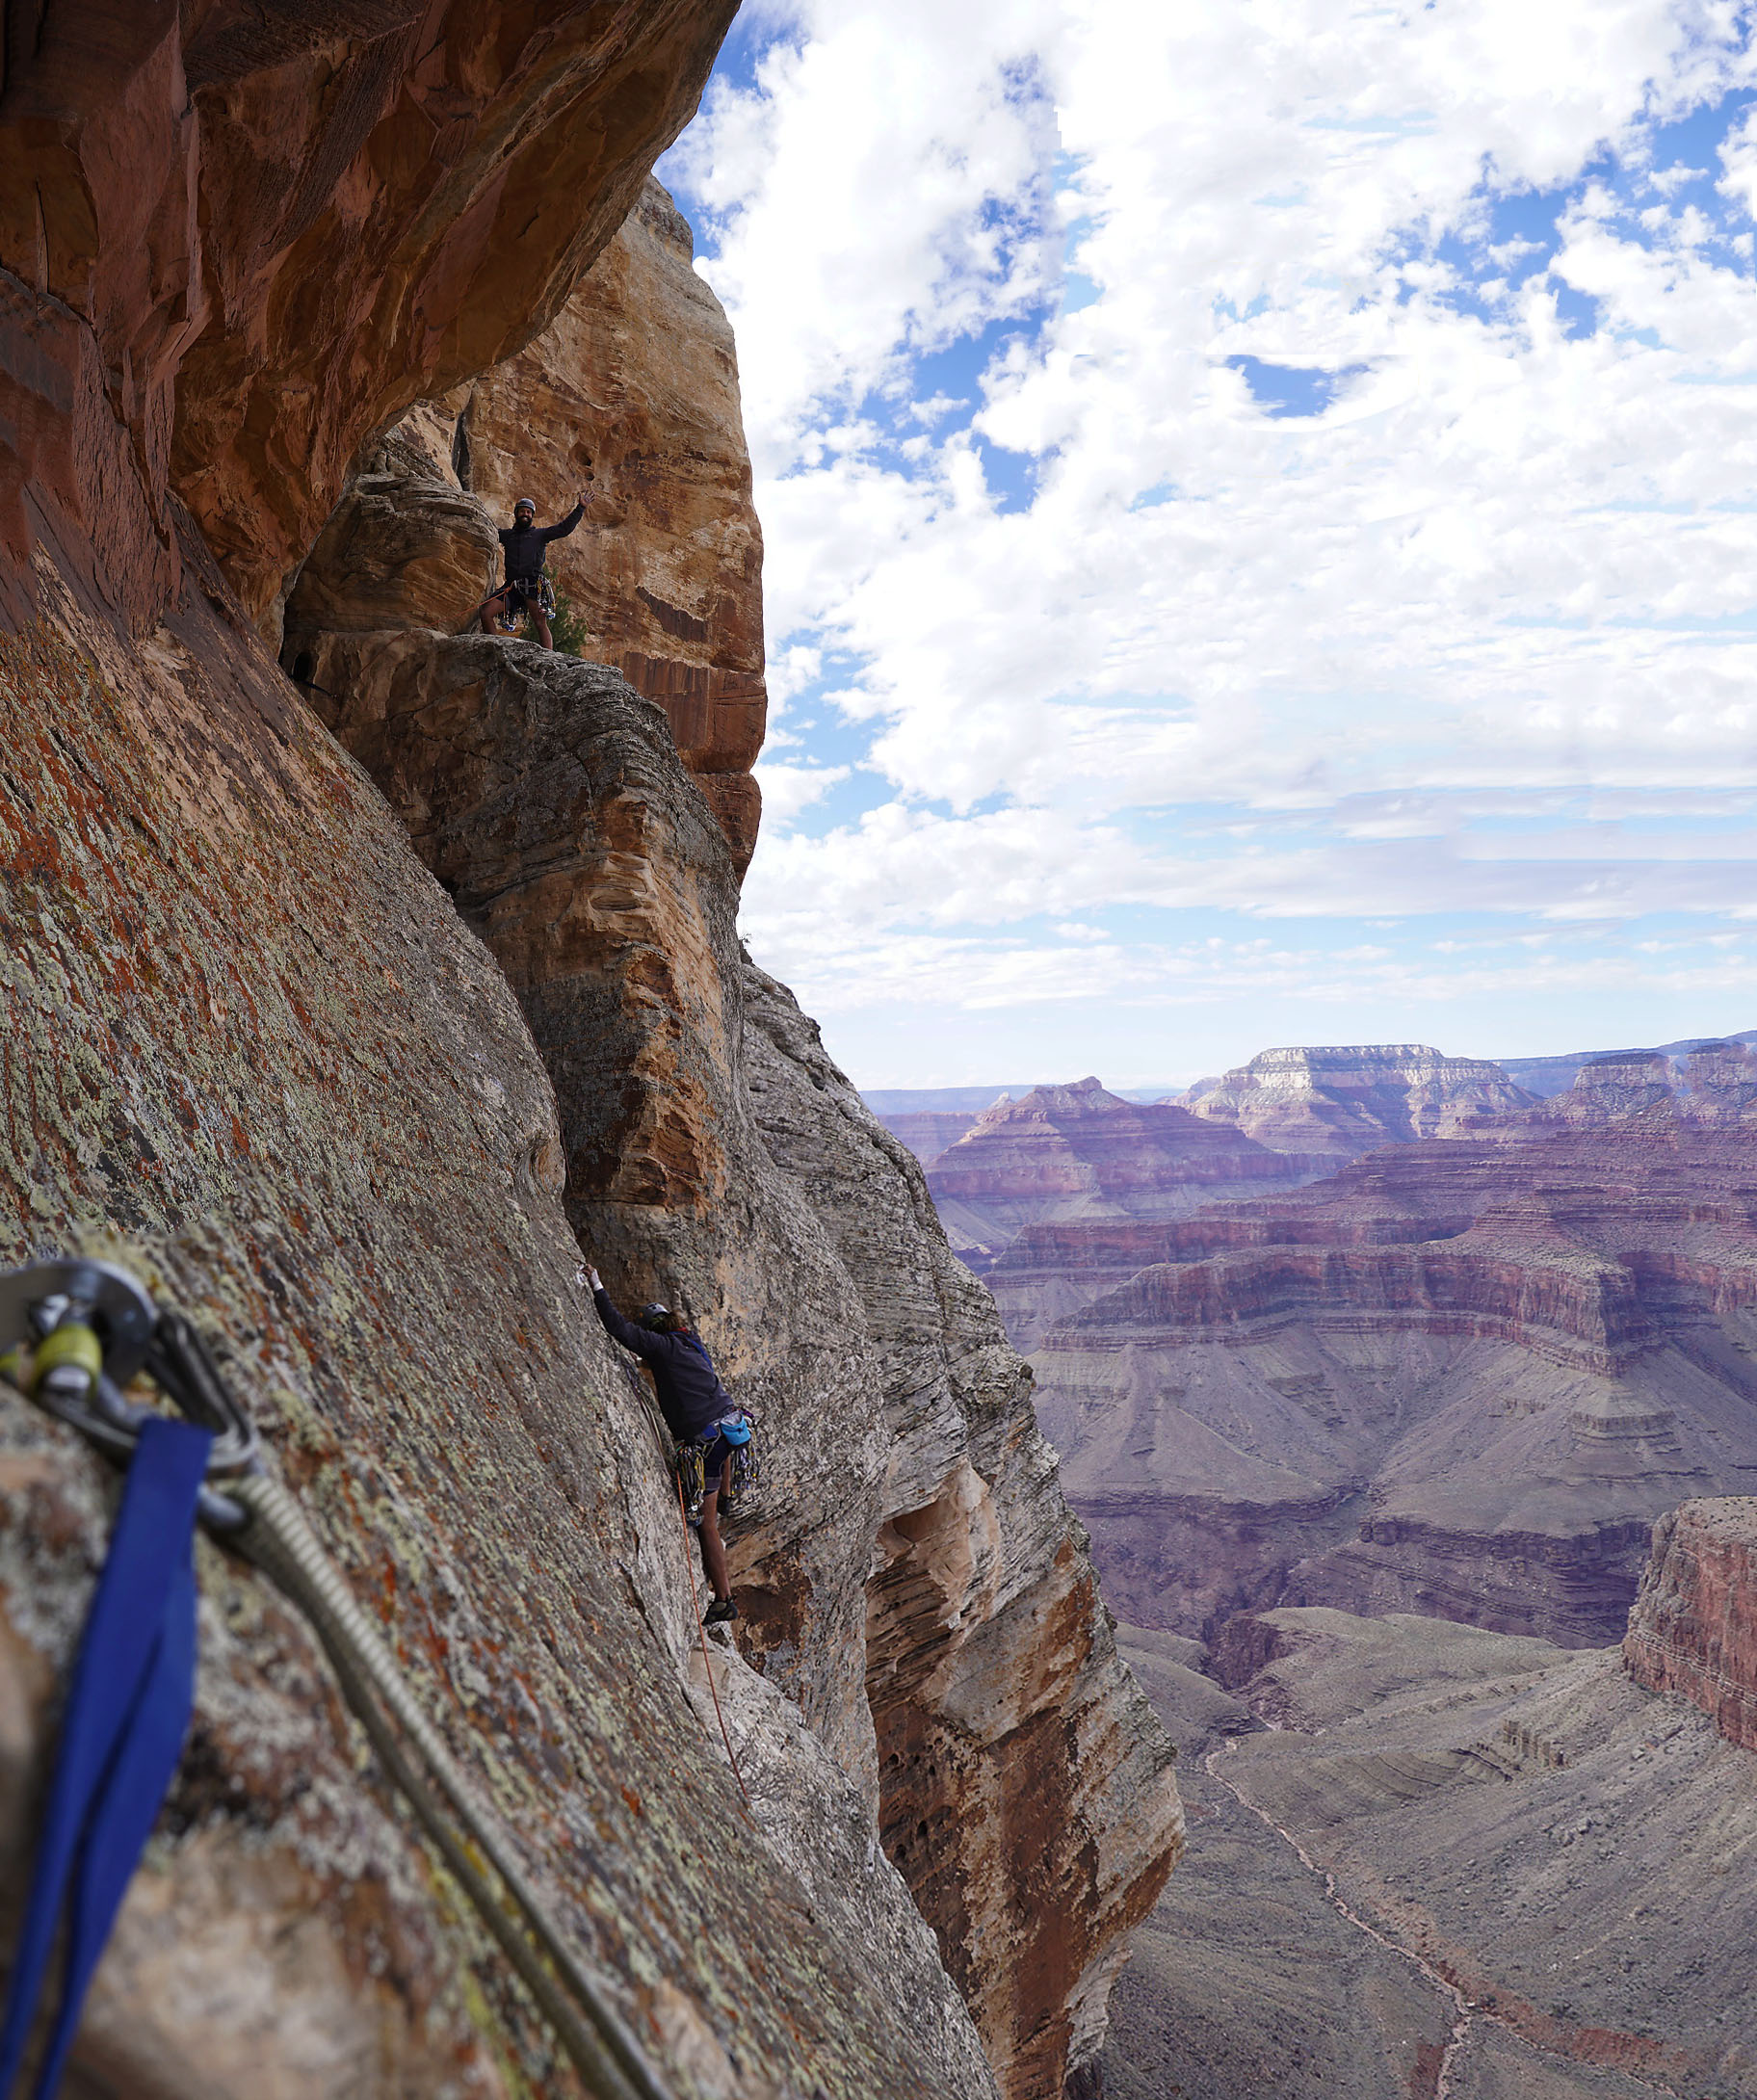
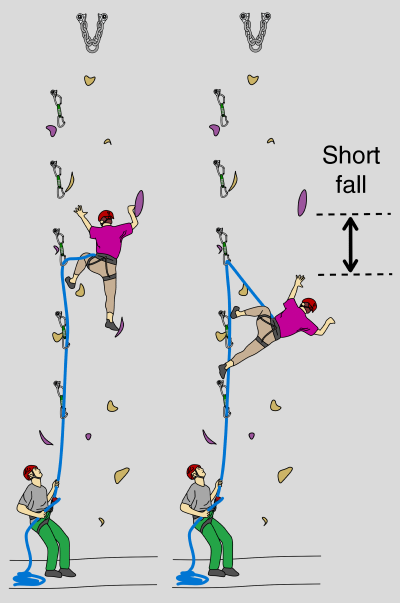
The leader’s job is to ascend the route, clipping their end of the rope into protection using a quick draw as they ascend. The belayer’s job is to feed rope through the belay device at the same rate as the leader ascends the wall, leaving just the right amount of slack in the rope. Too little slack and the lead climber is hindered and not able to clip into the protection or ascend further by being held back by the tautness in the rope: this is called “short roping”. Giving out too much slack in the rope could result in the leader hitting the ground or “decking” due to the excess slack in the event of a fall. If the belayer executes their job well, the leader would only fall a distance twice the length of rope above their last piece of protection (plus a little length from rope stretch and from slack in the rope between the two climbers).

Protection types: There are 2 types of rock protection including fixed bolts and traditional gear and the climbing style associated with each is called Sport Climbing or Trad Climbing respectively.
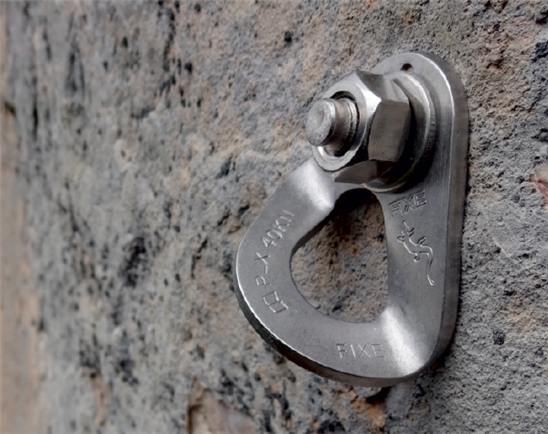
Sport Climbing – Fixed bolts are used when there are not a lot of options to use natural features in the rock to protect the climber with traditional gear. In this case the first ascent climber establishes the route by drilling bolts with hangers attached into the rock at either evenly spaced or hard portions of the route where a fall could occur, to protect the climber from falling. As the leader climbs they use quick-draws to clip one end into these permanent hangers to connect the other end to their climbing rope.
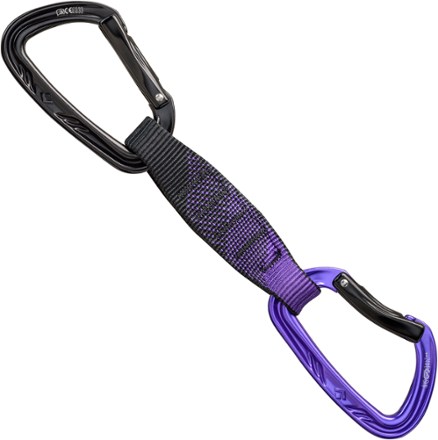
Quick-draw Bolt & Hanger
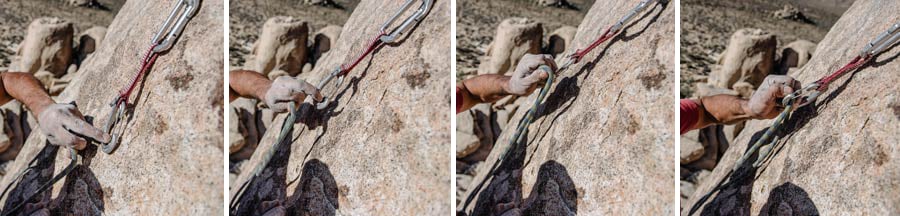
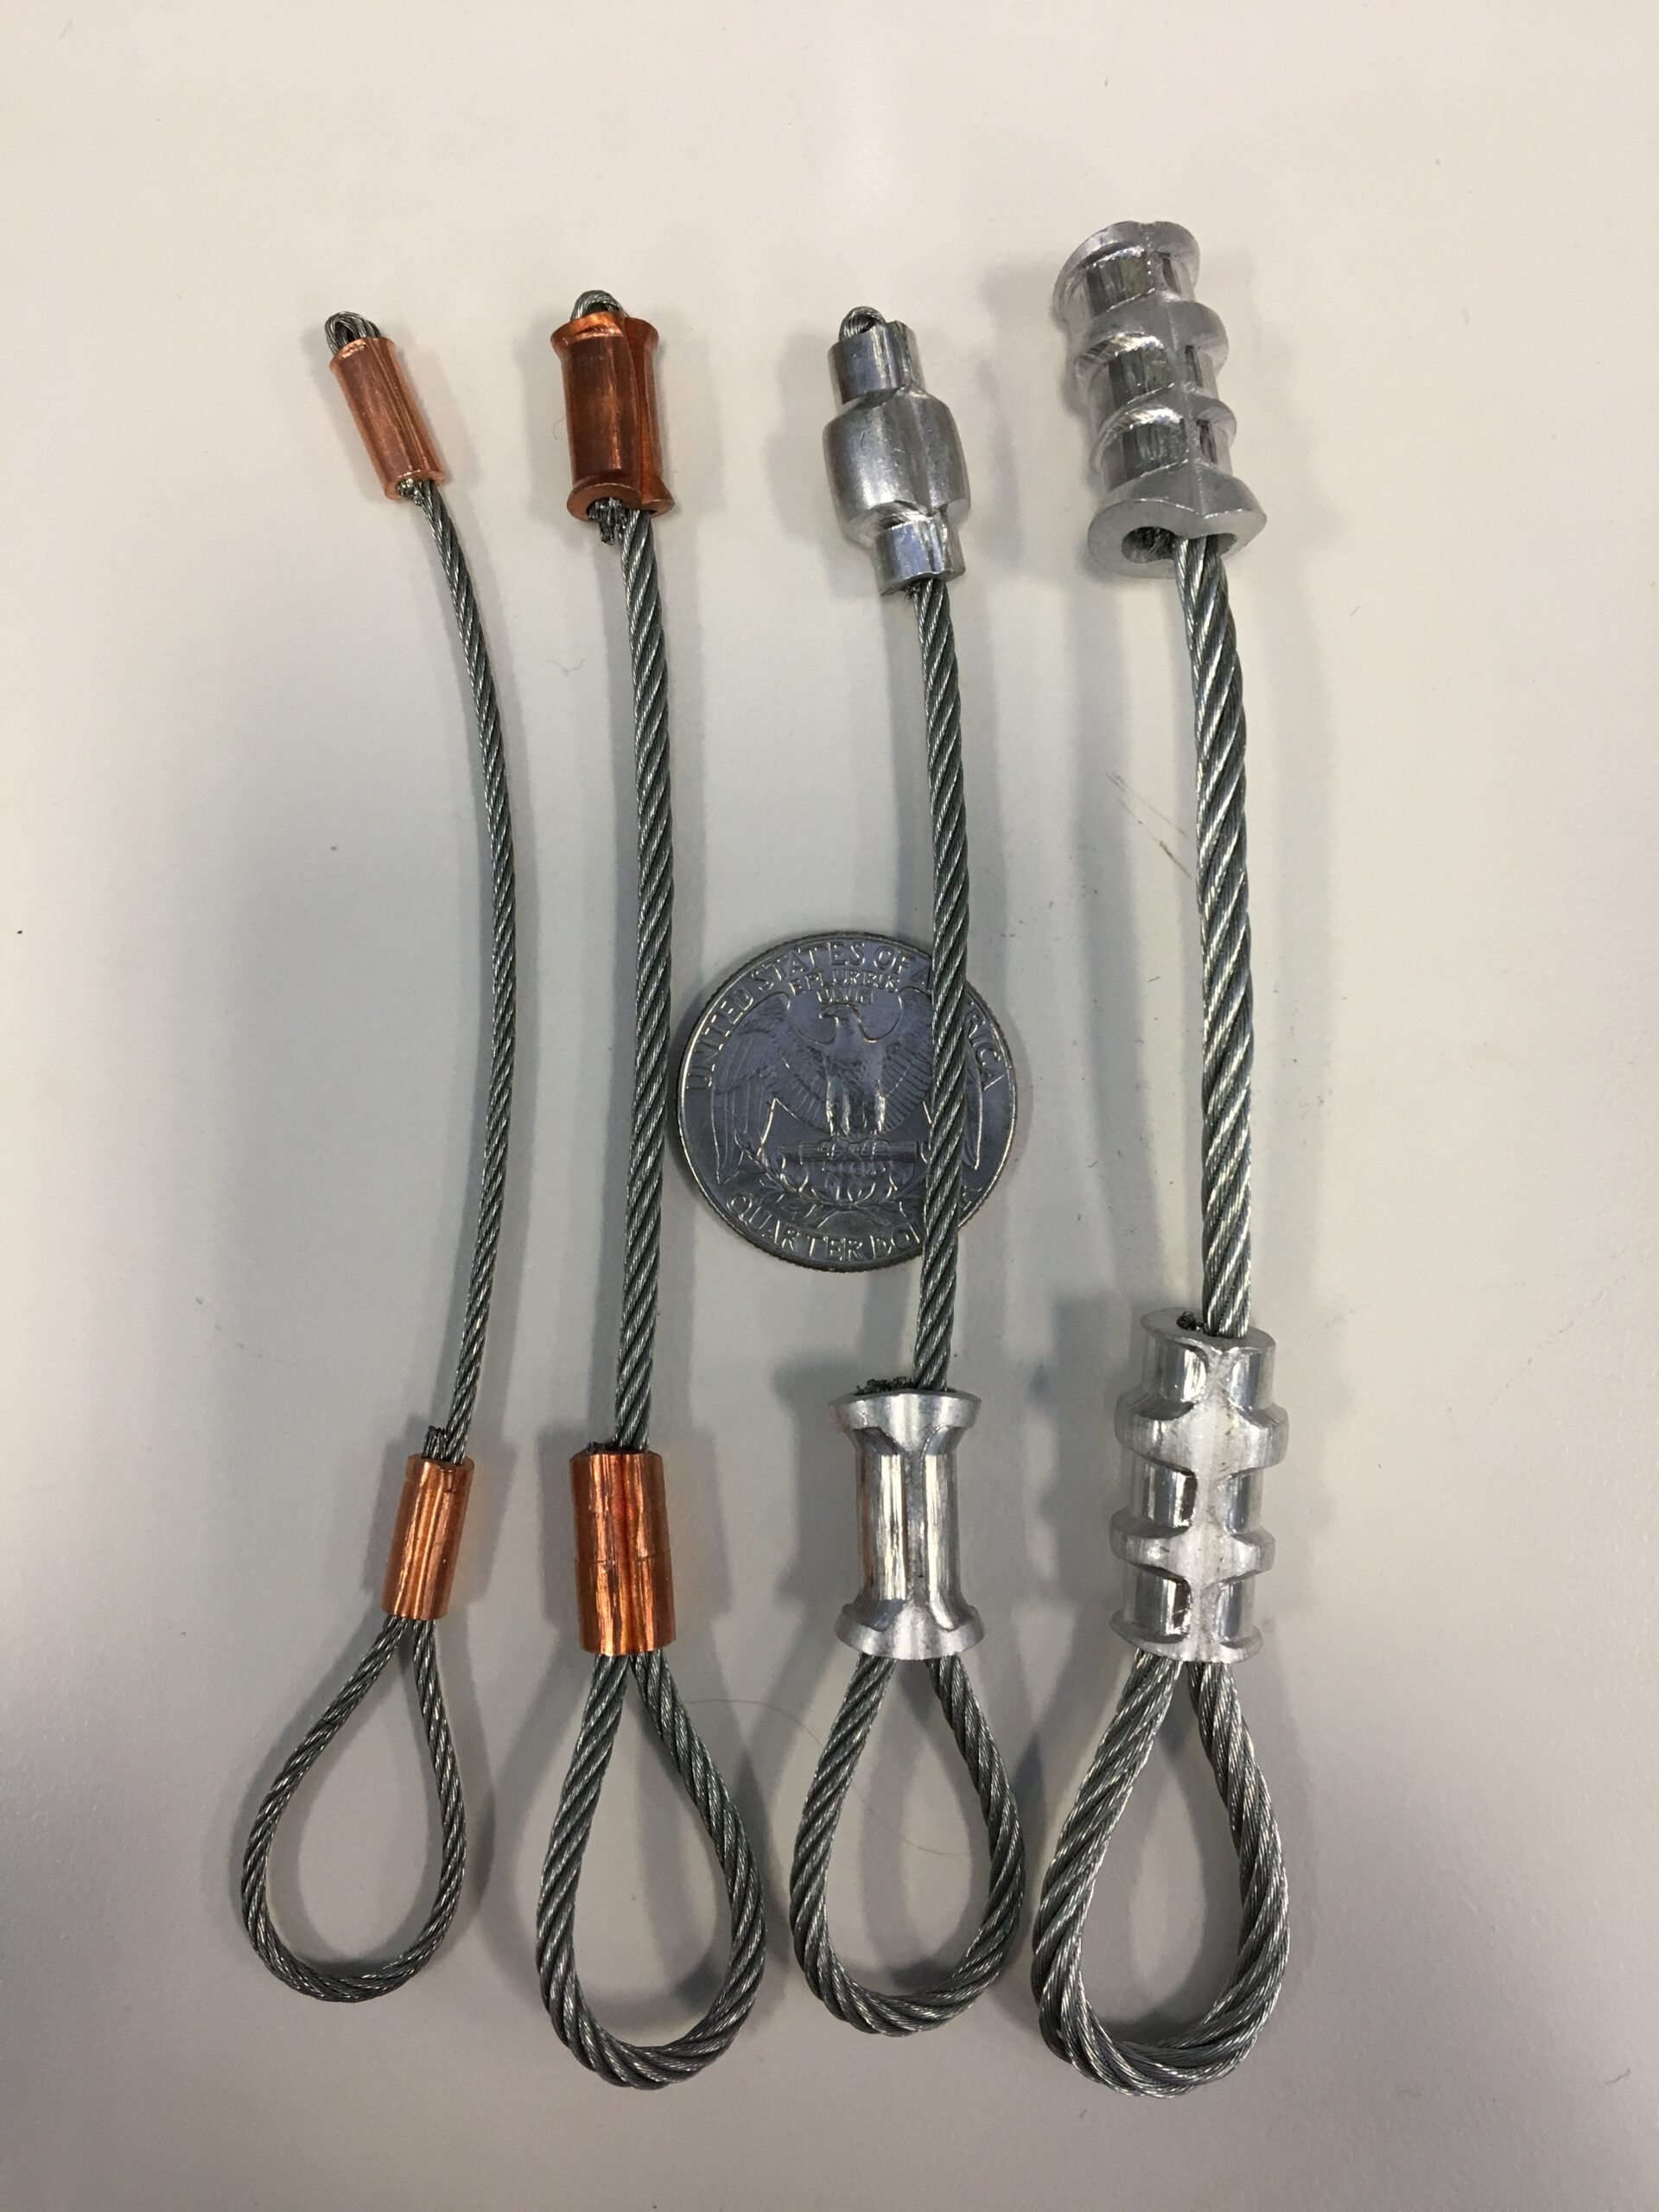
Trad Climbing – Traditional gear utilizes natural features in the rock to create a temporary anchor point that can later be removed by the follower. Traditional gear includes a variety of both passive and active gear. Passive gear such as nuts, monkey fists, and slings has no moving parts and is put into place to fit naturally occurring rock features. Active protection includes cams, ball nuts, big bros, and other pieces of equipment that have moving parts i.e. spring loaded lobes that expand into naturally formed features. Active gear has a larger range of versatility for different sized cracks in comparison to passive gear. Once put into place, the leader once again uses quick-draws to clip one end into the trad gear and connect the other end through their climbing rope. As you can imagine, carrying both trad gear and quick draws up a route can become very heavy which is why some climbers prefer Sport Climbing to Trad Climbing.

Climbing grades in 5th class are divided by difficulty starting at the easiest 5.1 and going to hardest 5.15. Once the level of 5.10 is achieved the grades are subdivided into 4 more sub-ratings suffixed with letters a,b,c,d respectively increasing with difficulty (Example: 512a is harder than 5.11d). The hardest rock climbing in the world at the moment is a 5.15d (video) which pushes the abilities of the human body to its absolute limit to climb a route free of aid.
- Fall occurrence: High, Death risk: Low-Med, Gear Required: Helmet, Harness, Rope, and Rock Protection.
- Annual Deaths: 5 (NPS SAR Data)
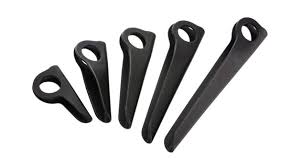
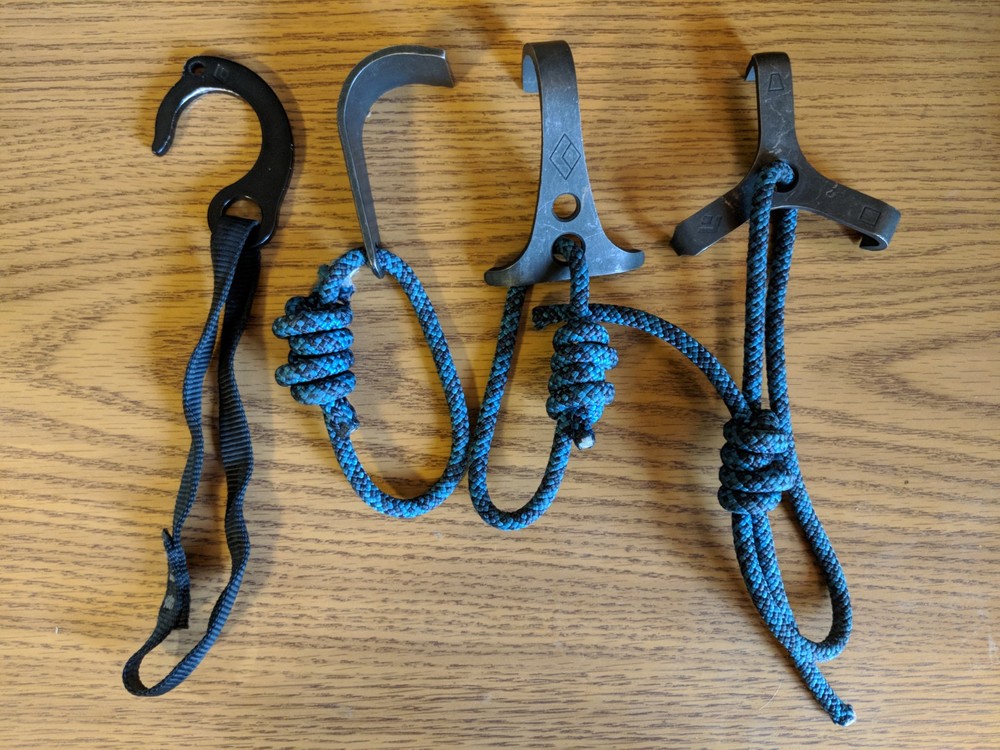
Class 6: Aid Climbing – Aid climbing comes into play where there are no holds or features that can be used to ascend a route with just your hands and feet. A crack system could shrink too tight to fit your fingers in, however you can still utilize a hook or hanger connected to a webbing ladder which the leader can step up into to ascend the route. The roped climbing techniques from Class 5 climbing are still utilized (lead climber, belayer, rope, harness, helmets, etc), however the protection changes to hangers, hooks, and pitons (protection such as nuts and cams can still be utilized). The leader uses these anchor points to pull on with a ladder system to ascend the route. Instead of only relying on the gear in the case of a fall, it now becomes the vehicle through which the leader climbs. There are 2 types of aid gear, removable and fixed. Gear such as hooks, hangers, nuts, and cams are only temporary anchors and can be removed cleanly. Gear such as pitons and copperheads are hammered into the rock and left behind as a permanent anchor point. Unlike bolts in sport climbing, pitons are like a wedge that are hammered in quickly but are not as reliable in the long term as fixed bolts are.
Aid Climbing grades range from A1 to A5, and from C1 to C5. ‘A’ grades refer to anything that will need a hammer (placing pitons or copperheads), whilst ‘C’ grades are used if the pitch can be climbed without using a hammer, i.e. ‘clean’.
- Fall occurrence: High, Death risk: Low-Medium, Gear Required: Helmet, Harness, Rope, and Rock Protection.
- Annual Deaths: Included within Class 5 deaths: average of 5 per year (NPS SAR Data)
Table 2. Climbing fatalities by climbing activity (1998–2011) in Boulder Colorado
| Activity Type | Number of Fatalities |
| Un-roped climbing | 9 (39%) |
| Lead fall | 5 (21.5%) |
| Rappelling | 3 (13%) |
| Anchor failure | 2 (8.5%) |
| Rock fall | 2 (8.5%) |
| Mountaineering | 2 (8.5%) |
| Total | 23 |
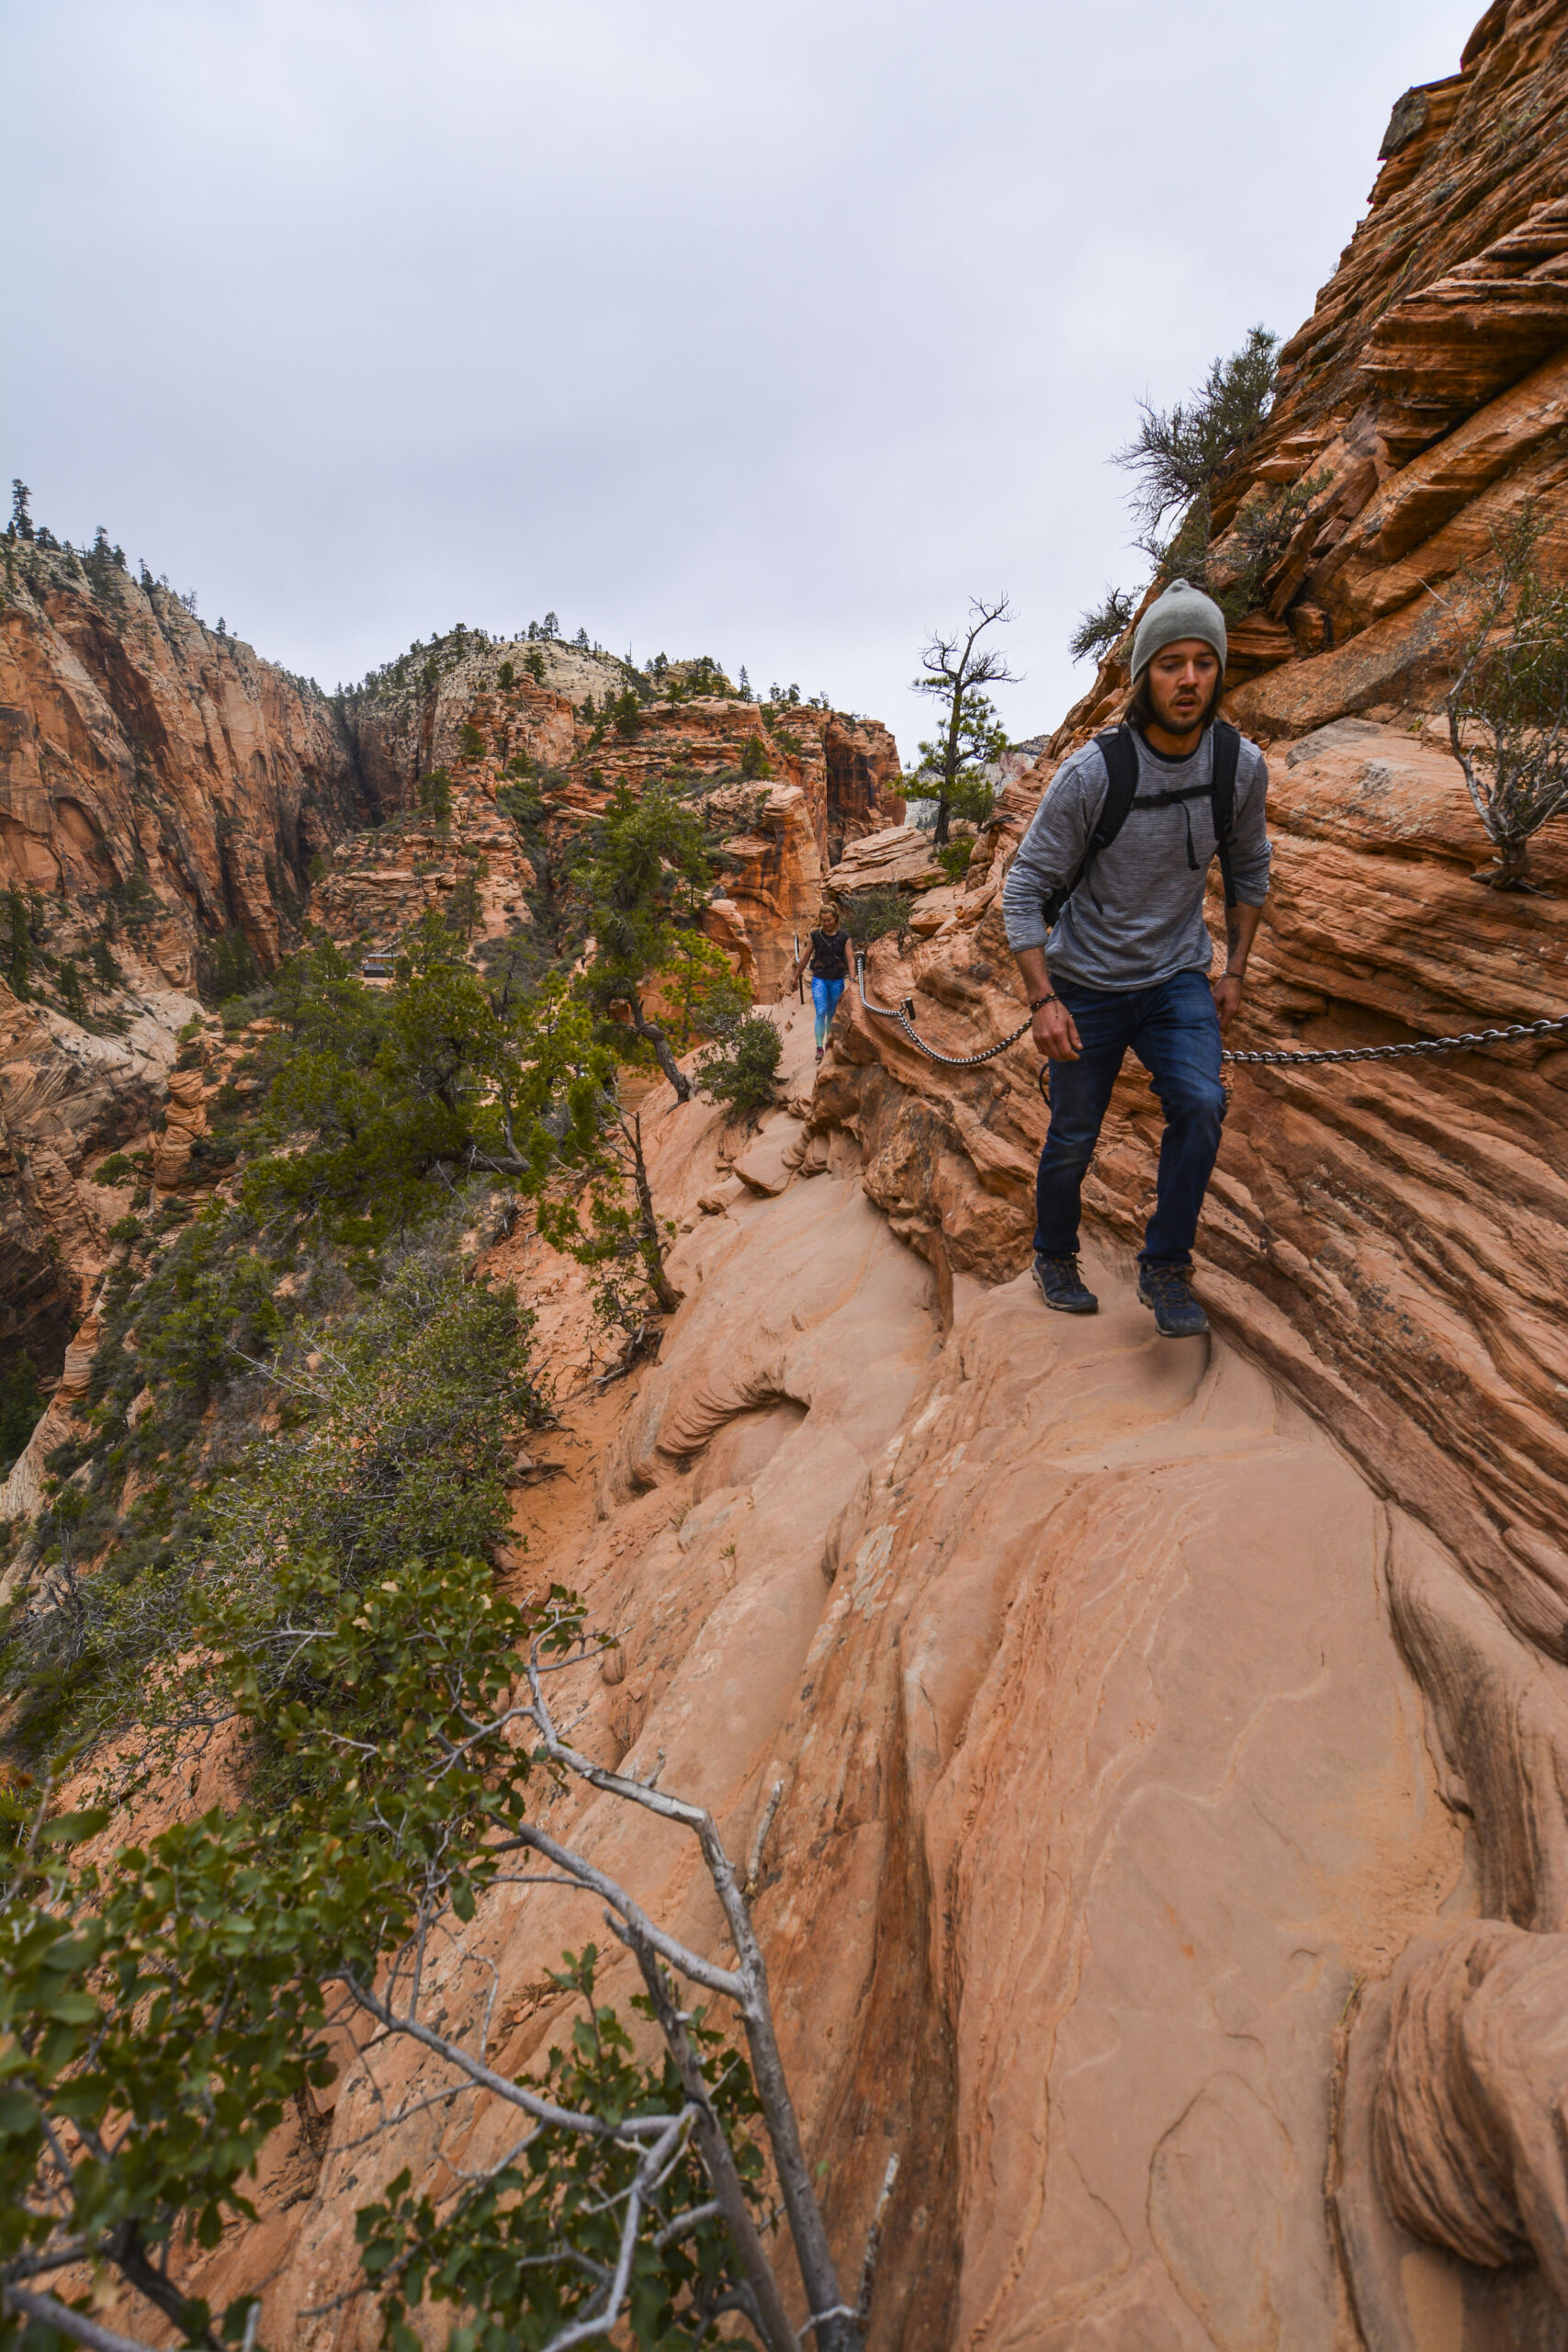
Exposure: Cliff Edges and Drop-offs – When you hear someone say “That’s an airy traverse” or “It’s an exposed walk” they are referring to the likelihood of coming close to a cliff edge where there are large drop-offs. You can encounter exposure on Class 1-3 pretty often but in most places these edges are protected by handrails to keep everyday hikers safe from going over the edge by accident. Angels Landing in Zion National Park is known for its exposed cliff edges; however you are only on Class 1-3 during this hike. Exposure in Class 4 and 5 climbing are inherent to the classification thus already come with a higher risk of injury when falling from one of these routes.
Conclusion: The bottom line here is that it’s up to you to be responsible for your own safety. The level of danger in climbing can be assessed by looking at the likelihood of a fall vs the risk of death if a fall were to occur. As you move into class 4 from class 3 you transition from a low likelihood of a fall to a high likelihood of a fall which may or may not result in death. This uncertainty and the lack of ropes for protection makes this the most deadly class with respect to falls, even though it is not the most physical or mentally difficult climbing. The fact remains that the death is preventable if you rope up when needed.
Most people in the general public are afraid of exposure to heights and drop-offs. It’s that queasy feeling that rises up in our stomachs and send tingles up our spine. It’s our brain telling our body that there is imminent danger and you need to be on high alert! You can make this go away with practice and time. This is how rock climbers, window washers, skyscraper construction workers, and other people in high exposure activities look calm and collected. It doesn’t mean the danger isn’t there, it just means the skills they have developed help decrease the risk of a fall. You can decrease the likelihood of a fall by increasing your rock climbing/scrambling skills thus becoming more comfortable and competent on vertical terrain. However, don’t let your ego and confidence be your only guiding principles, listen to your gut and make smart decisions. Once you do gain competence with climbing skills, rock climbing can be some of the most rewarding, enjoyable, and exhilarating experiences as you play an active role in the relationship of risk and rock.
Obviously the definitions for the route classifications are only a light overview to understand some of the terms used in my blog posts and are not meant to be an all encompassing document as they only scratch the surface. I also do not include statistics to compare the number of hikers vs climbers in relation to falls in the mindset that any fatality is unacceptable. There are so many other topics that could be touched on here: Free Soloing, Rope Soloing, Ice Climbing, Bouldering, etc but that’s for a different discussion.
For further reading please check out:
- Climbing and Bouldering Ratings: https://www.rei.com/learn/expert-advice/climbing-bouldering-rating.html
- Aid Climbing Ratings: https://www.vdiffclimbing.com/bigwall-grades/
- Takeaways from 2017: https://www.rei.com/blog/climb/top-5-takeaways-from-accidents-in-north-american-climbing-2017
- What’s killing Americas Hikers: https://skyaboveus.com/climbing-hiking/Whats-Killing-Americas-Hikers
- Boulder Co Deaths: https://static1.squarespace.com/static/552e8f43e4b07f0b3920027b/t/566b0151e0327ccd996817f3/1449853265496/2012_WEMJ_RMRG_Rock_Climb_Accidents.pdf
- Allure of Free Soloing: https://www.liveabout.com/dangerous-allure-of-free-solo-climbing-755444