
Step 11: Finishing touches.
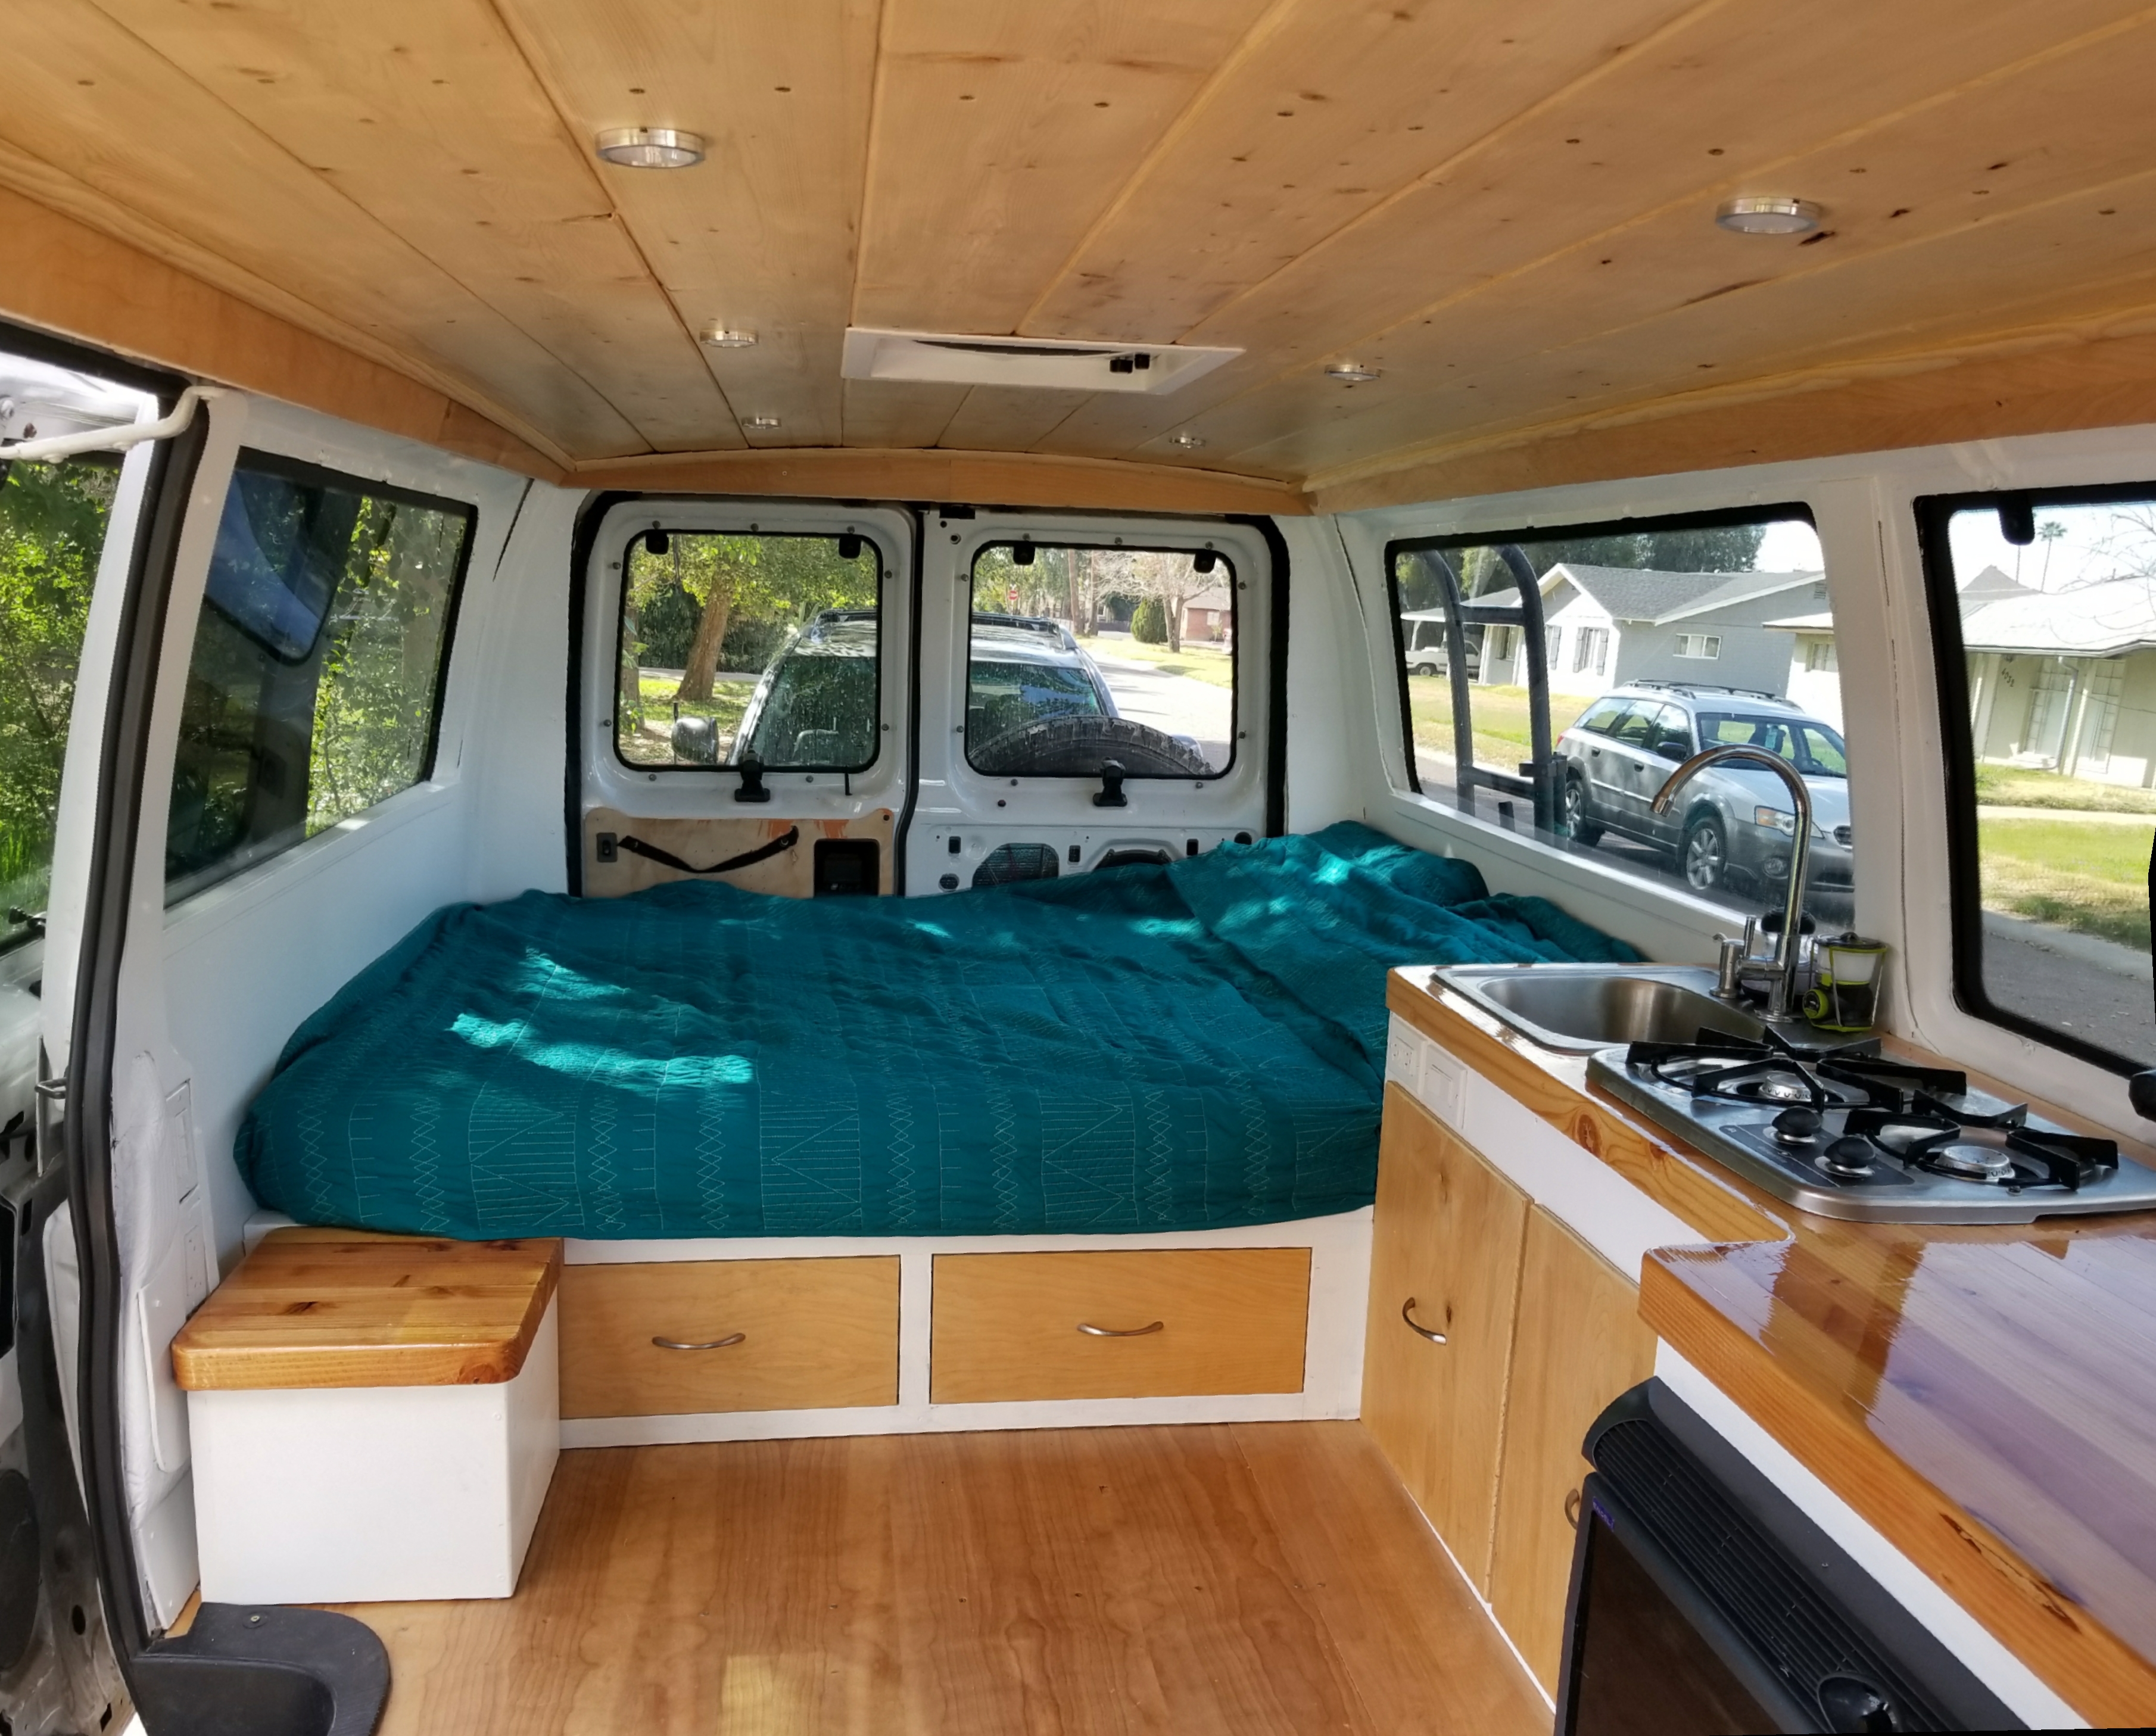
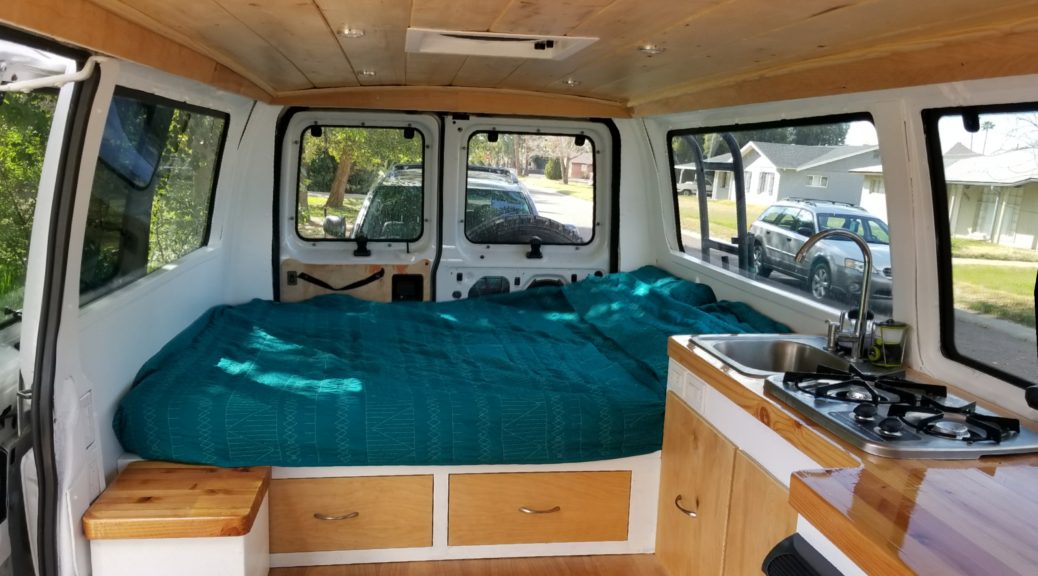
Whew, man it’s been a wild ride! The van looks good, but it isn’t the final version of what you envisioned. It about to be though! In this final push I closed most of the loose ends, and cleaned up all the ugly edges.
Tools/Materials used:
- Table Saw – Ridgid 15amp Portable 10″ Saw
- Sheet Sander – Makita 1.7 amp Sander
- Sand Paper – Grit: 100, 150, 220
- Dewalt Drill 20V Cordless
- Dewalt Drill Bits
- Measuring Tape
- Basic Tool Set
- JigSaw – Makita corded JigSaw
- JigSaw Blades – 3 Pack – I used a few different blades, found that the fine tooth took longer but made smoother cuts.
- Router – 8.5 Amp Ryobi Hand Router – Used this to make smooth edges on corners
- Router Bit – 1/2 Inch corner bit
- Bartop Sealer – SuperGlaze Gloss Kit
- Propane Torch – Worthington Trigger Start Torch
- Screws – Black square head wood screws 2″
- Screws – #6 x 1/2″ Philips Screws
- Screws – #6 x 1″ Philips Screws
- Stain – Natural 209 MinWax Wood Finish Stain
- Qty: Quart
- Paint – BEHR 3050 – 32oz
- Qty: 2
- Paint Tape – Blue Paint Tape – 1 Roll
- Paint Tray – Small disposable
- Paint Roller – 6″ Mini Foam Roller
- Pain Brush – 1.5″ Angled
- Magnets – Neodymium Magnet 6 Pack
- Qty: 36 (6 sets)
- Reflixic – Double sided insulation
- Sewing Machine – Singer
- Backlighting – 5 color LED strip 32ft
- Qty: 2
- Quarter Round – 3/4″ Wood – Used for finishing the interface at the back wall/side wall.
- Finishing Nails – Nails – Used for the quarter Round
- Wood Glue – Gorilla Wood Glue 8 oz
Procedure:
- Make window sills. I cut strips of wood to go between the glass and the wooden walls that I installed. This would create a windowsill, stopping anything from falling behind the walls from the windows. I used a finishing facing strip to clean the outer edge once installed. Sand it down to prep for paint!
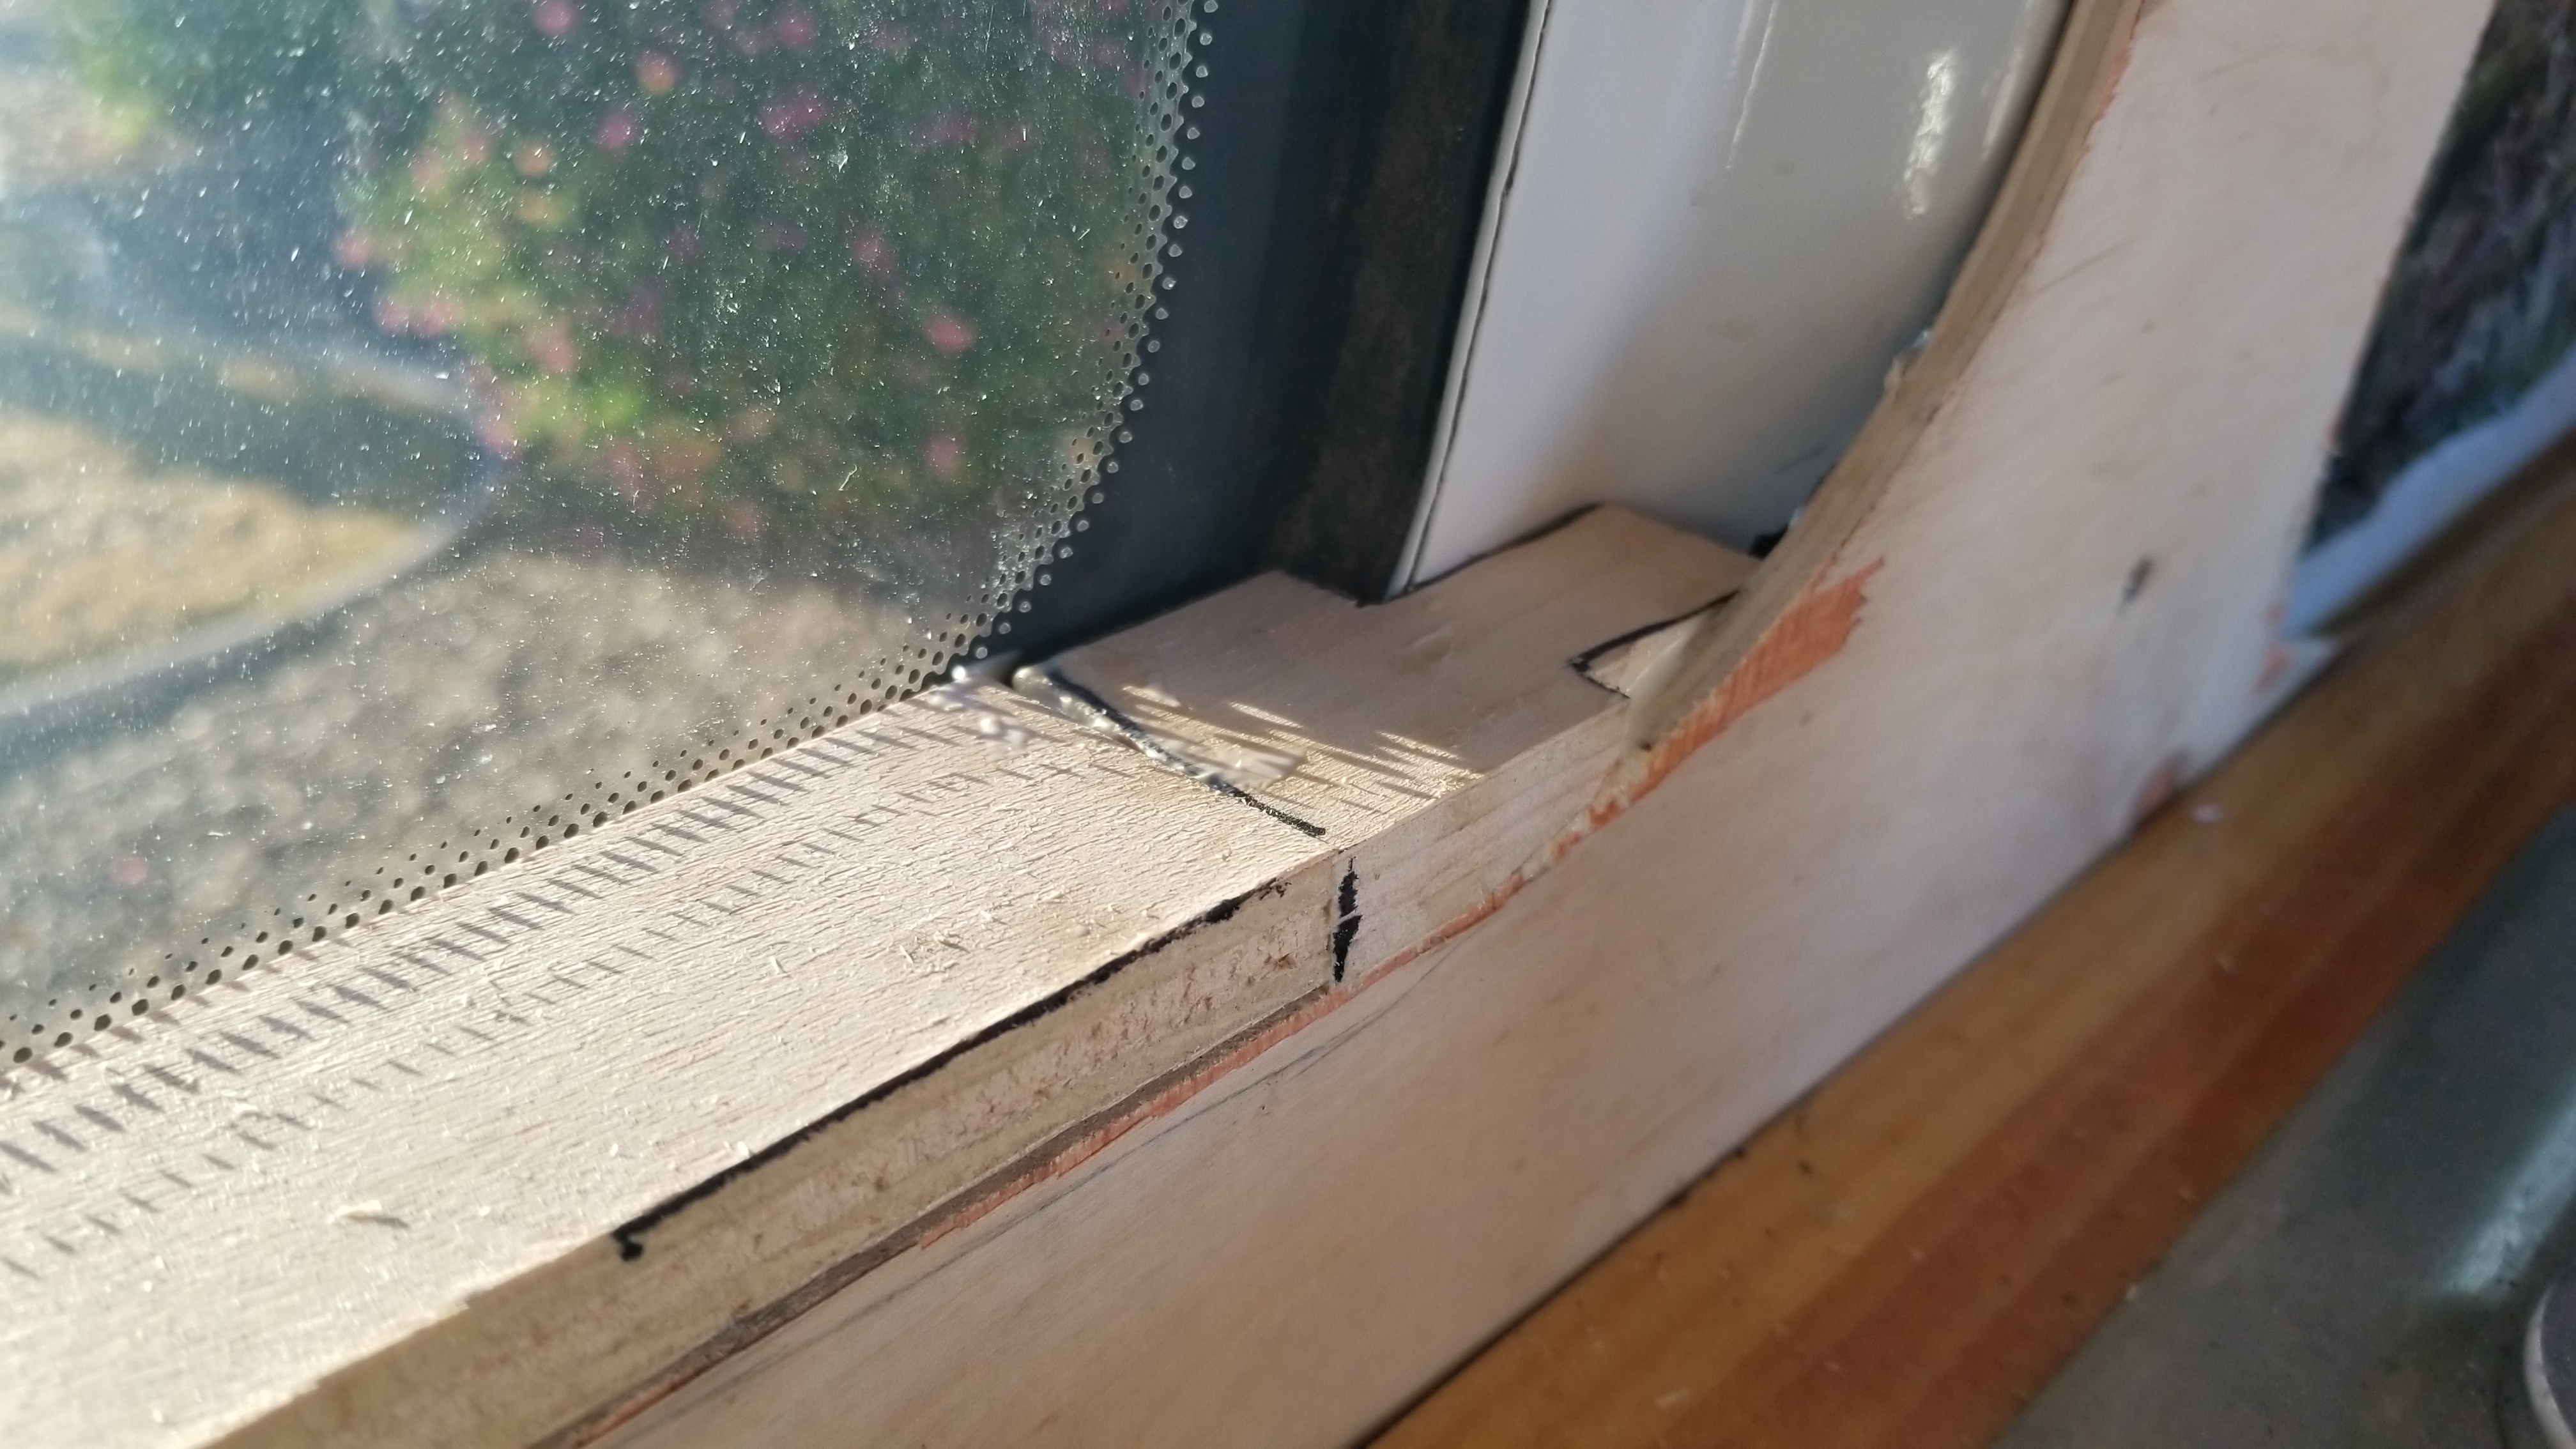
Window sill all installed, making custom pieces to seal off the edges. 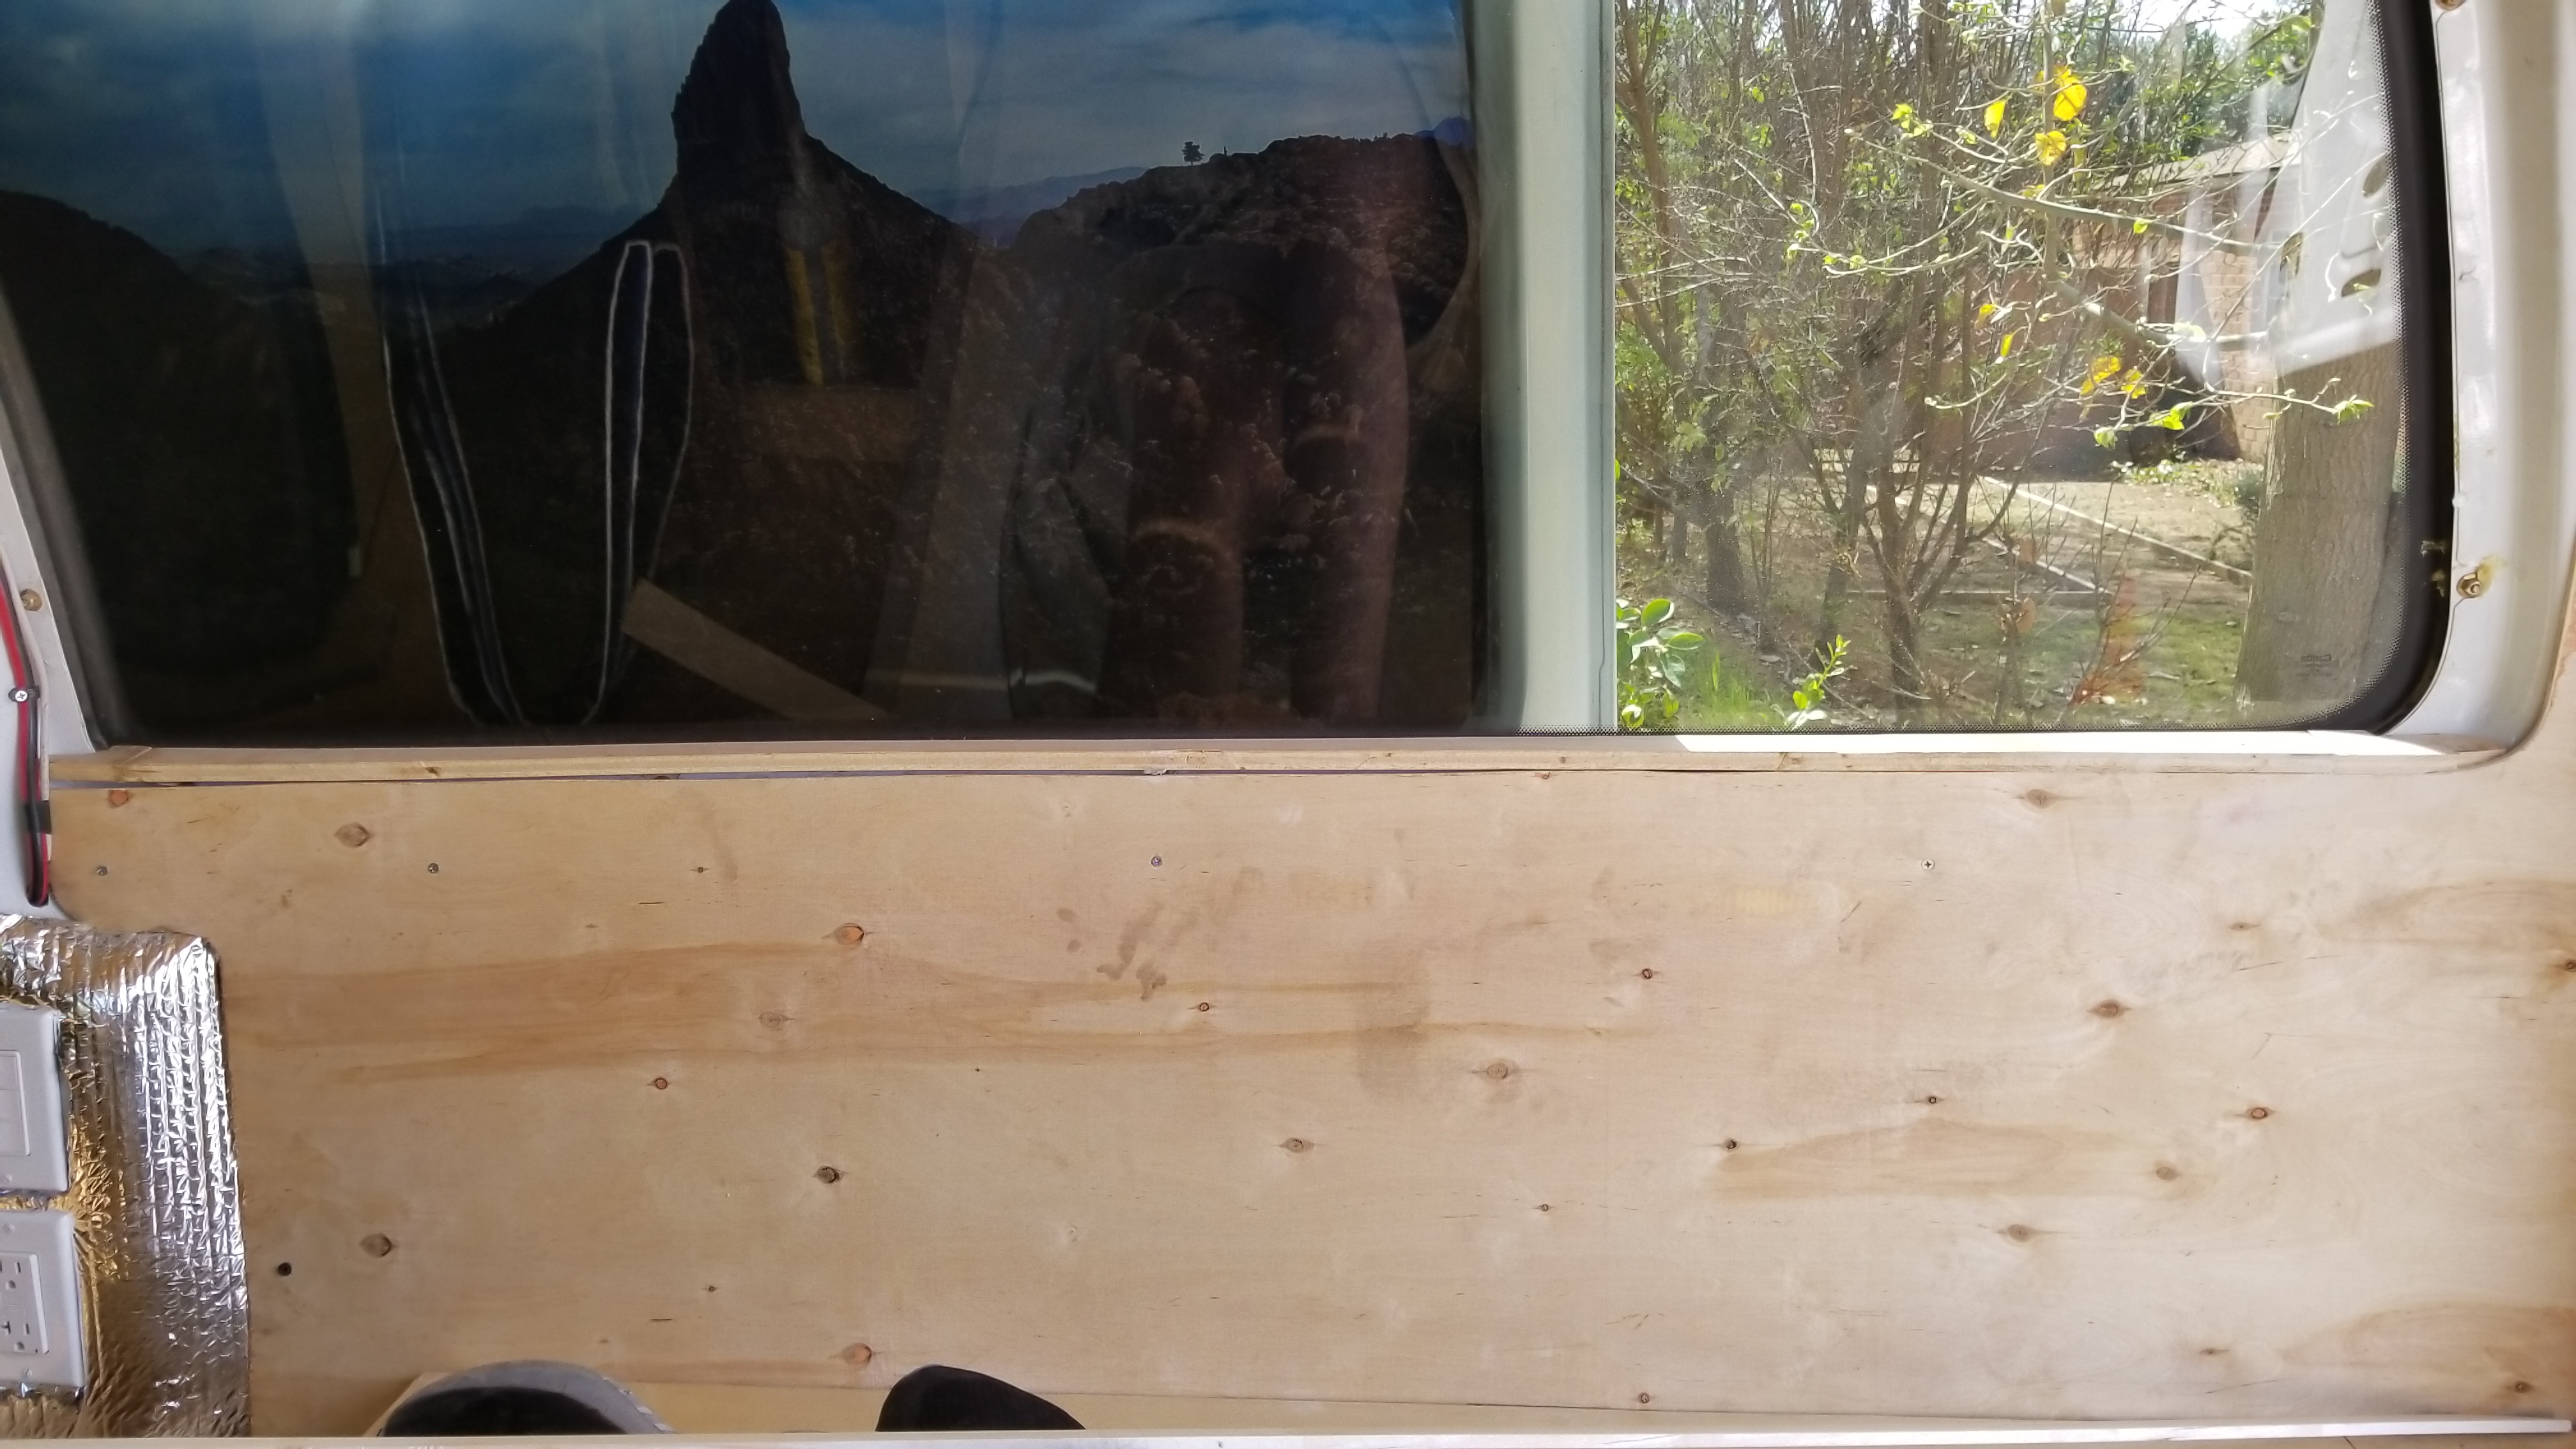
Install your window sill. I did this behind the wall with some L brackets, 3 window frame bolts, and 3 wood screws. 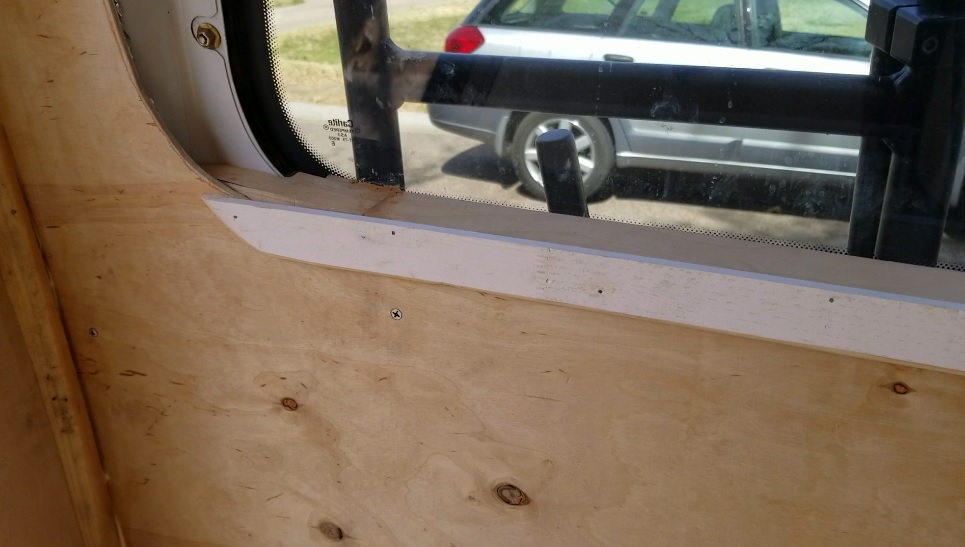
Create a face board and install it with wood glue and finishing nails. This will clean up any imperfections at the seam. - Video 1: https://youtu.be/kY_VeDkjhjg
- Video 2: https://youtu.be/xjOsI3CuSf4
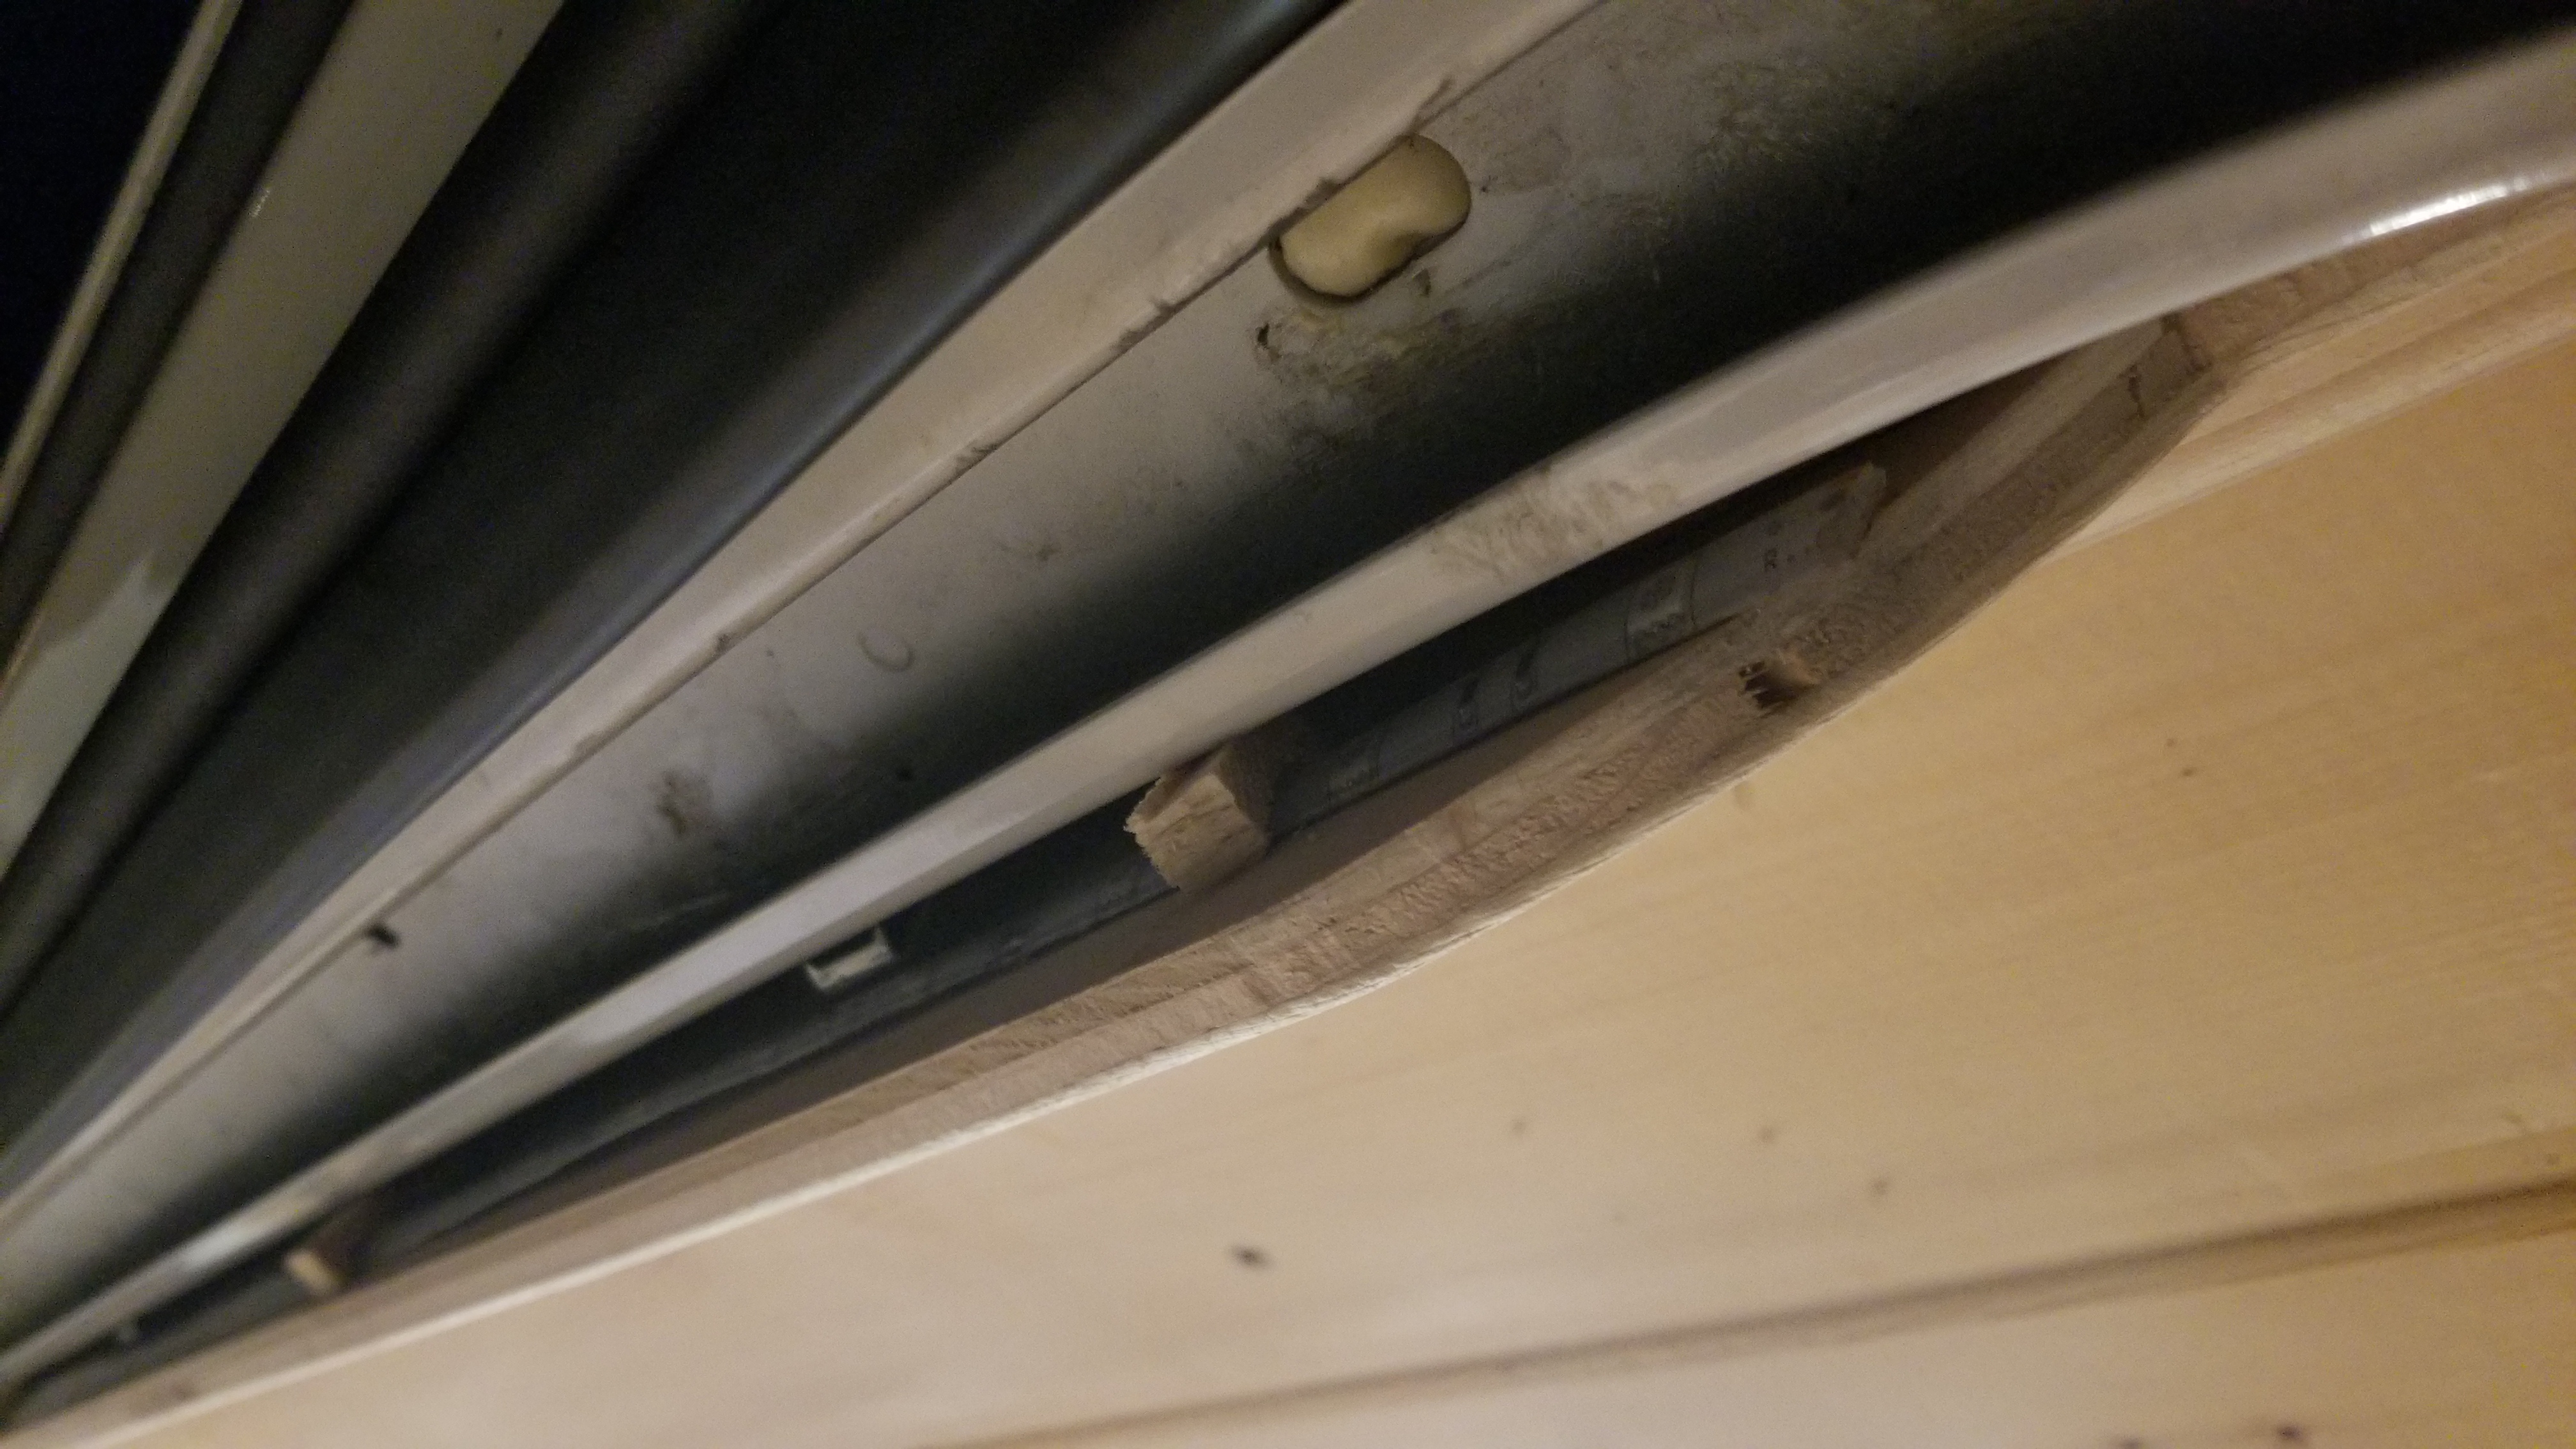
- Complete the back corners of the van. The space where the back walls meet the side walls must be dealt with. I used some quarter round to accomplish this. Cut to length, cut slits in the back, and then soak in a water bath for a few hours to allow the wood to become bendable. Cover the back of the wood with wood glue and press the quarter round into the corners and nail it into place with finishing nails. Sand everything down to prep for paint.
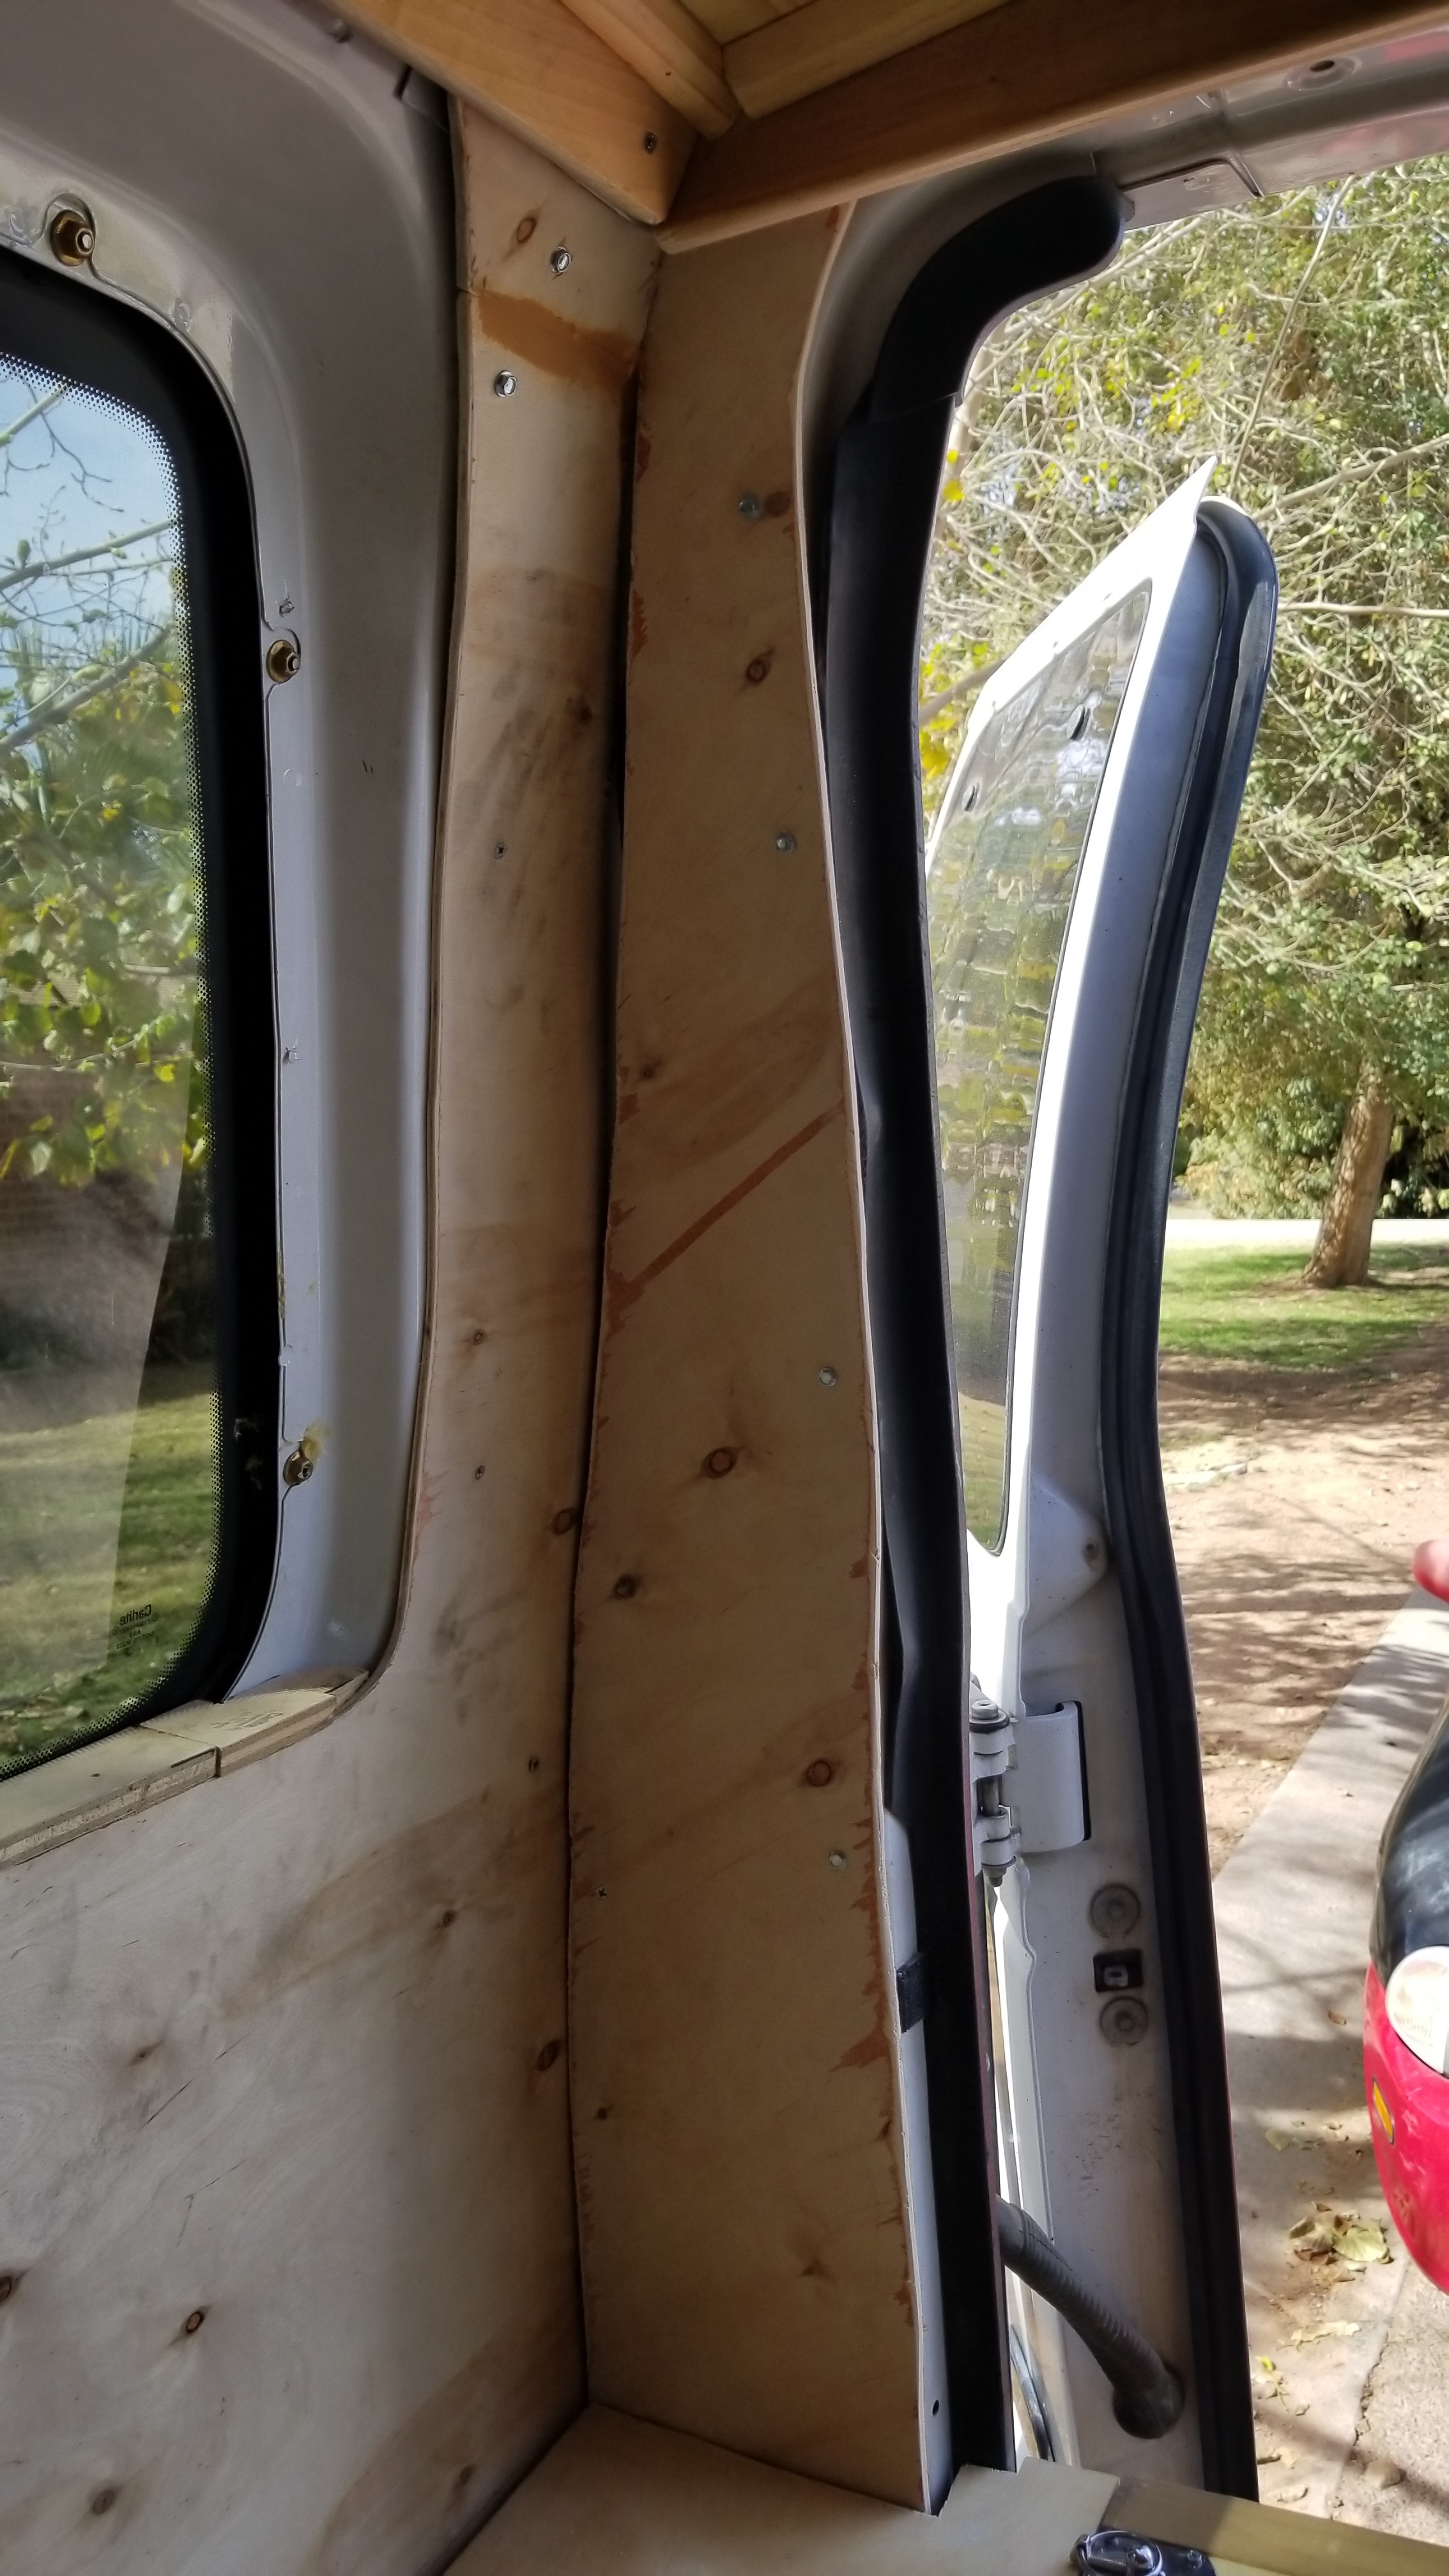
Unfinished corner, you can see the wall joint seam to the metal. 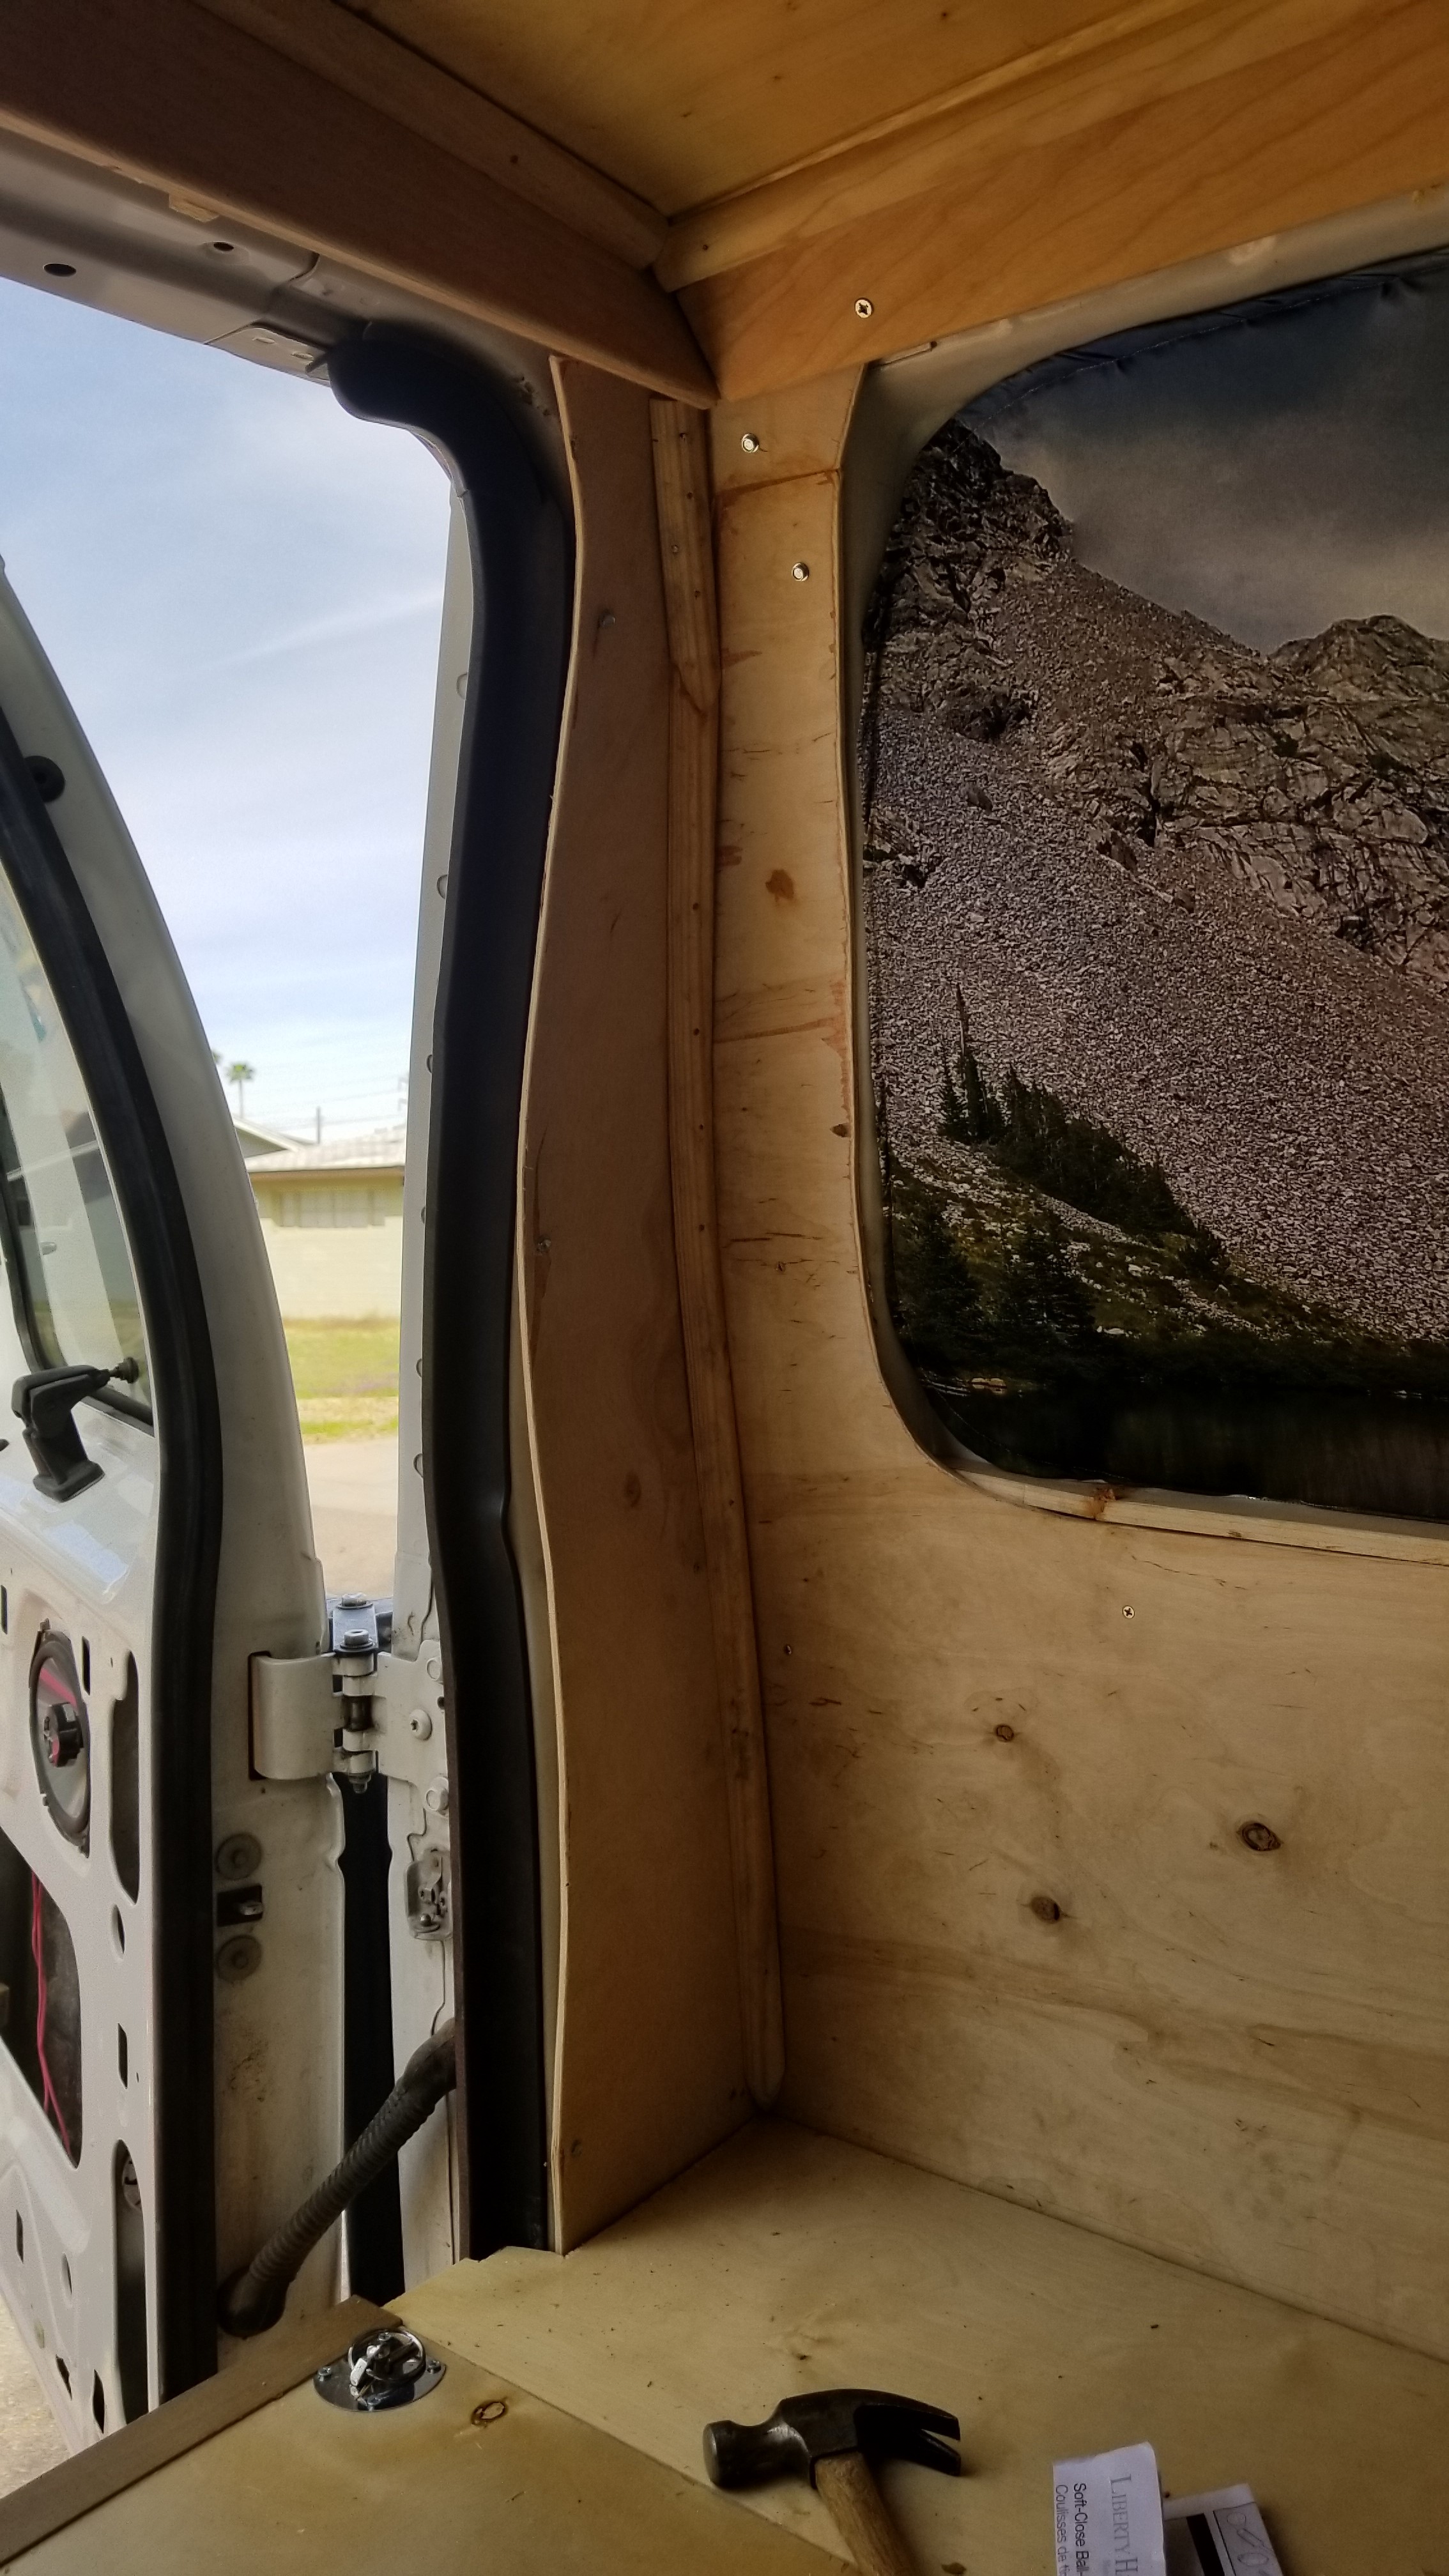
Use the quarter round, soak it in water, cut slats in the back for bendability, then work from bottom up tacking it into place with wood glue and finishing nails. - Video 1: https://youtu.be/1_sF3UDD9Ho
- Video 2: https://youtu.be/mrNAtllTjjY
- Video 3: https://youtu.be/DFE4jMRFtFg
- Video 4: https://youtu.be/zG2hoKsABgA
- Video 5: https://youtu.be/7UugZaSNUXo
- Run the LED light strip behind the upper facer board. I held these in place with some wood ‘C’ clamps that I cut and glued over the light strip itself. The adhesive isn’t good enough on the back of the lights as it didn’t adhere to the wood so I had to create these ‘C’ clamps to hold them in place. Wire these lights into the light switch (that was run early on in the build).
The glue on the back of the LEDs doesnt stick to wood well, so I had to make ‘C’ clamps out of wood and glue them around the light strips to hold them in pace. 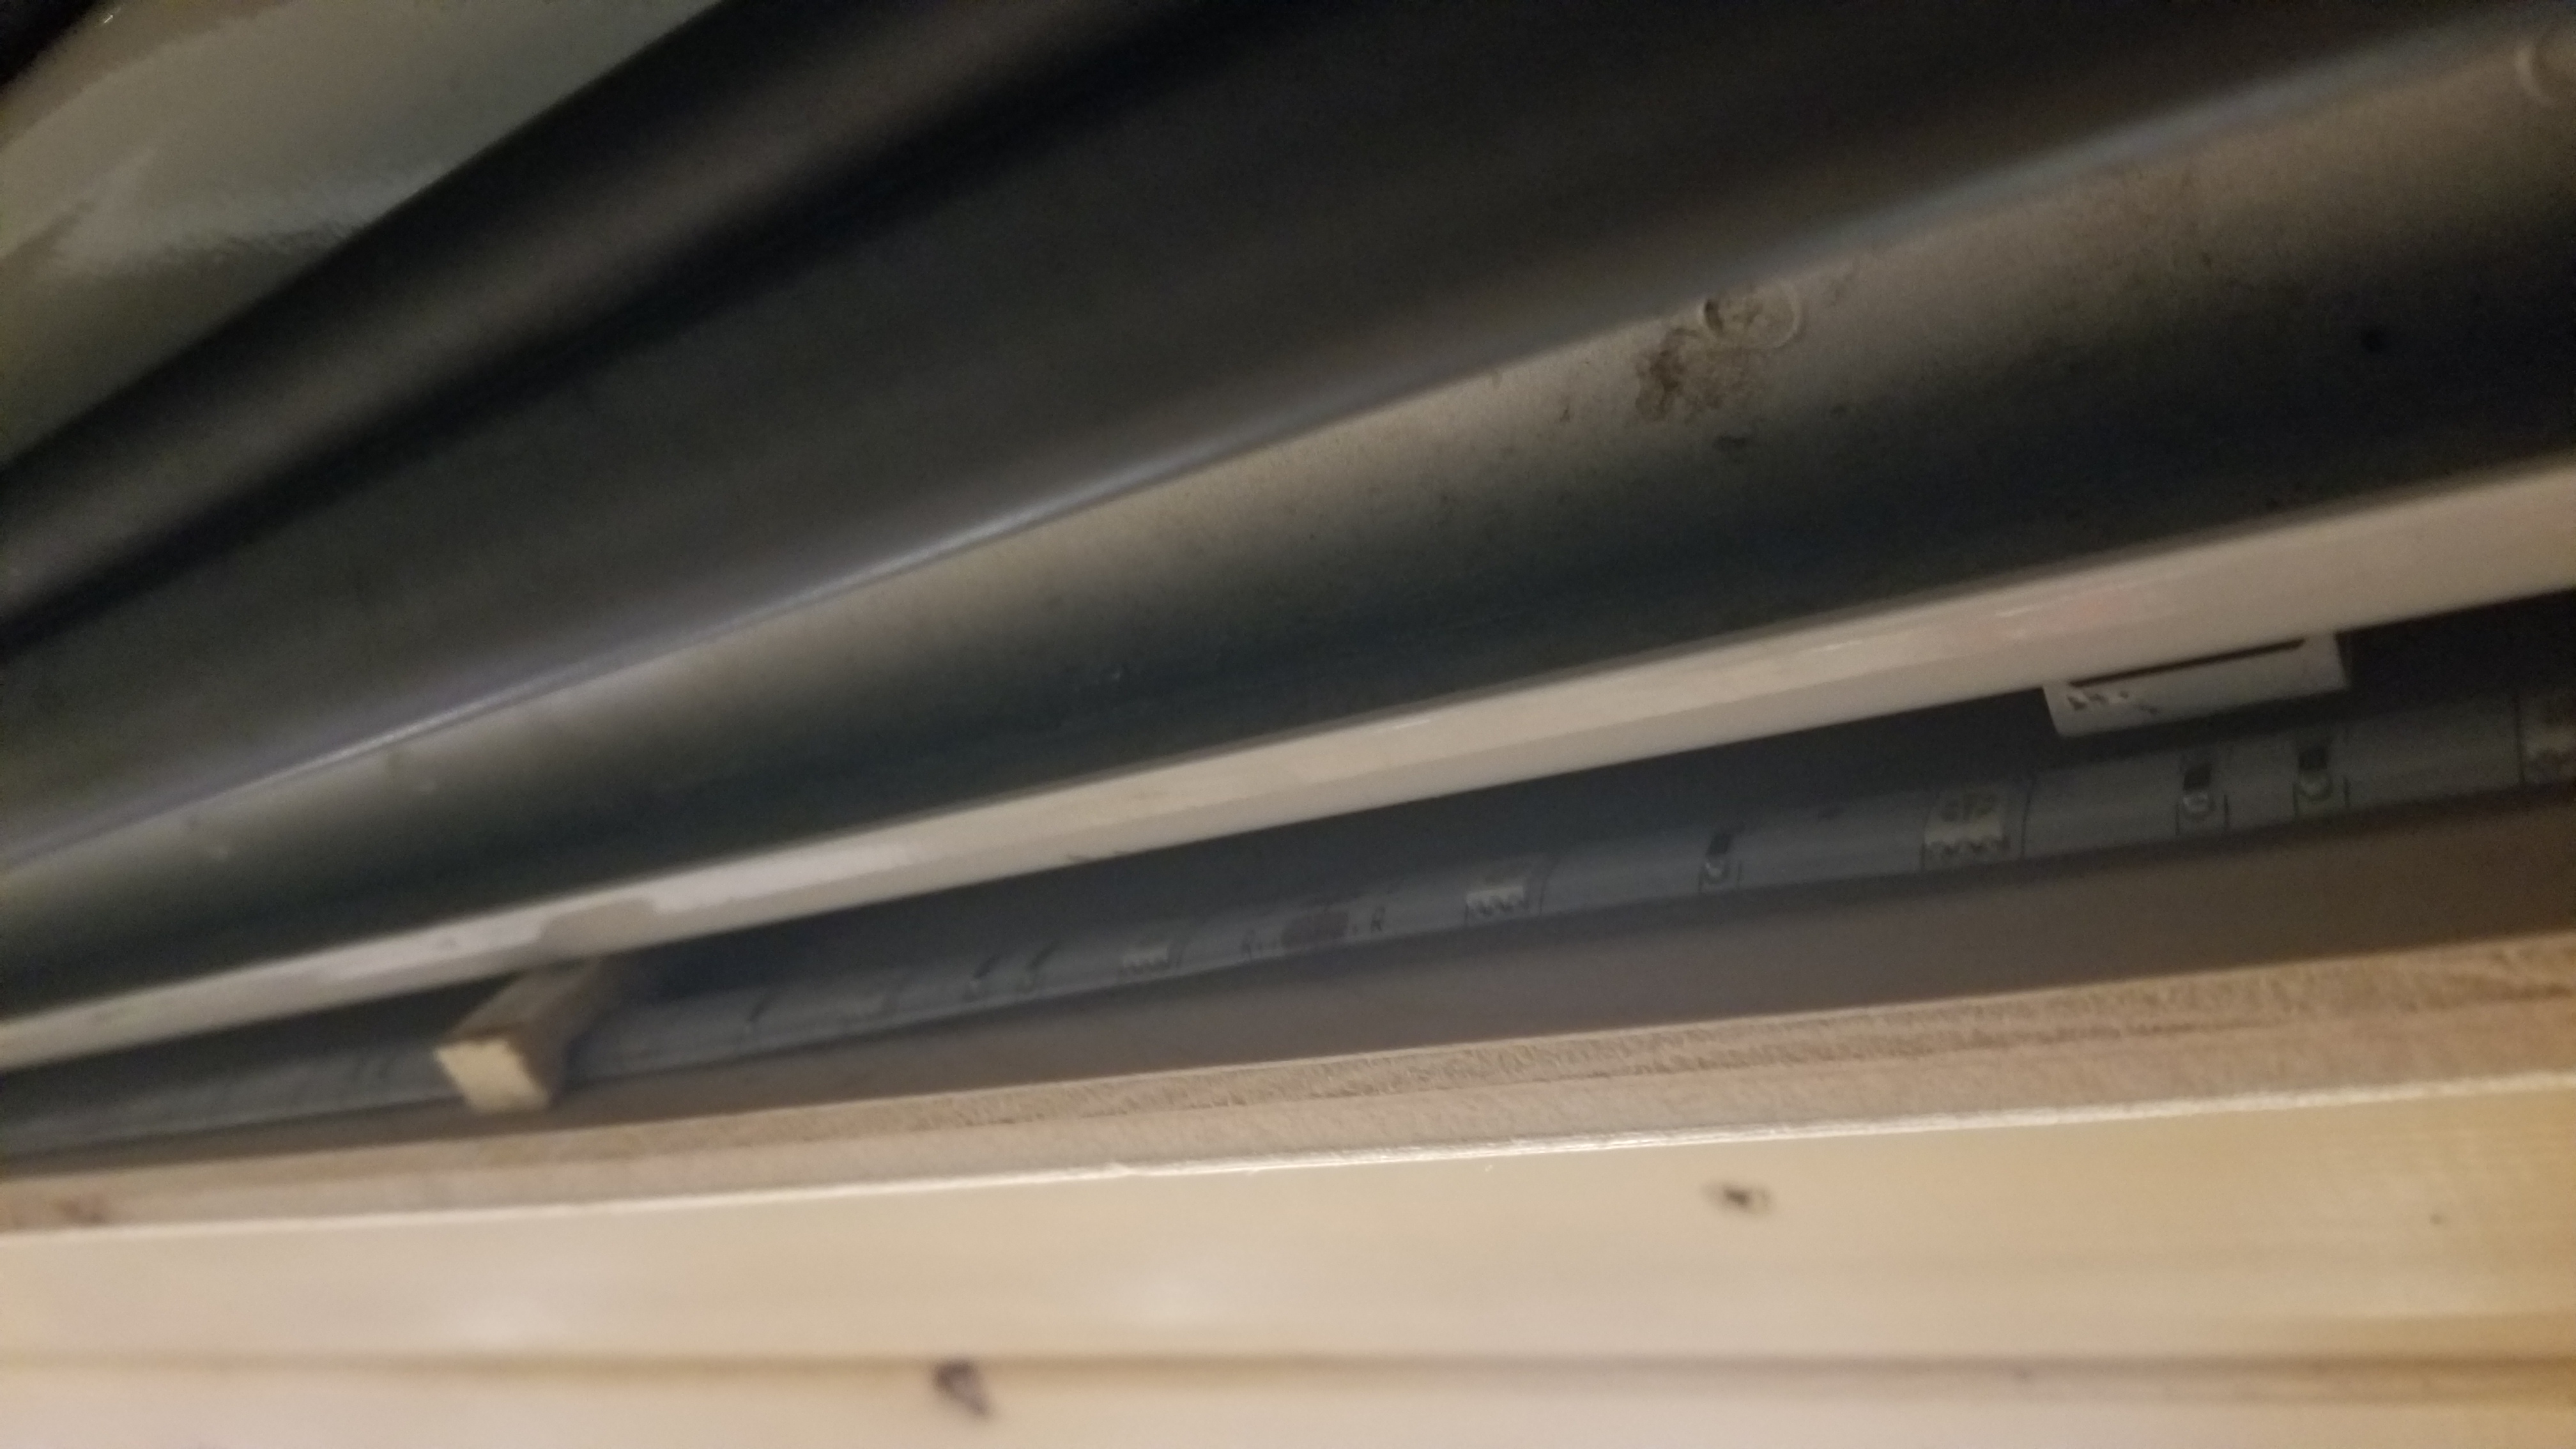
5 Color LED’s with remote! 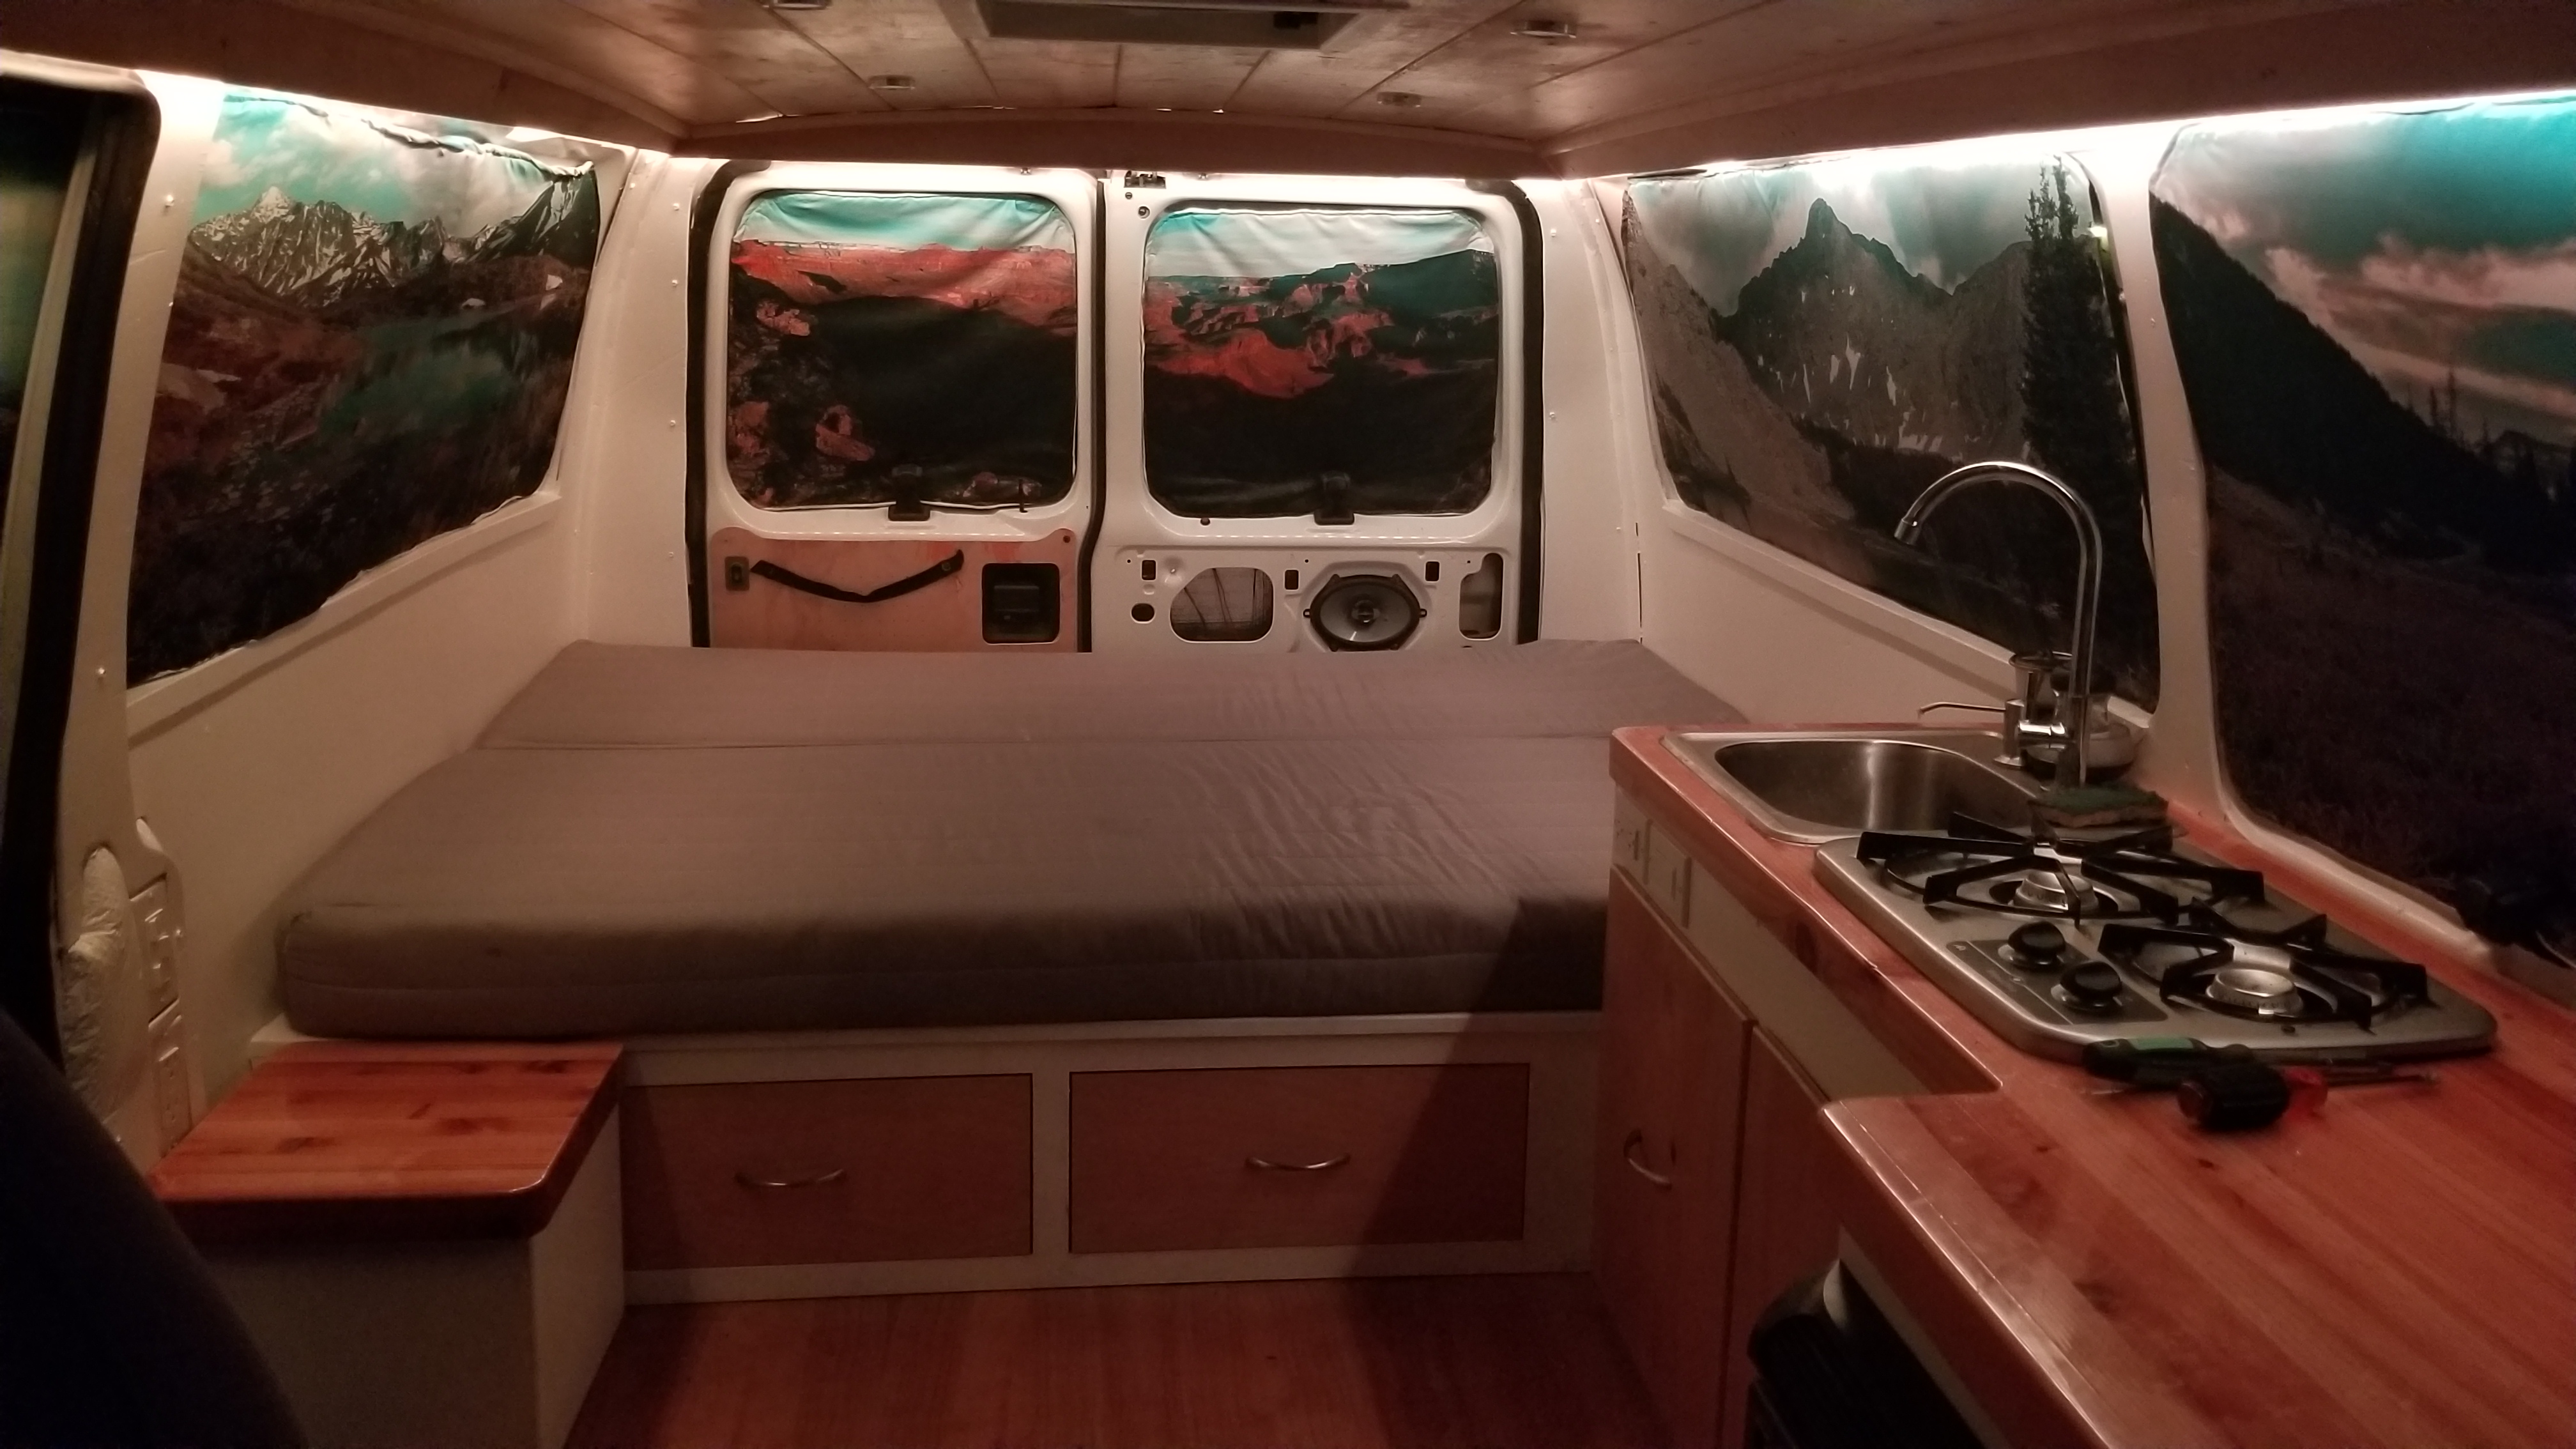
LED back lights installed and wired up! - Video: https://youtu.be/2RWEncGjwBA
- Make the stool. My van does not have a pop-top or a hightop, therefore cooking must be done from a seated or kneeling position. I made a stool to accomplish this. I used one of the wooden cutouts from the counter top for the stove as my seat top attached with a small piano hinge, then stained and sealed it just as the counter was. The wood I used for the body was some leftover MDF my brother had laying around.
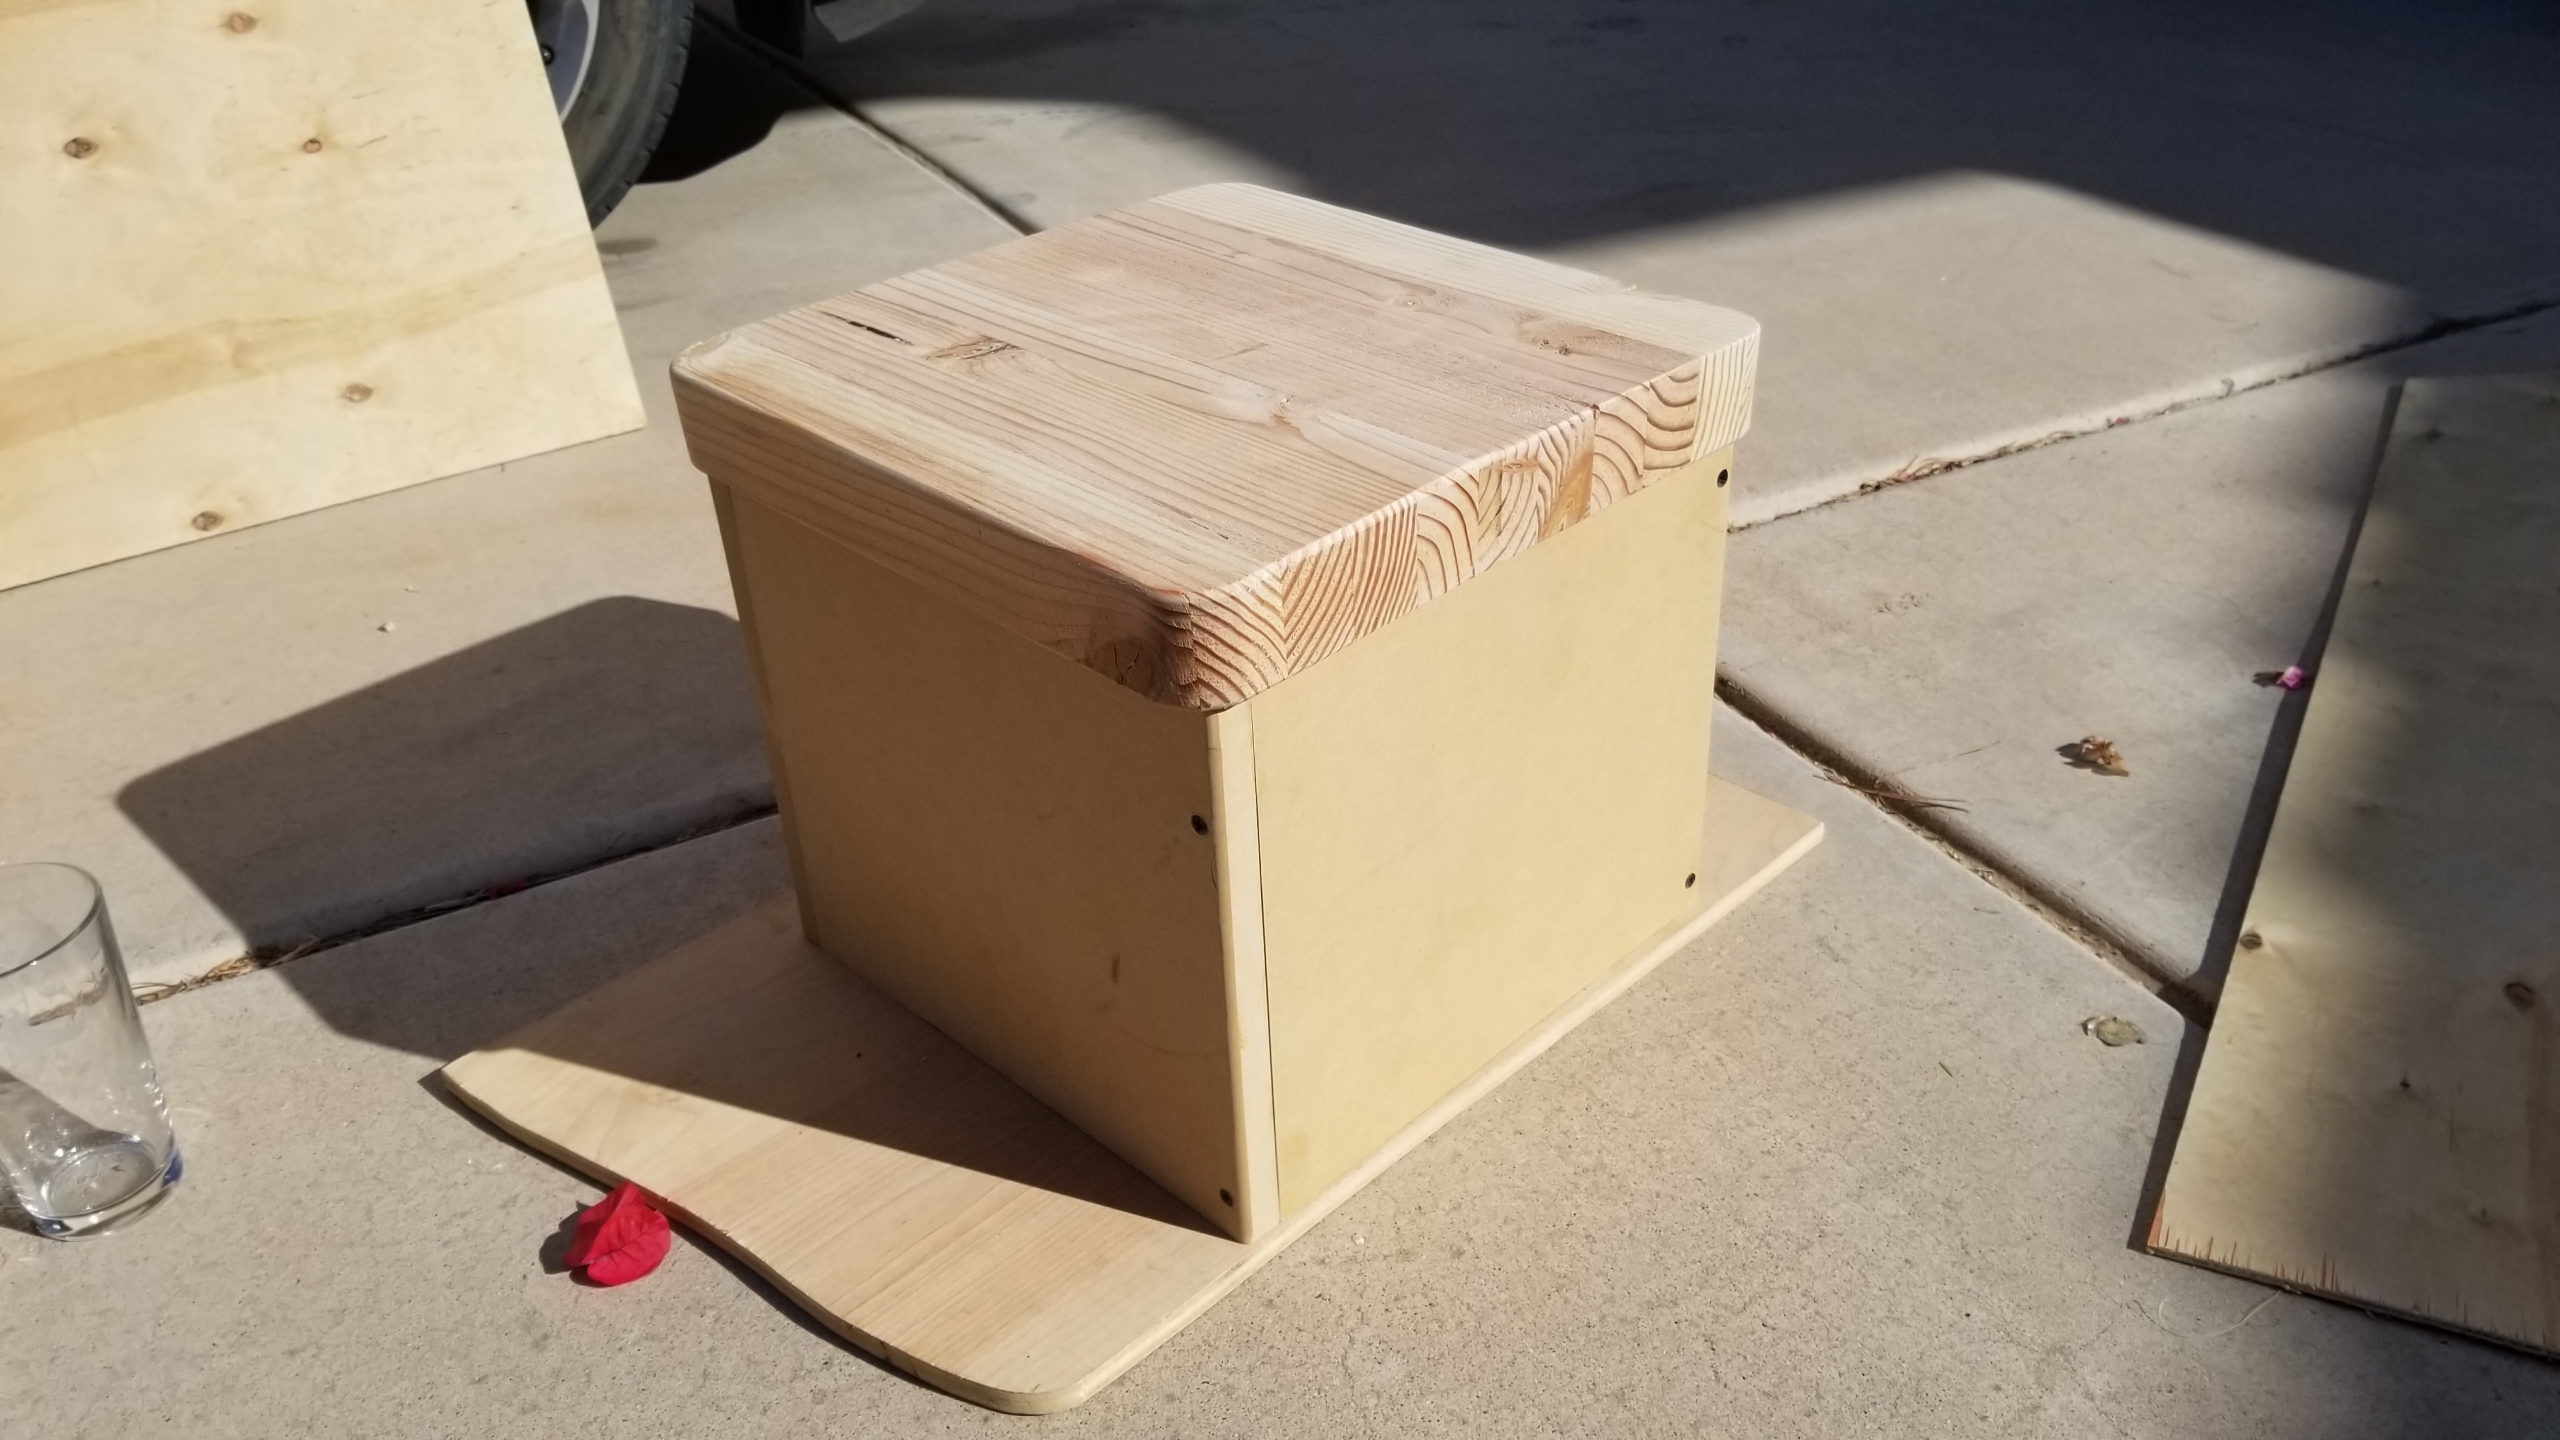
Stool, all mocked up! 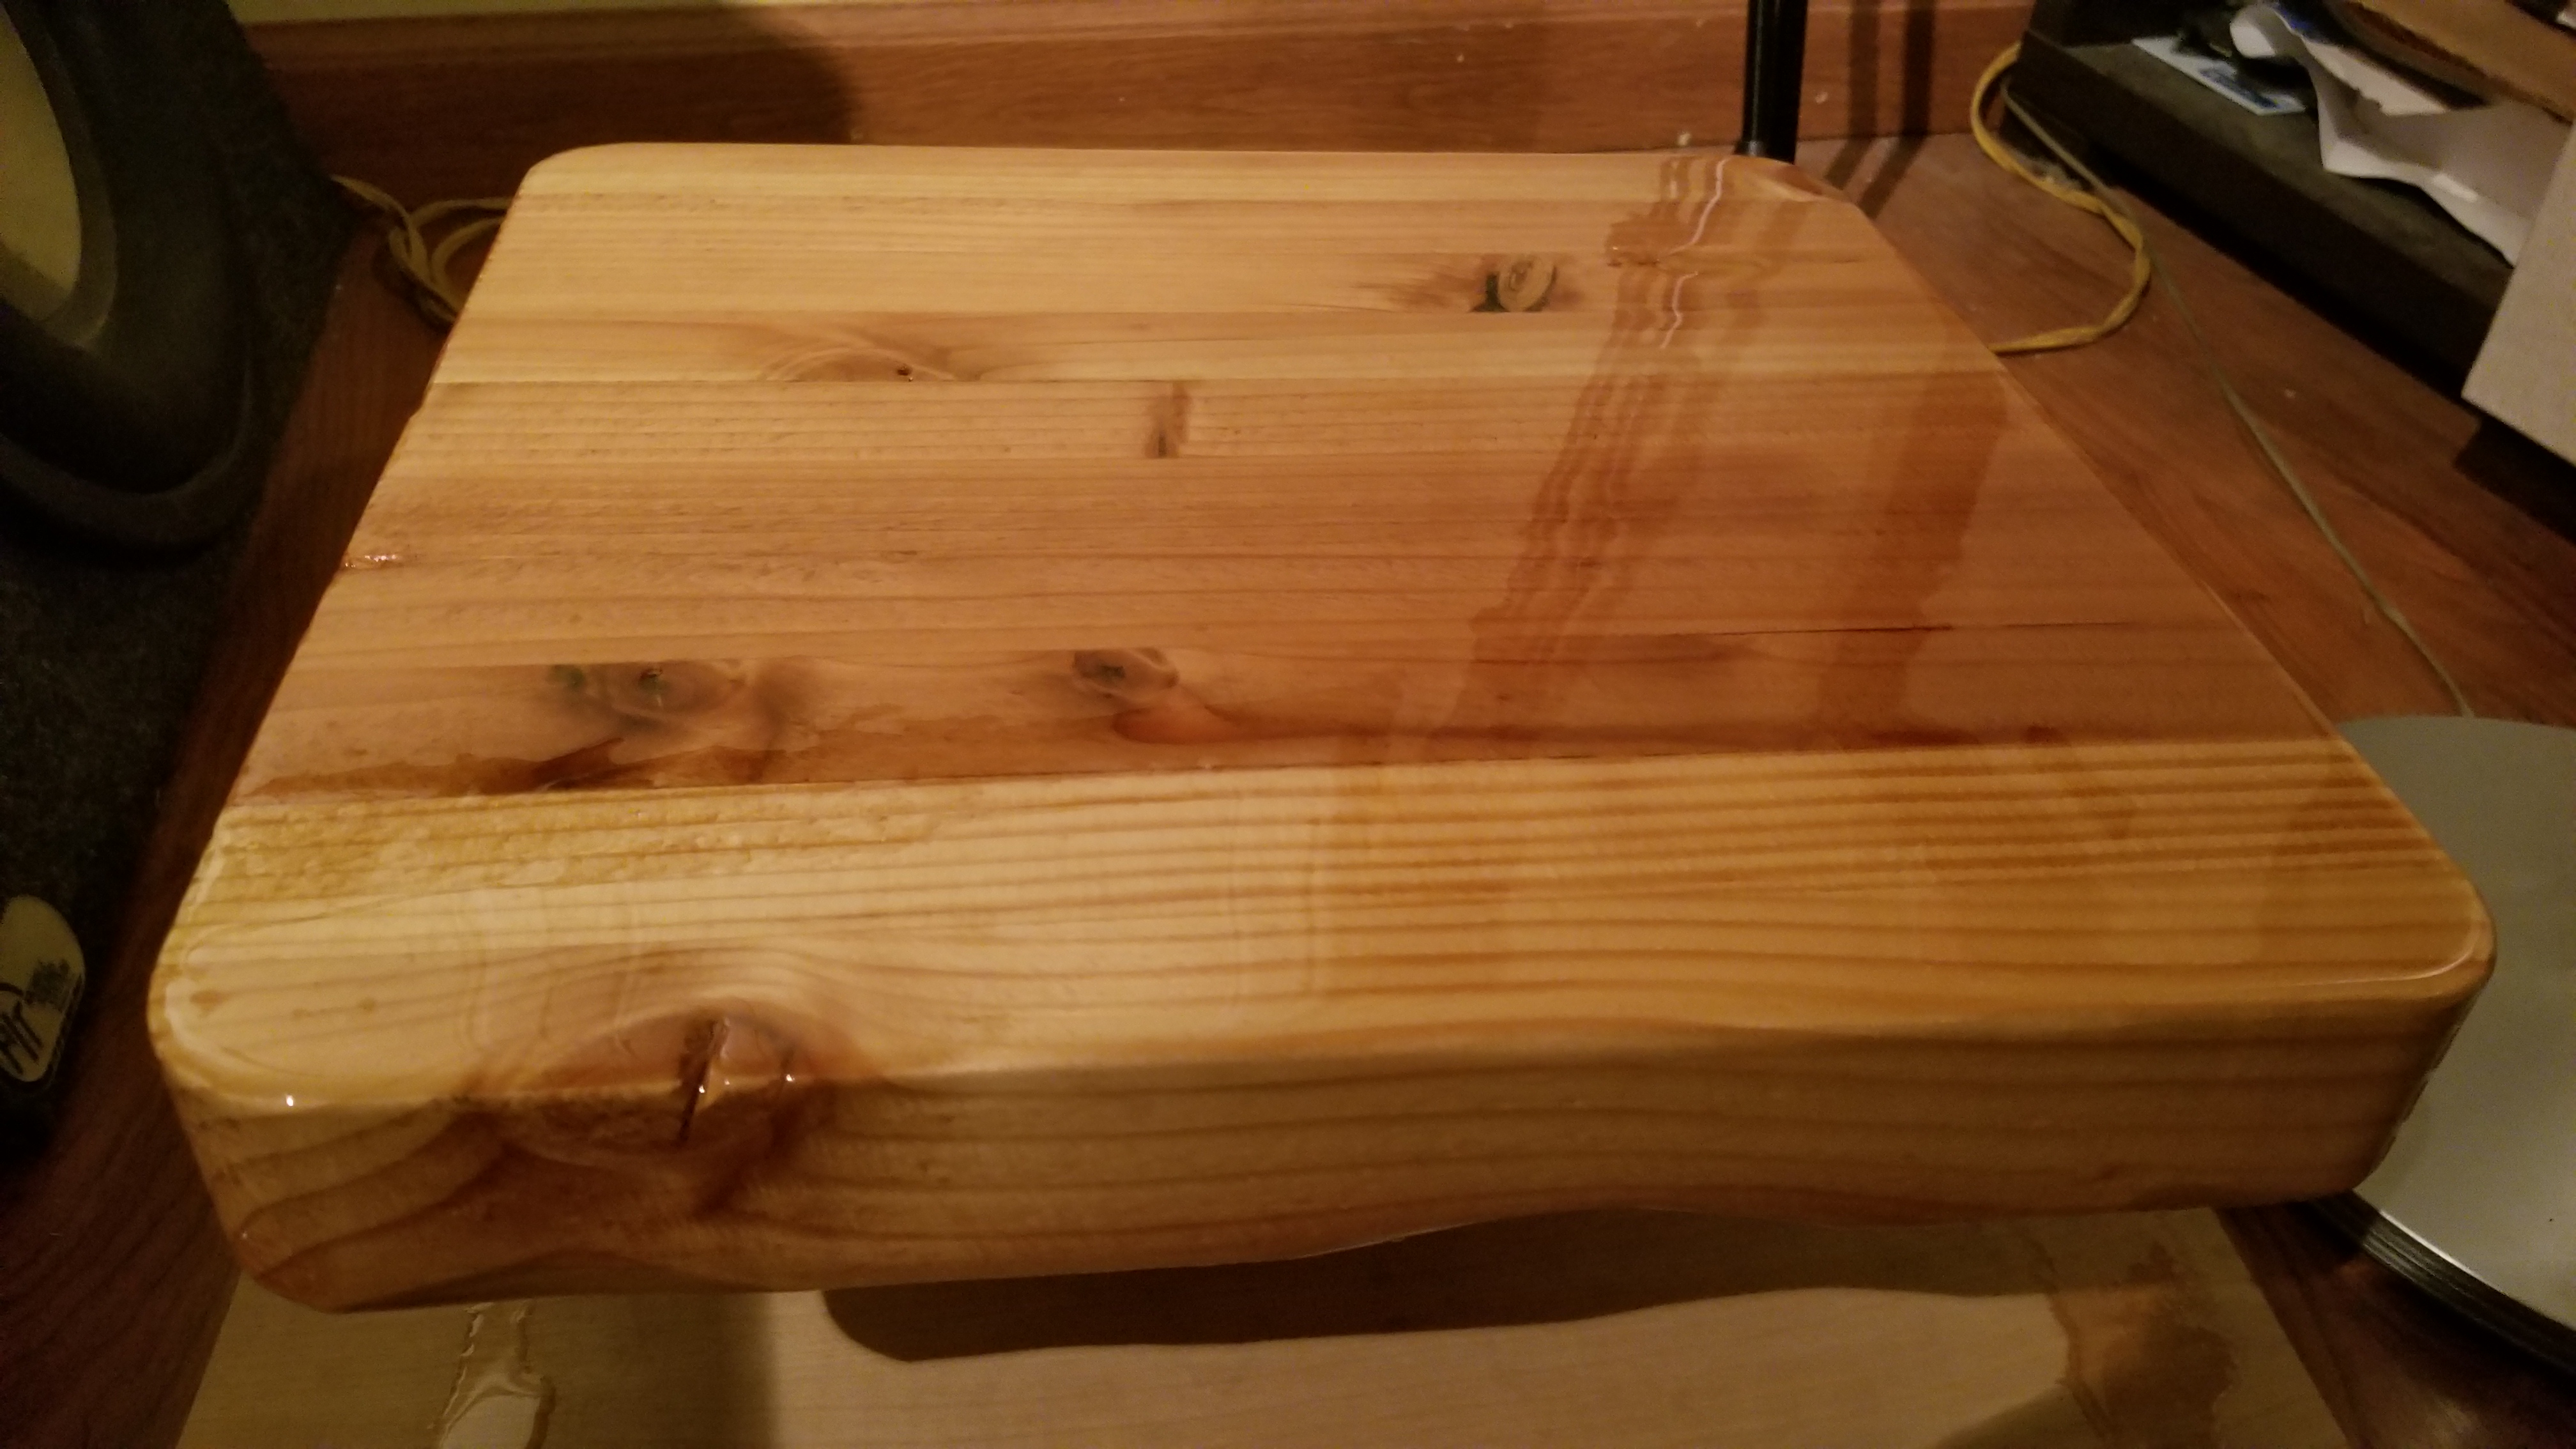
Stained and working on the Glaze BarTop seal - Grind down any extruding metal. The bolts that hold the windows into place stick out quite a bit when not covered by the plastic interior plastic body that I removed during the stripping step. I used a metal grinder and cut these down.
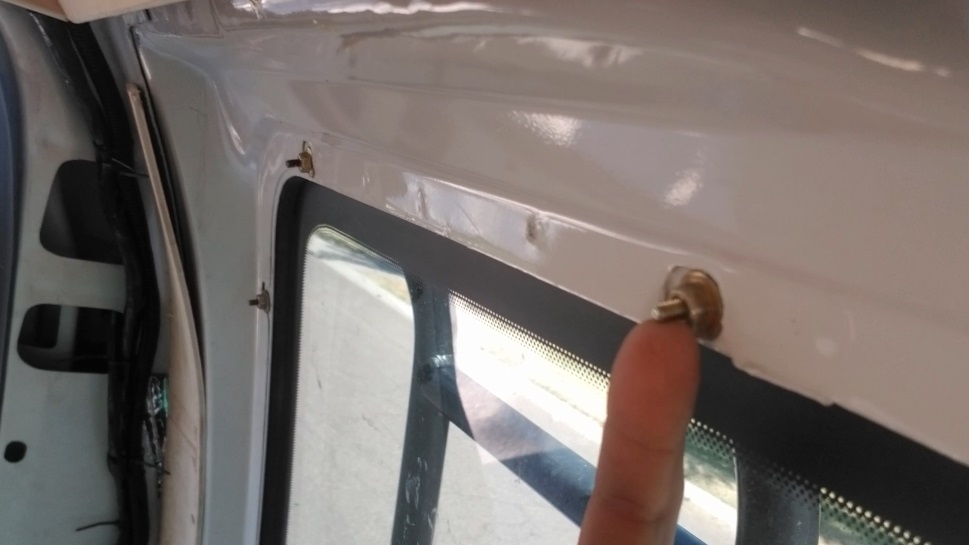
Window frame bolts sticking out. Before the grind 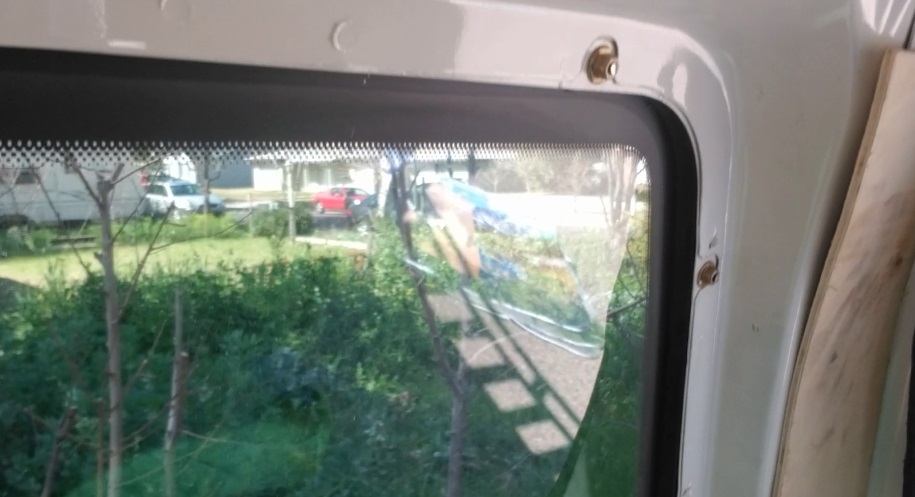
After the grind - Time to paint! Get your brushes, painters tape, and friends out to help. Tape down any area that you don’t intend on painting. Make sure you use wood putty to hide any blemishes or screw holes. Remove any covers, drawers, or things that you don’t want to have painted from the van. Sand everything down to prep for paint. Vacuum all surfaces and wipe them down. Paint it up (I went with two coats)!
- Prep for paint, sand it all!
Sand, clean, and prep it all! 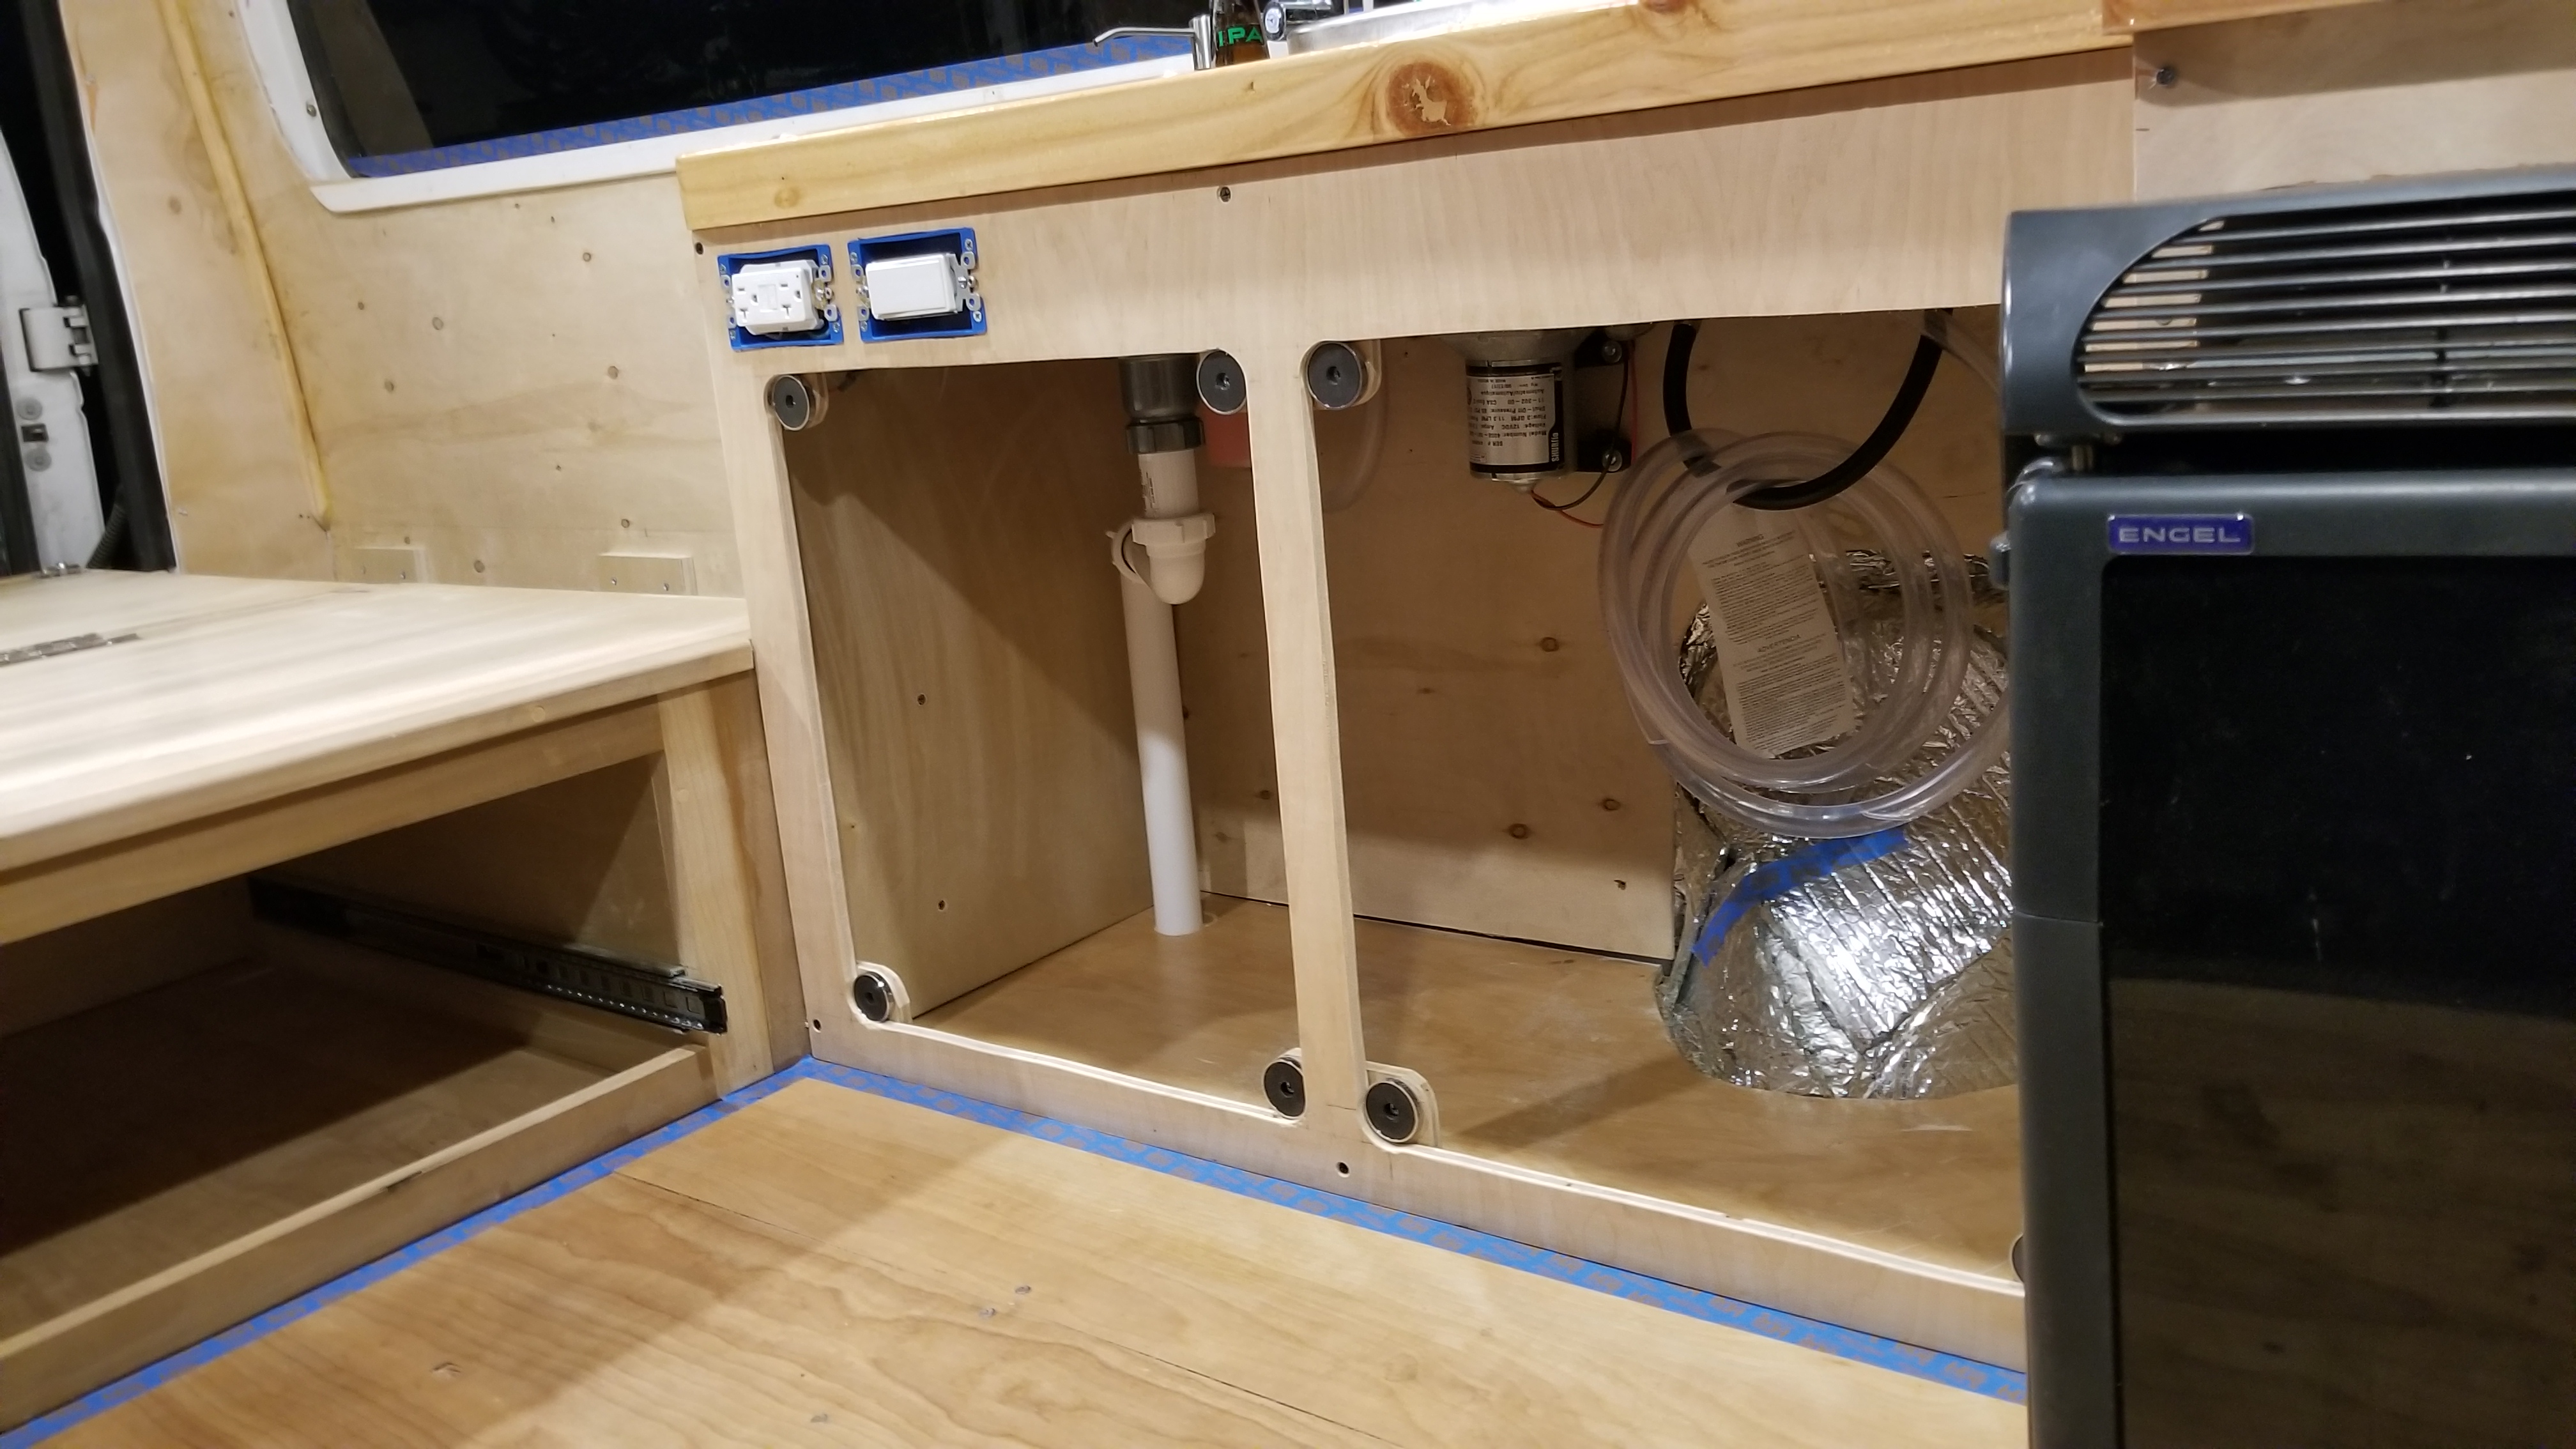
Tape it up! Getting it all ready for paint! 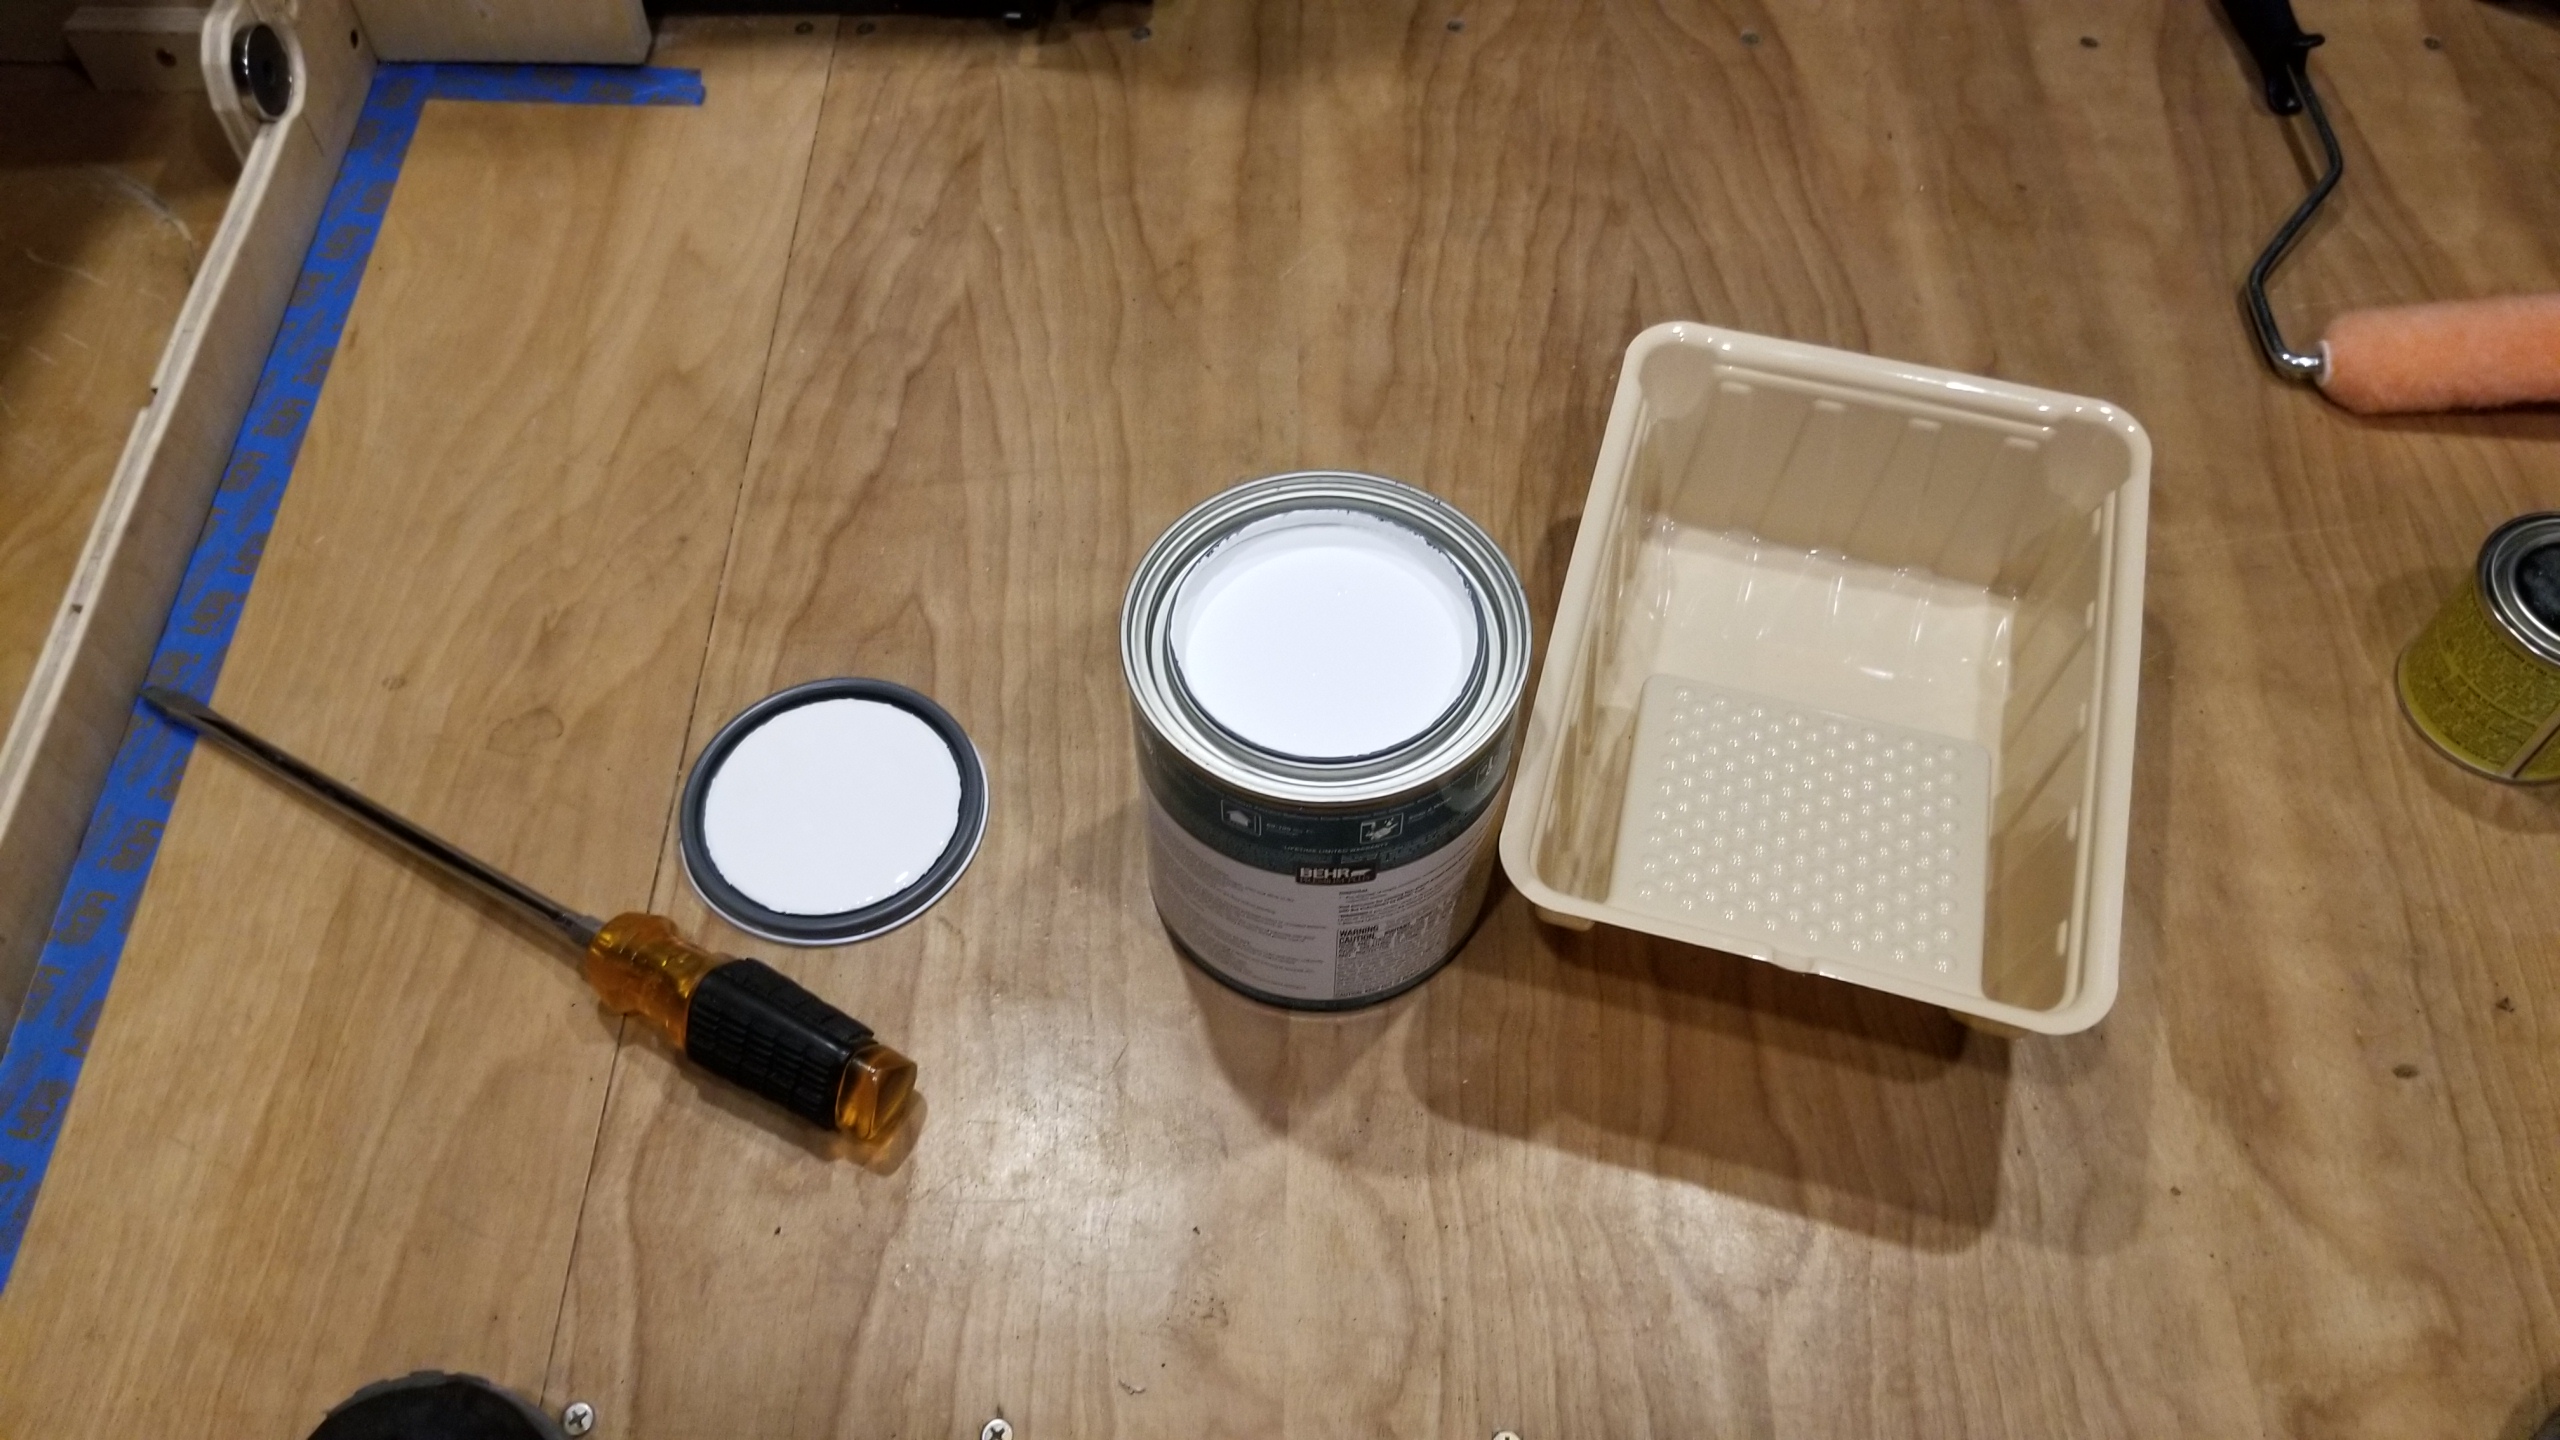
Pop the top and start praying pain everywhere! - Video 1: https://youtu.be/4ViYypDOA2k,
- Video 2: https://youtu.be/9JMoNYxX3PY
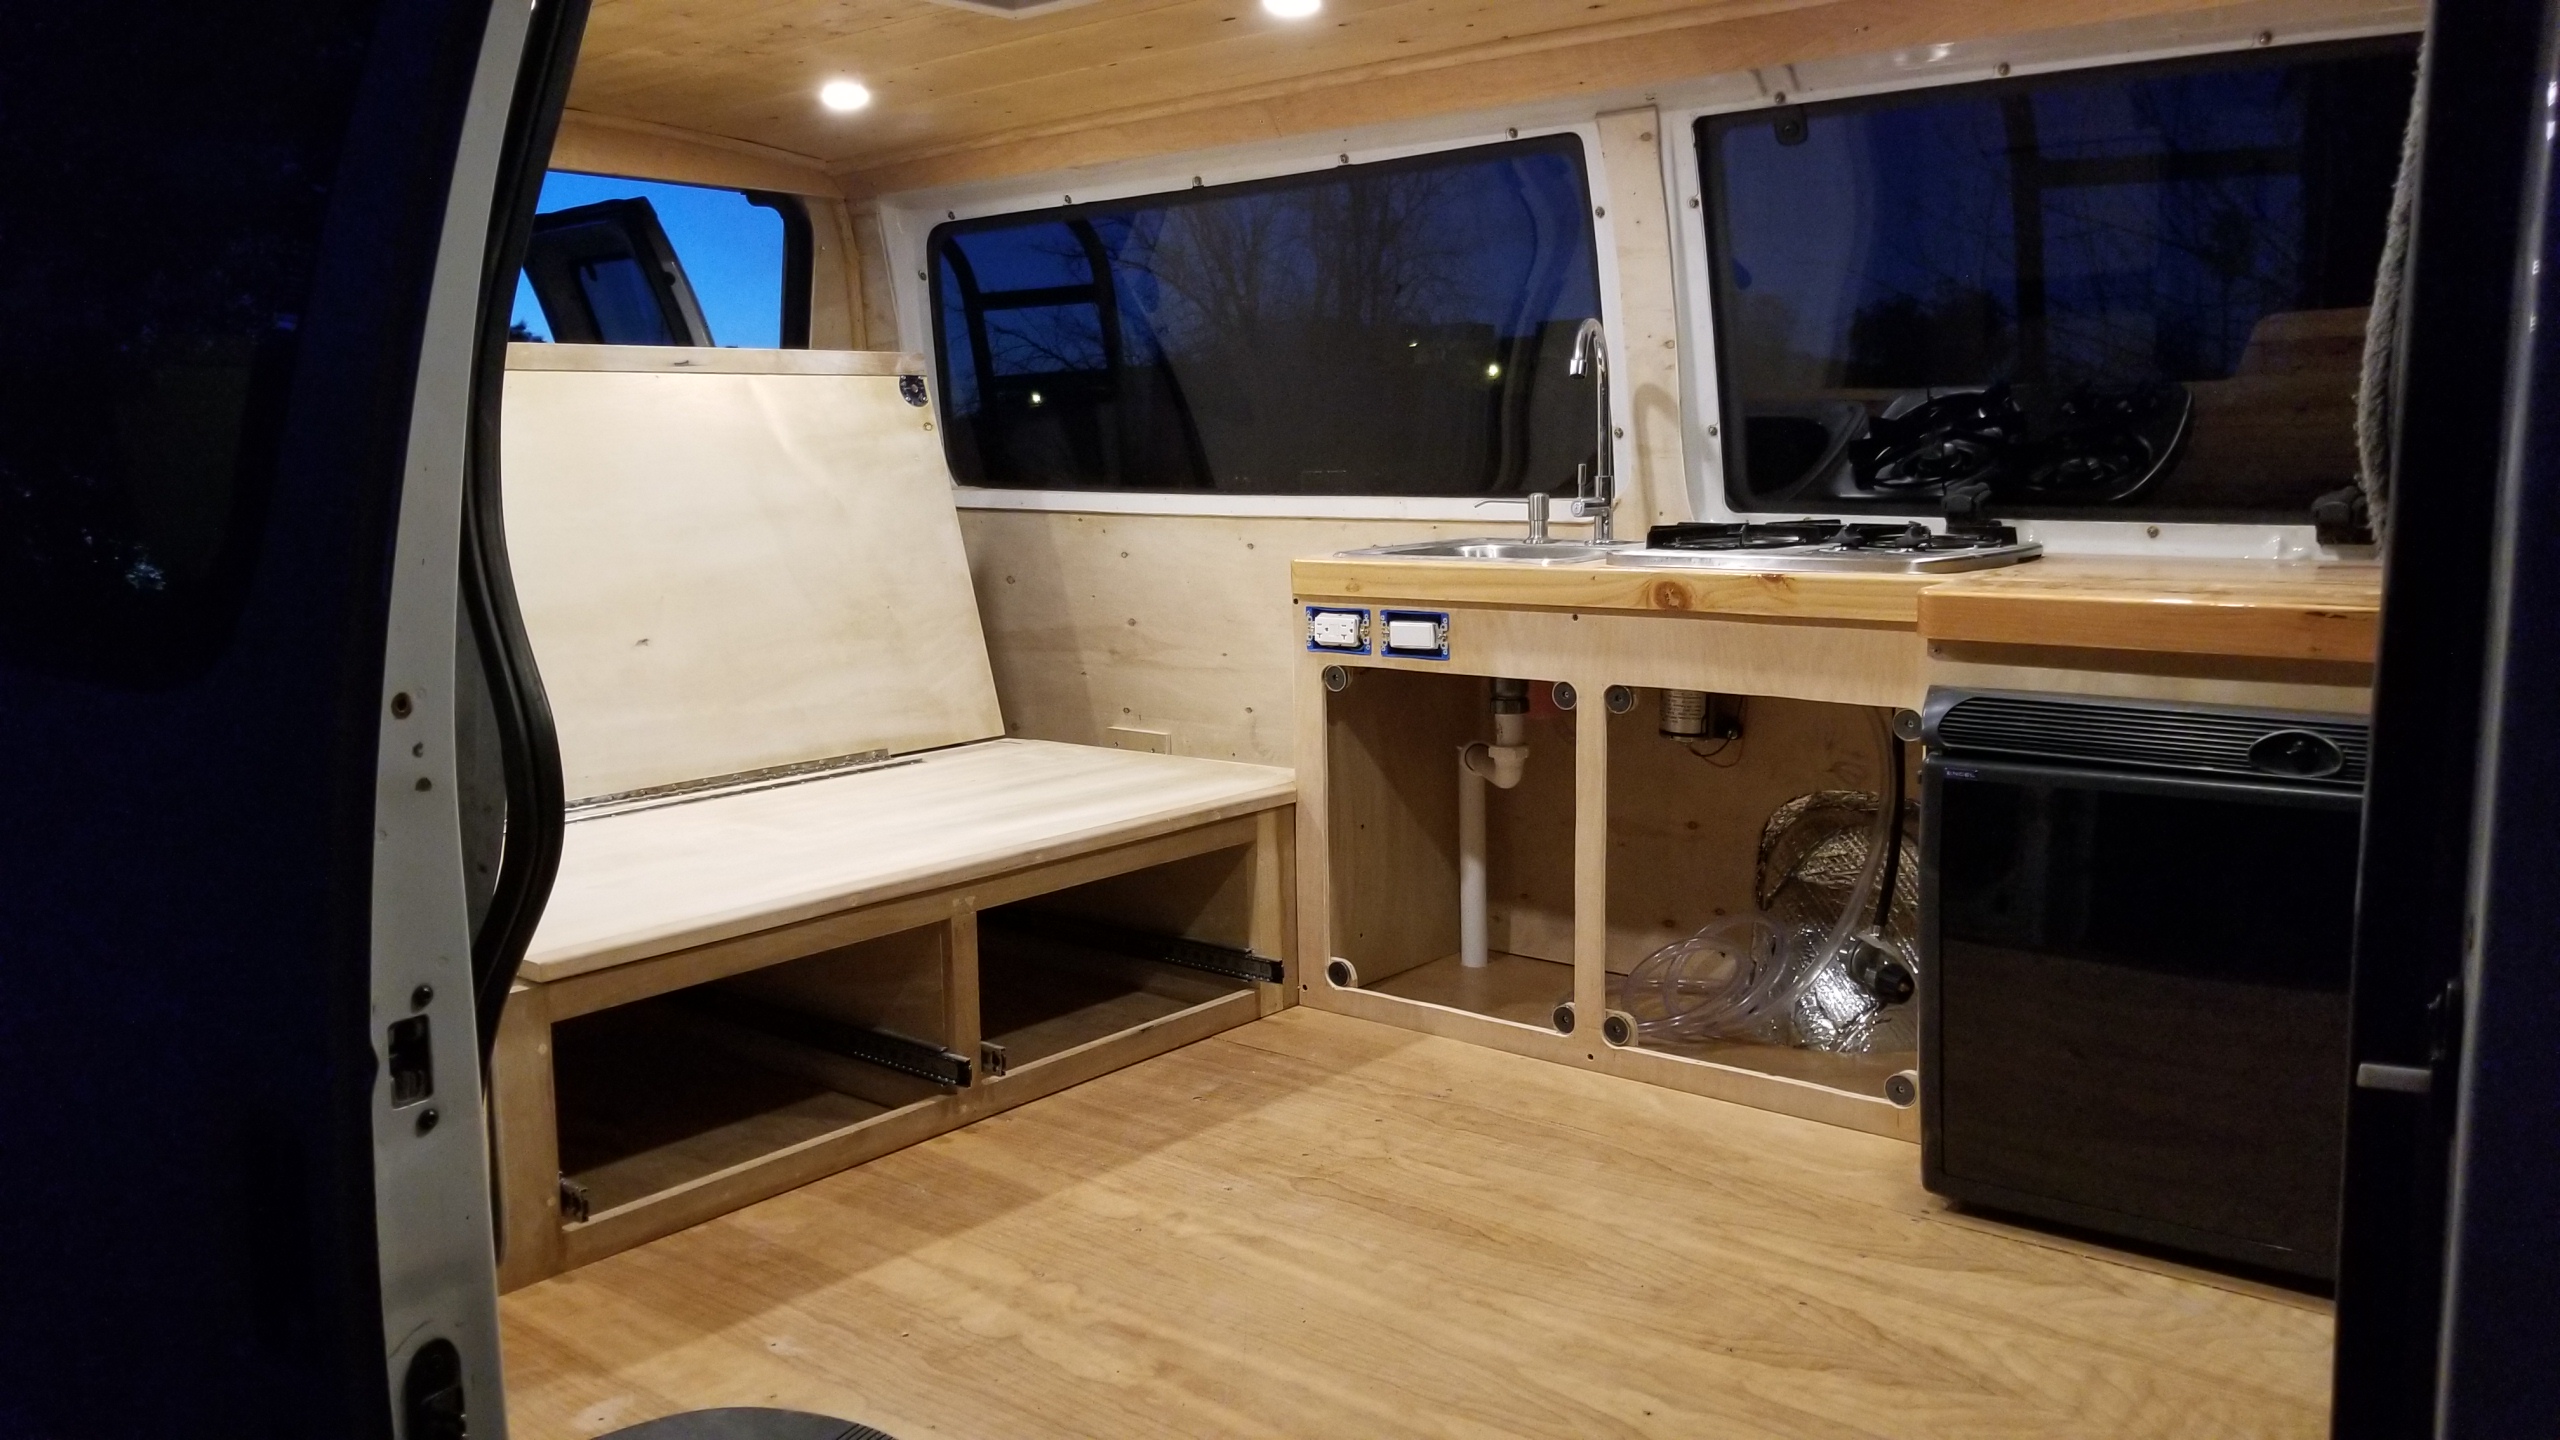
- Paint the bed frame, inside and out, excluding the drawers.
- Paint the cabinet, inside and out, excluding the countertop and cabinet covers.
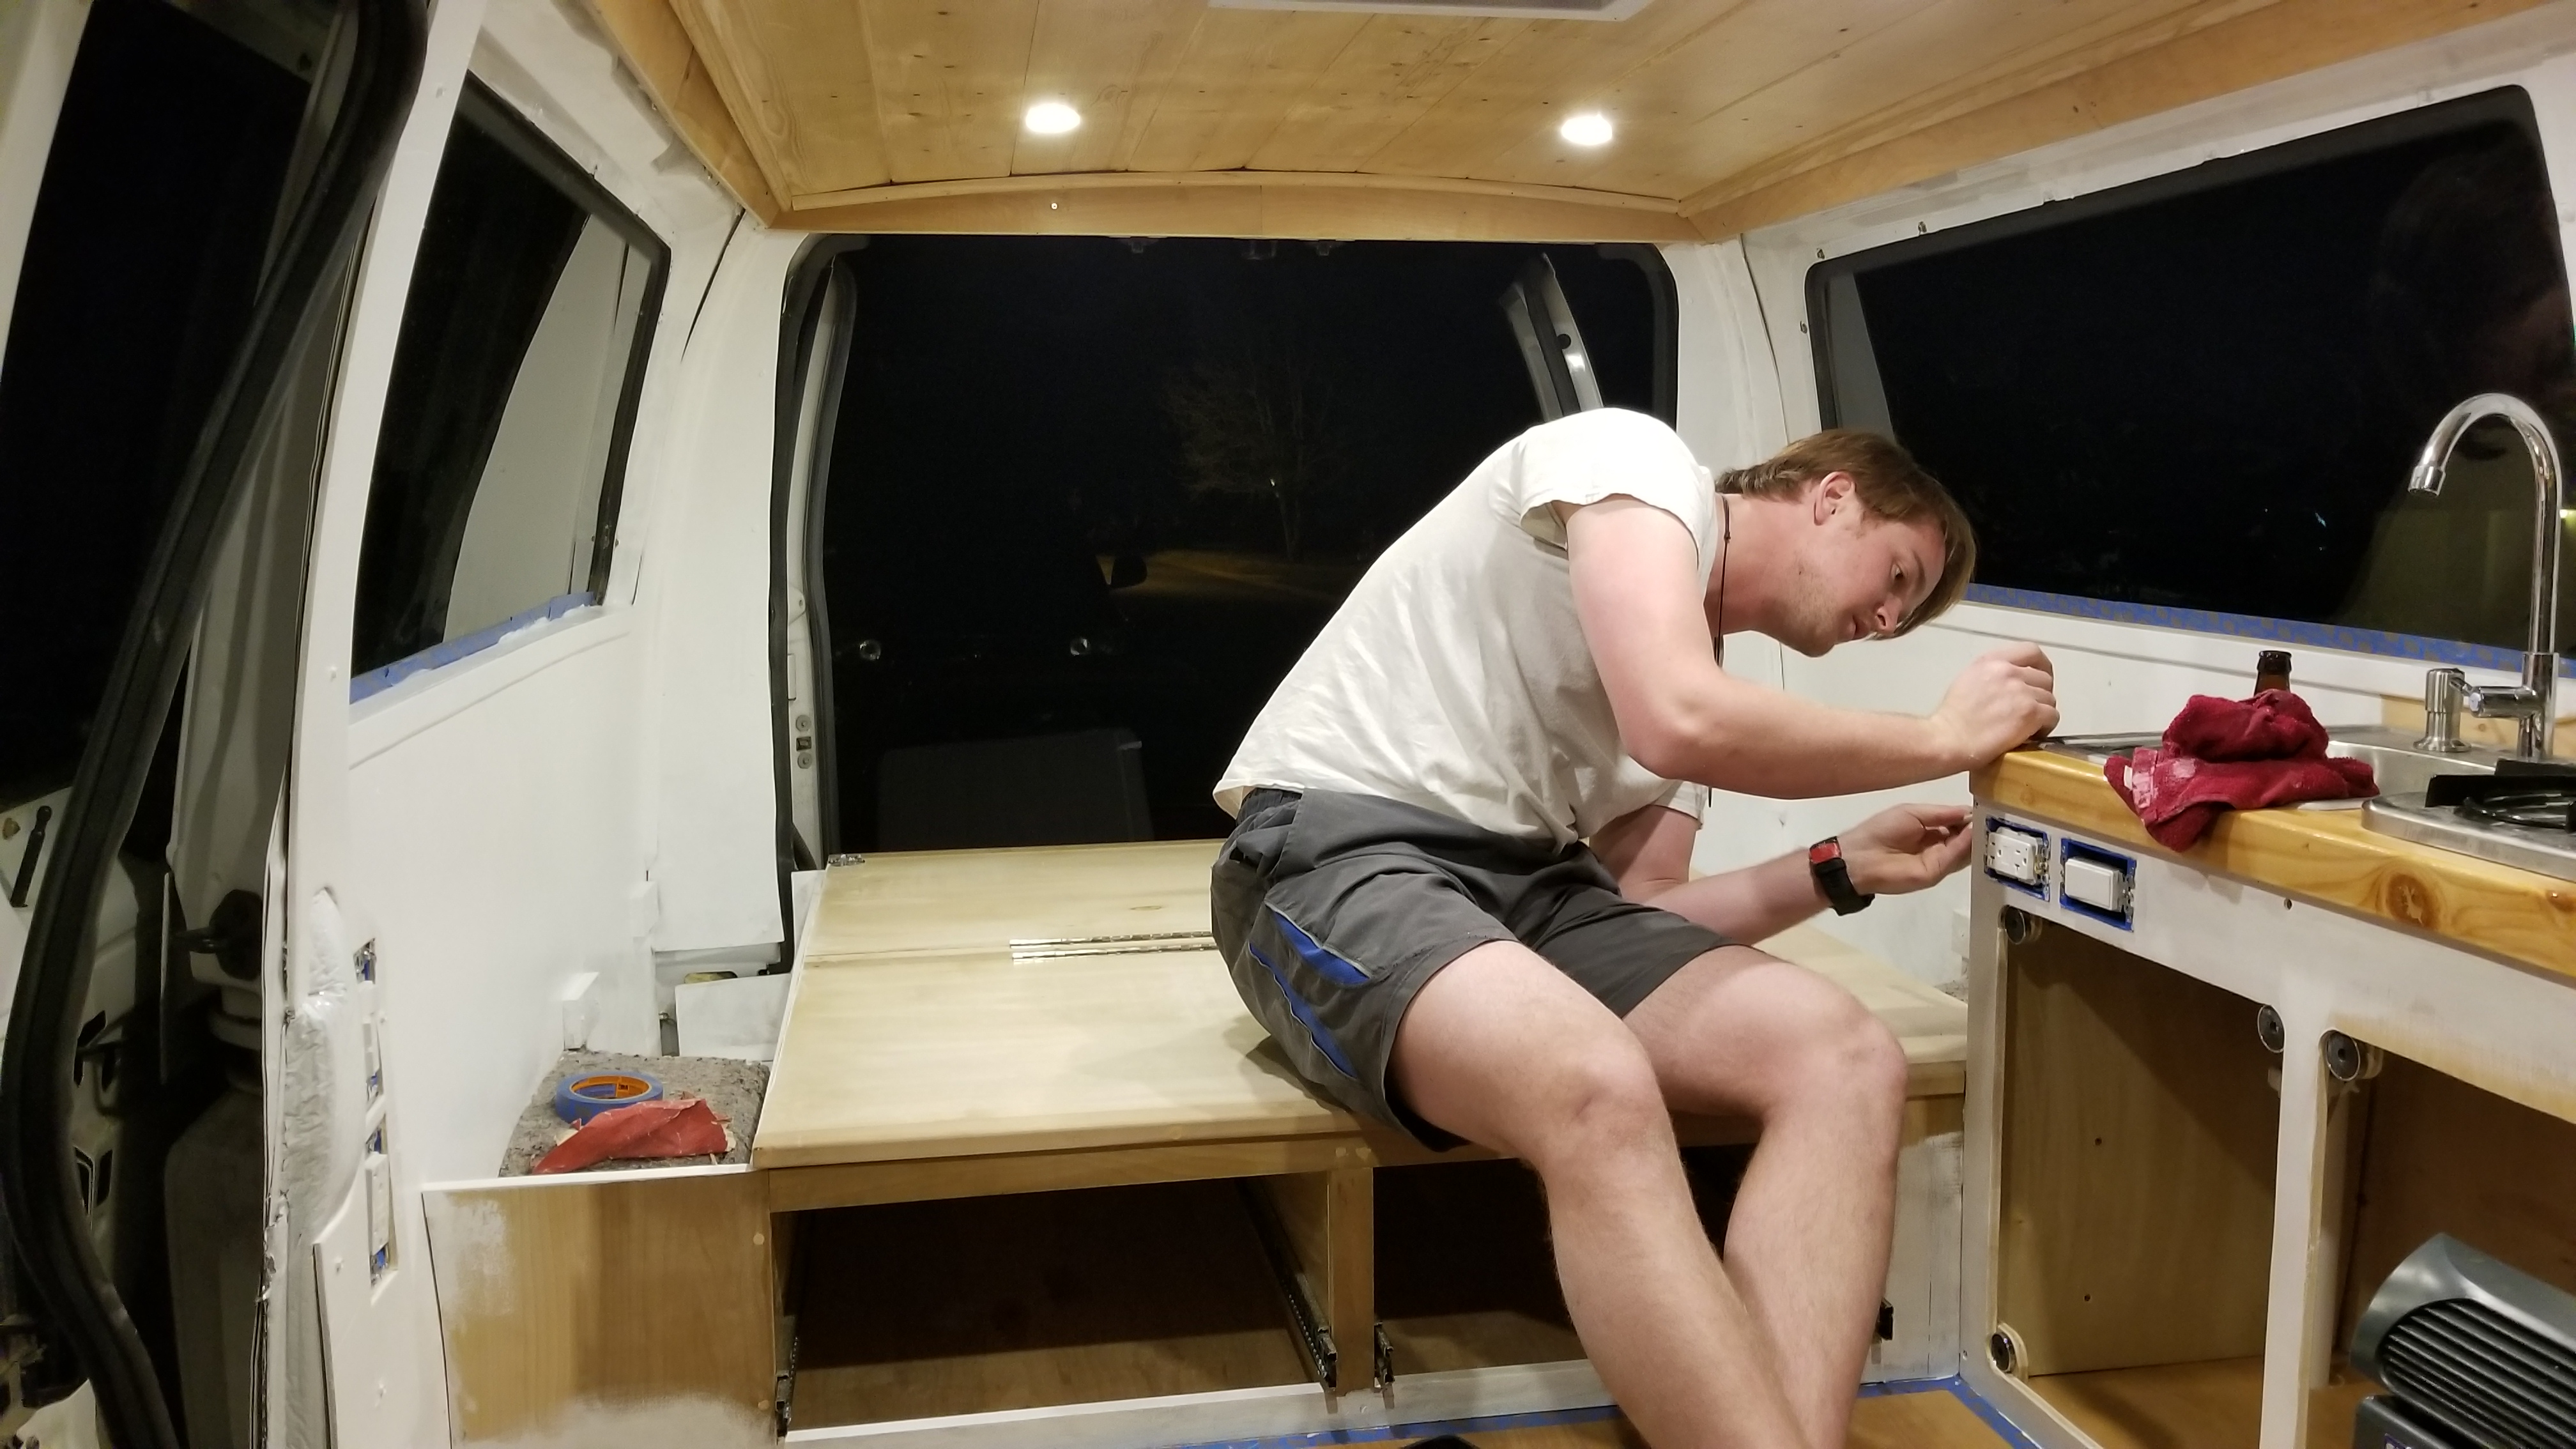
My buddie Nick Norwood, working hard. Hell soon be making his own van! - Paint the walls top to bottom.

Put the elbow work in 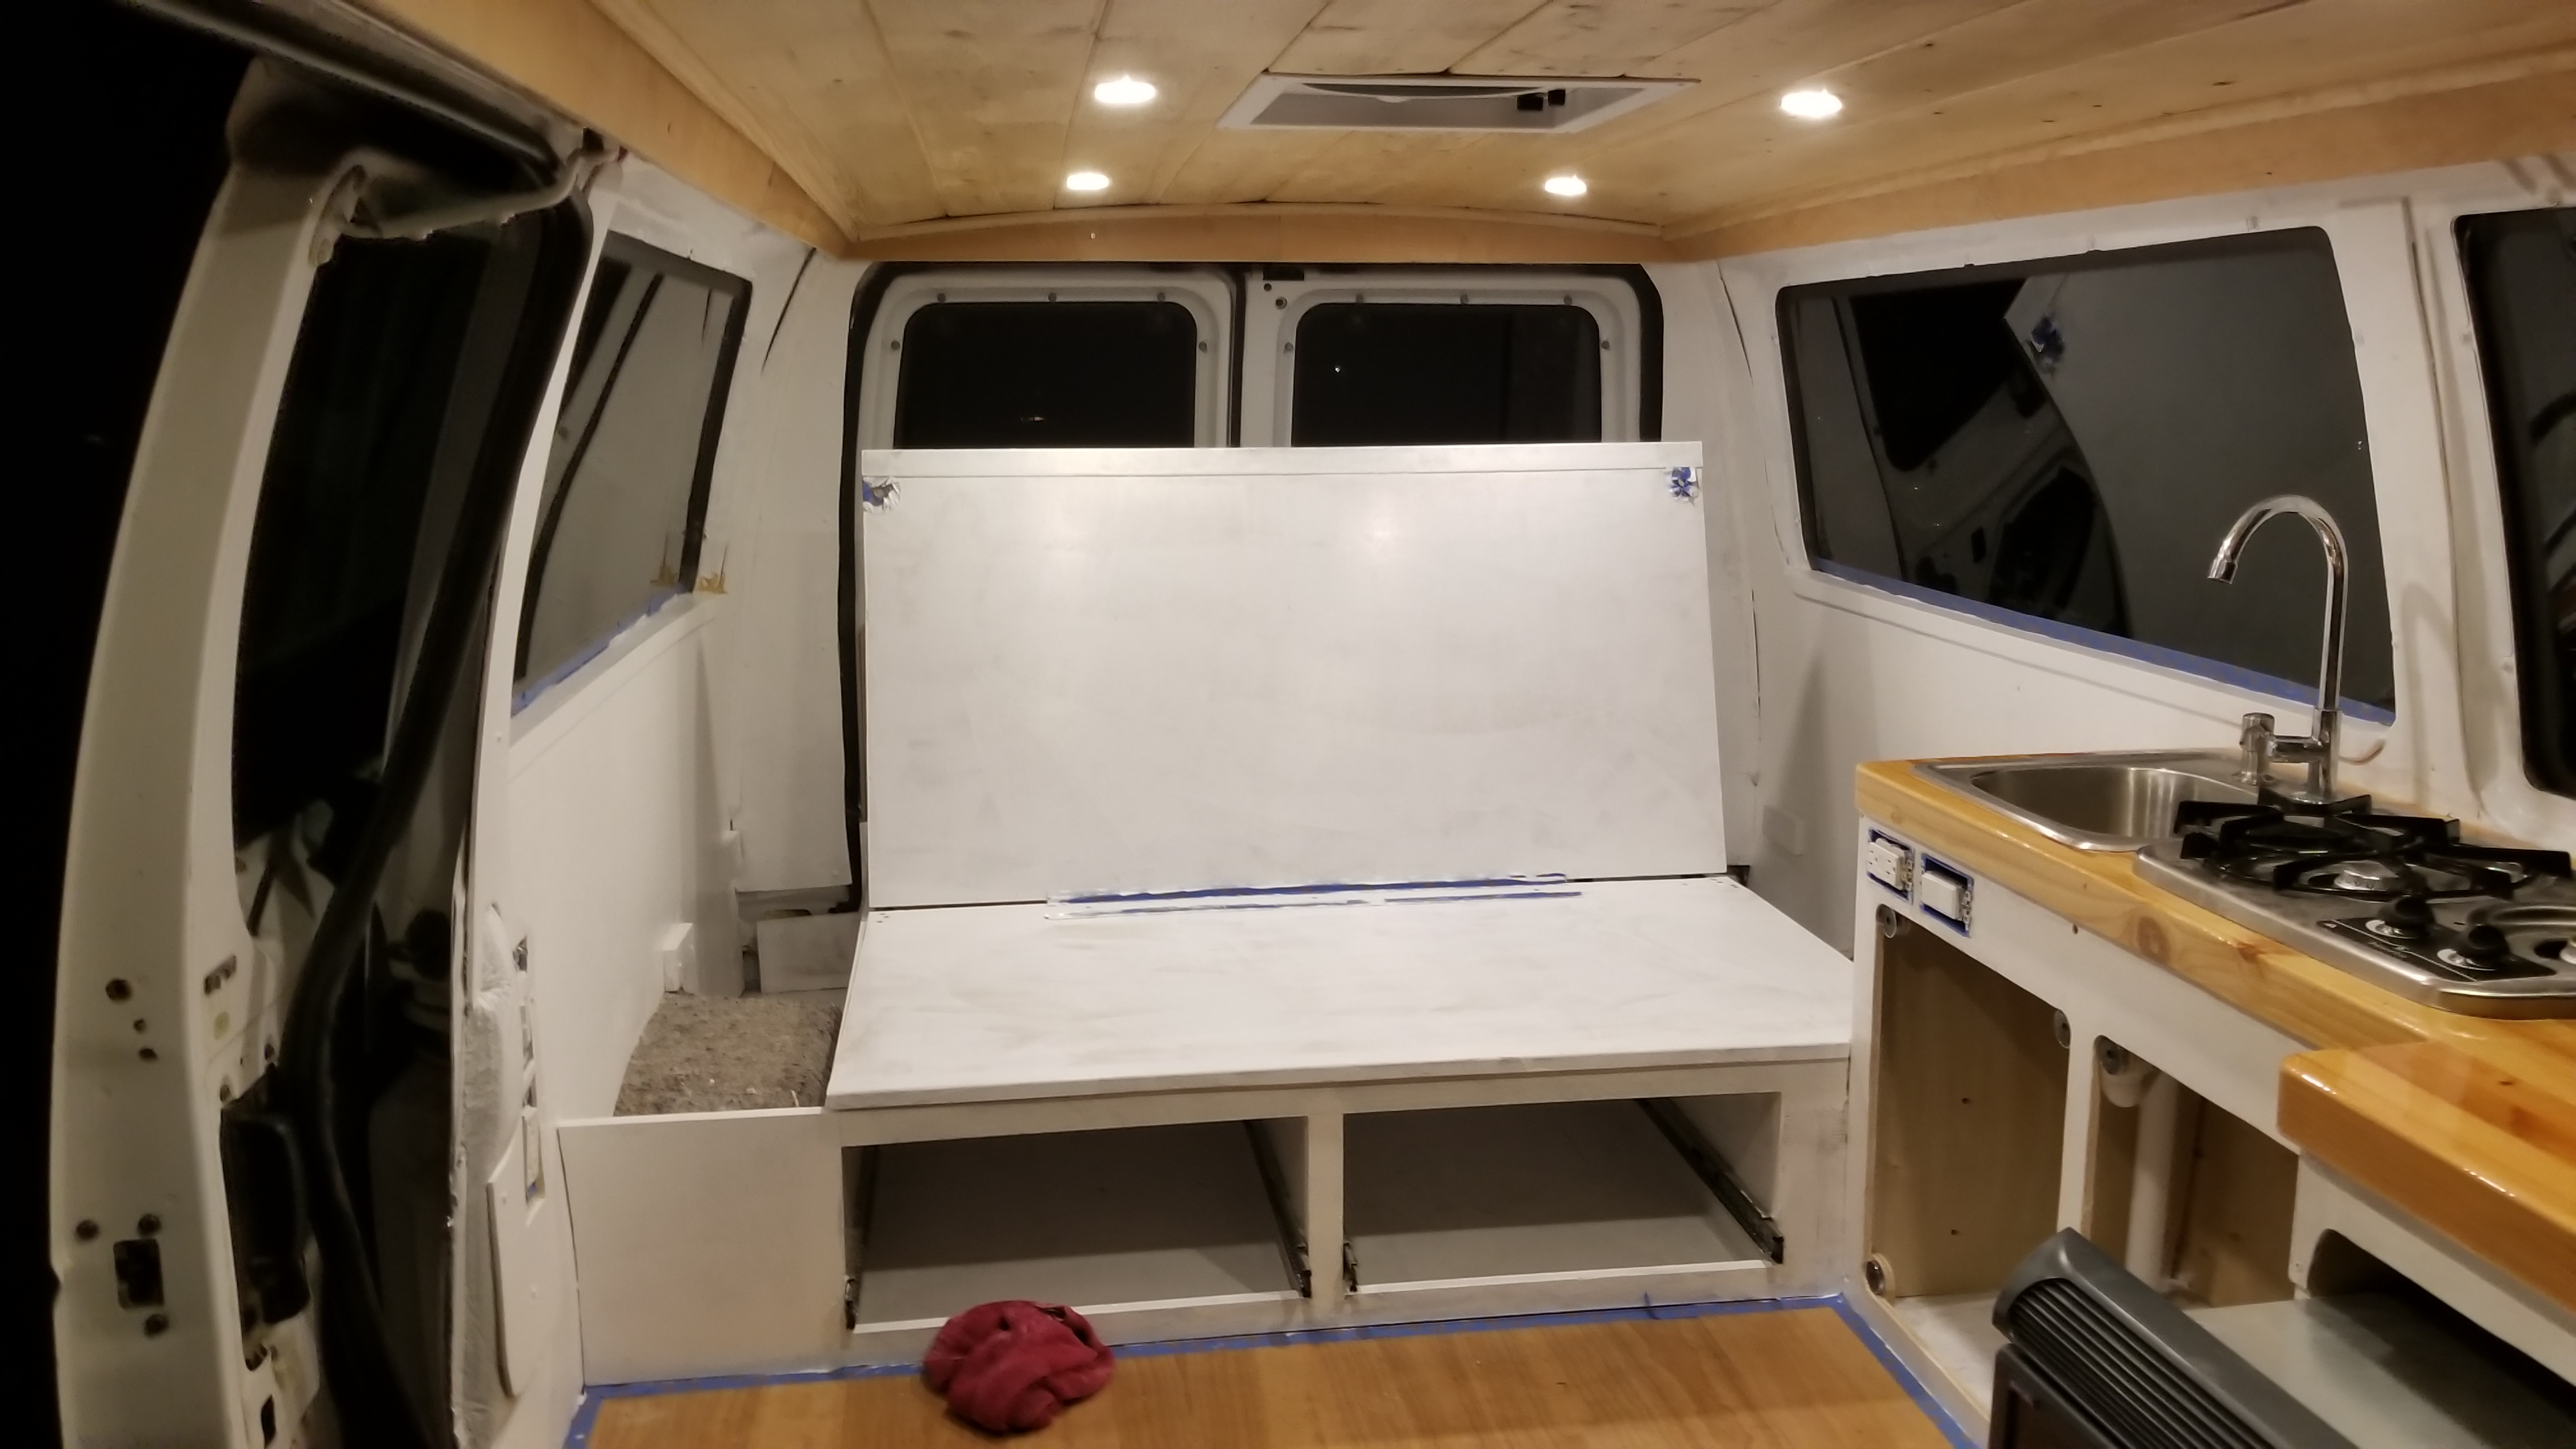
First coat, a little blotchy, but coming 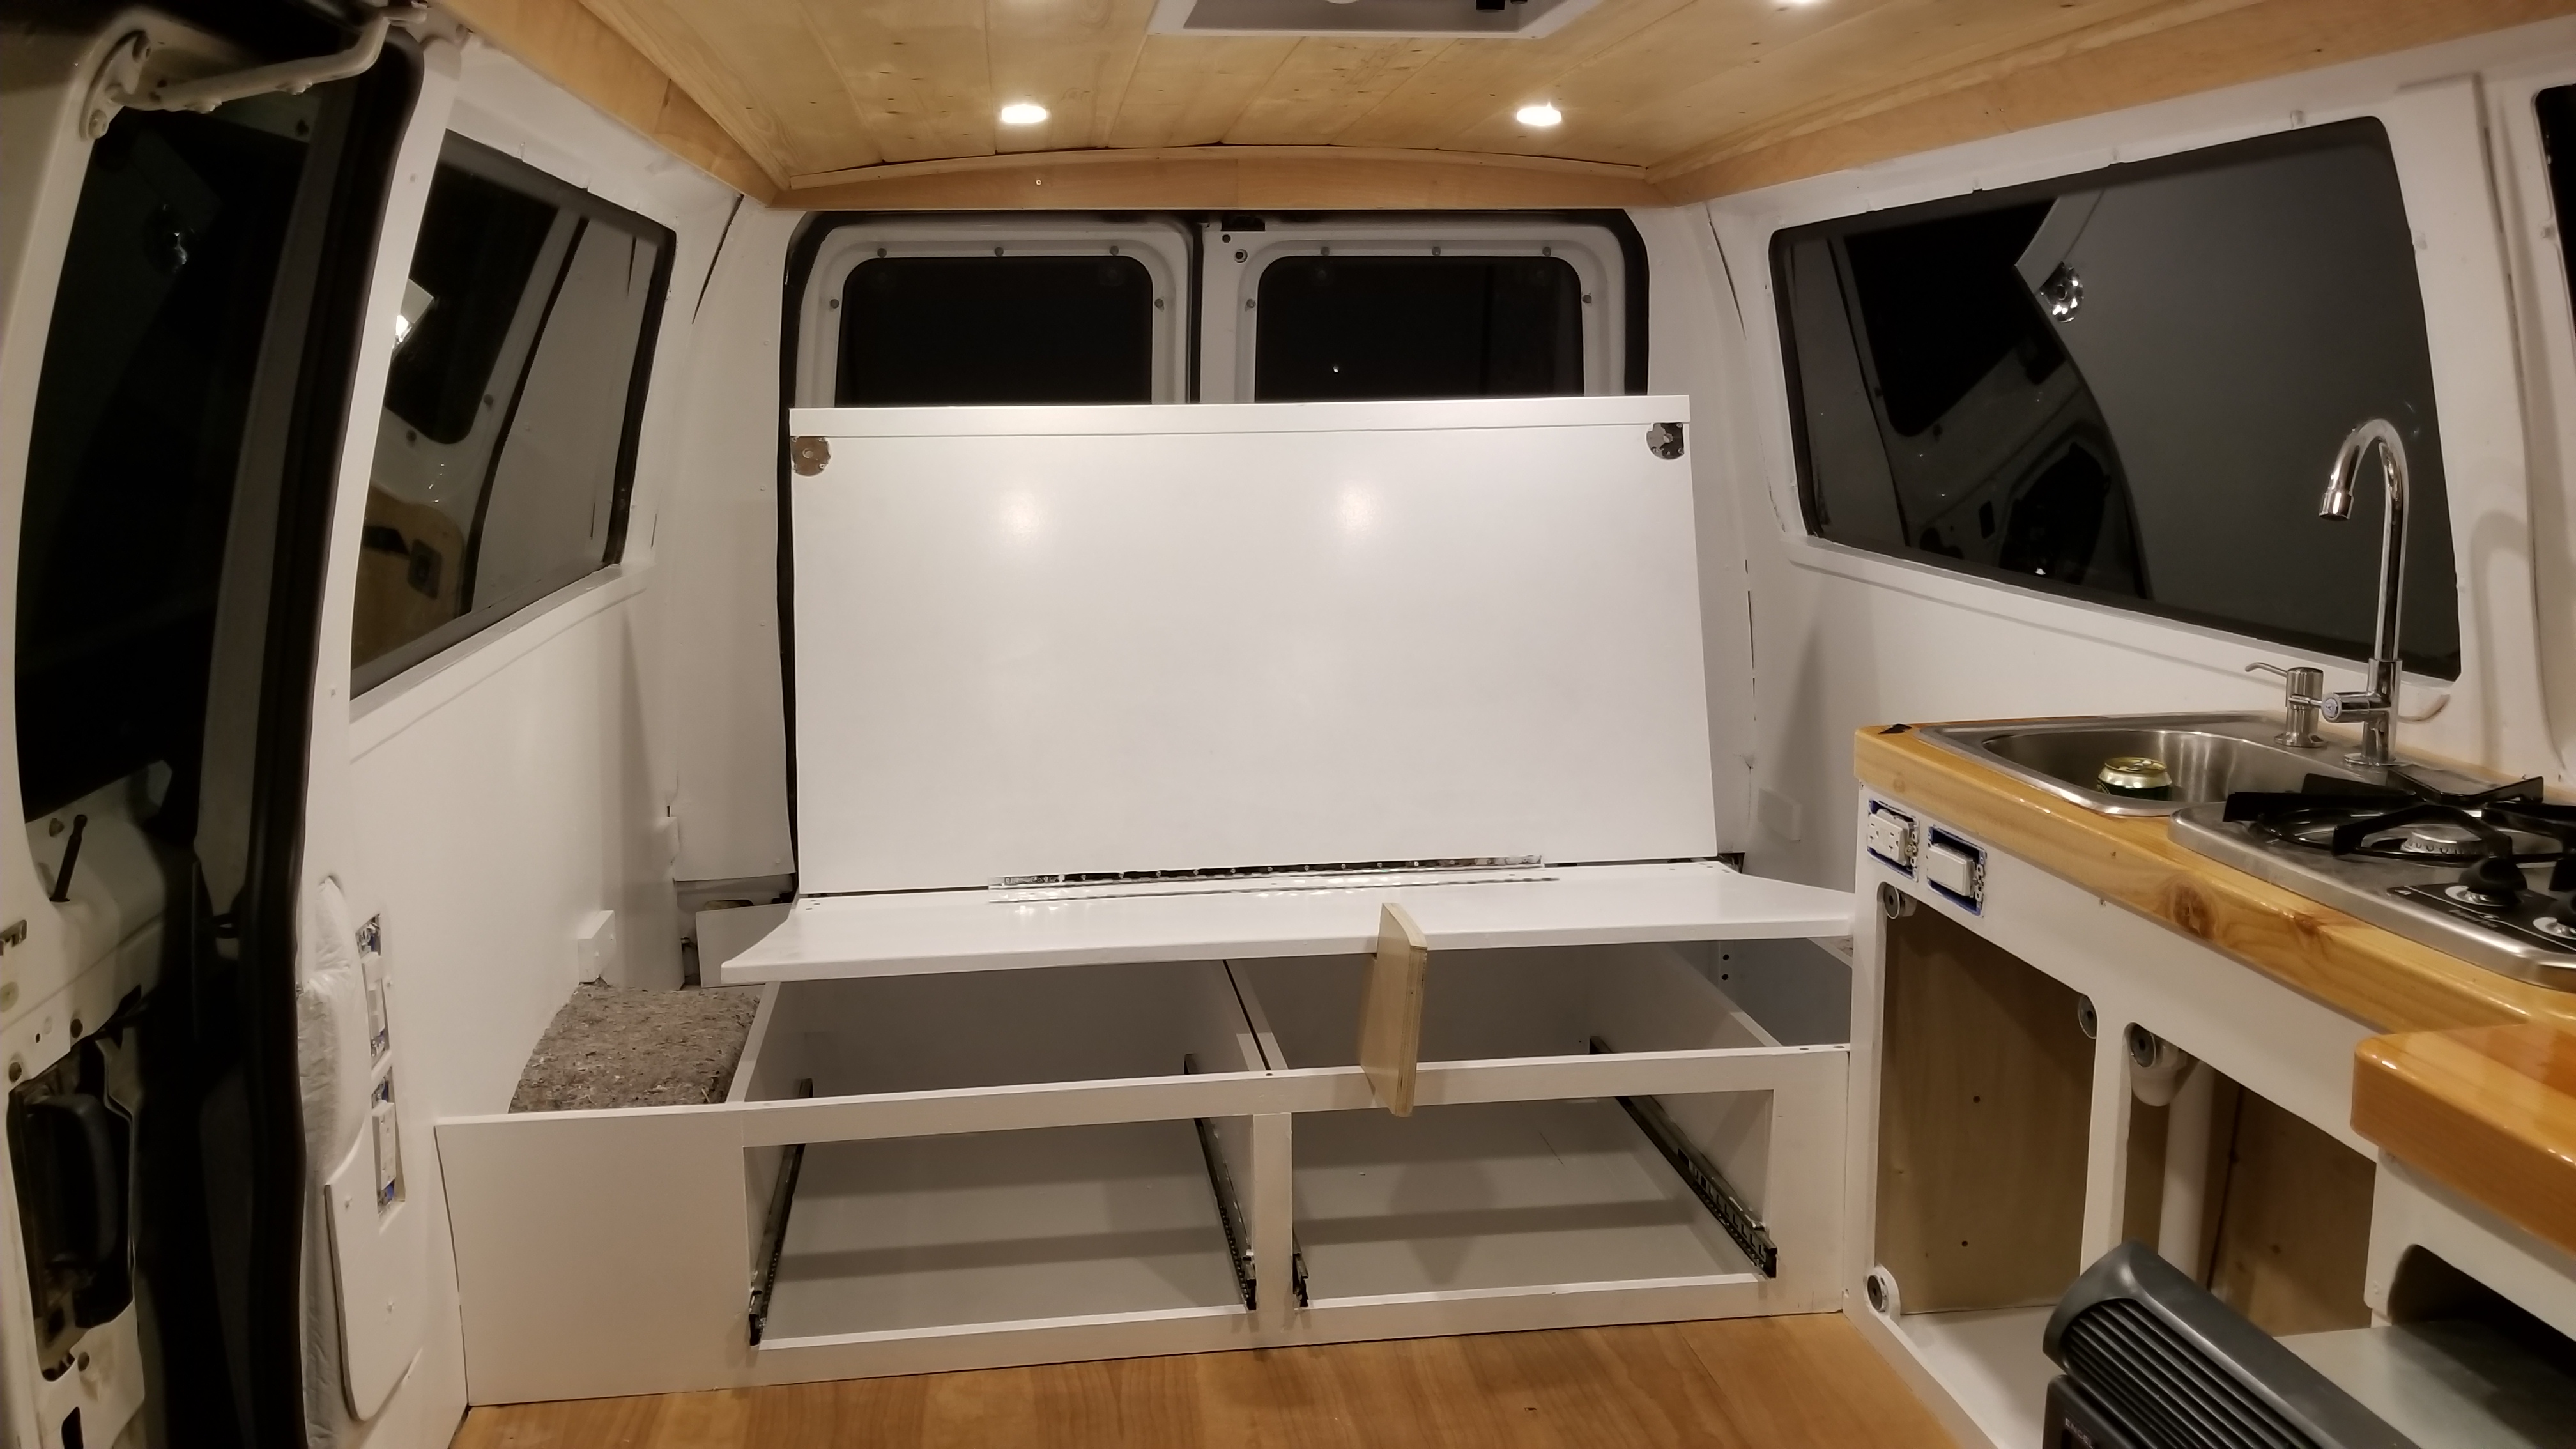
The second coat will really start to make it all come together! - Paint the stool, inside and out, excluding the top.
- Video coat 1 in progress: https://youtu.be/DTn_9AAMh8E
- Video coat 1 done! https://youtu.be/WJpZApE3tt0
- Video coat 2done! https://youtu.be/pzzlysPAcyM
- Prep for paint, sand it all!
- Let it dry then replace anything you removed to prep for paint.
- Grab the plastic cover for the column just behind the driver’s seat and cut it to fit your new counter. This will be used to cover all the wires that you ran down the column and save your sanity from trying to make a custom cover. Install the modified plastic cover.
- Make the window covers. I used Reflectix to accomplish this, it keeps the heat out and does decently for insulating the windows. I had a friend (Thanks Lyndz!) print out some pictures I loved from treks I had done and I had my old roommate (Thanks Laura!) sew the cloth printed pictures onto the reflexive. I finished it all off with a layer of gorilla tape. I taped on some strong magnets and manually sewed them into place to make sure they didn’t come free.
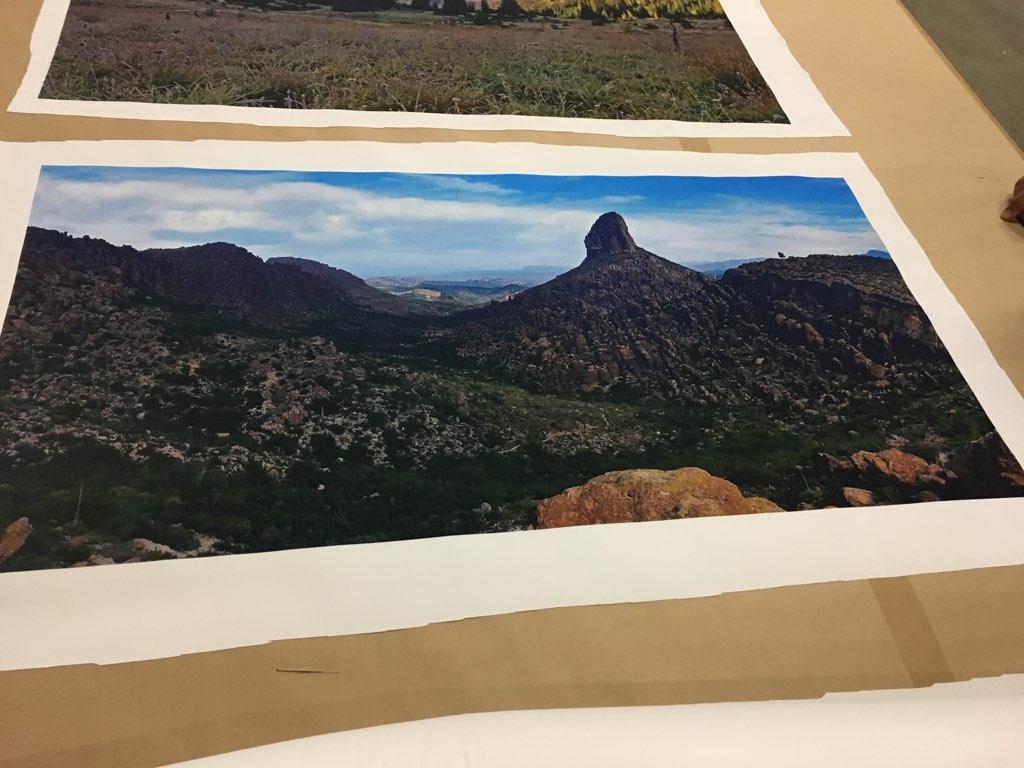
RootWares crushing the prints! Sublimating like a boss. https://www.rootwares.com/ 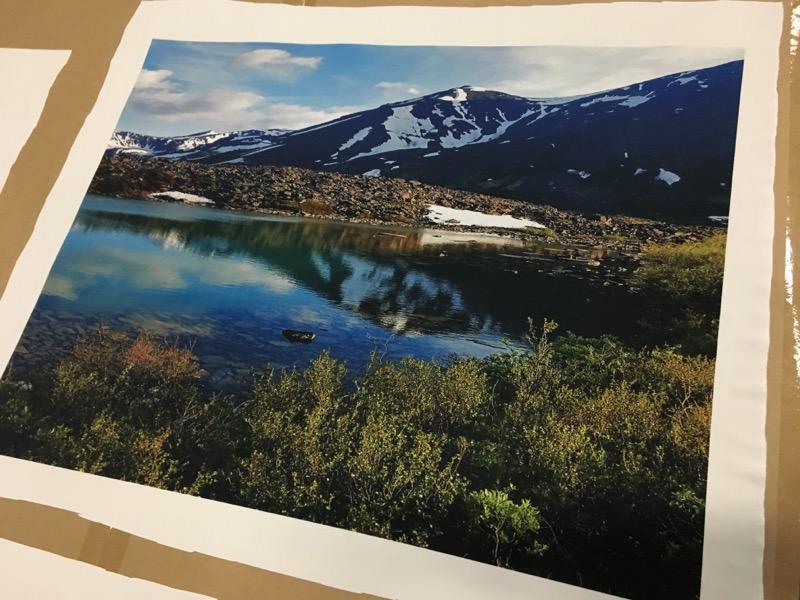
Prints on prints. https://www.rootwares.com/ 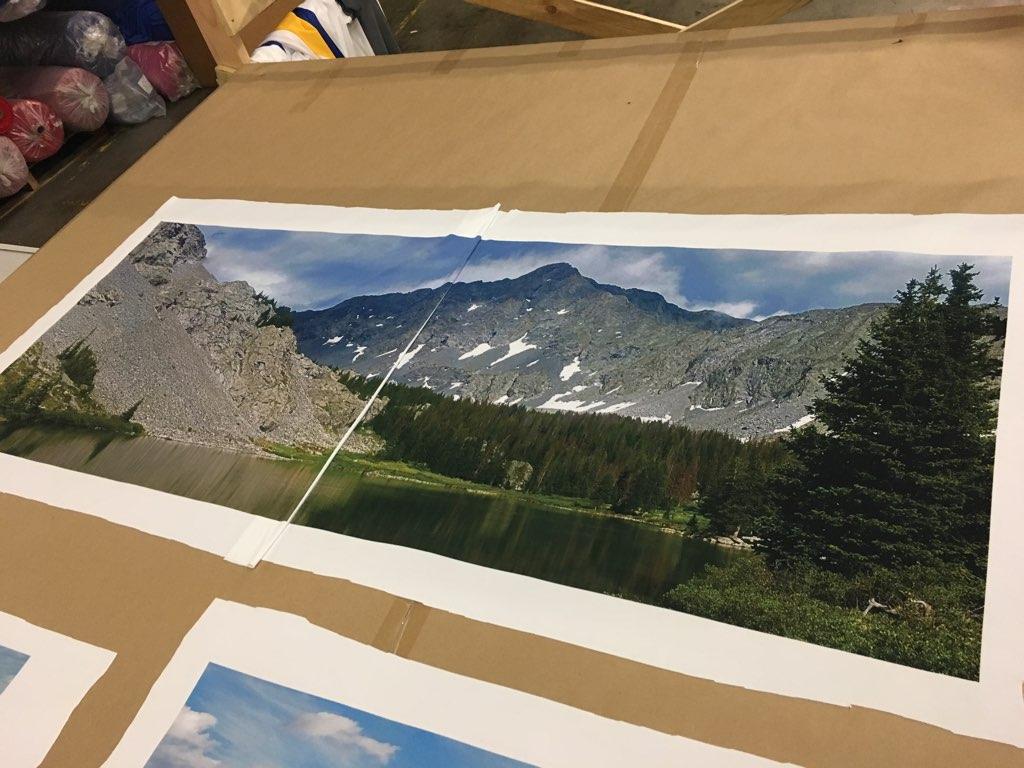
piecing them together getting ready for sewing it up! 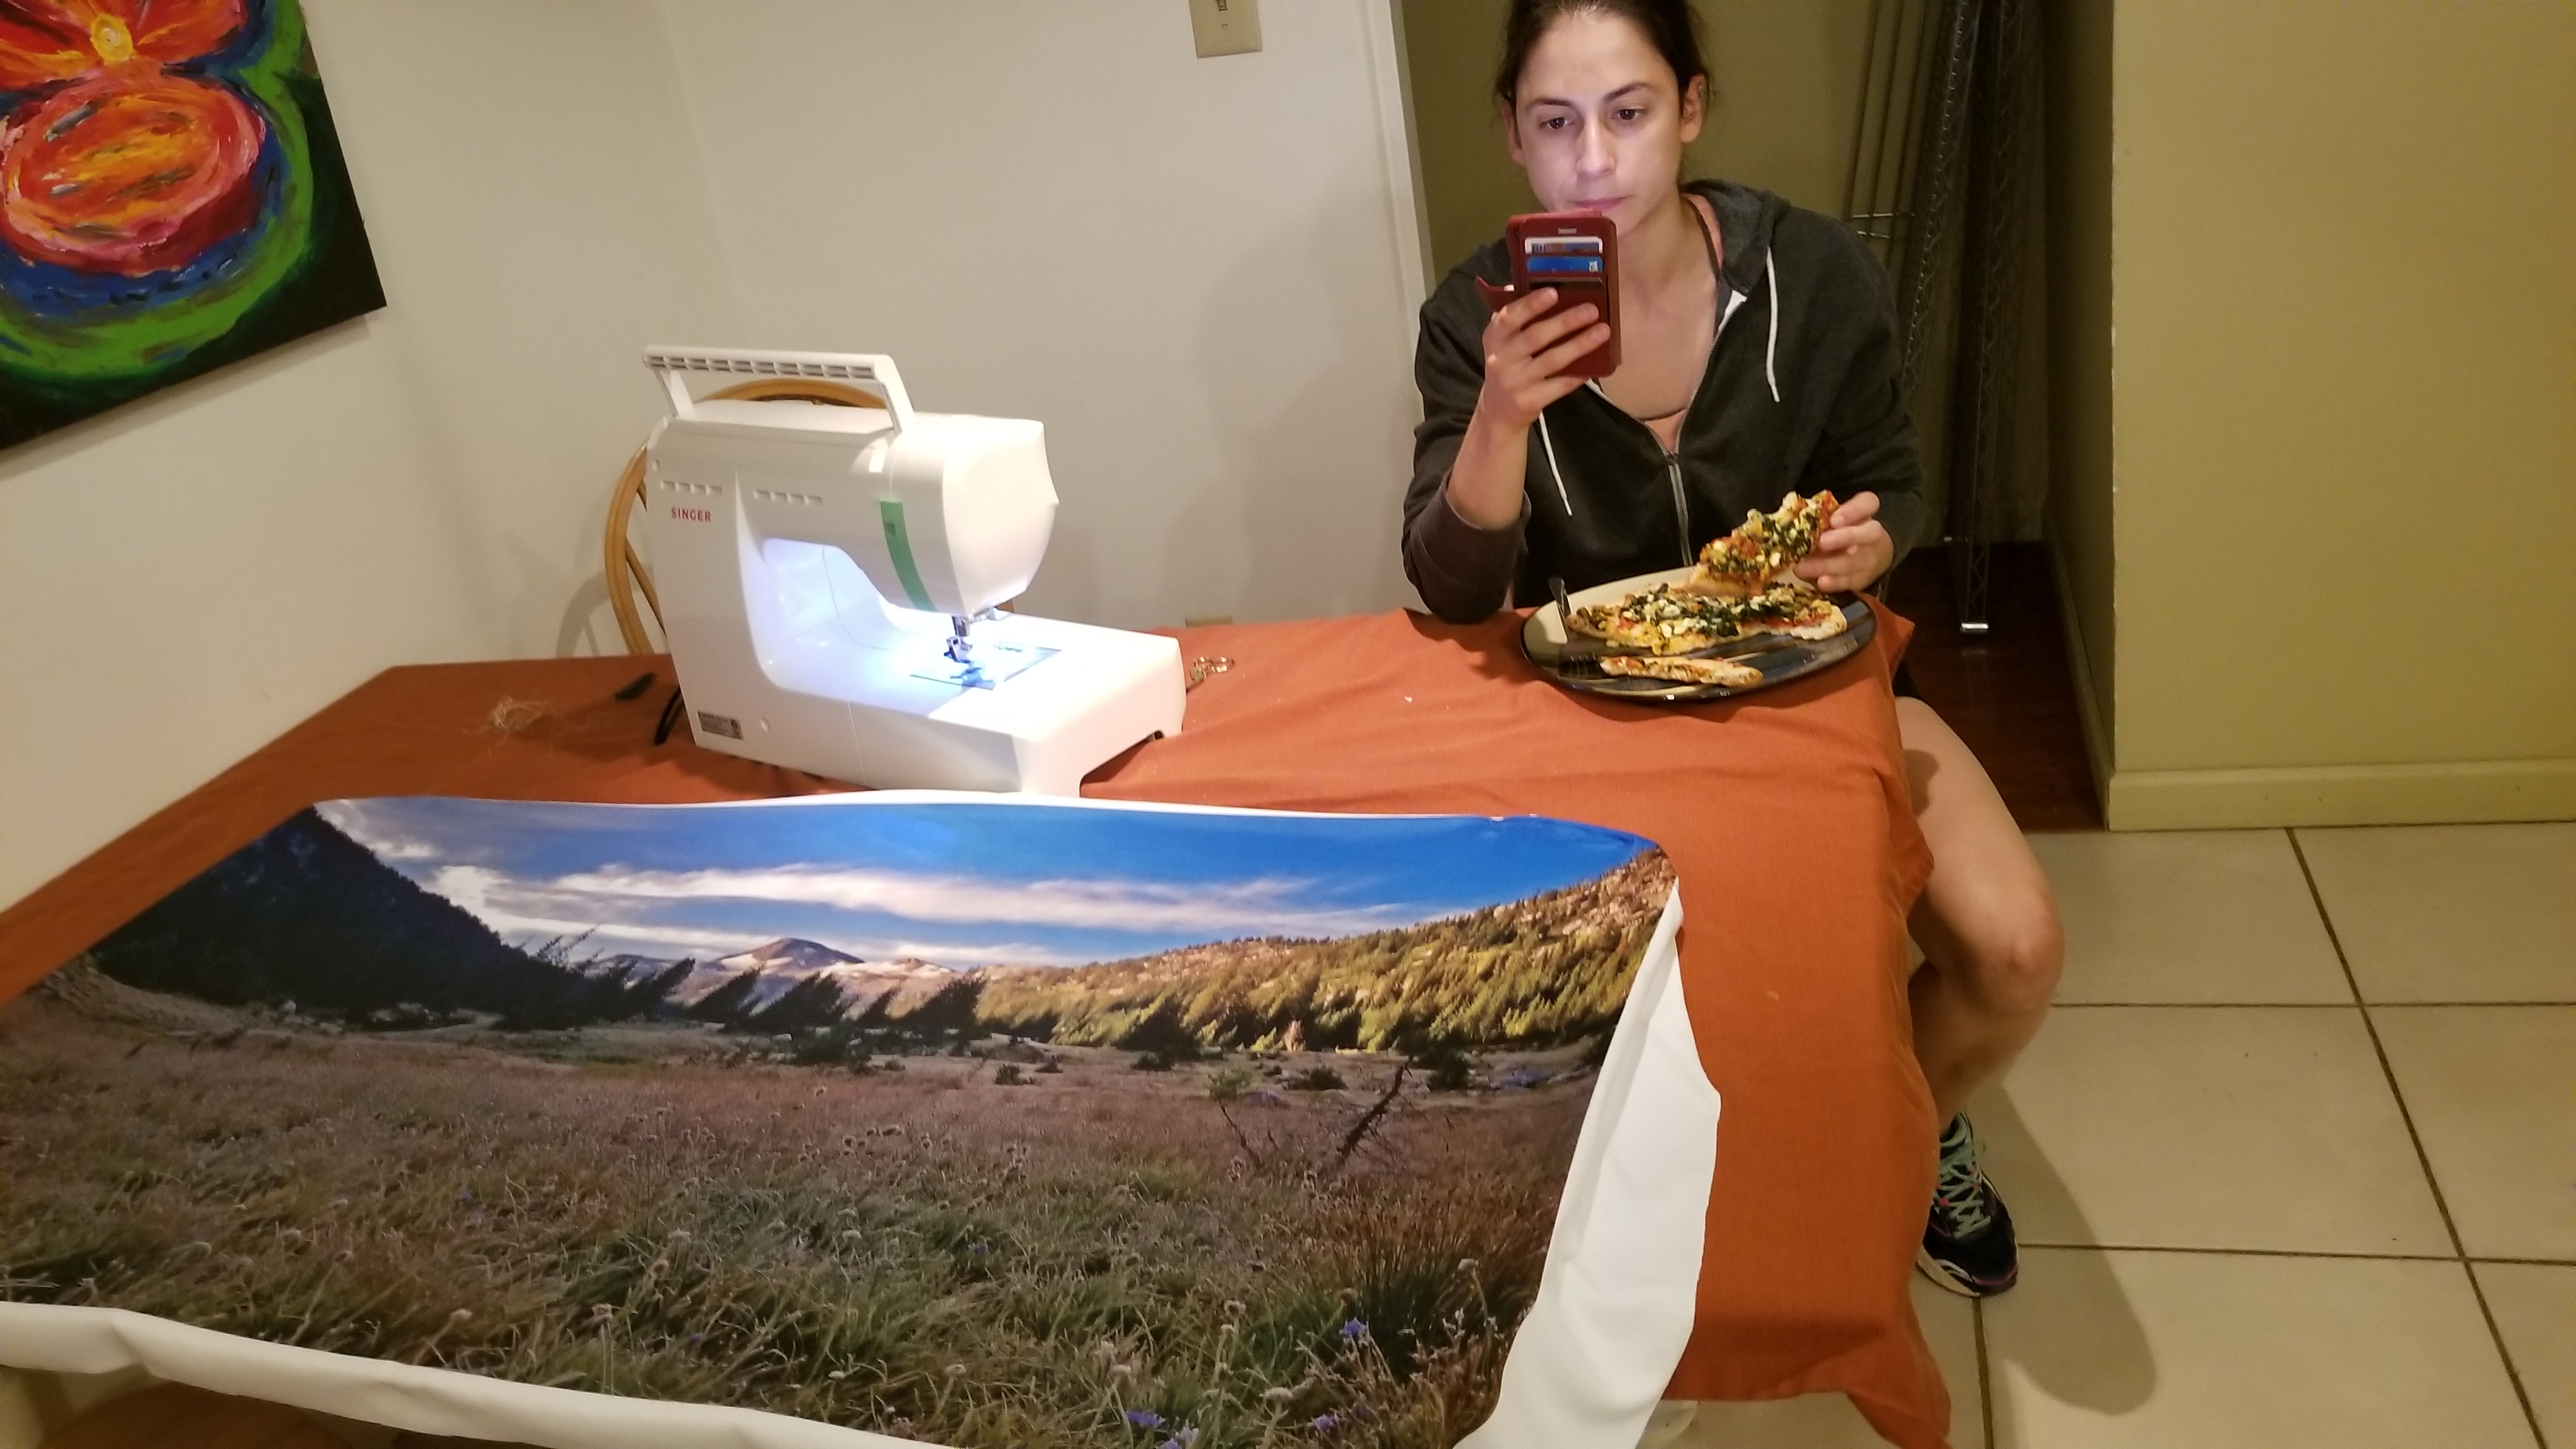
Laura Schmidt (FEATZ owner) https://www.etsy.com/shop/Featz 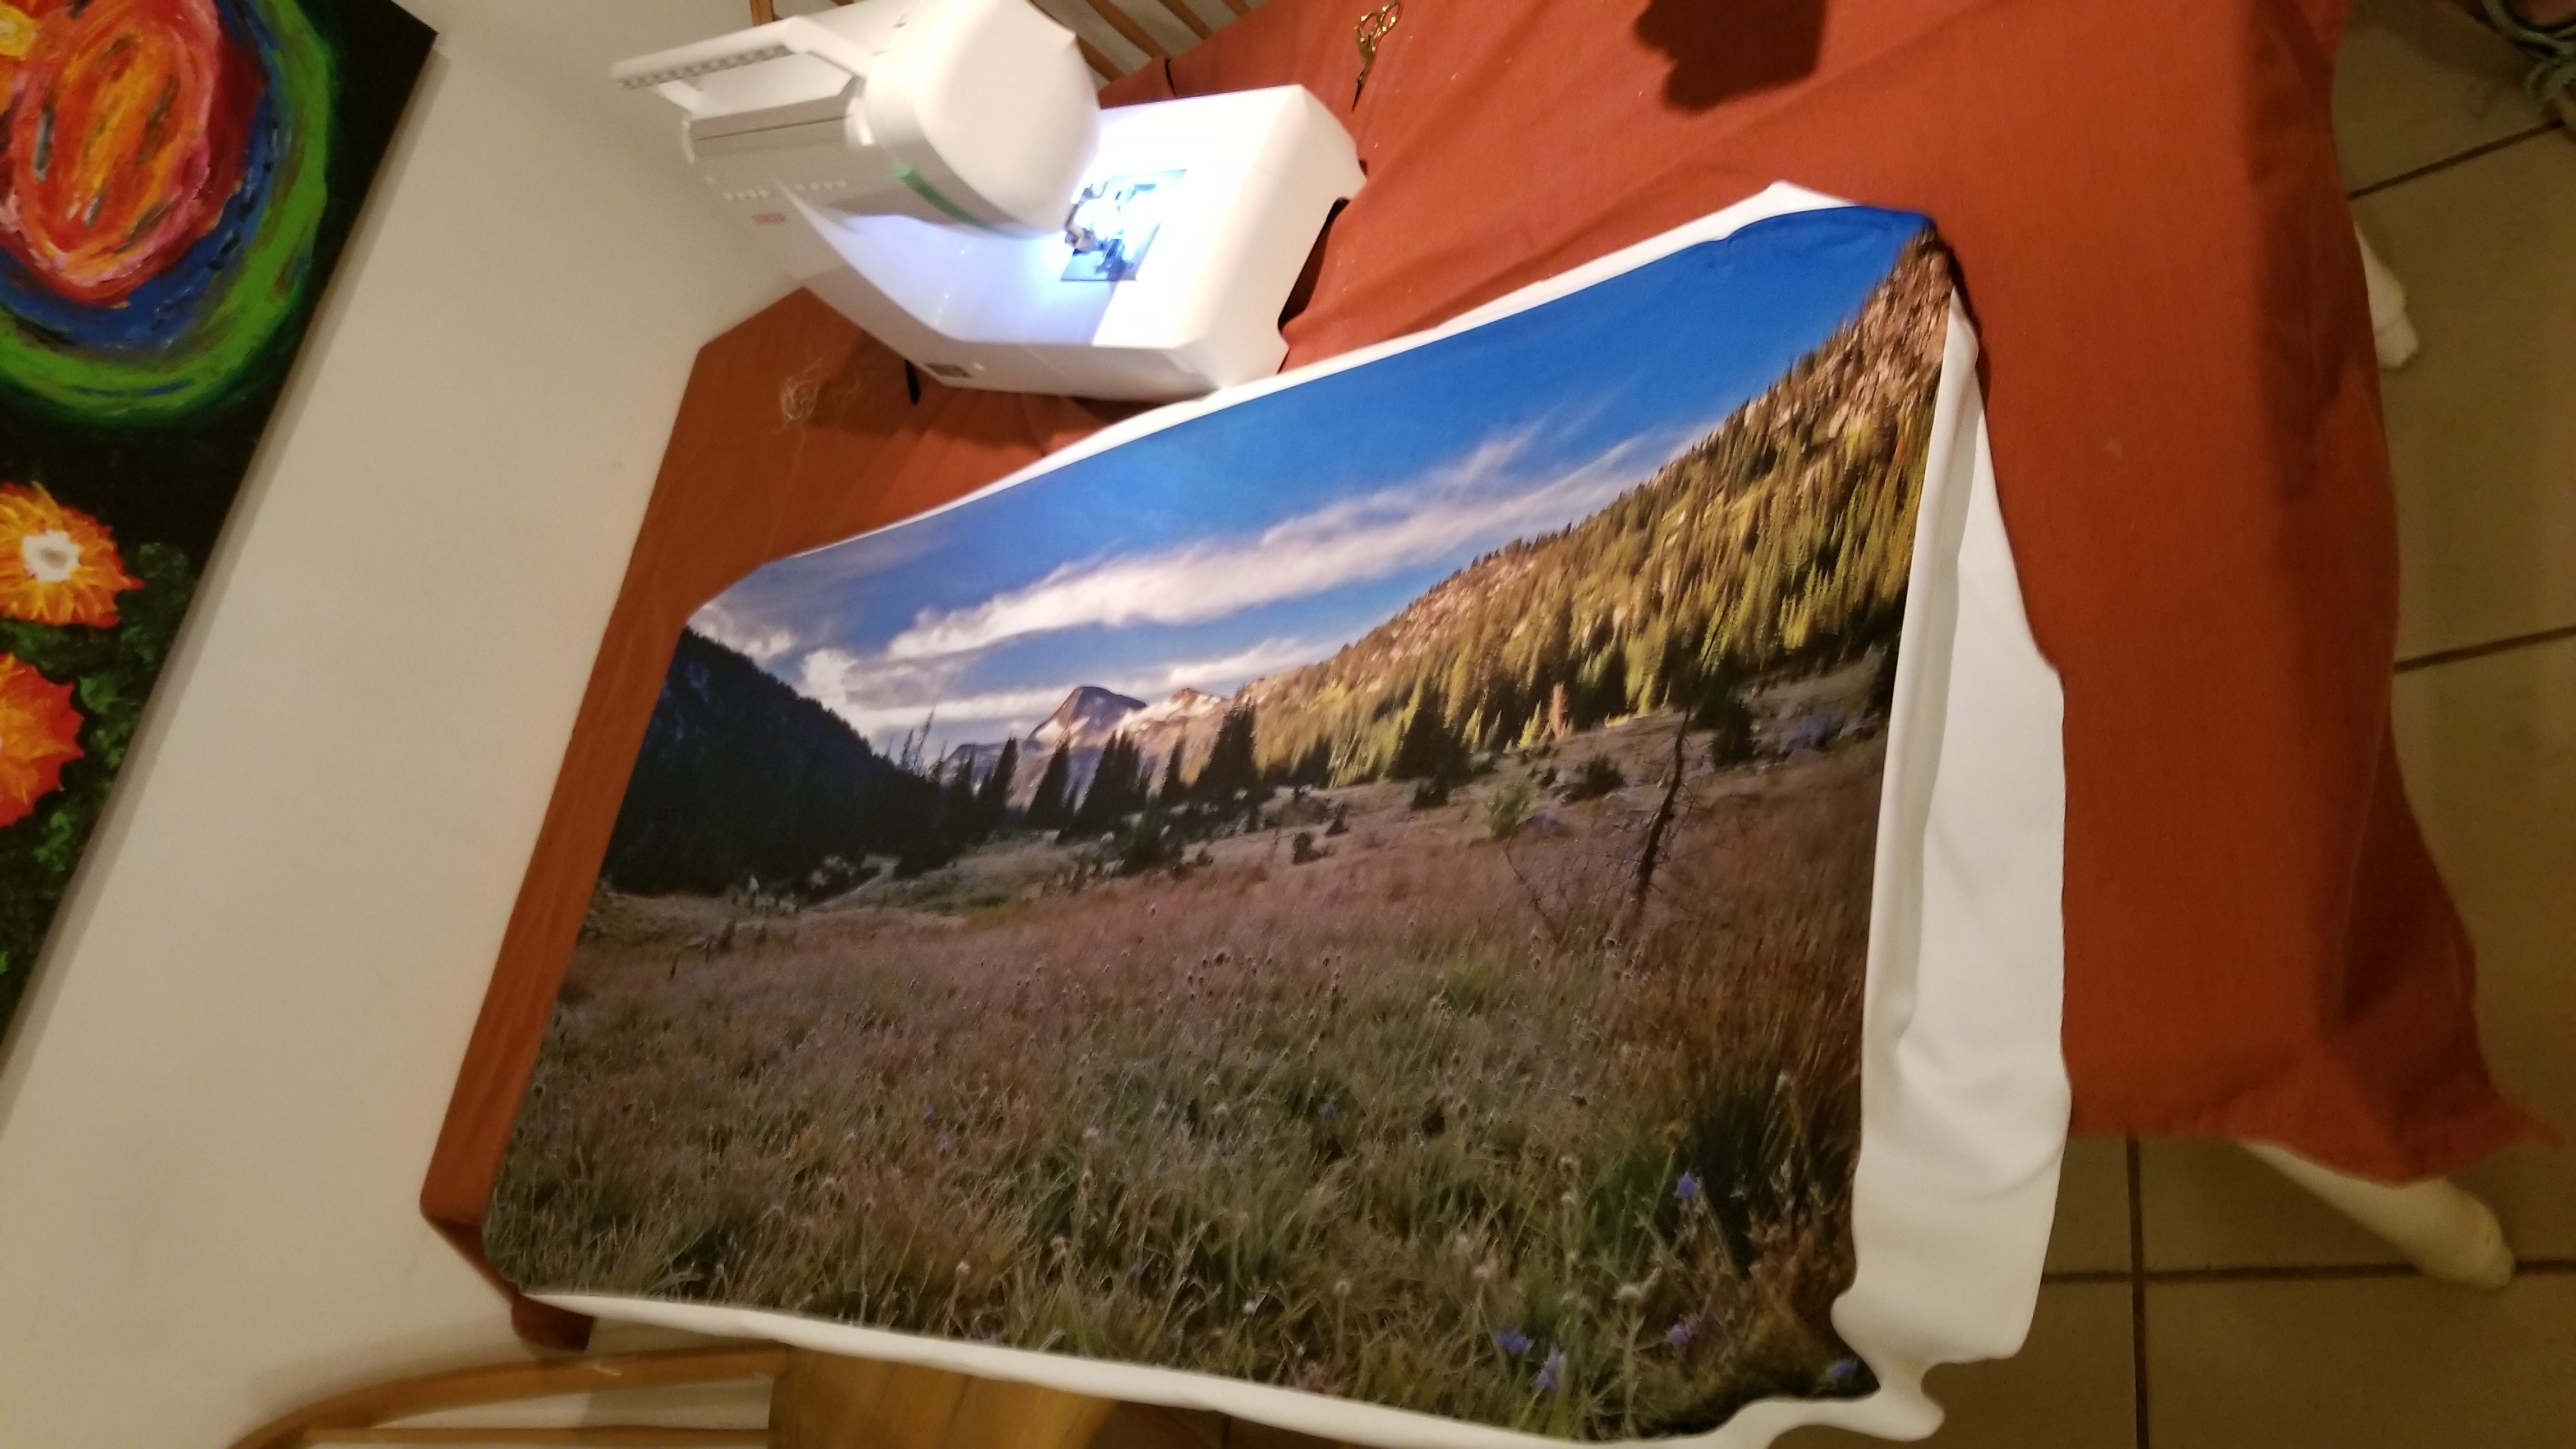
Crushing the sewing skills. 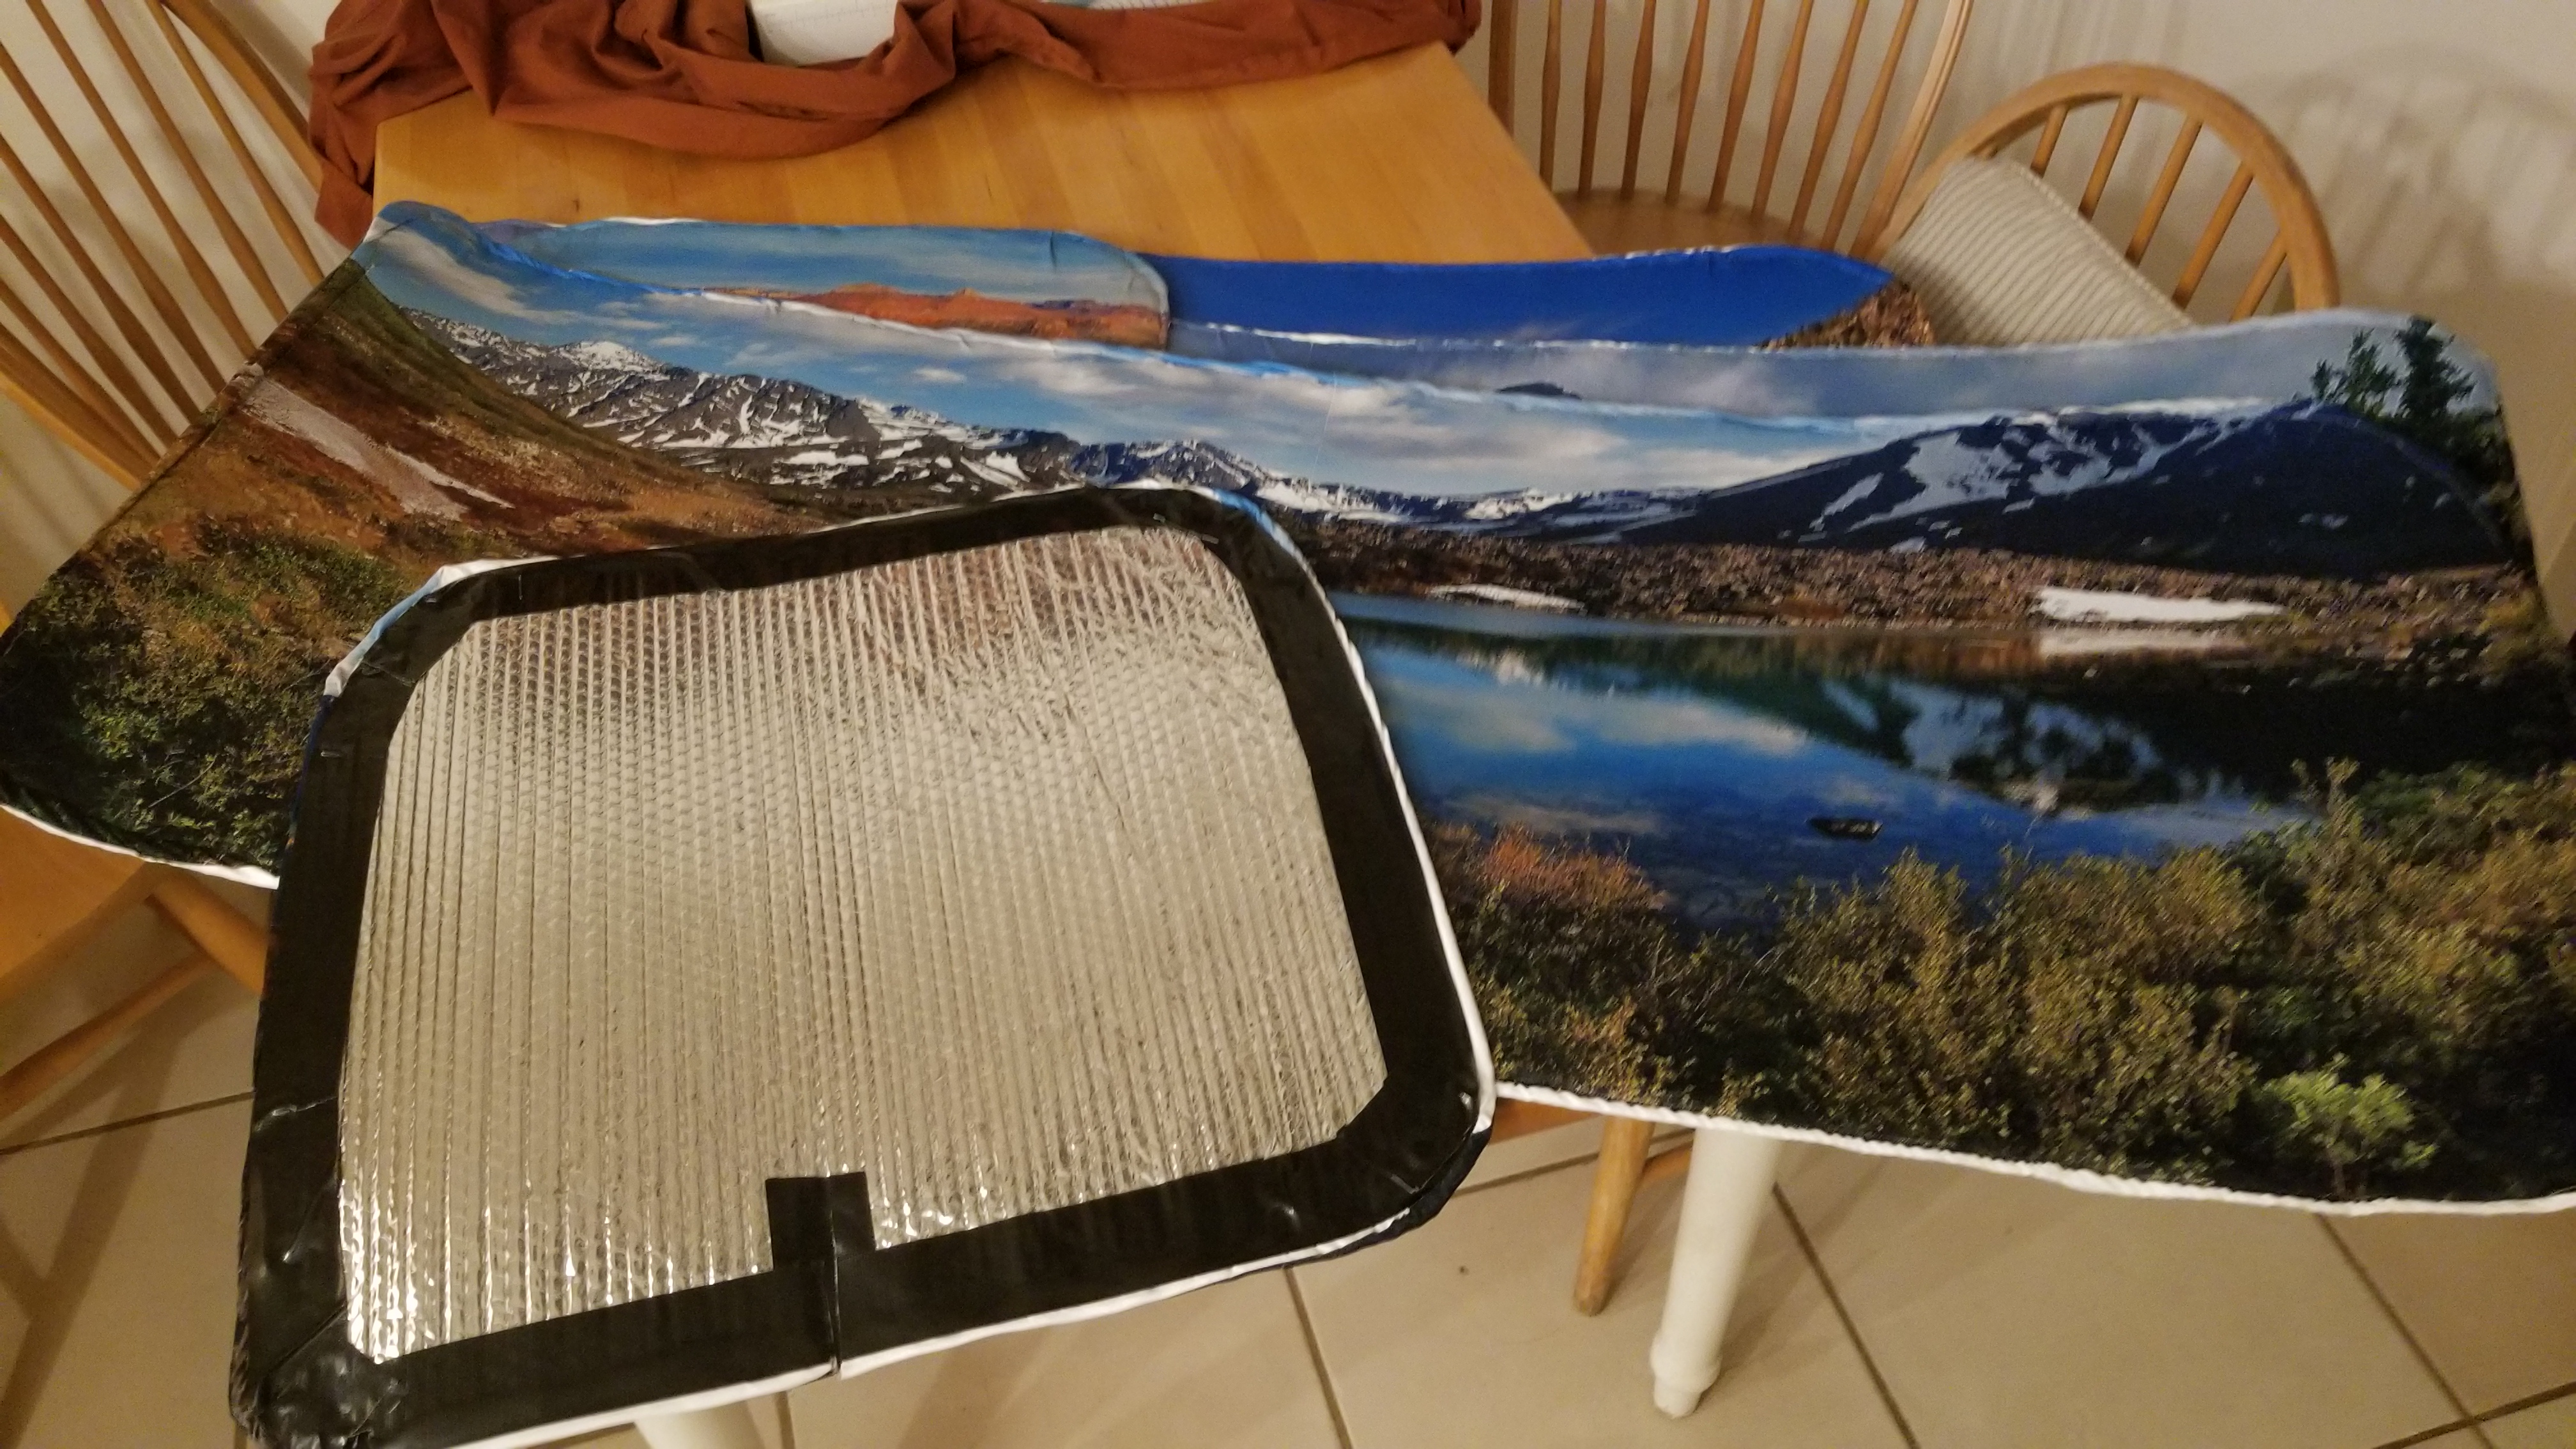
Print, sewn onto Reflixic, Gorilla Taped on the edges and Magnets taped to the corners to attach to the inside of the window frame. https://www.etsy.com/shop/Featz – Laura Schmidt
- Construction Video: https://youtu.be/3gLHX7jIcTs
- Installed Video: https://youtu.be/Hq7oZ2Qu_NQ
- Stain and seal the floor that is still exposed and not painted white.

- Replace the plastic step to the sliding door.
- Replace the rear plastic lip at the bottom of the rear doors. I had to modify this to fit below the wooden strip of my rear drawer frame. Once cut in, it really made everything look clean.
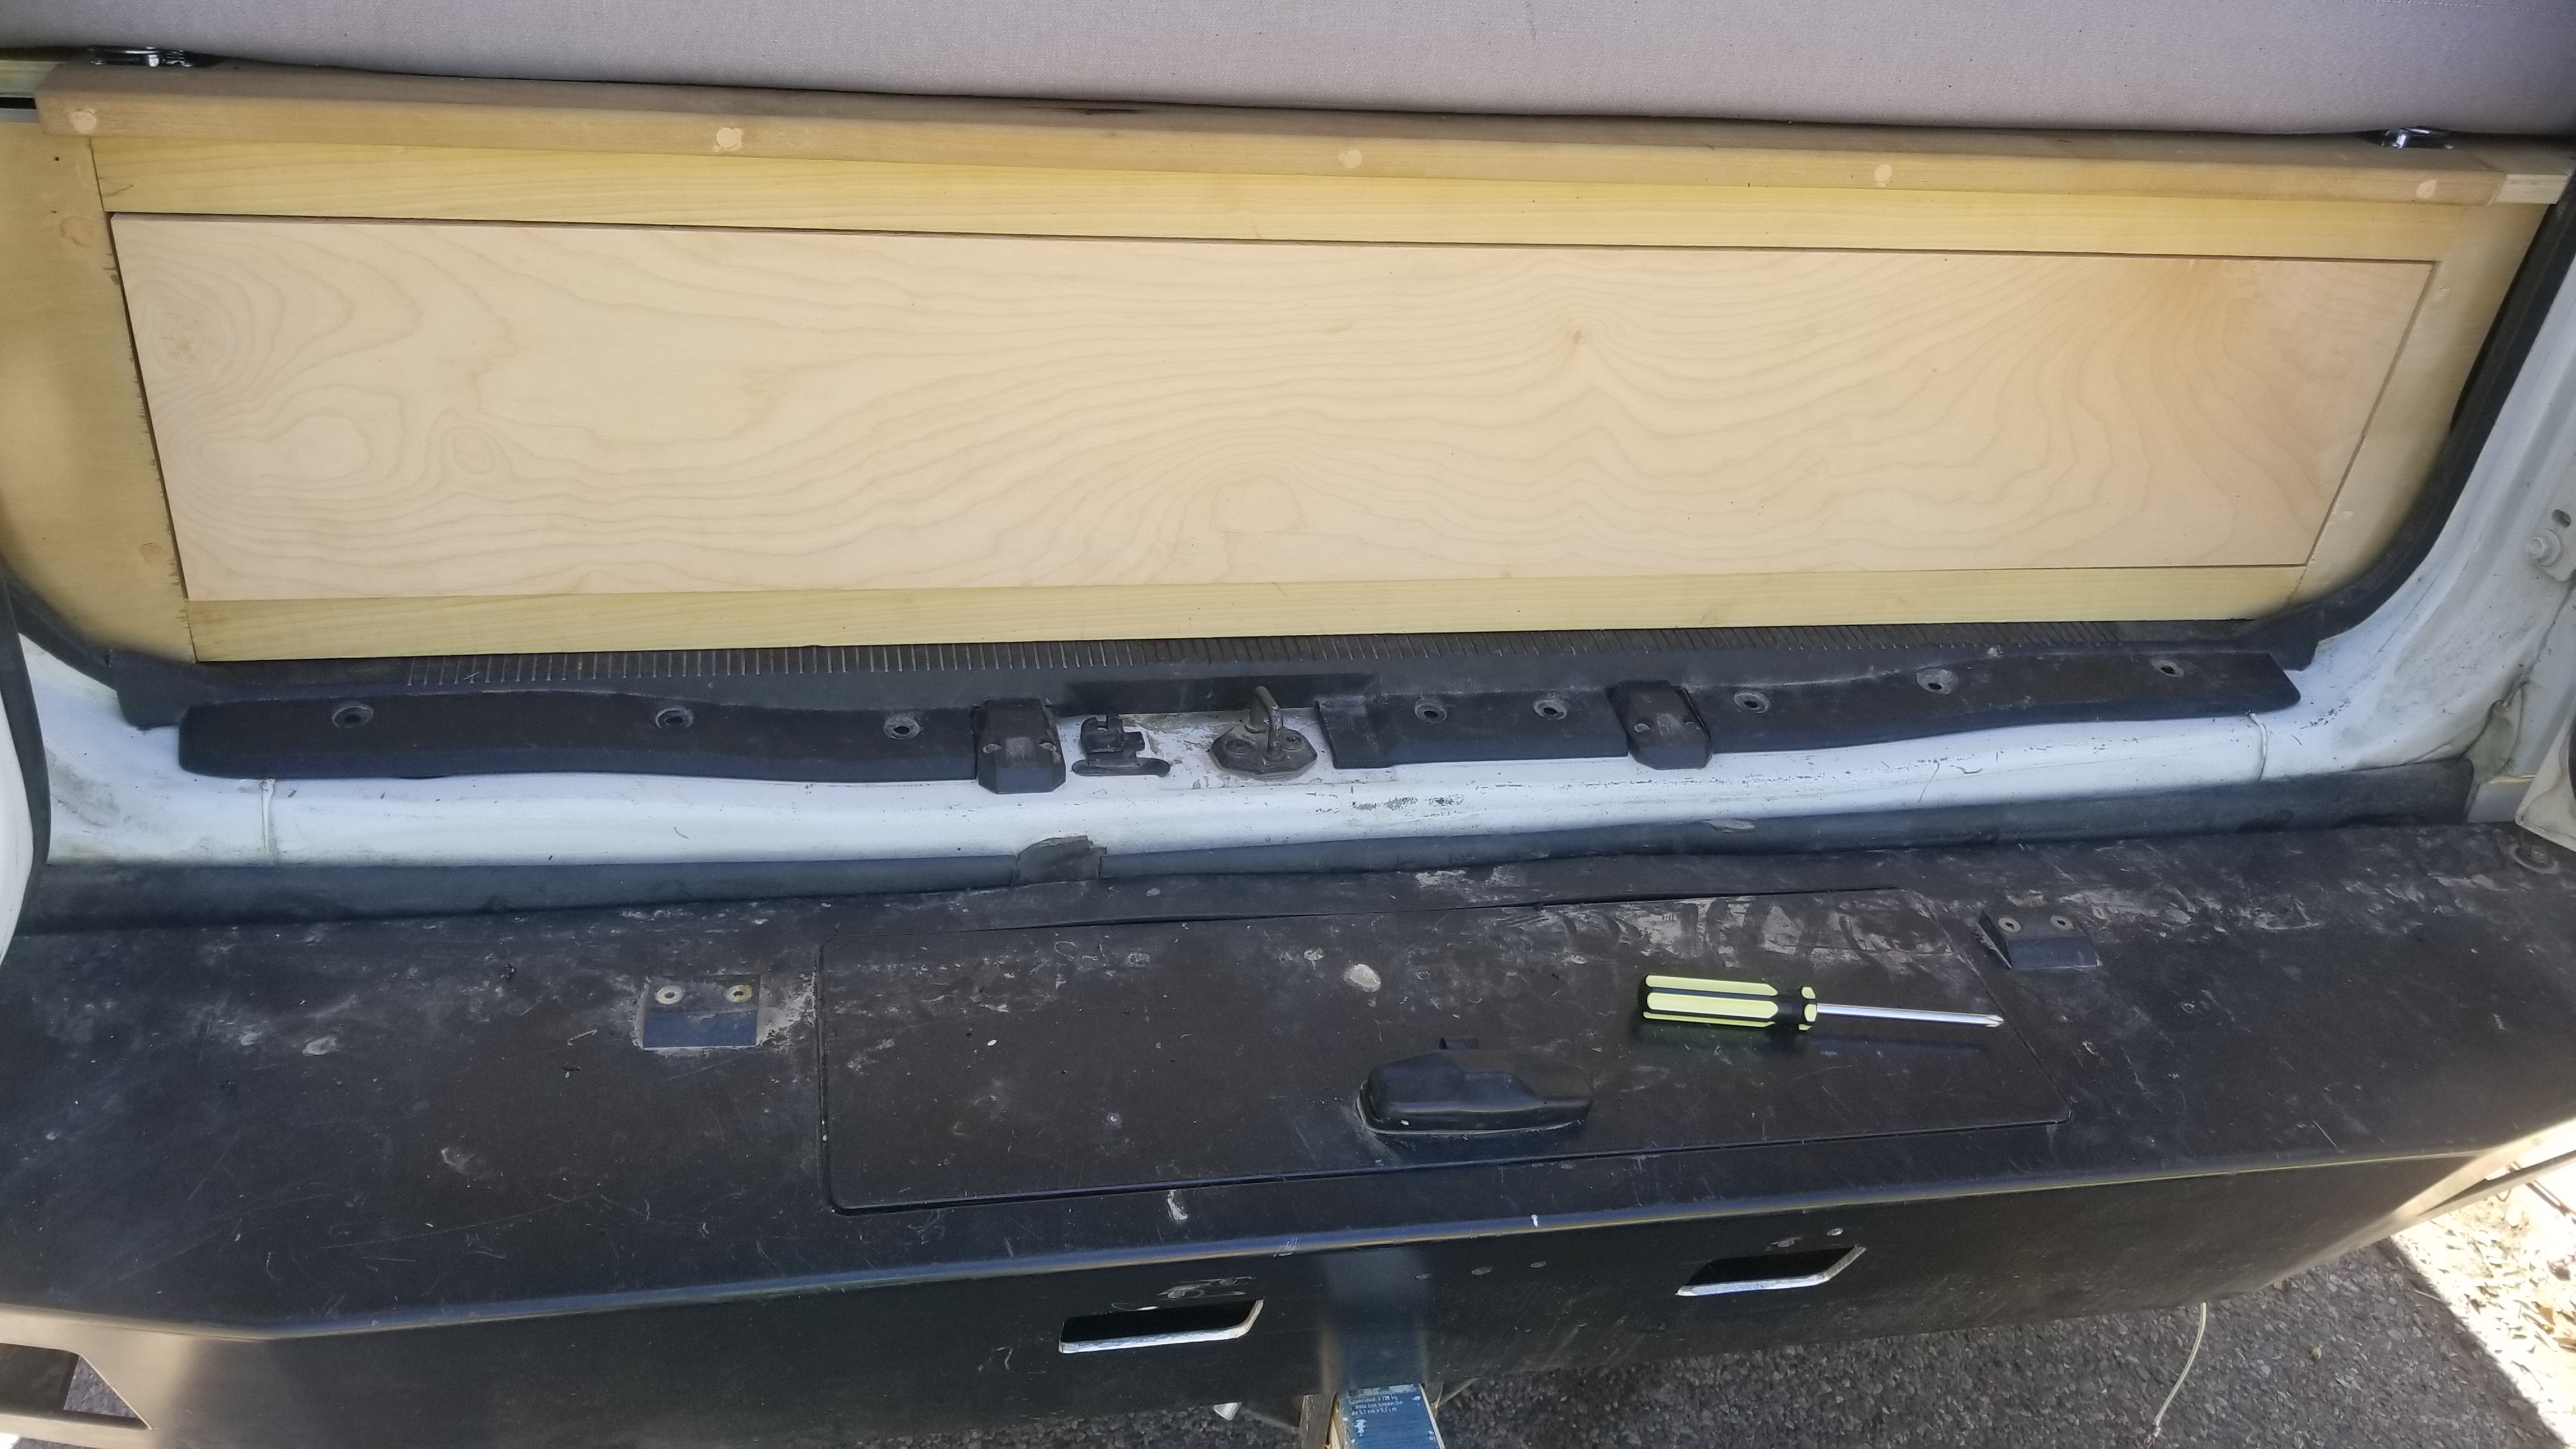
- Video 1: https://youtu.be/9JWyLOZgKiw
- Video 2: https://youtu.be/FNaxH06ZYdQ
- Remove your passenger seat base and replace it with a swivel seat. It’s pretty simple overall, just make sure the seatbelt buckle wire does not get pinched. You may need to split the carpet to have it fit over the new base.

- Make your sliding door and rear door covers. Once again use thin wood similar to what was used for the walls. Attempt to utilize as much of the existing bolts/screws as possible that held on the original paneling. Stain/seat as necessary.

Door covers . . . I still haven’t finished mine . . . just being honest!
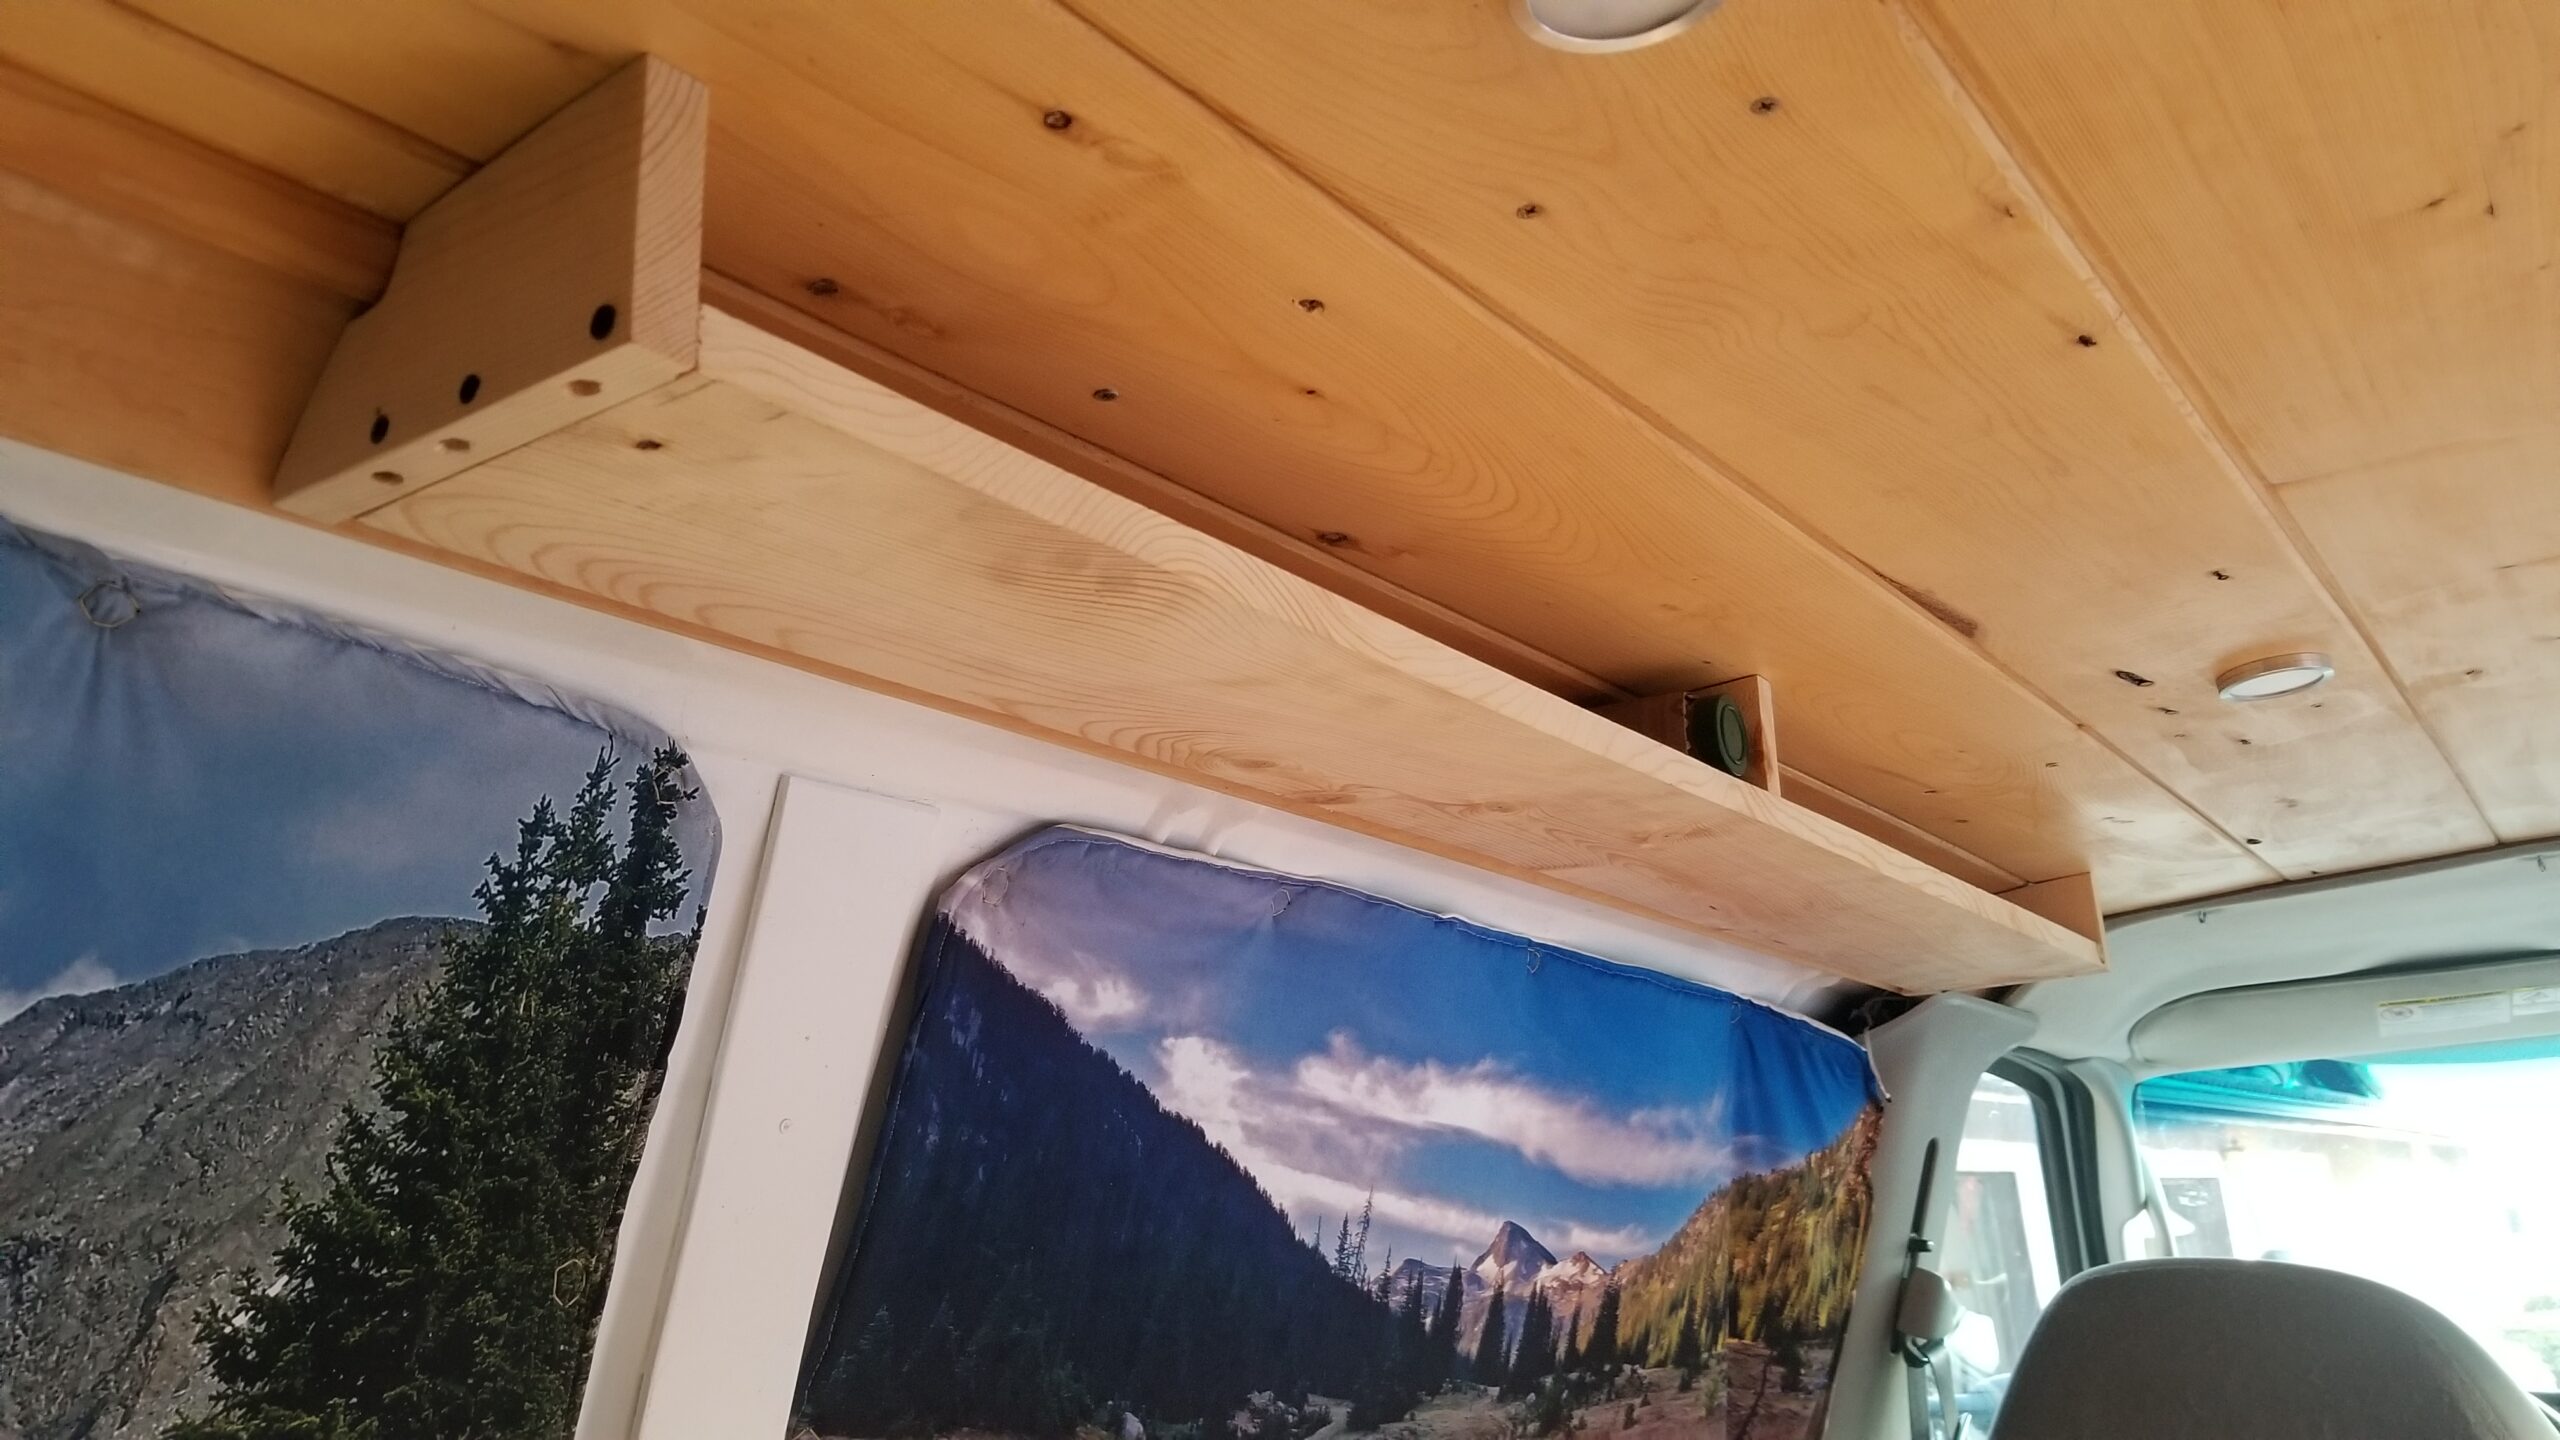
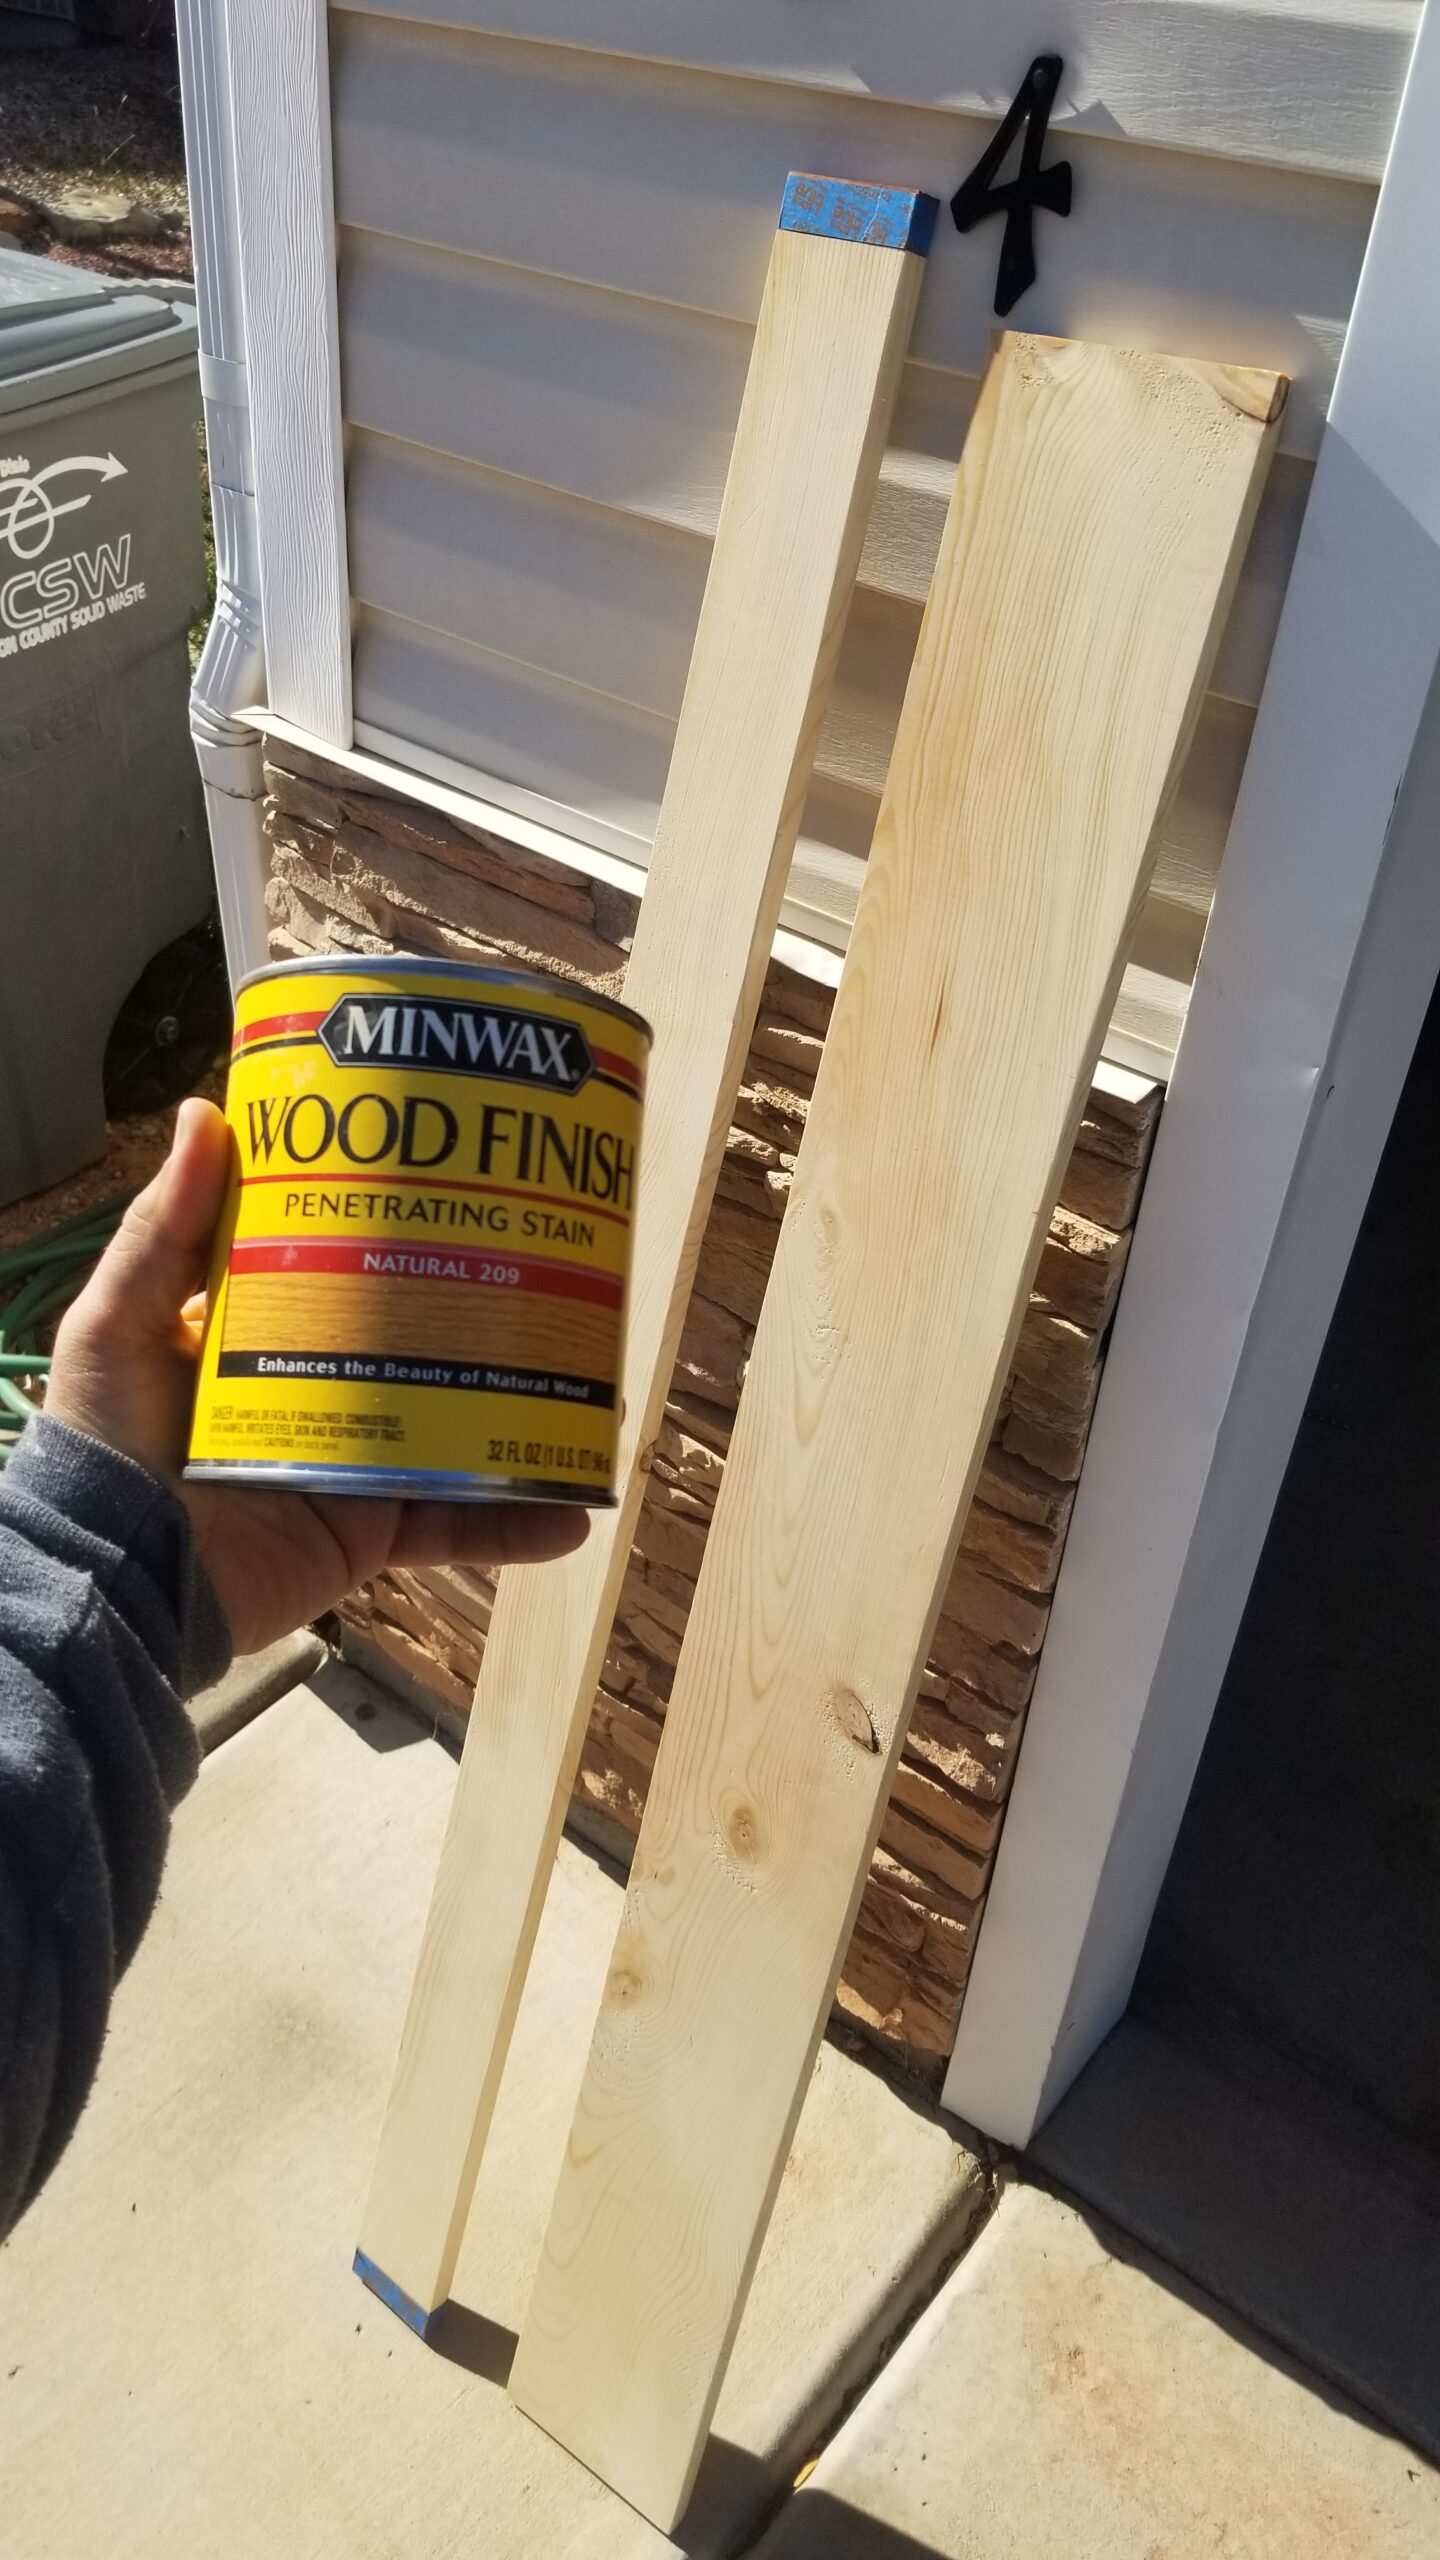
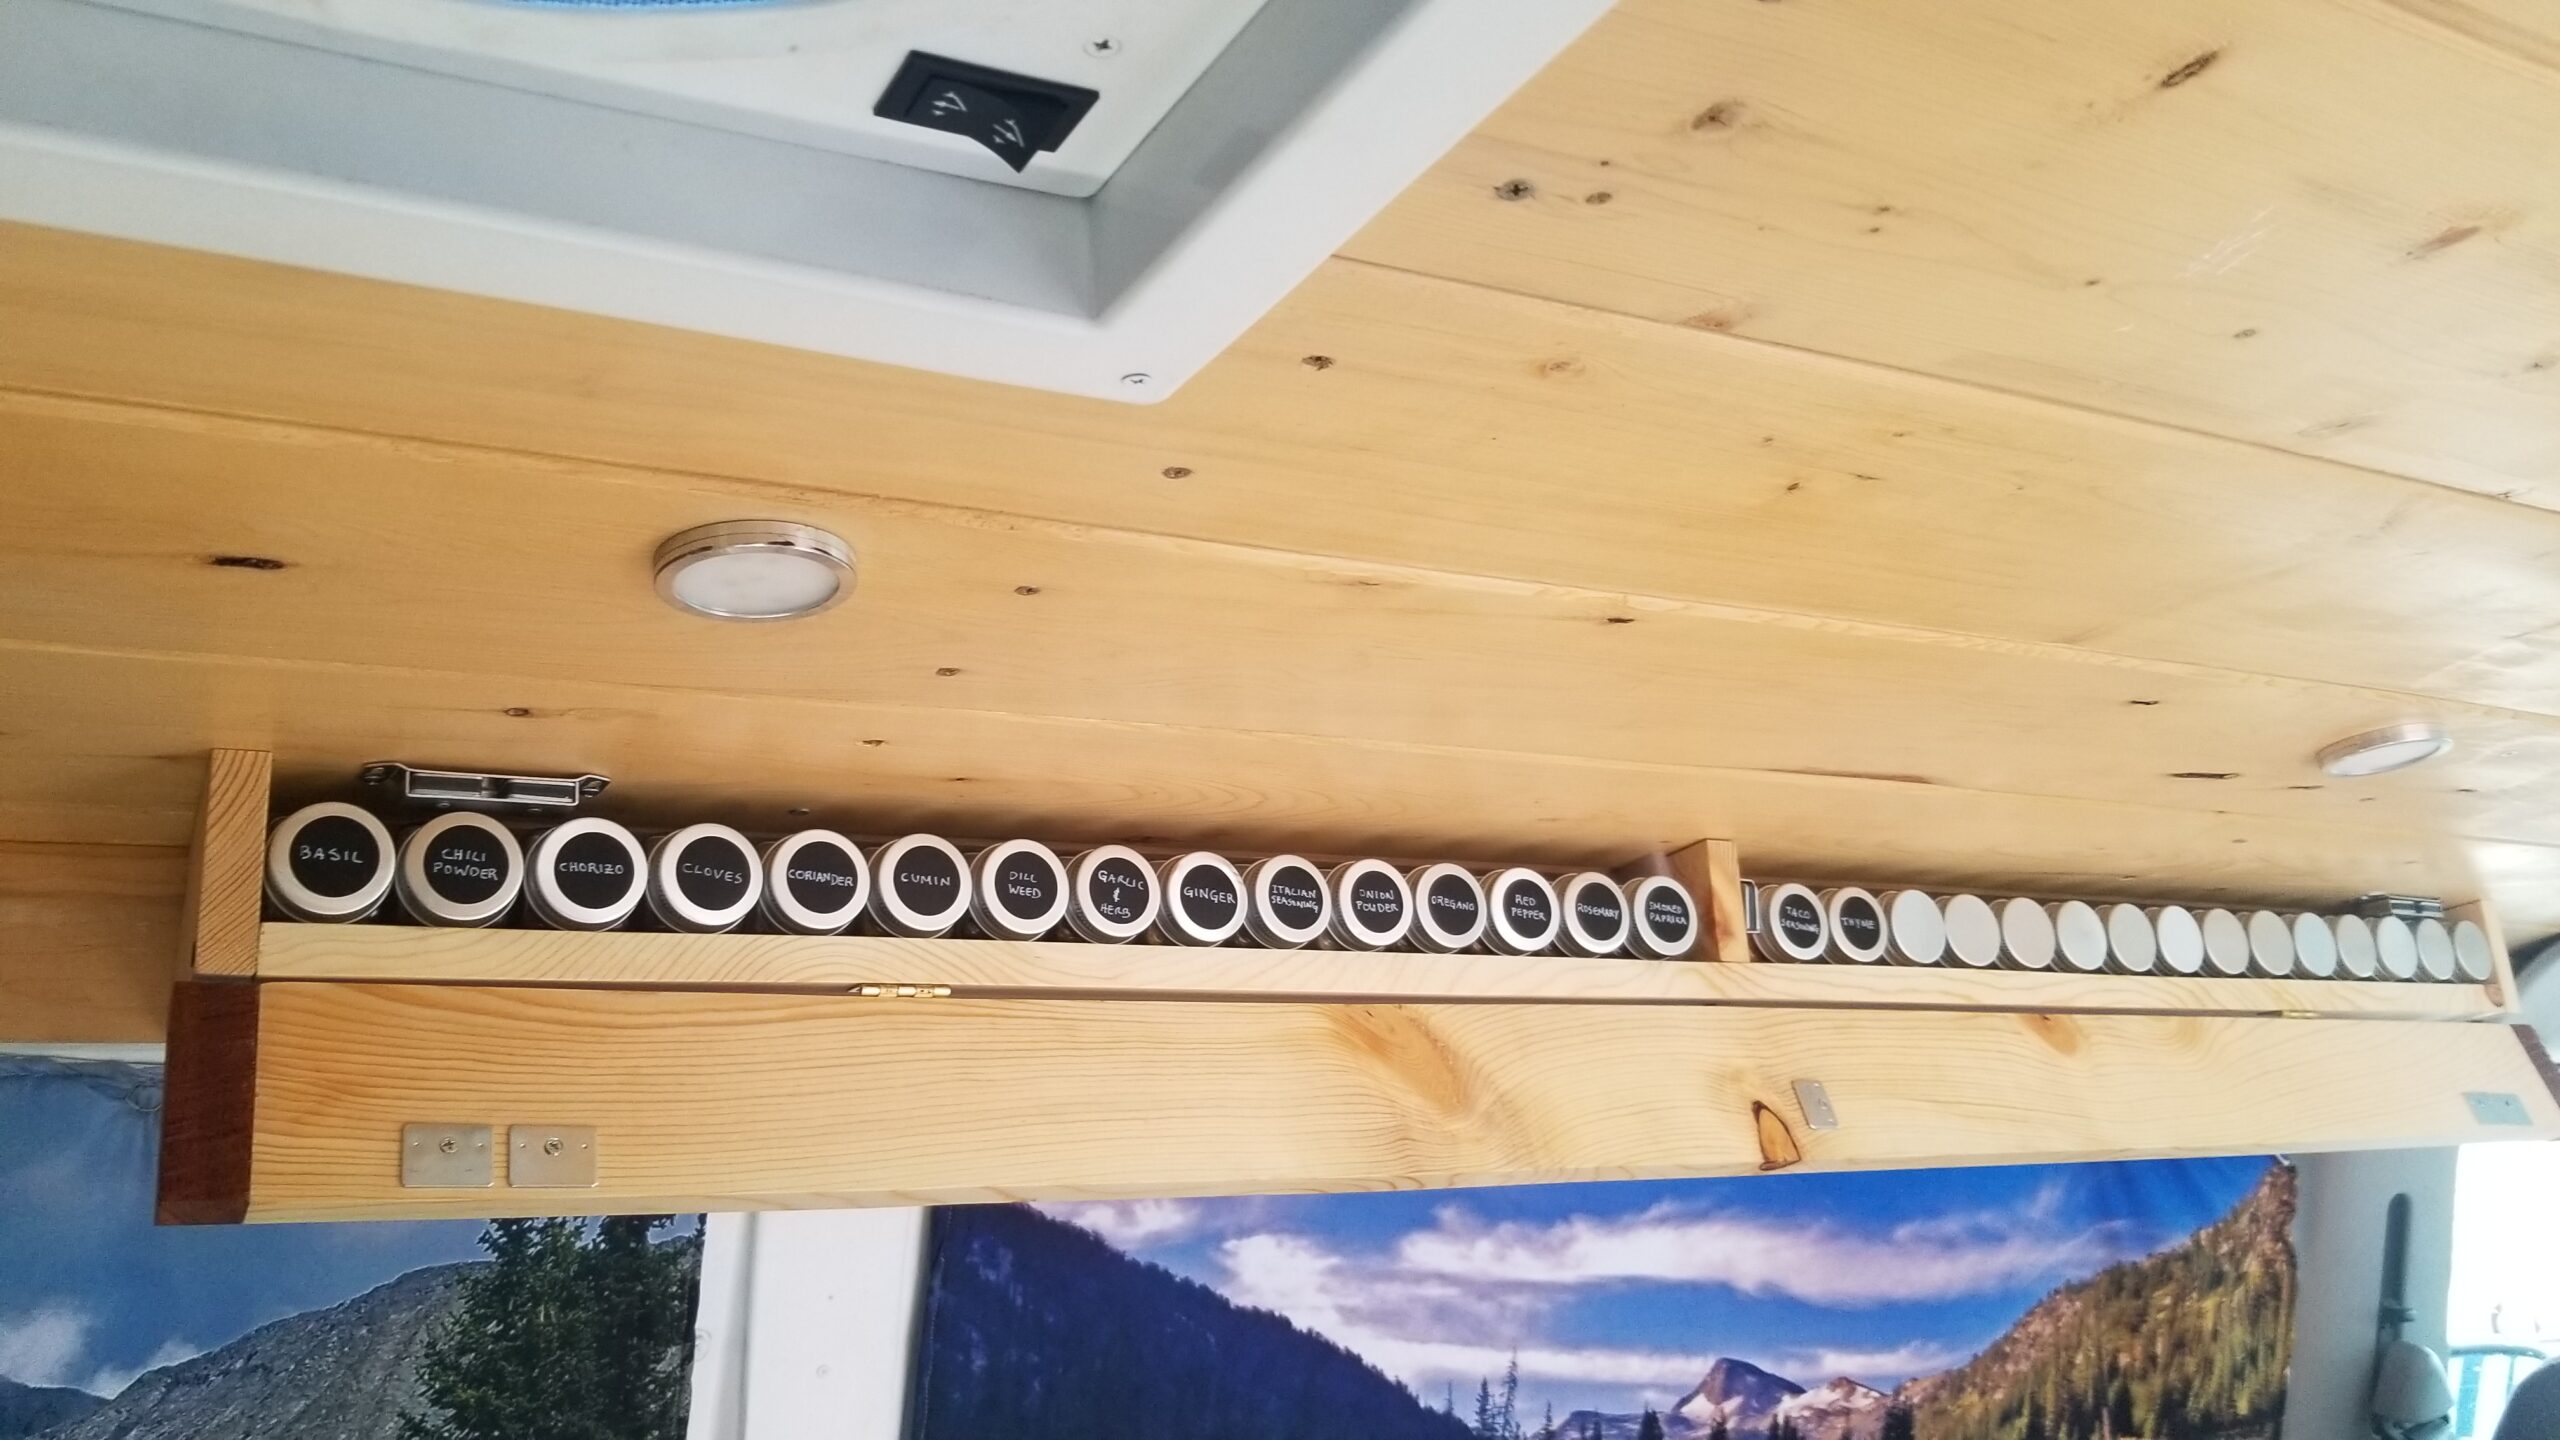
15. Make a spice rack. I used a piece of cardboard to fit the contour between the roof and the facer hang down boards at the corner. From there I sketched up a design and grabbed a 3/4″ x 10″ x 6′ board from home depot.
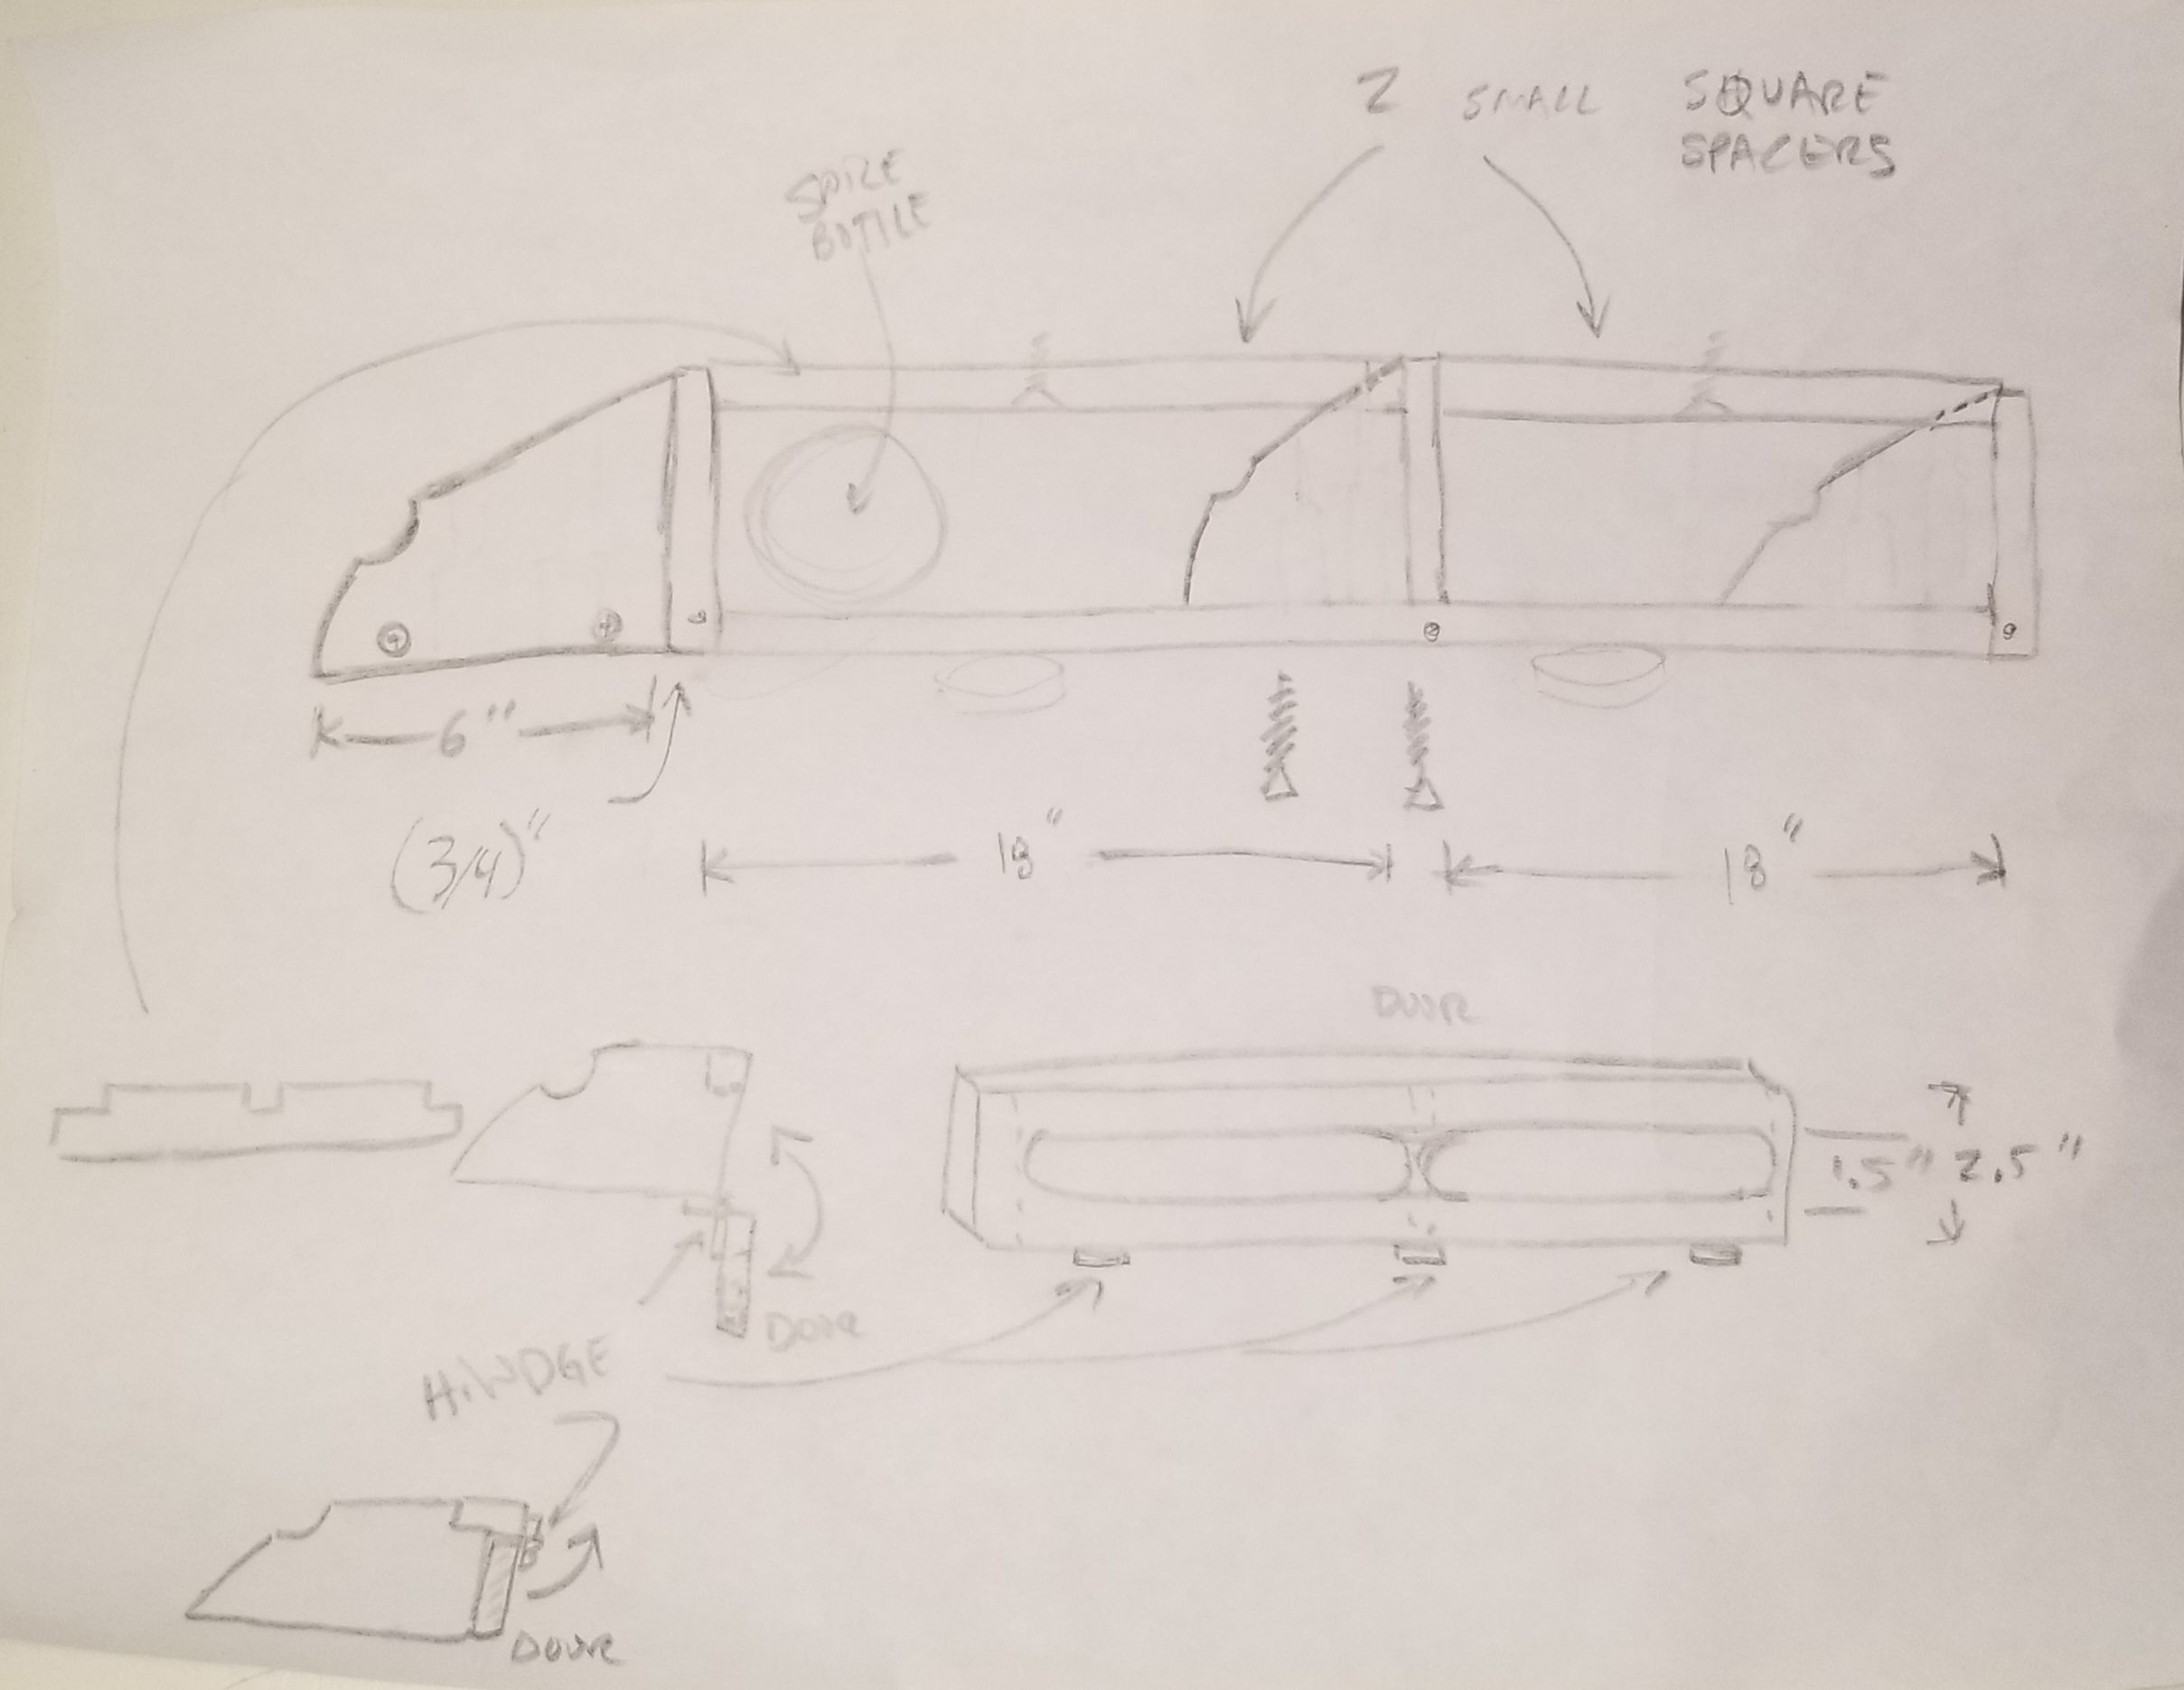
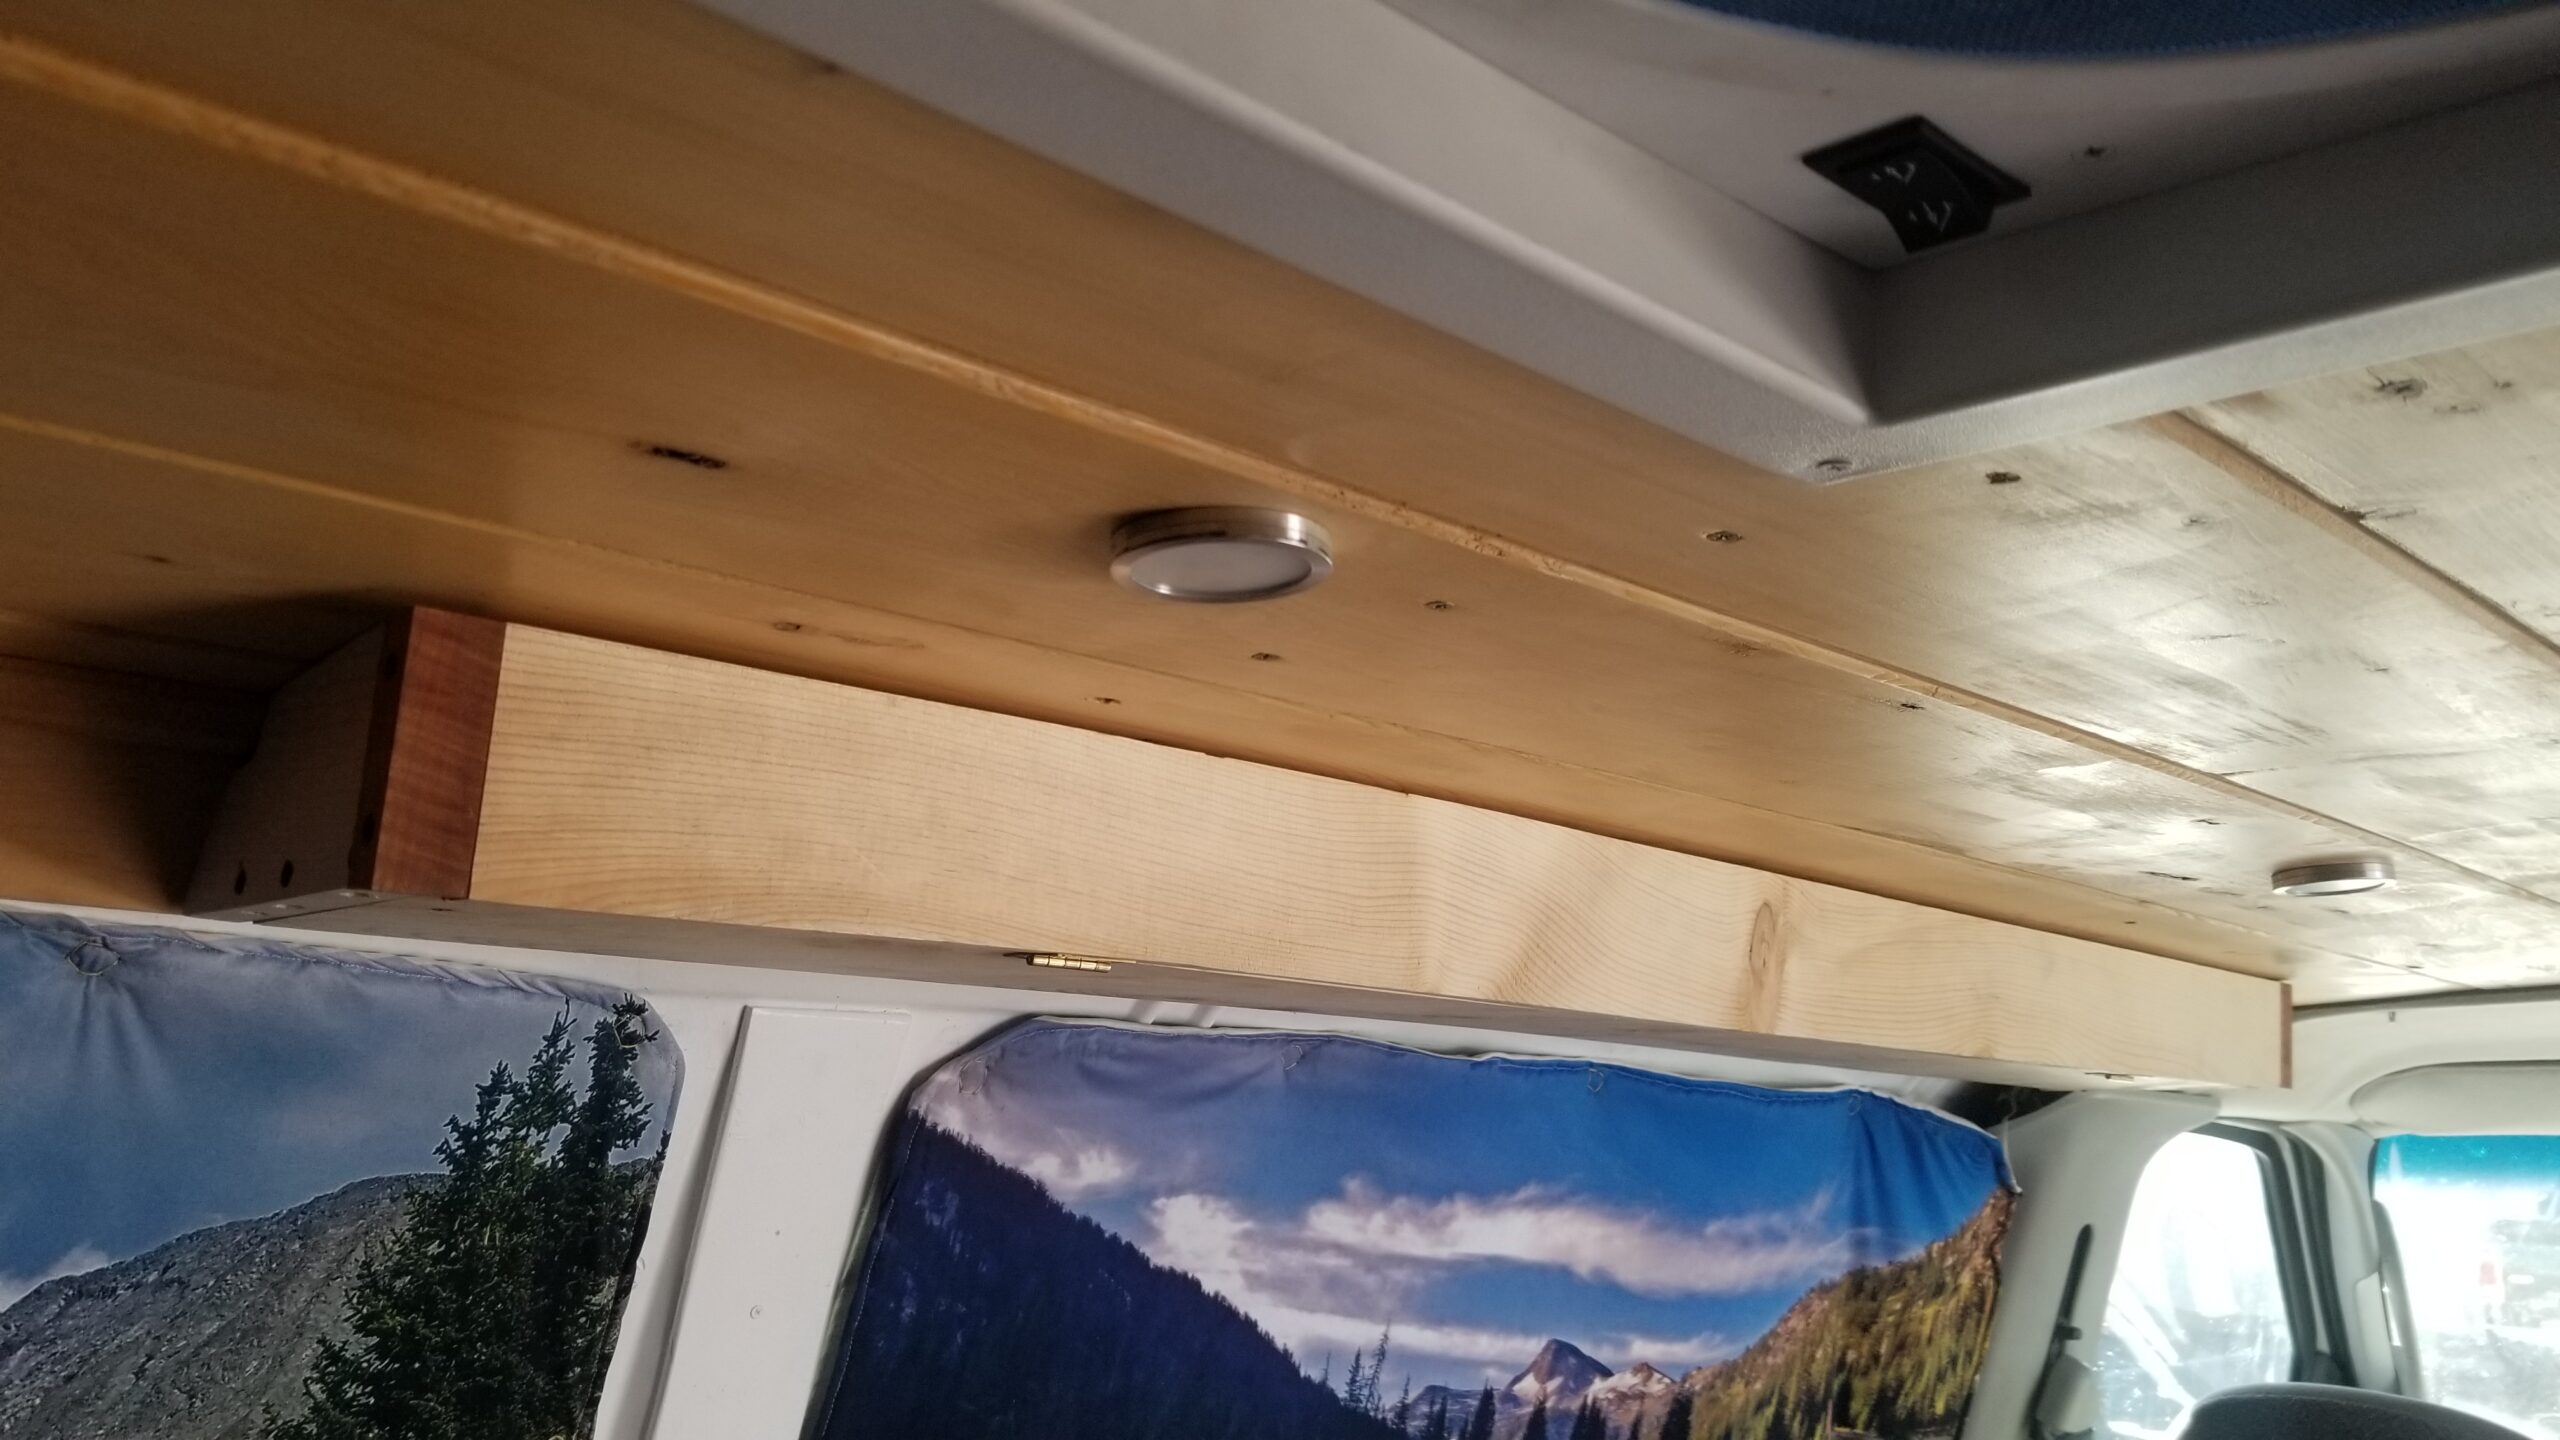
Cut the spice rack cover (3 1/4″ x 56 3/4″) and the base (6 x 55 1/4″) leaving the rest of the excess wood for the supports you mocked up with the cardboard. Cut the 3 supports out and fabricate to fit flush sanding as needed for fit. Drill bore holes and counter bore holes for the 3 fastening screws that will hold the supports to the ceiling. Screw the end-caps to the spice rack base (with bore and counter-bore holes of course) using 3 screws for each side and hold the structure up and figure out laterally in the van where the rack position should be. Mark the location and drill the end caps into place.
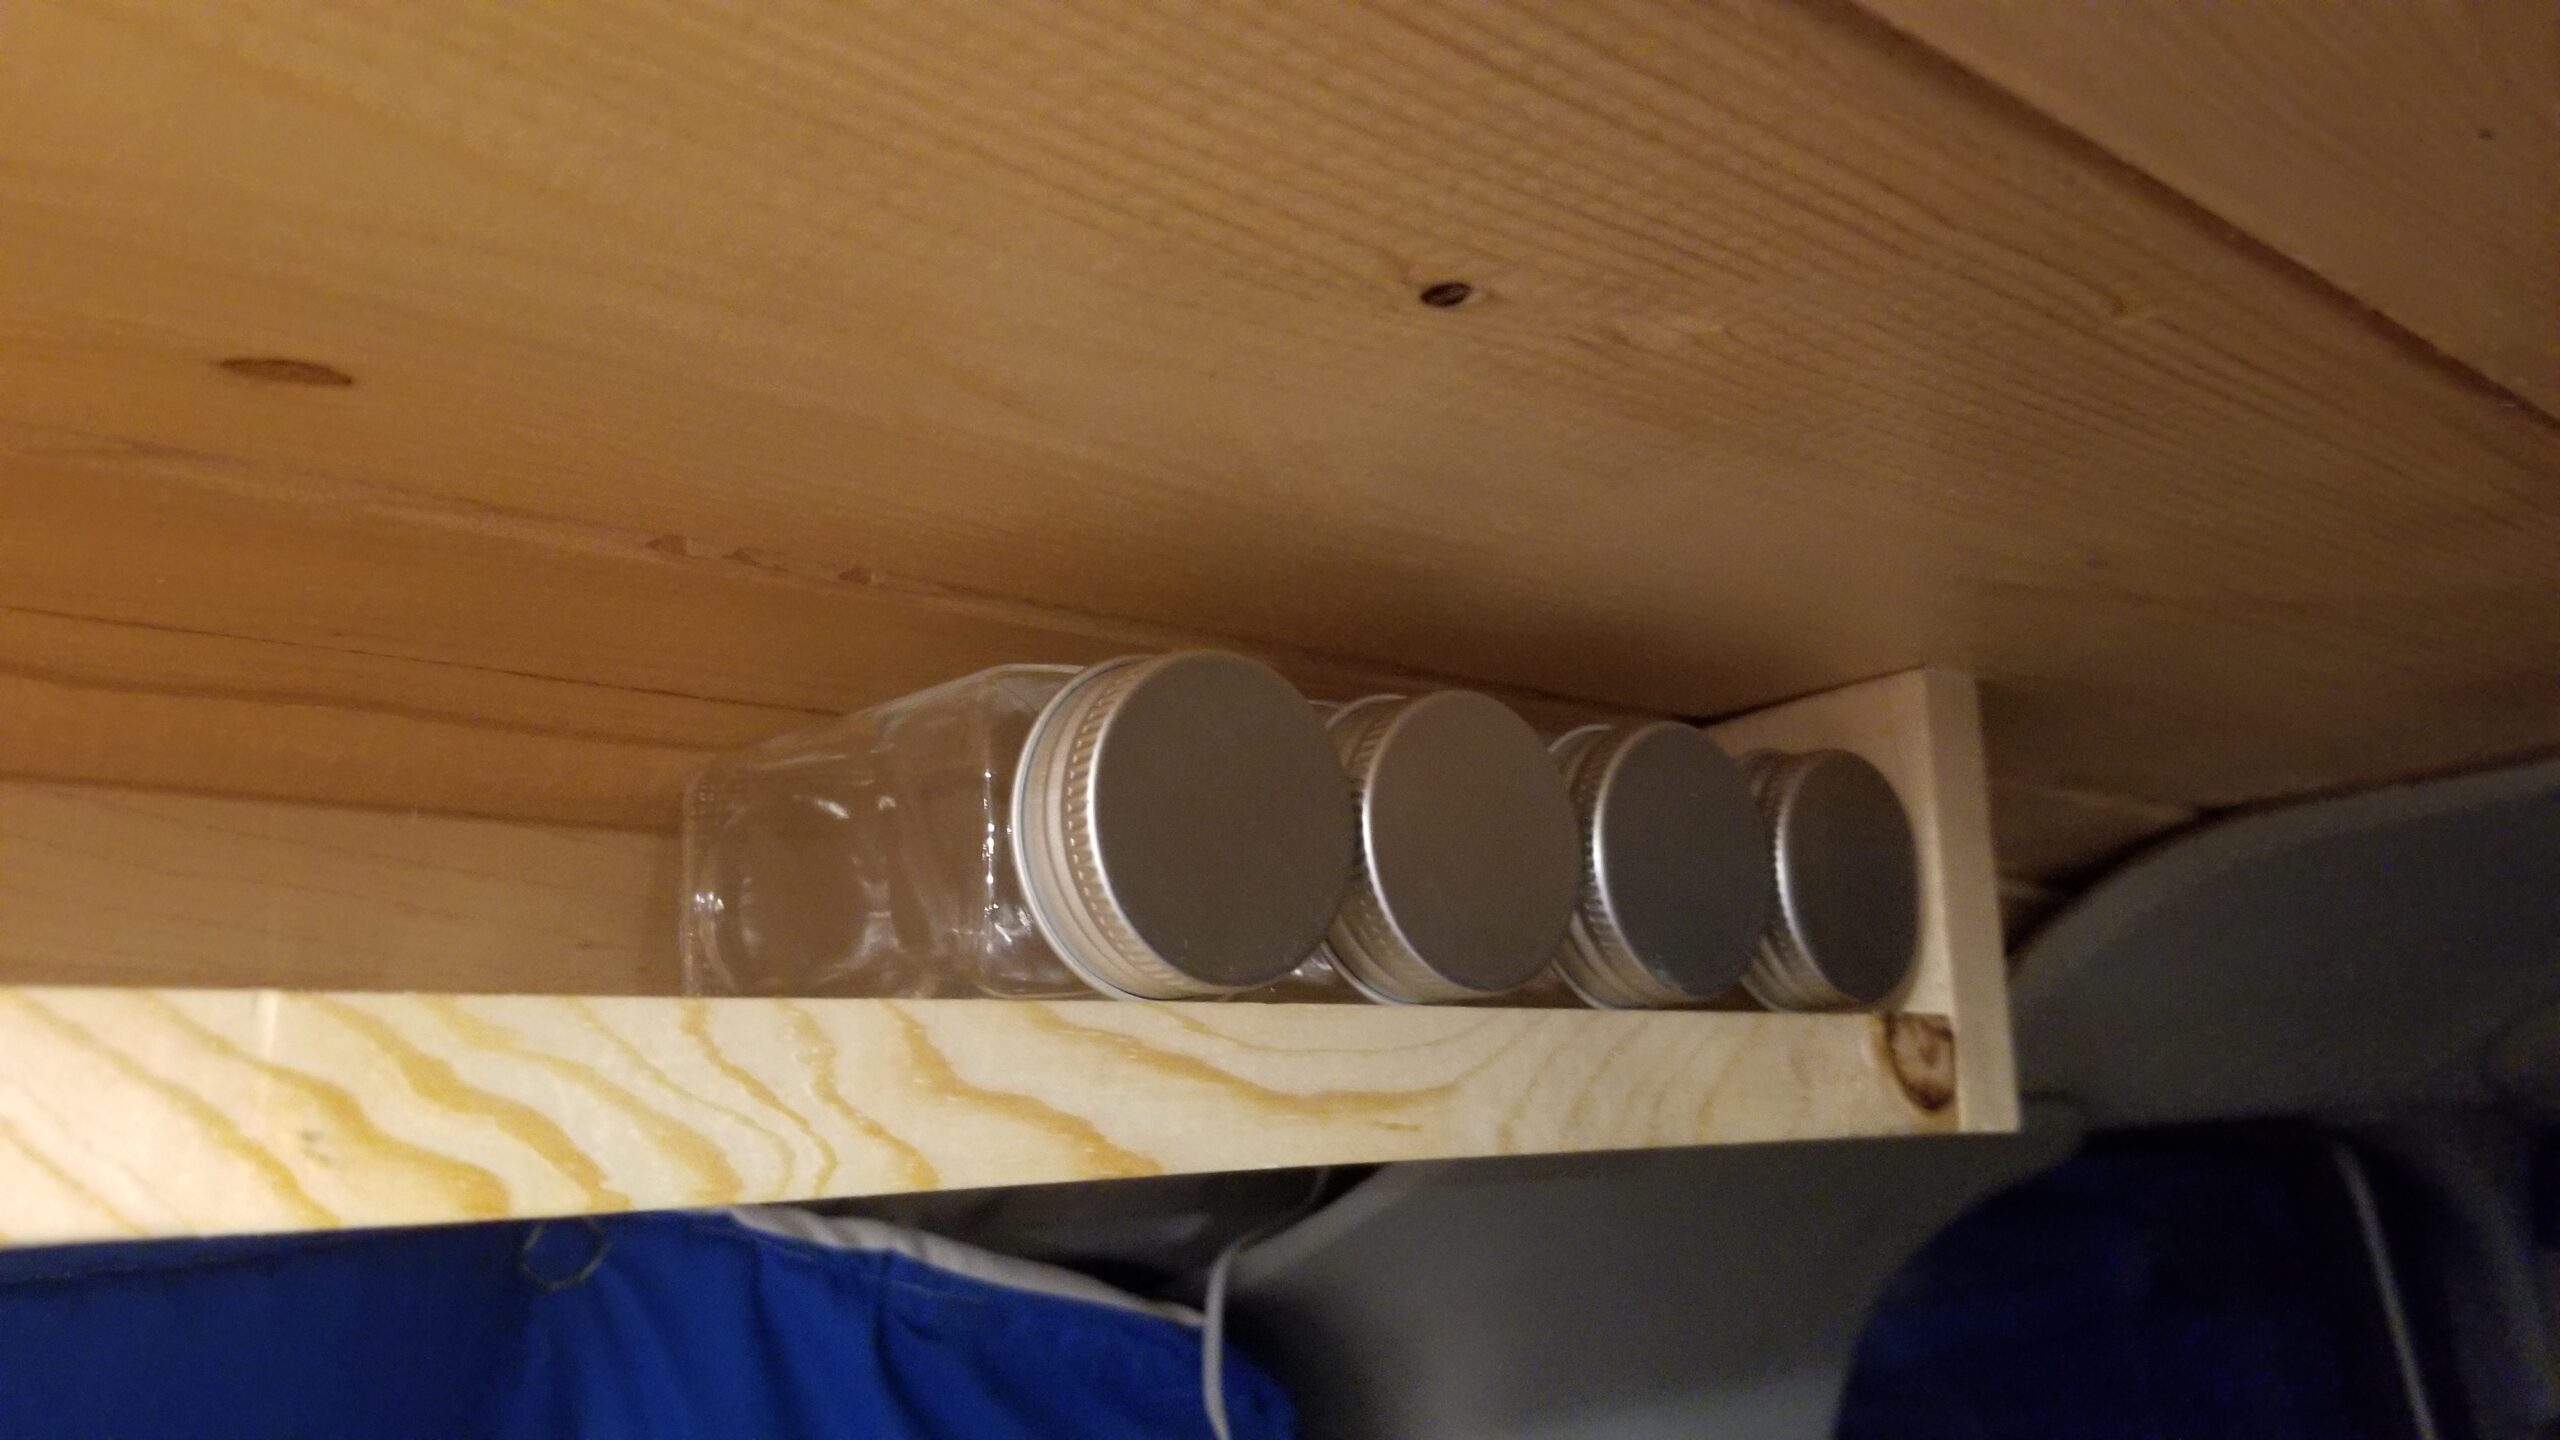
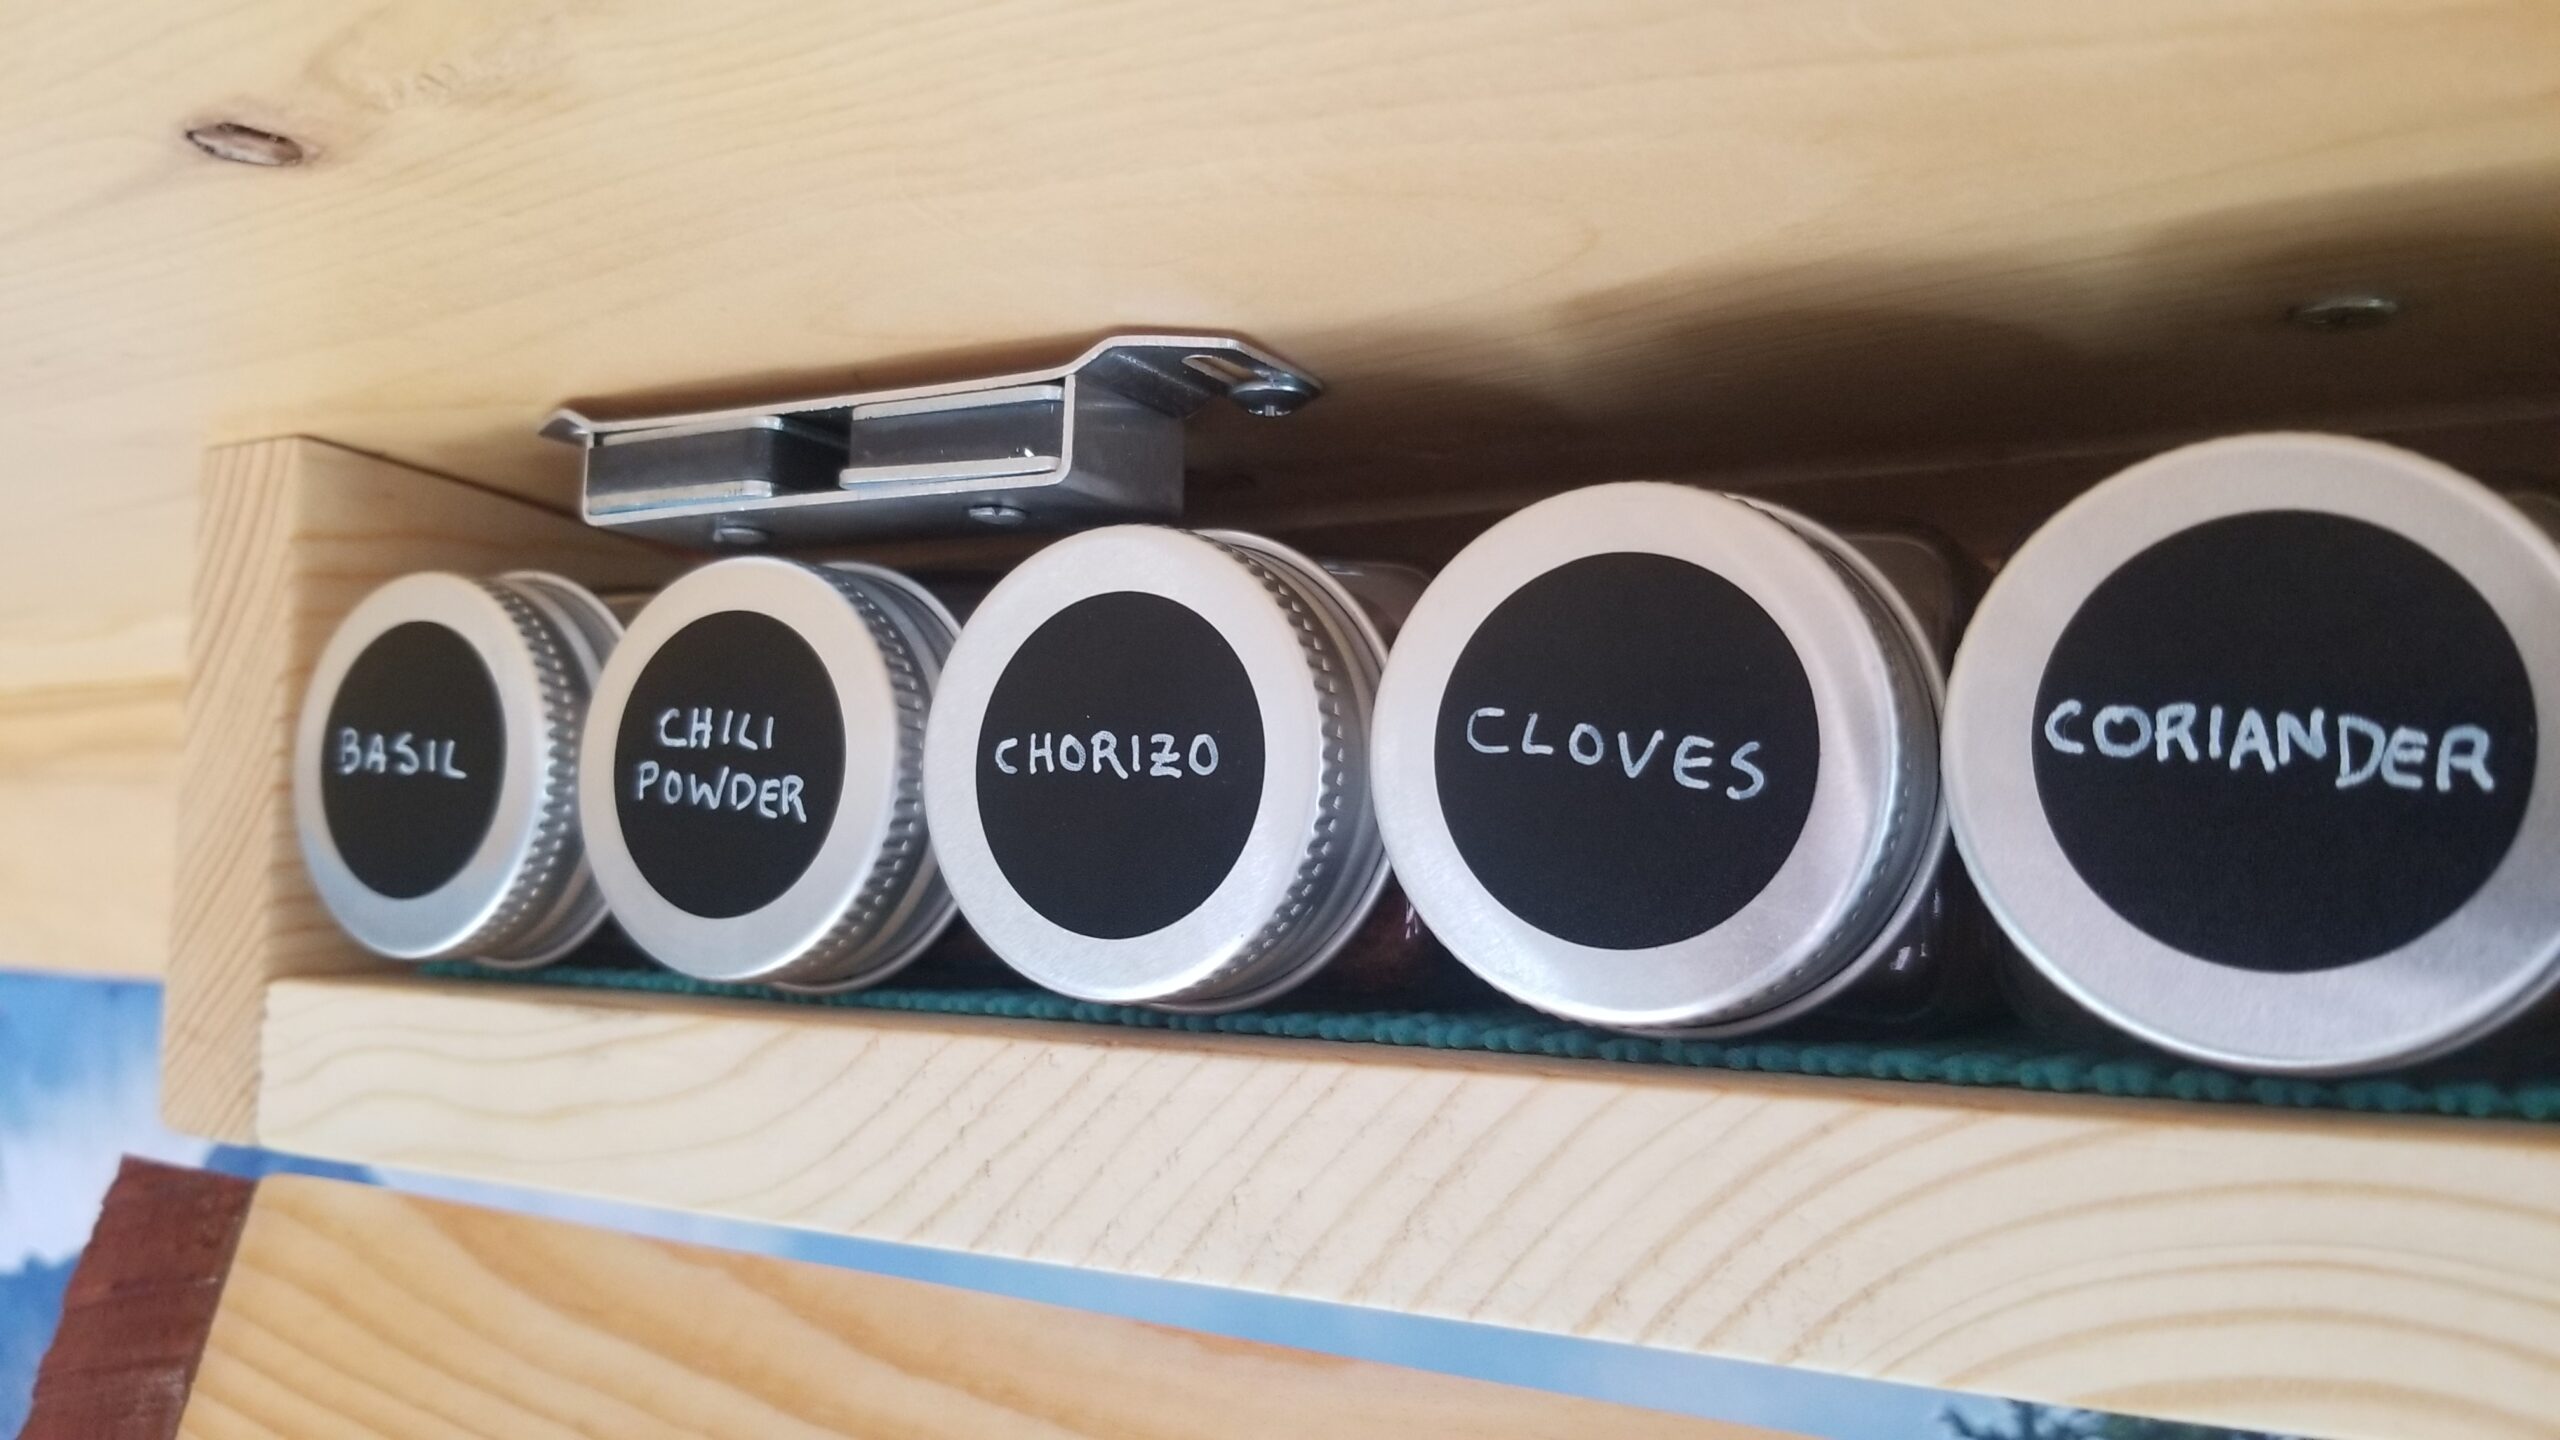
Once in place fit the middle support into place, and figure out how the spice separation should be. I used magnet closures so I offset my middle support a little to compensate. For sanity I threw all the spice bottles I had into place to ensure the spacing was correct before marking the middle support, removing the spice rack base and screwing the middle support into place.
Now that all the wood was cut to size and sanded I stained everything (base, cover, 3 supports still in place screwed to the roof) and put it all back together once it was dry.
Once dry I grabbed some hinges and screwed the cover into place. To hold the spice cover door closed I used 3 magnet clasps with strike plates for a cabinet doors and screwed them into place (adjust as needed for proper closure). Finally I laid down 2 strips of drawer and shelf liner, cut to size, in the bottom of the rack, held into place with some spray adhesive. Grab all your spice bottles, fill them, mark them, and throw them into your finished spice rack!
Congrats! You’re long adventure in converting your van is now done, go forth and adventure! Explore all the things and sleep well knowing all your hard work can now truly be appreciated and put to good use!